WoodCentral Forums

Est. 1998 — 27 years of woodworking knowledge

Search query: «#604»

Posts

General Woodworking » Re: Dining Table - re-visited »

Edited #1

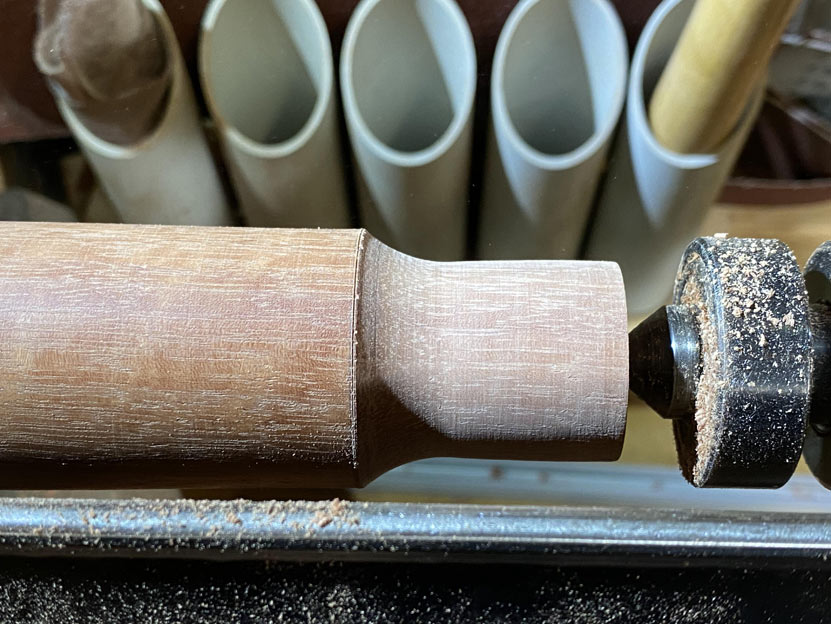
Quick review - we left off with then posts shaped into an ellipse ..

TT10.jpg
TT11a.jpg
TT12.jpg

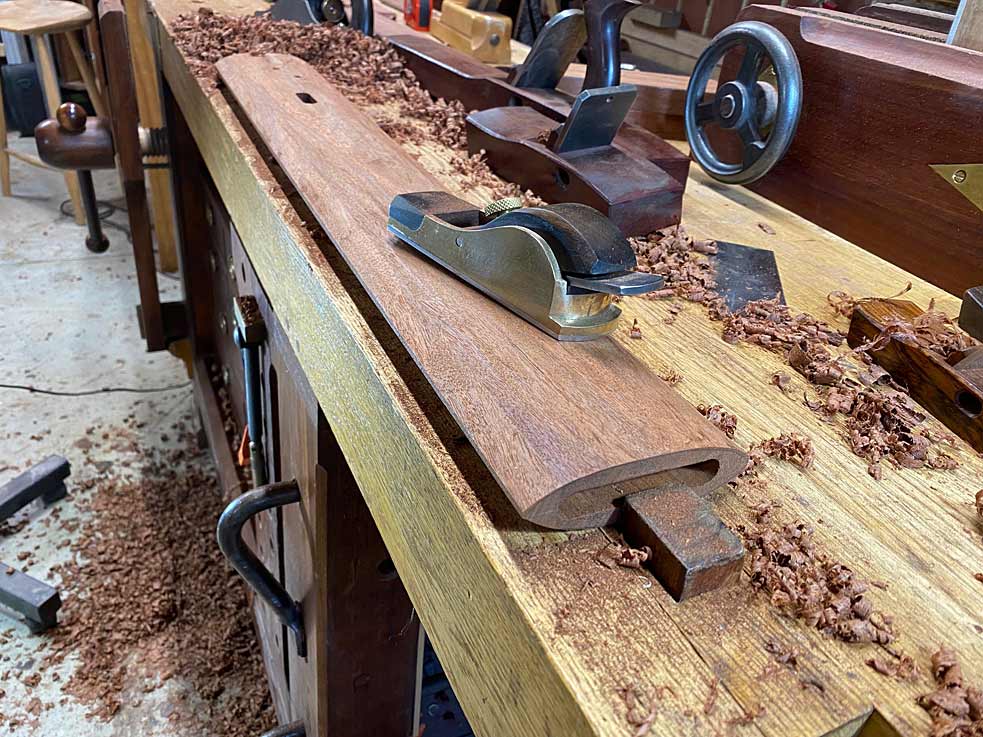
Time to turn that thick blocky base into a shapely, organic foot for the post. 

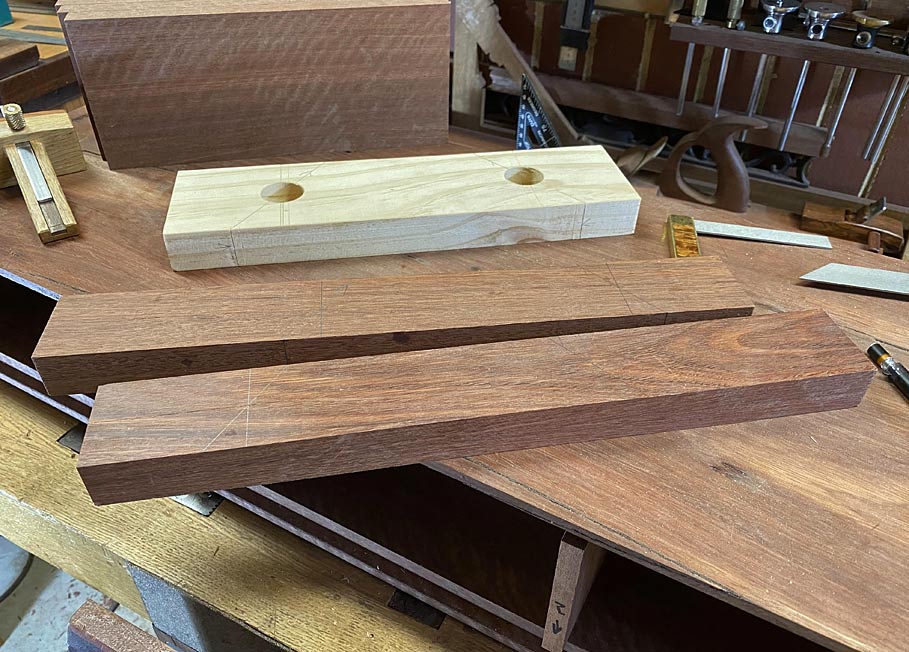
It needs to be said that I binned the first feet I shaped as they ended up too thick looking. I want slim. I realised that a reason for this was that the blocky base was not wide enough (at 80mm), and so I built new ones, this time 110mm wide. In the photo below, the first is being shaped with a scrub plane into a half-ellipse to match the posts ...

Base1.jpg

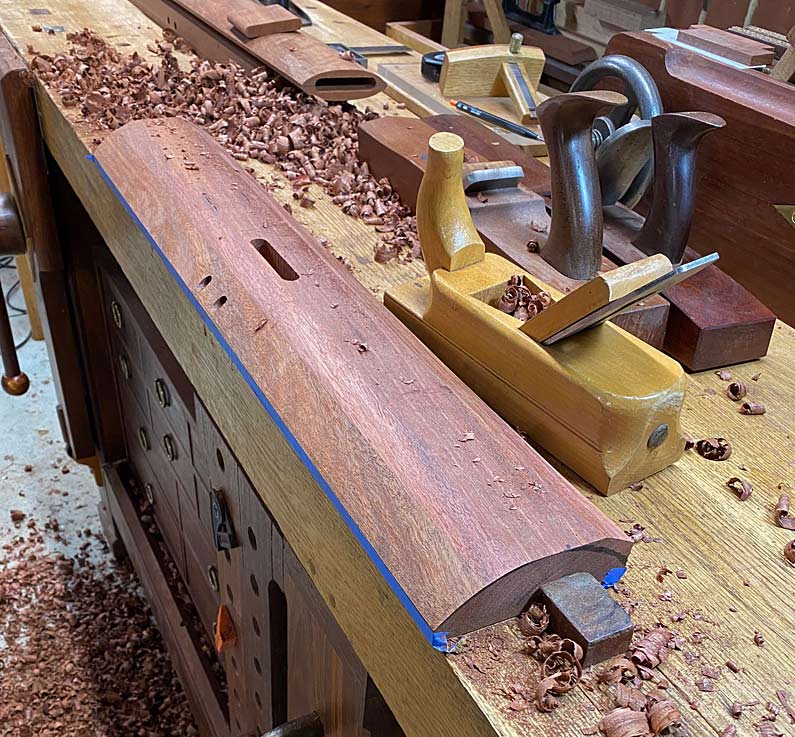
This was followed up with a trying plane ...

Base2.jpg

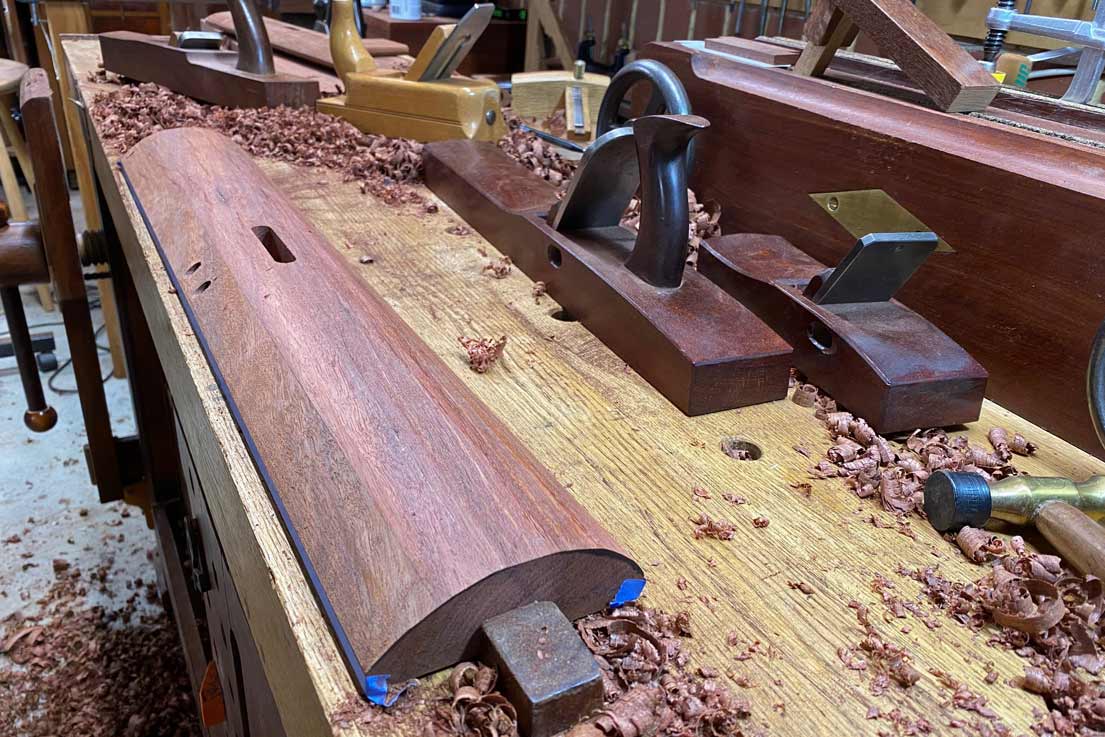
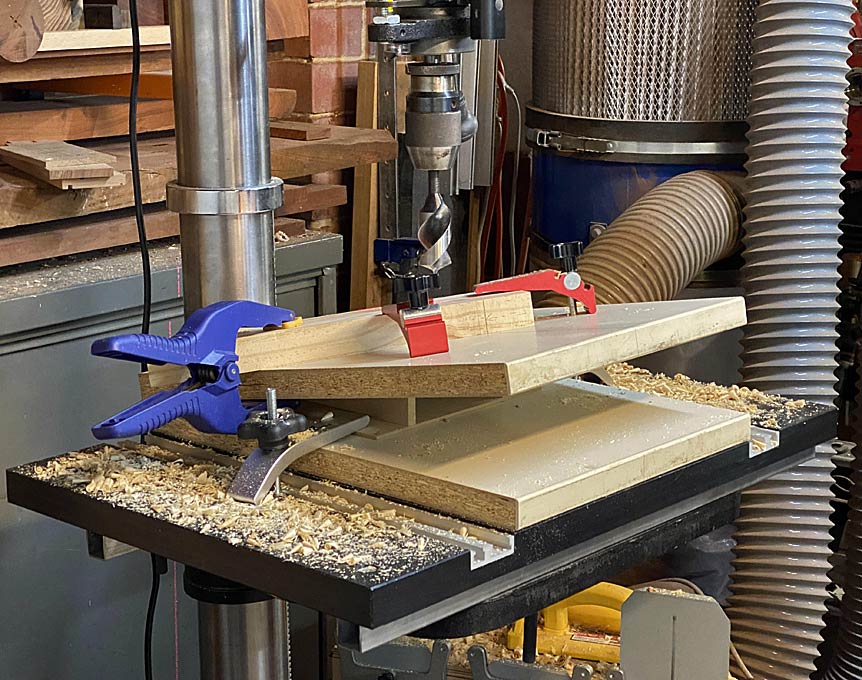
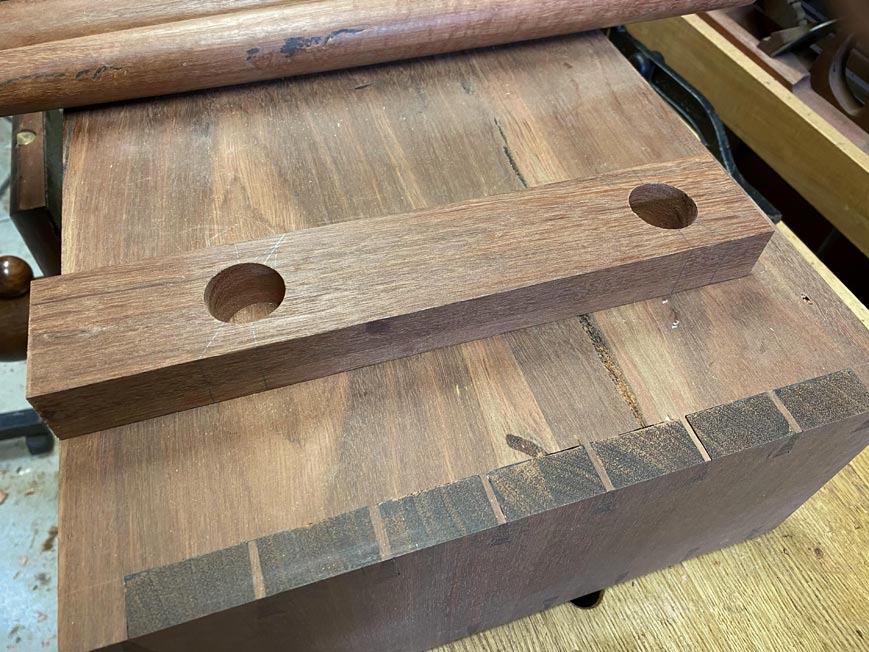
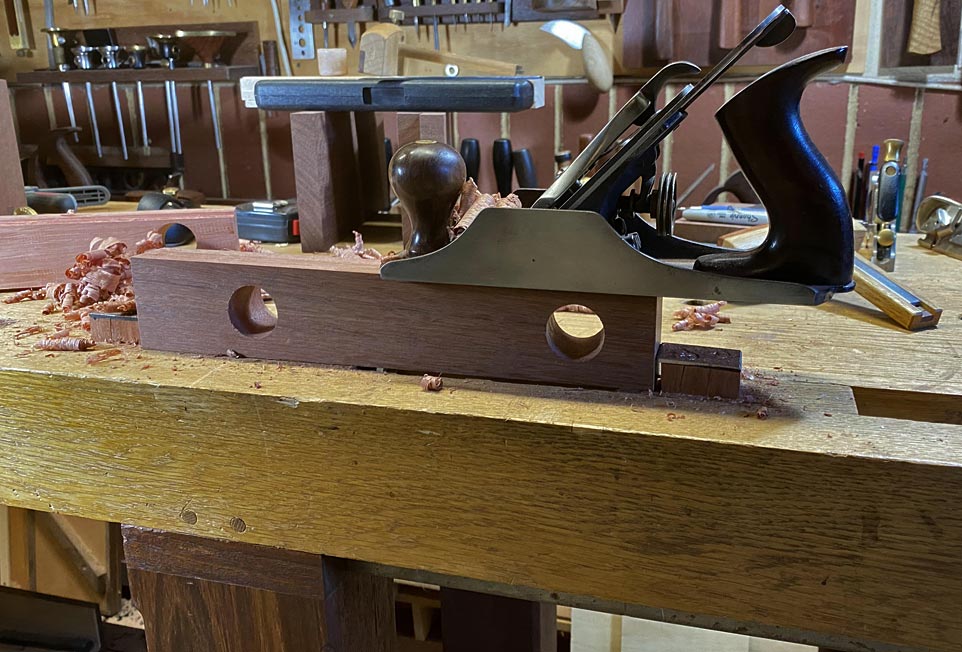
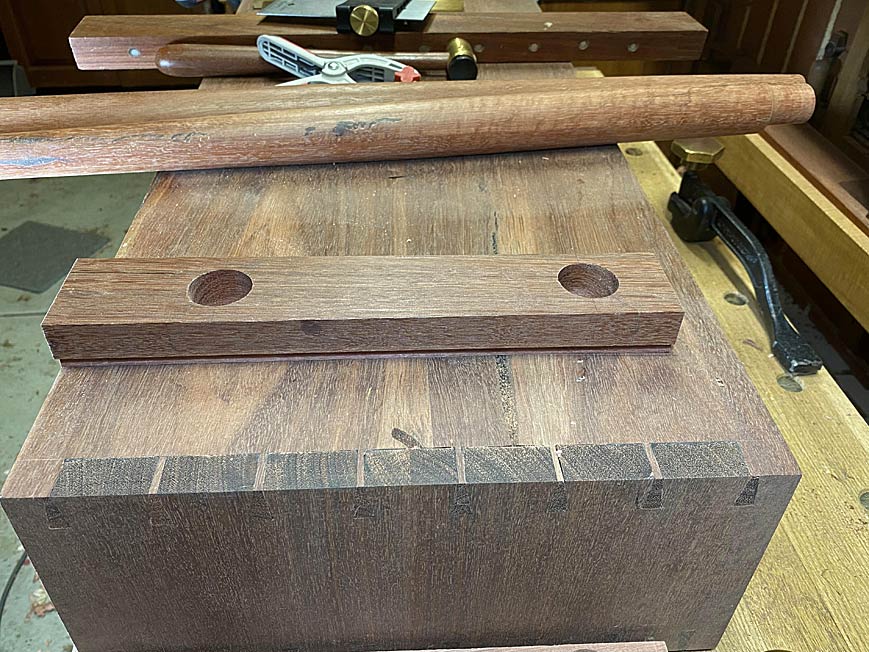
Prior to shaping the base, it was drilled for the dowels which will later be used to draw-bore the mortise-and-tenon joint ...

Base3.jpg

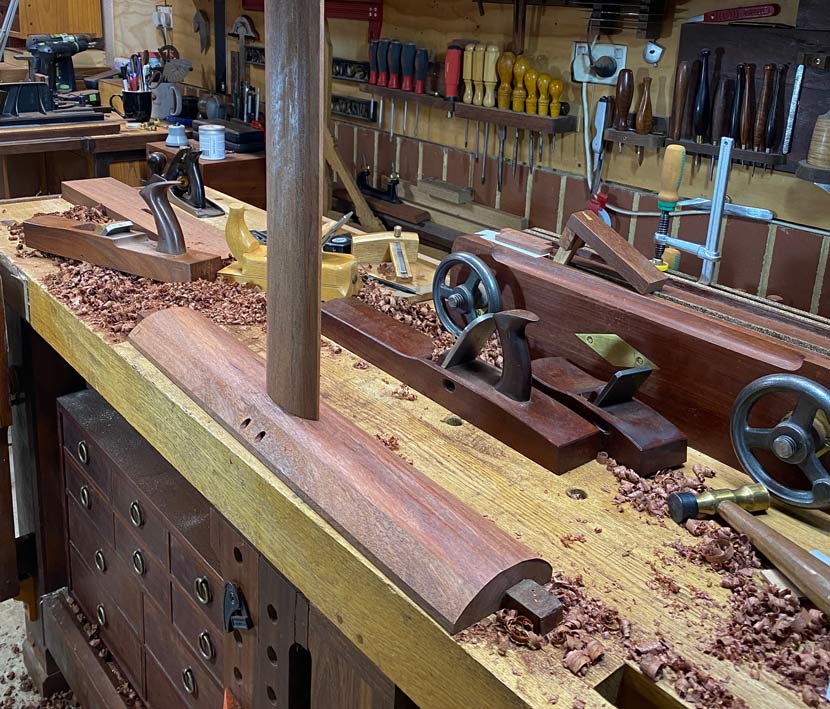
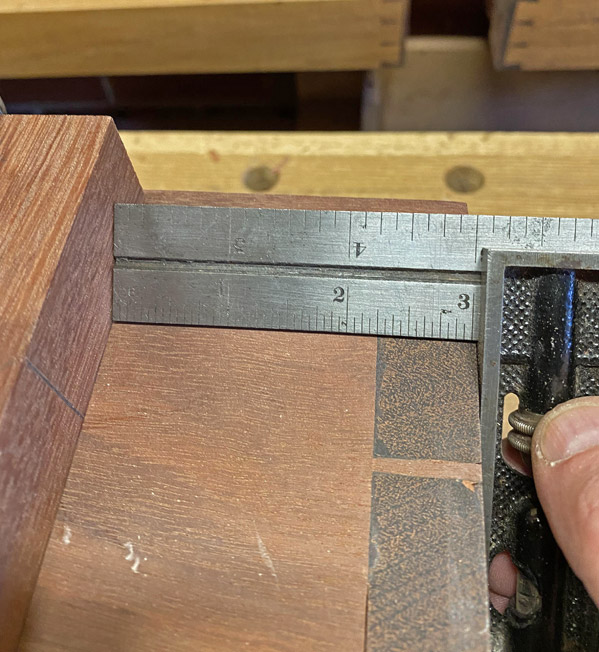
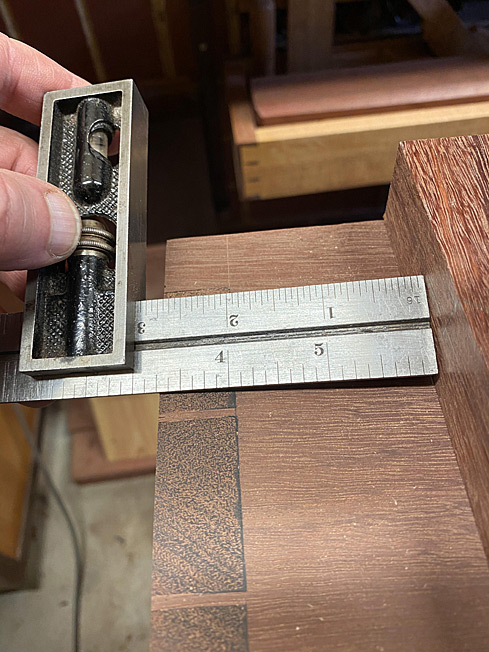
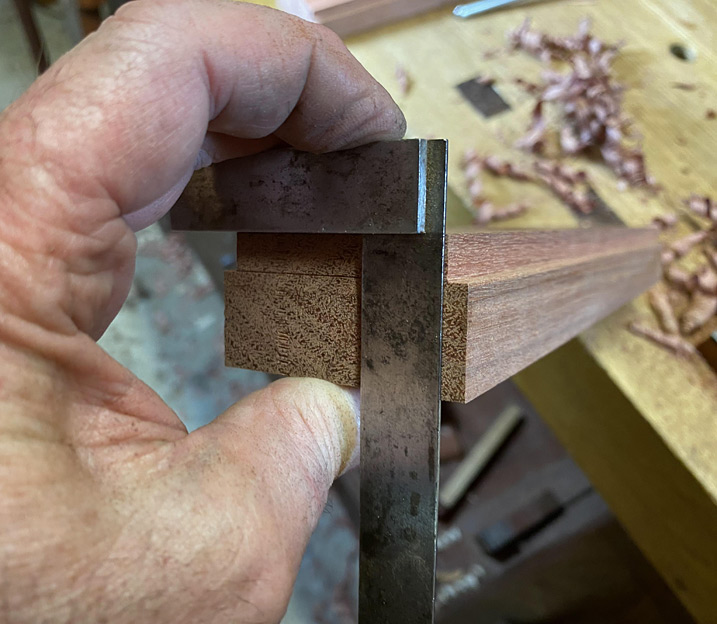
The feet are too thick, and this will be reduced with a taper. Below the beginning and end is marked out ...

Base5.jpg

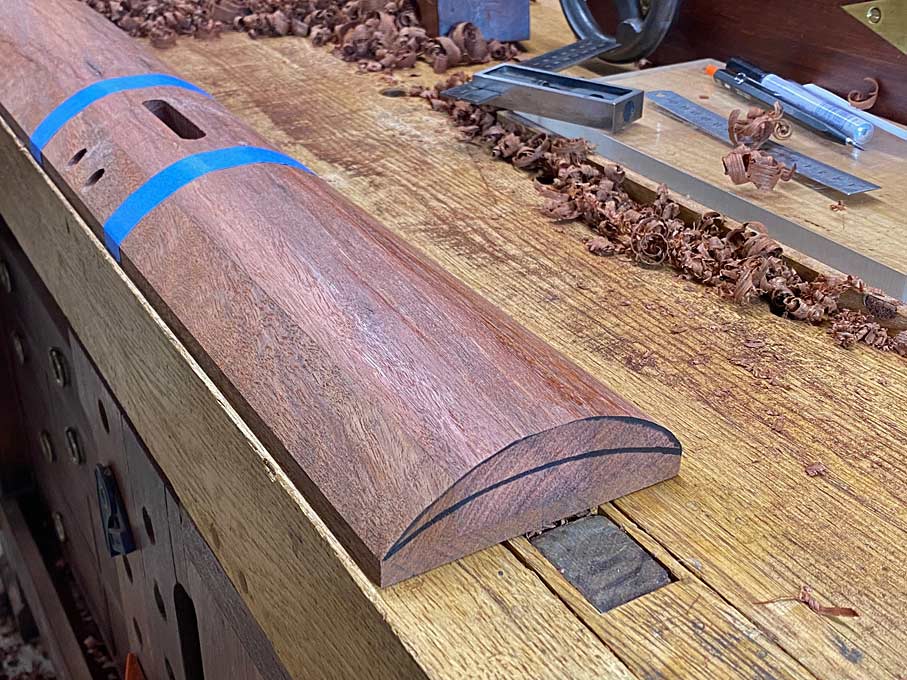
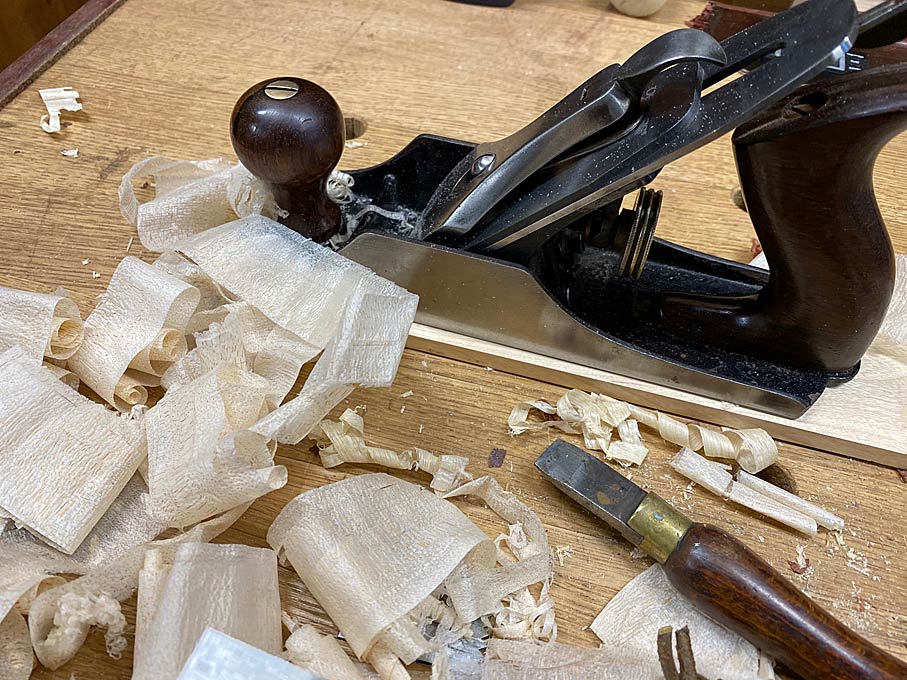
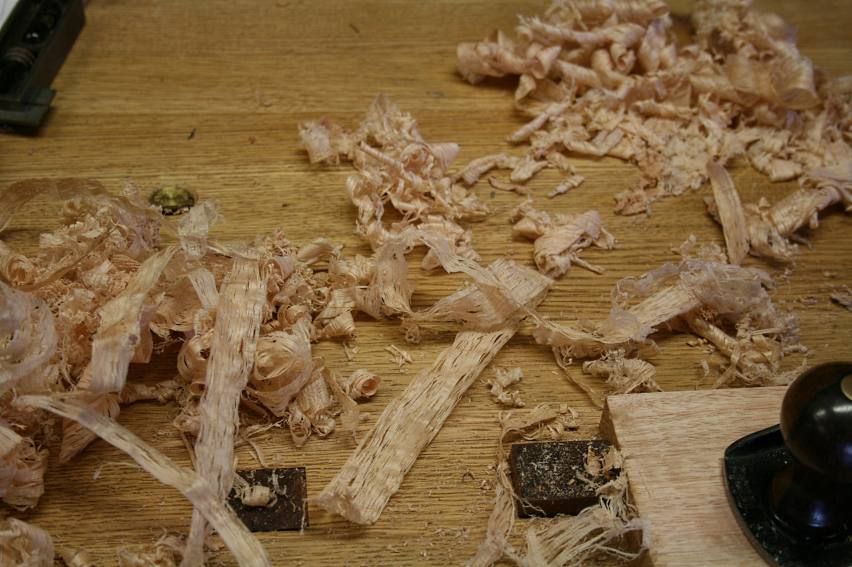
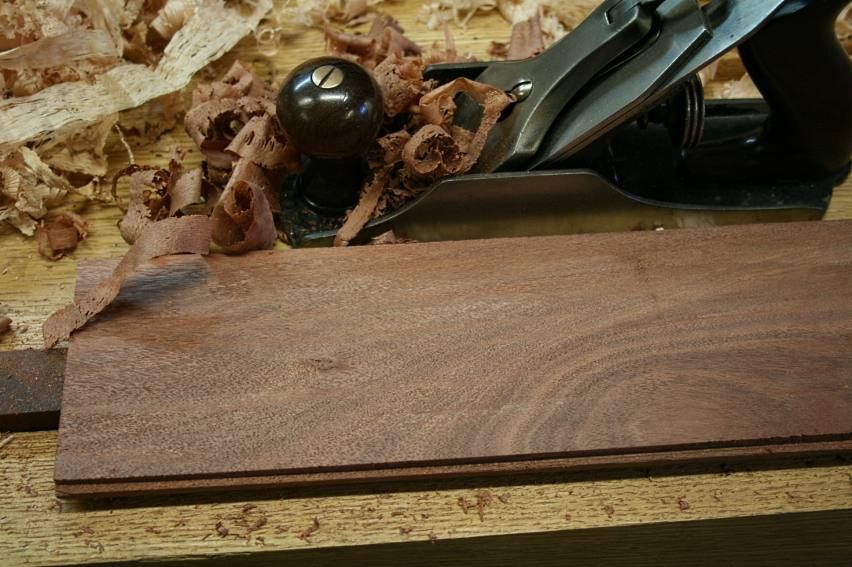
A succession of woodies are used (as was done in shaping the curves). First a scrub plane removed the bulk of the waste. This produces a rough finish ...

Base6.jpg

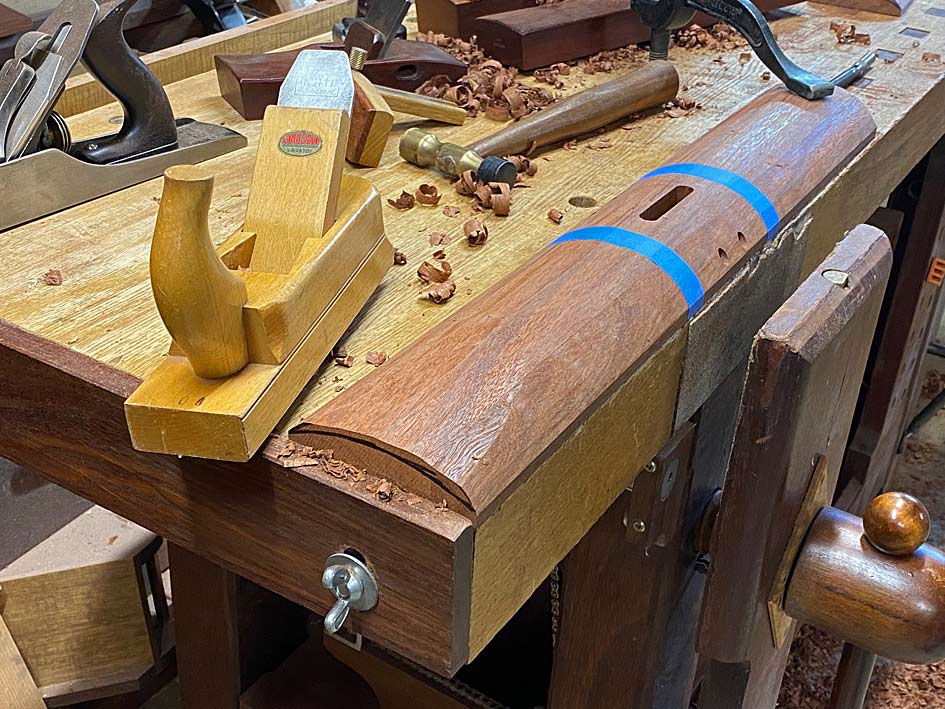
This is followed by a jack plane, which has a less aggressive radius to its blade ...

Base7.jpg

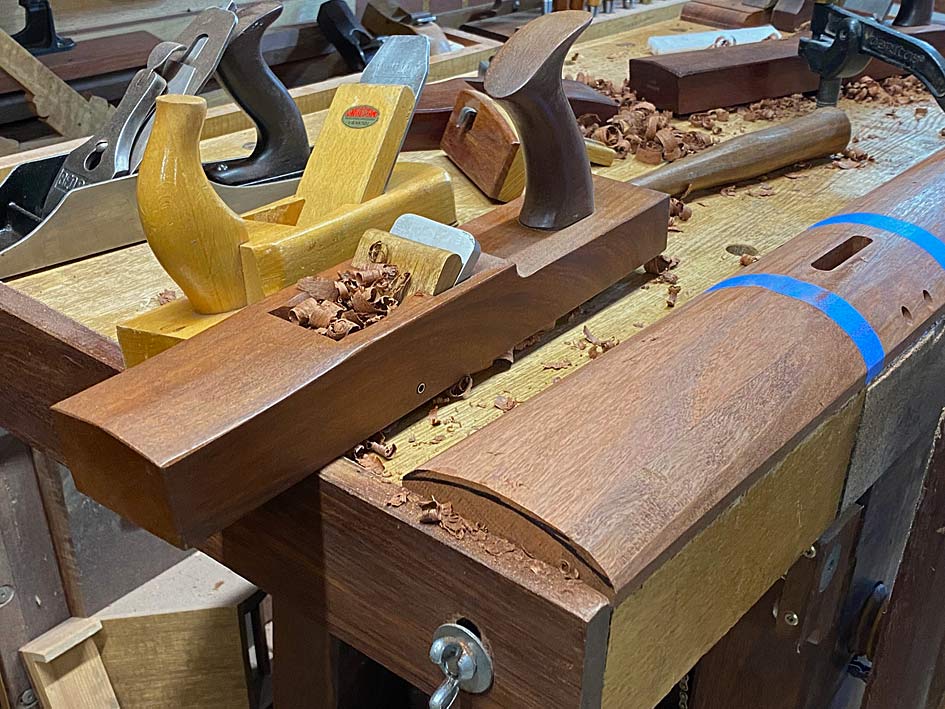
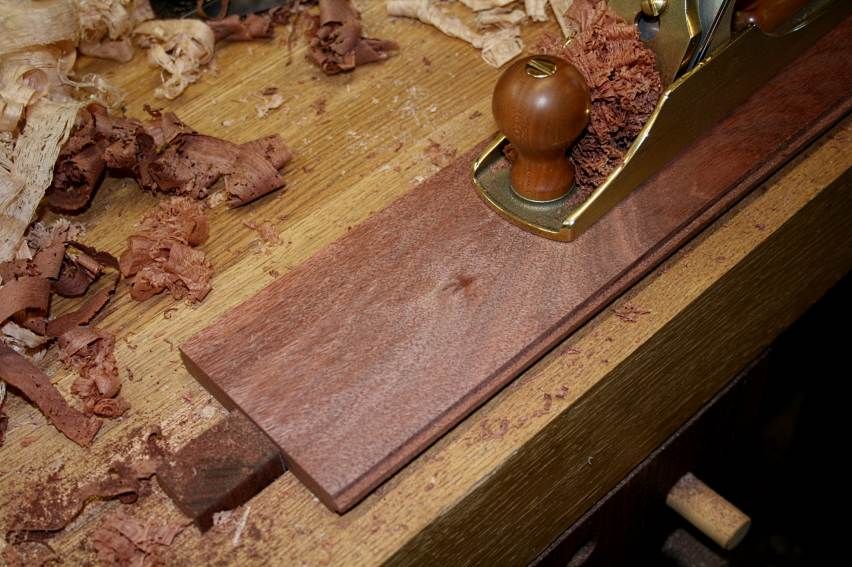
A trying plane now smooths out the surface ...

Base8.jpg

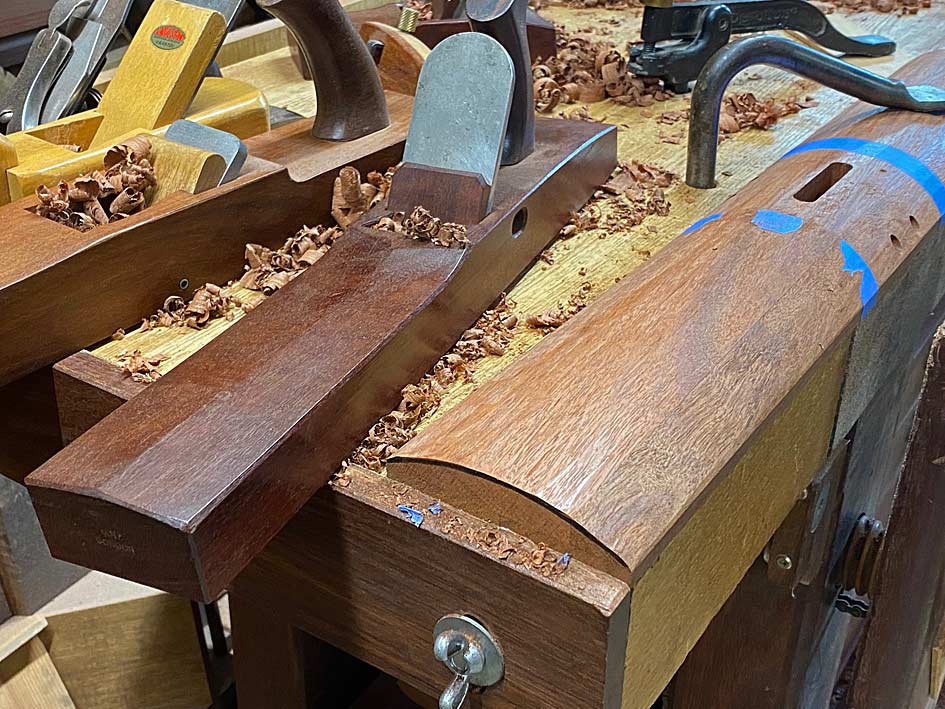
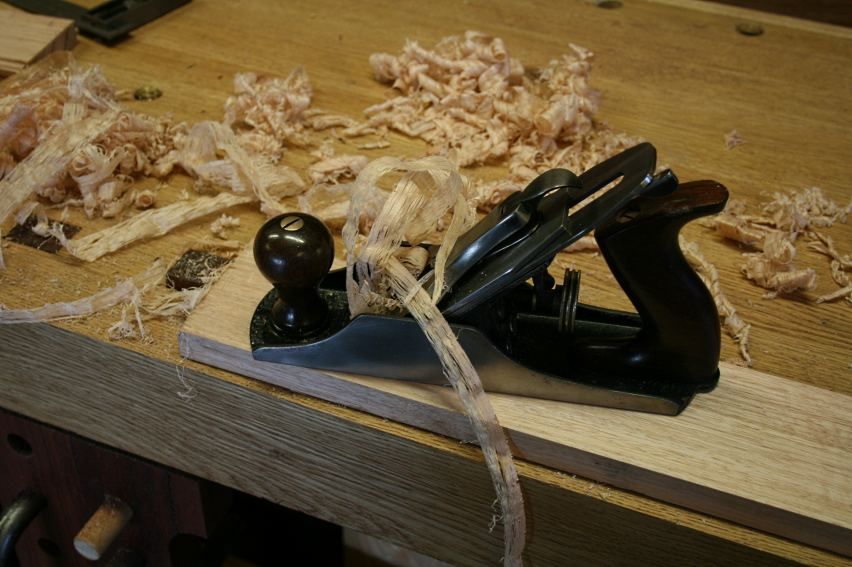
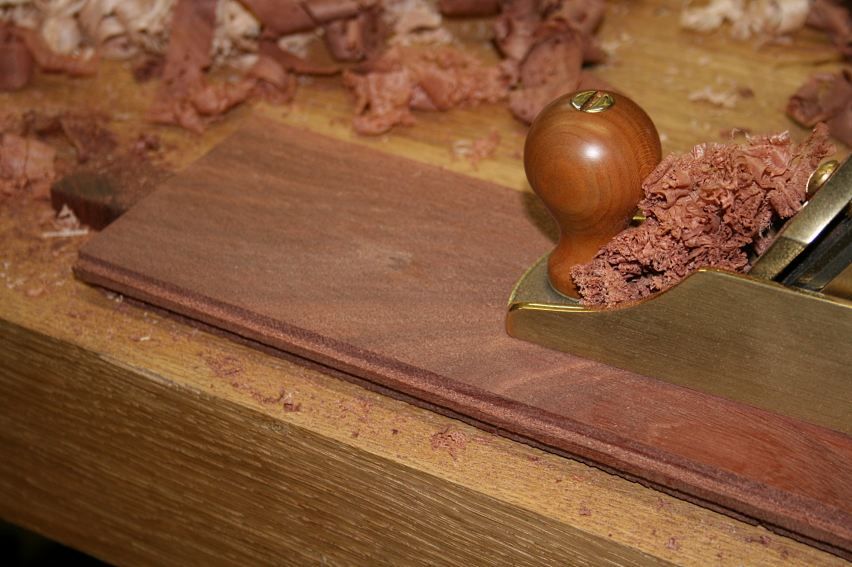
Finally, a smoother is used for the finish ...

Base9.jpg

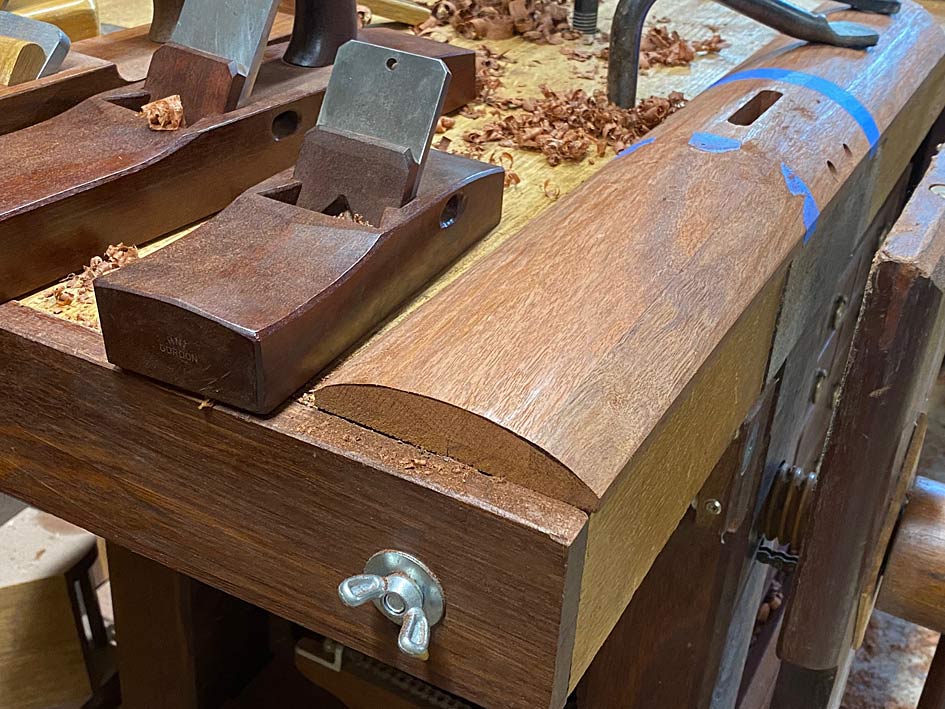
It is relevant at this point to recall that the table top with be curved at the sides and ends, similar to this Nakashima ...

Nakashima4.jpg

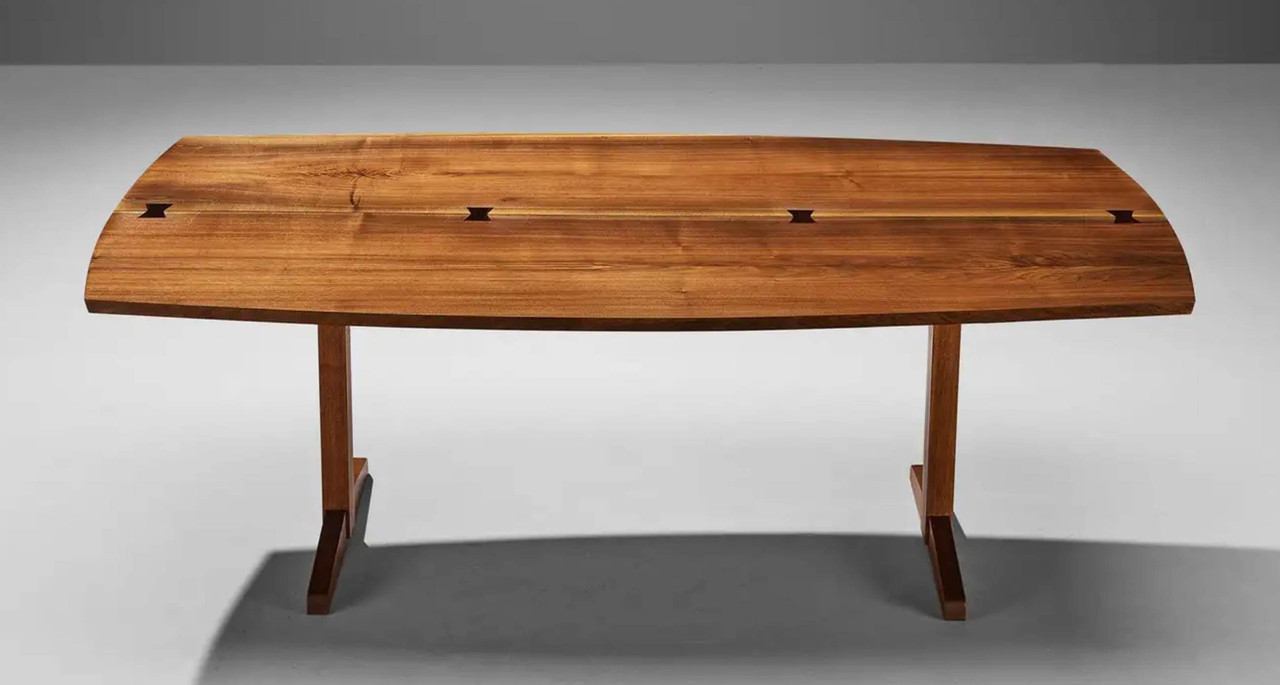
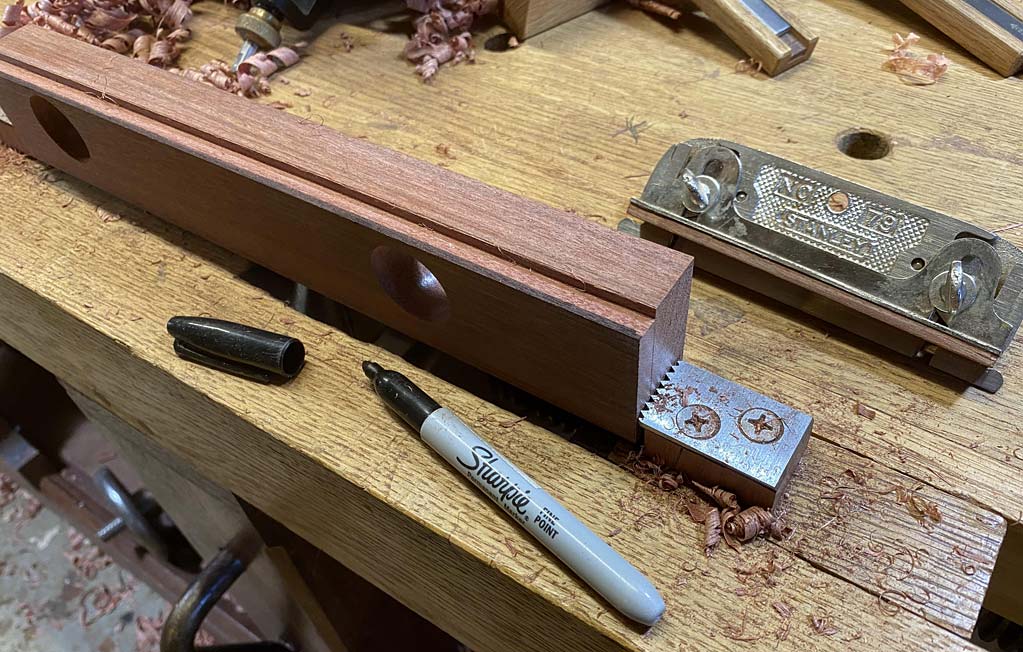
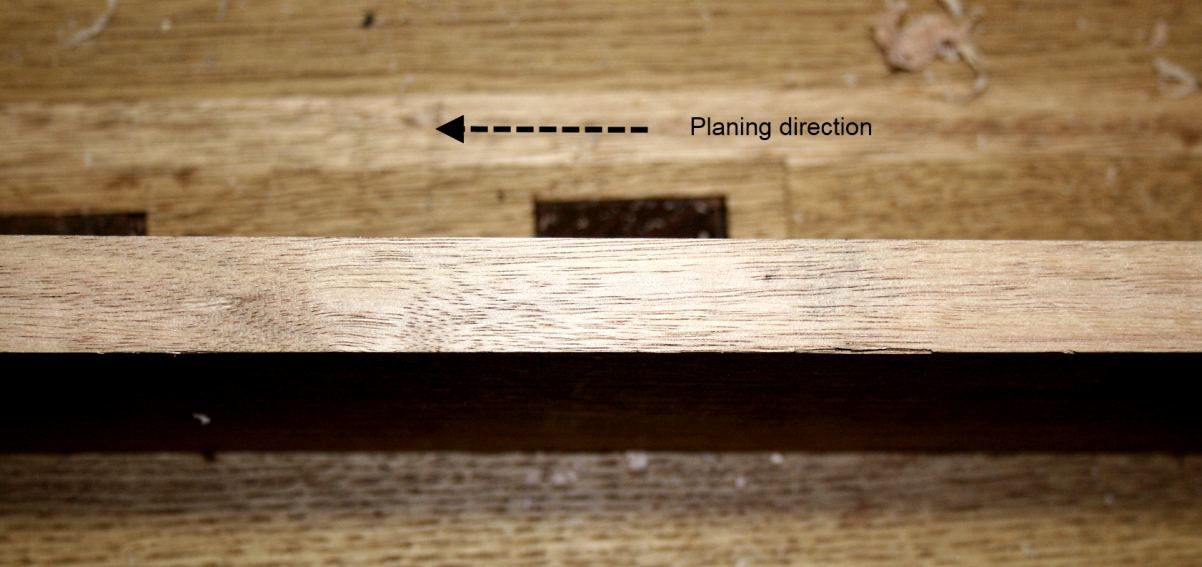
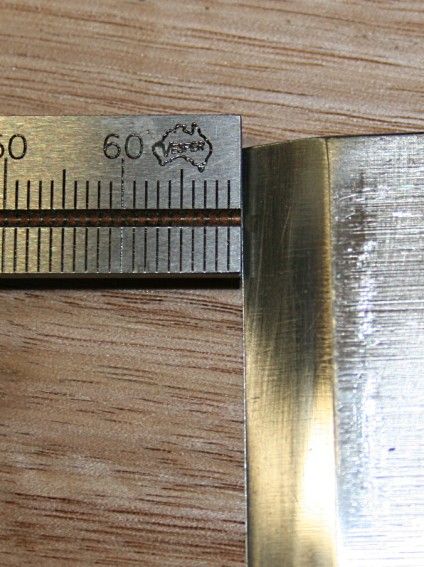
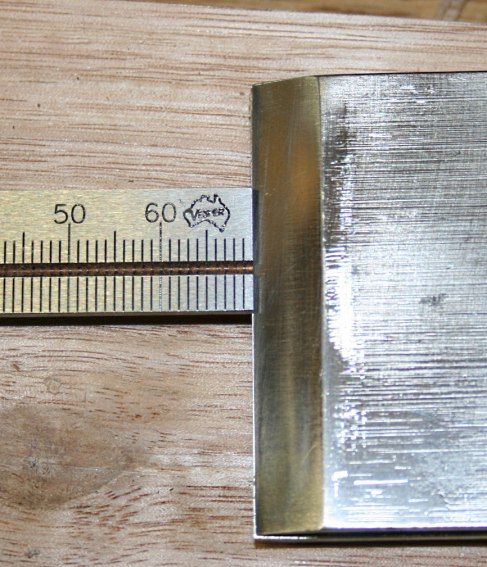
The ends are marked with a slight taper, about 8mm each side ...

Base12.jpg

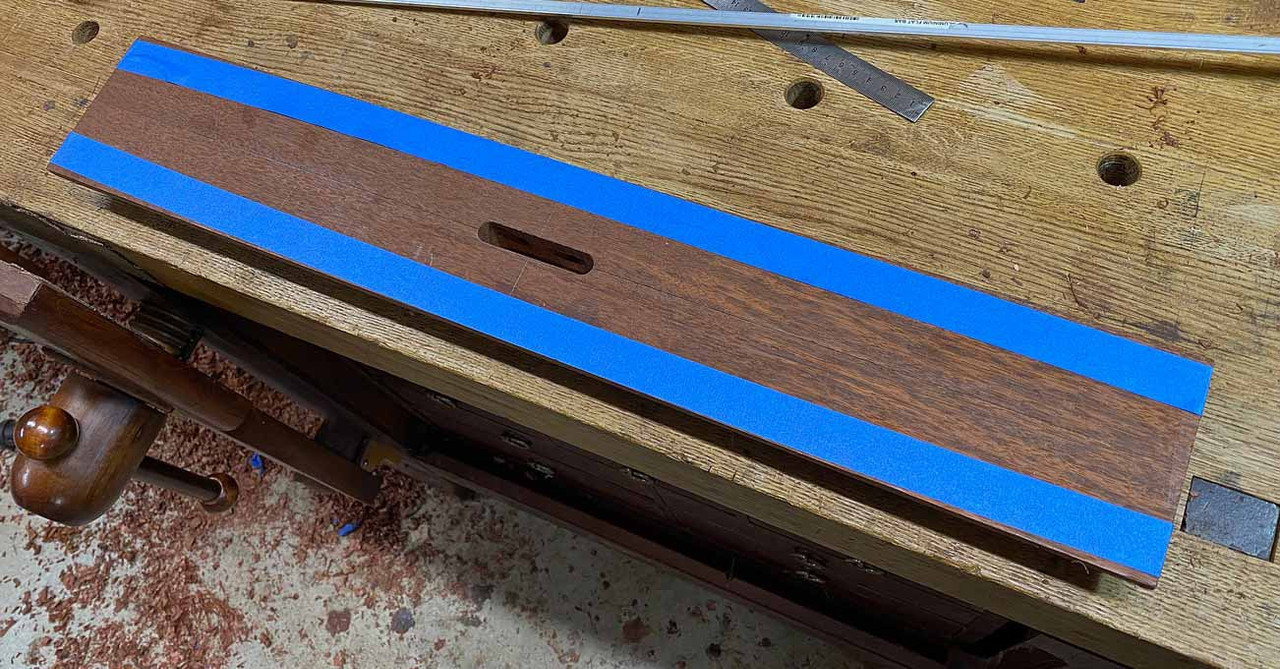
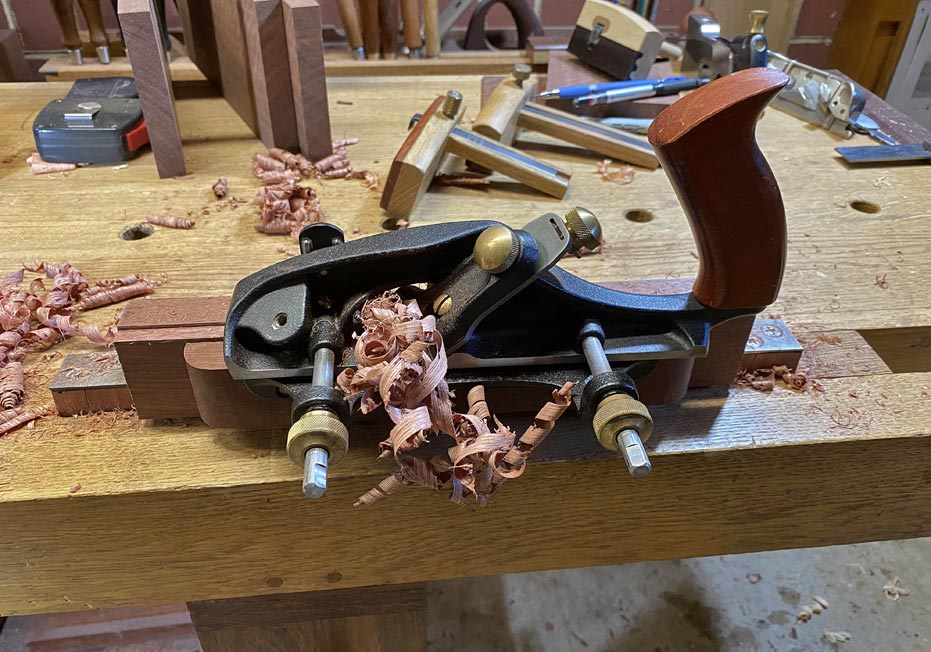
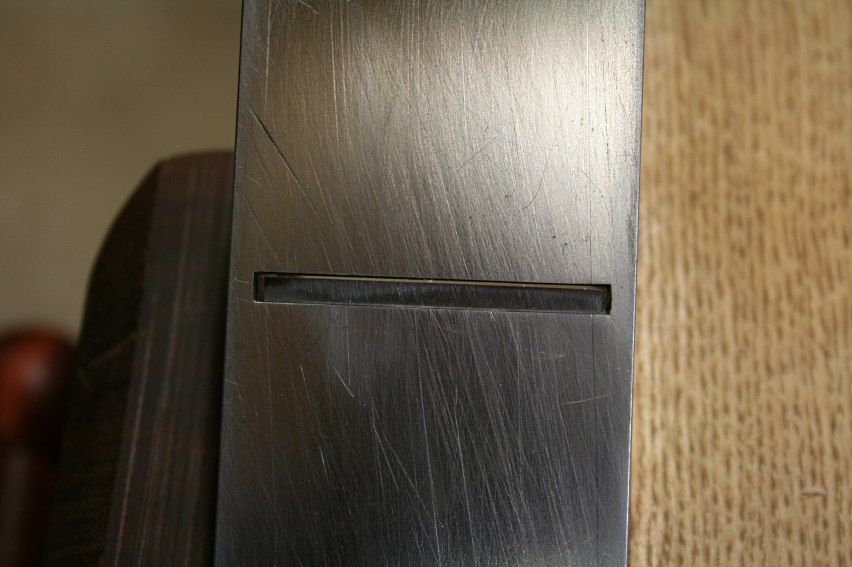
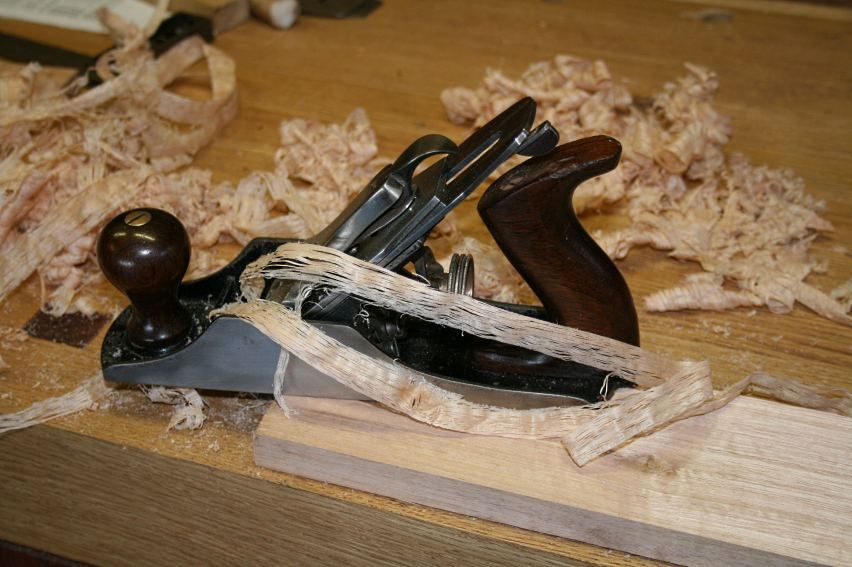
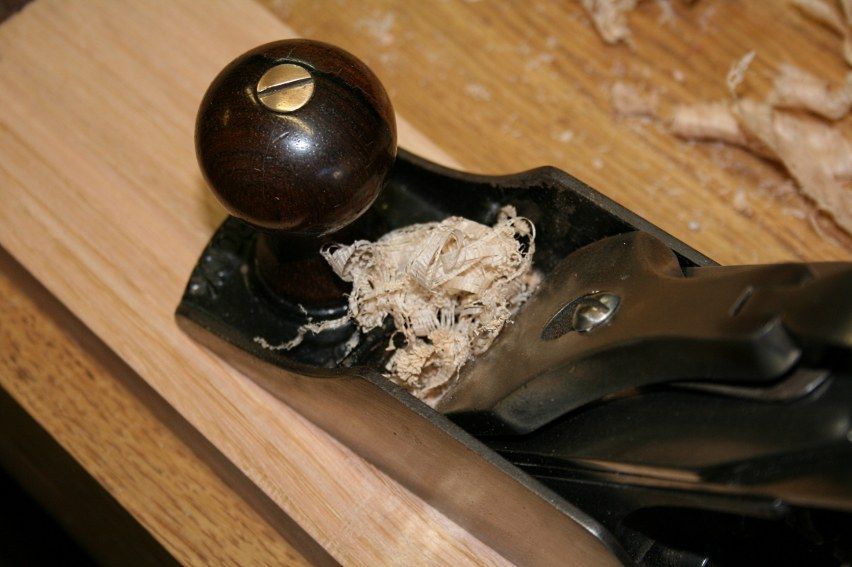
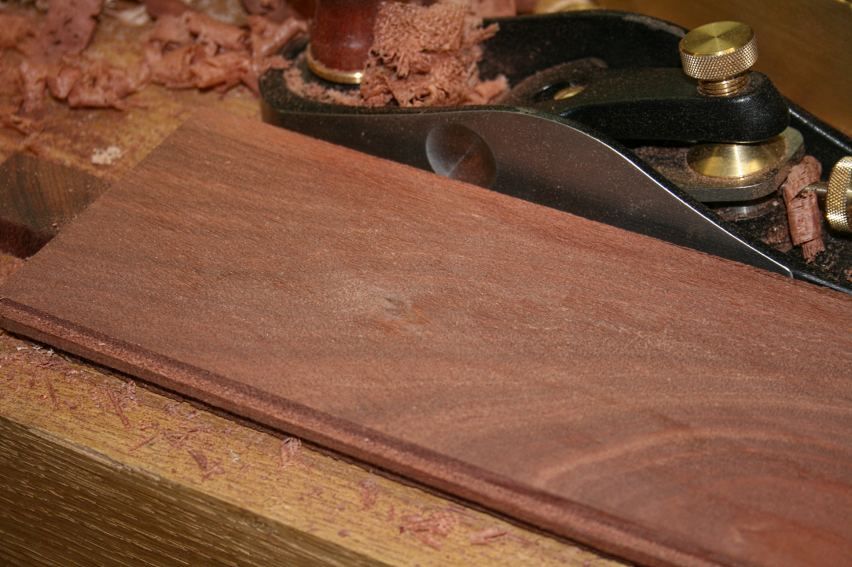
This time I used a Stanley #604 with a close chipbreaker since it handles reversing grain best of all ...

Base13.jpg

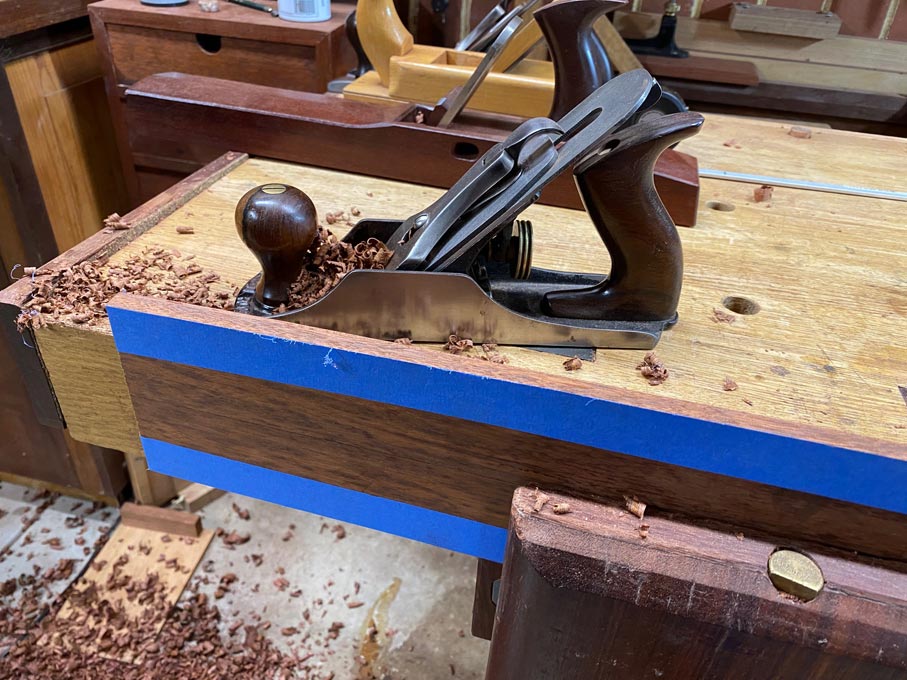
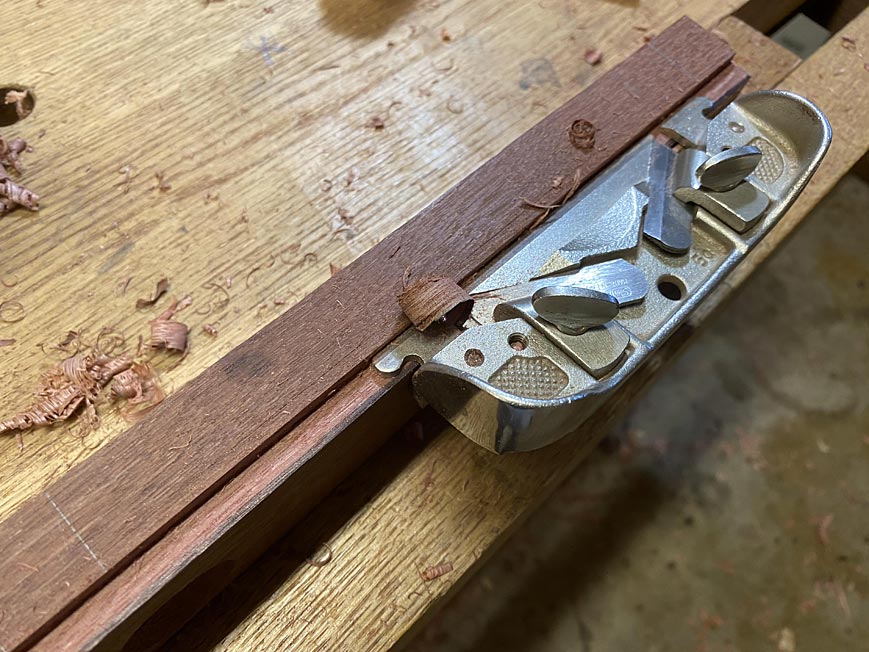
The end curves were marked ..

Base14.jpg

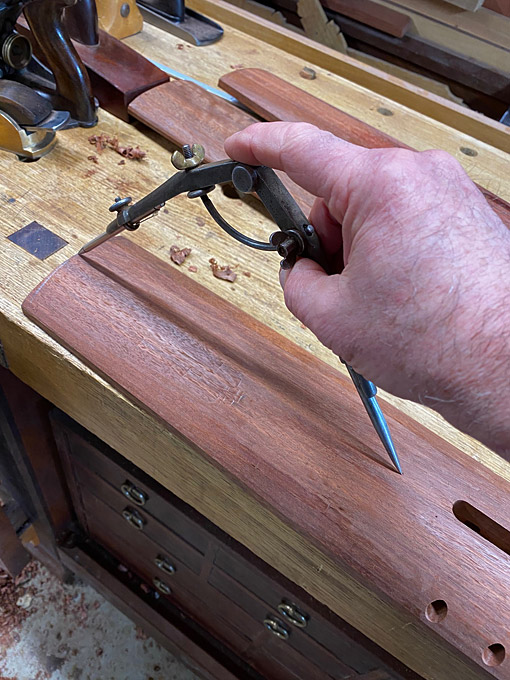
... and the waste removed with a block plane.

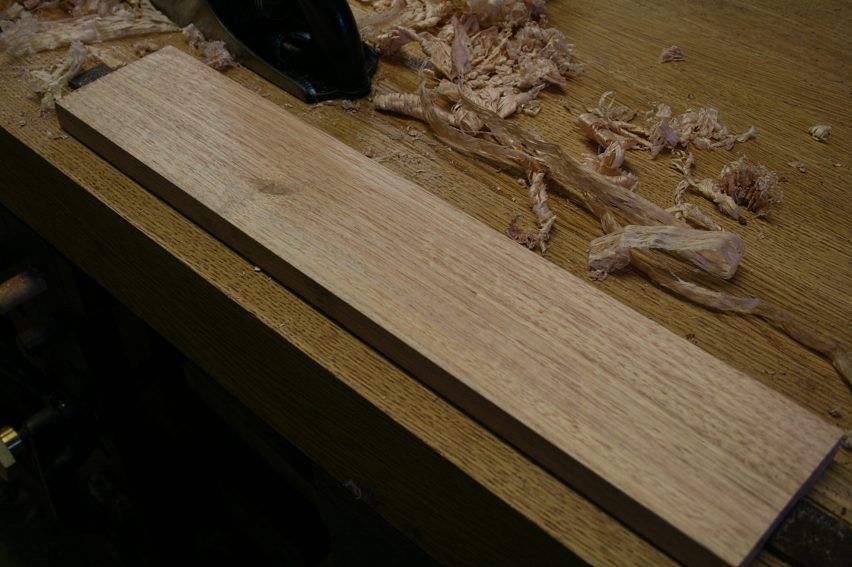
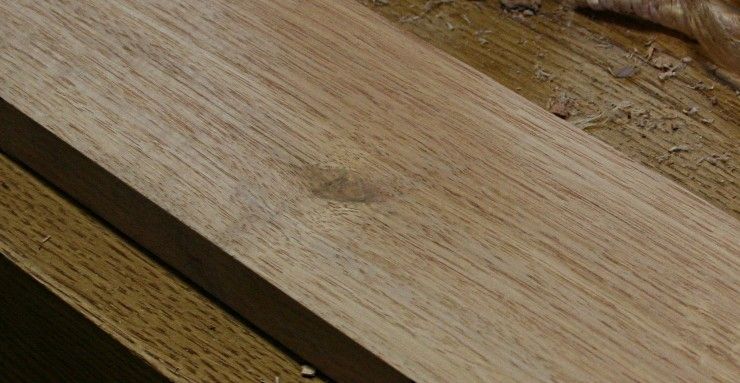
This is combination after sanding to 400 grit ...

Base15.jpg

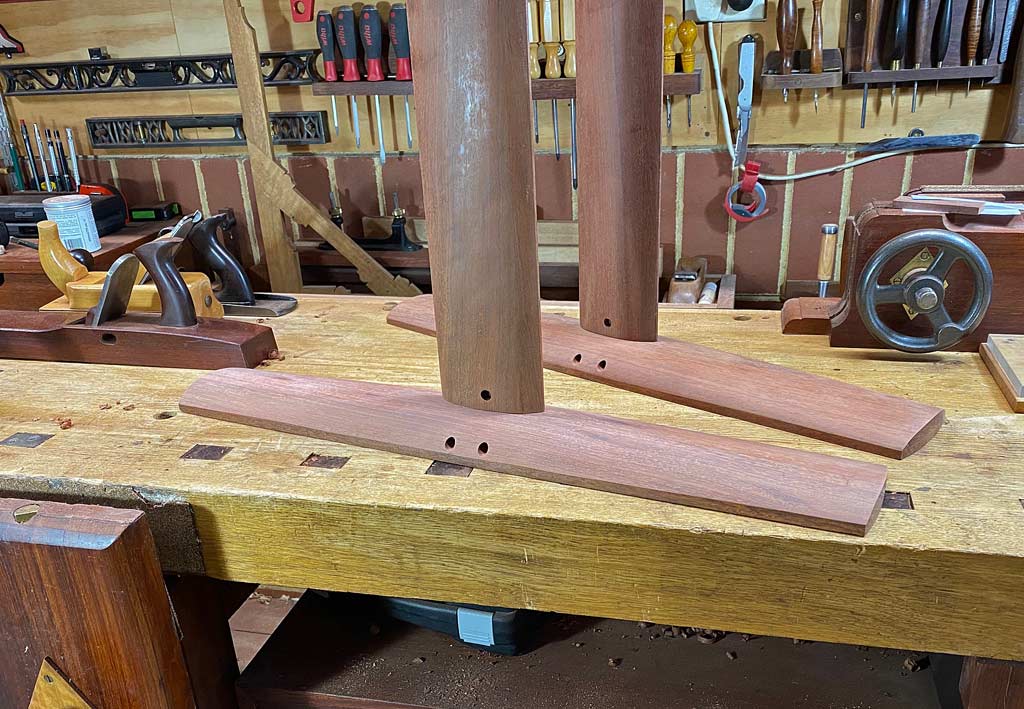
Hopefully, tomorrow may see the trestle table base completed.

Regards from Perth
Derek

Added later 19 h 01 min 47 s:

NEXT:


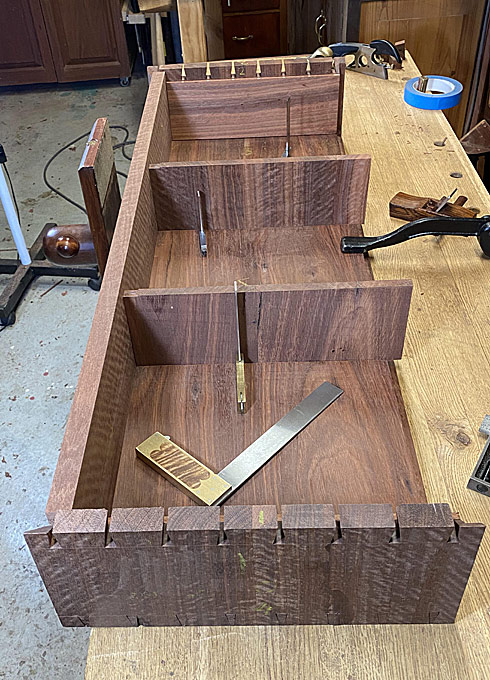
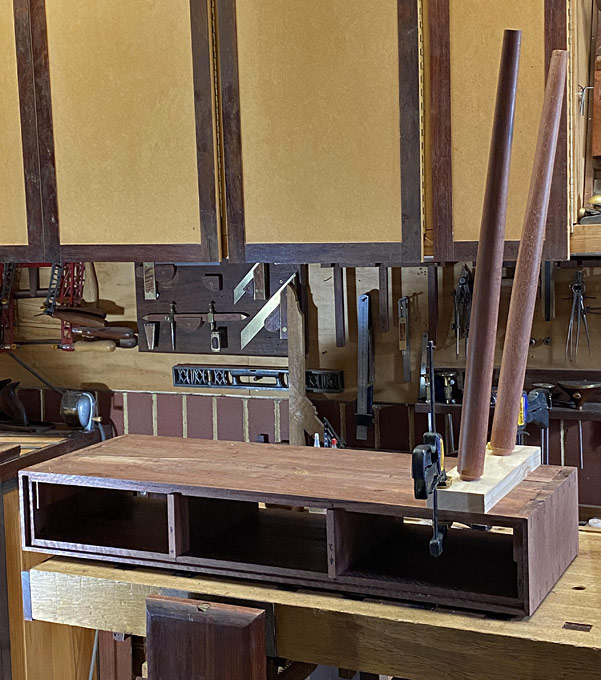
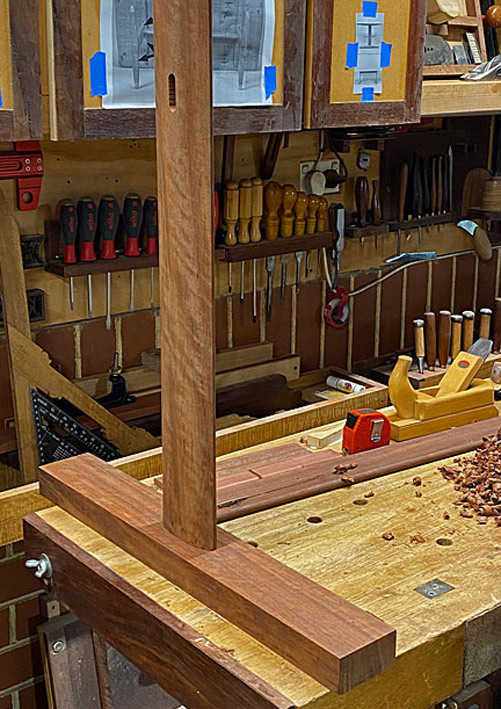
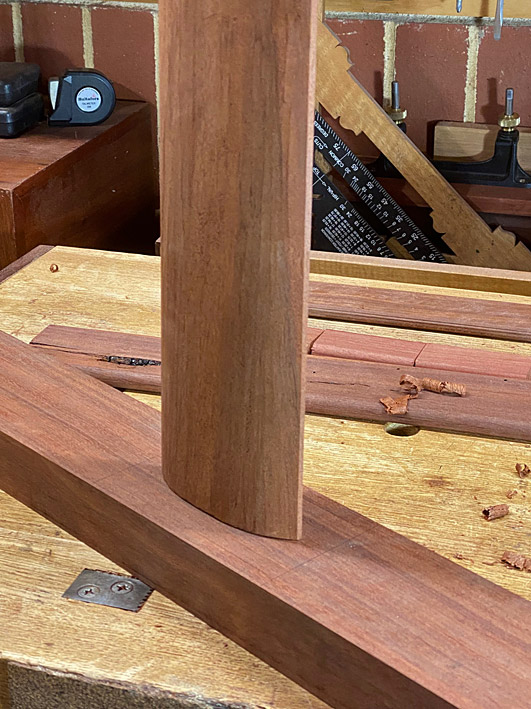
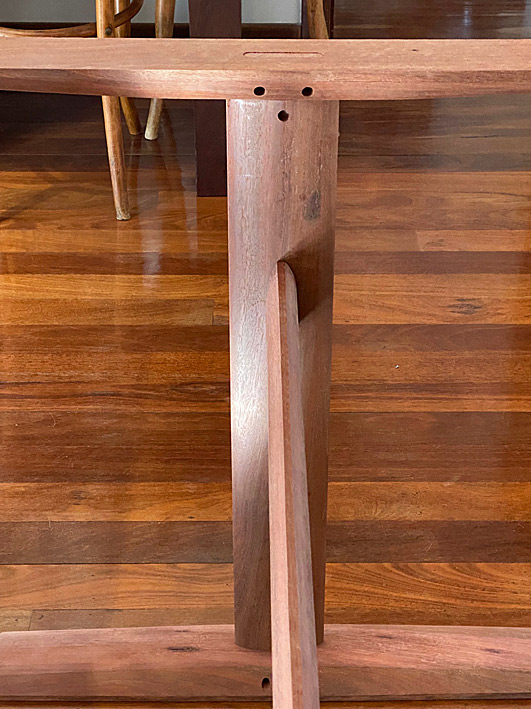
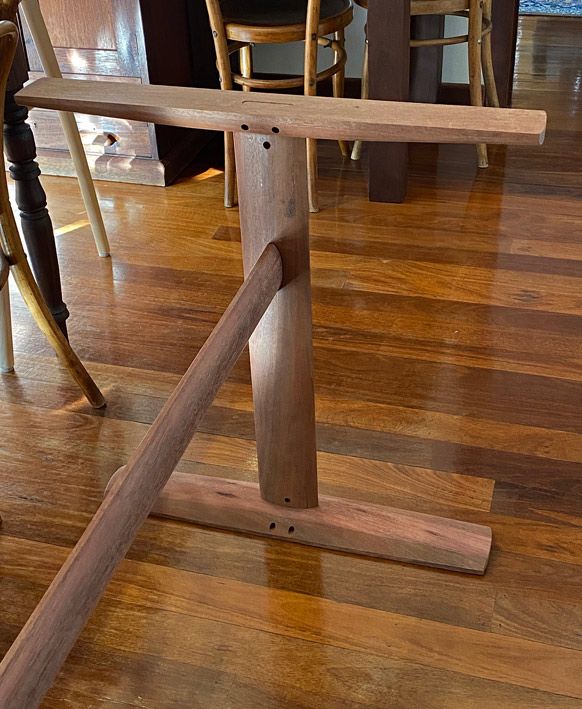
The last two structural areas for the base were the central rail, which was also planed into an ellipse ...

BB2.jpg

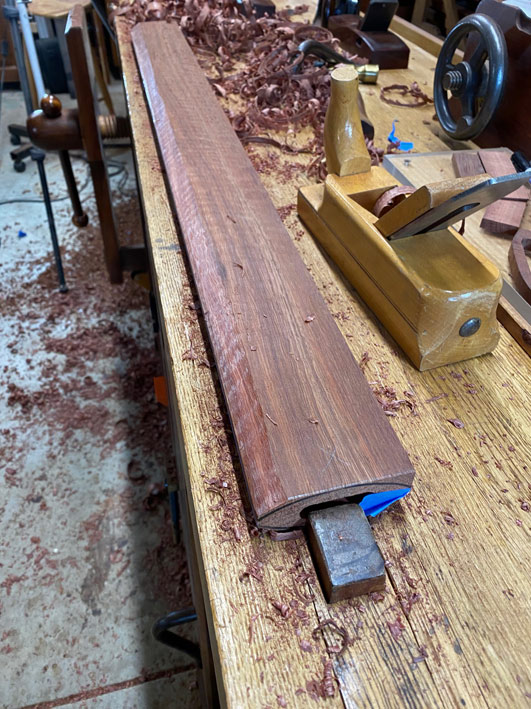
... and the upper, support rails ...

BB1.jpg

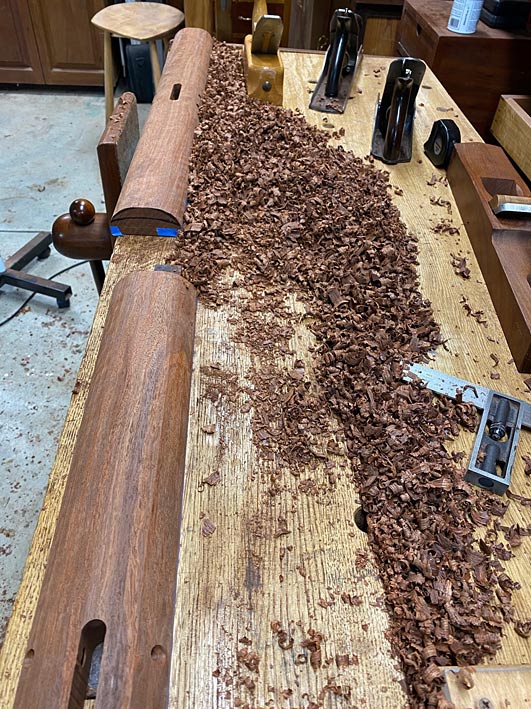
These also required tapering, which I shall not go through again here. Instead, I will move to the completed - but dry and unfinished - trestle base. I would have preferred to have it all done, but the weekend came to an end. Rats.

BB3.jpg

BB4.jpg

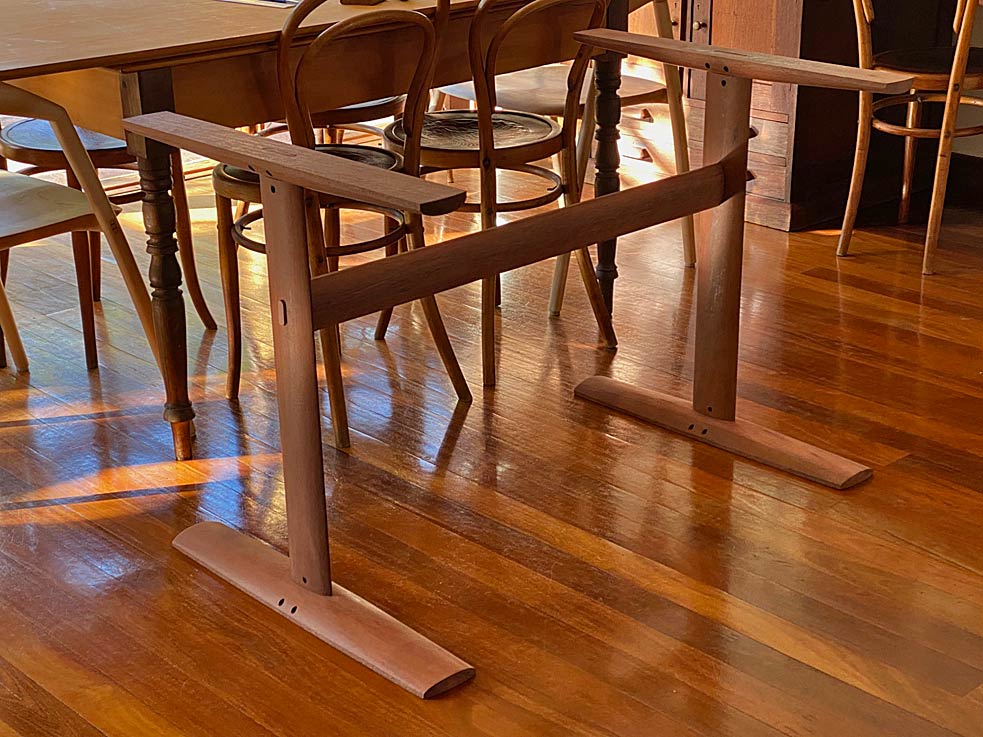
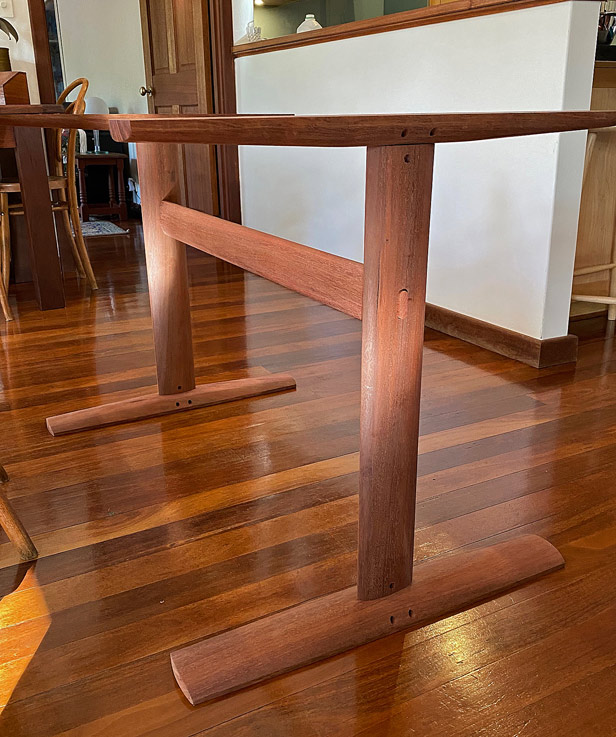
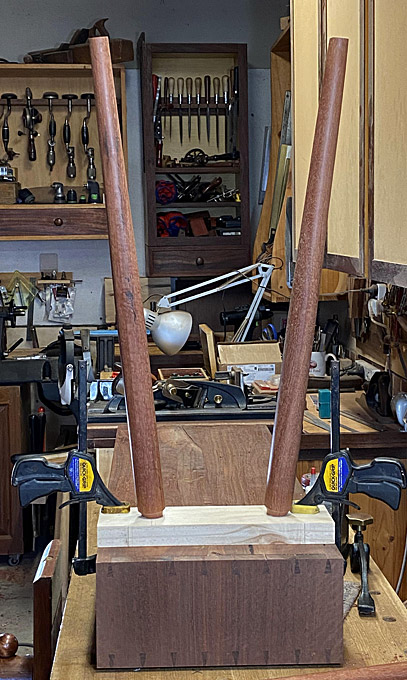
These will provide some idea of the curves and, hopefully, organic feel I was aiming for ...
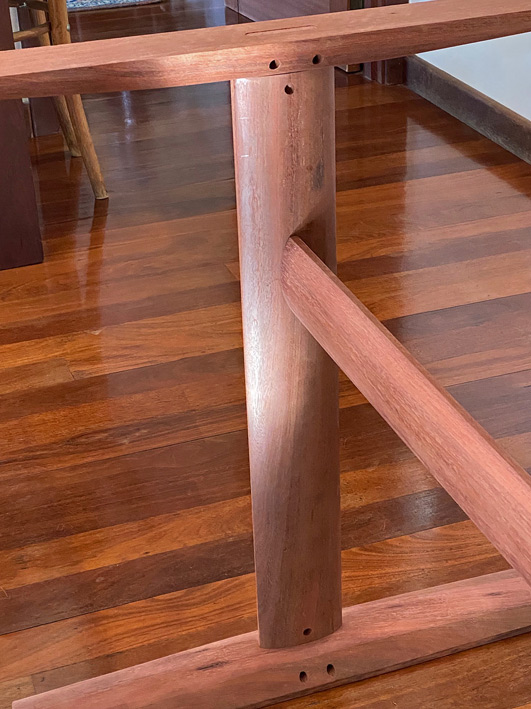
BB5.jpg

BB8.jpg

BB7.jpg


Regards from Perth

Derek

Turning » NEW SHOP SHOTS *LINK* »

#2

NEW SHOP SHOTS *LINK*

David Yoho

>I've just uploaded our four newest Shop Shots this morning. There are several more here waiting to be processed and I'll be getting to those as time permits.

Thanks to these talented folks for the latest submissions:

Brian Gray - Shot #601 - shares a beautiful wine cabinet he made, which features a few secret compartments.

Larry Verhoff - Shot #602 - finally finished the baby bed and changing table he's been building for his granddaughter, Lila. Both pieces contain a special link to the past and are sure to be cherished.

Joe Burke - Shot #603 - shows off a beautiful wall unit with a contemporary look to it. The veneer work in this project is wonderful!

Marc Snodgrass - Shot #604 - wanted his niece and her husband to have an heirloom piece of baby furniture for the arrival of their first child. Have a look at the lovely cradle he made from cherry.

David Yoho

Editor - Shop Shots


New Shop Shots

Hand Tools » Re: Unicorning other steel »

#3

Re: Is there an aversion to 23 degrees?

Derek Cohen (in Perth, Australia)

Hi David

The reason I have been sticking to 30 degree bevels in BD planes is that I am curious to see how this goes, and whether the clearance is an issue.

I am also a little reluctant to jump in with all my planes and change the bevels since this is early days with the planes. I really do not want to be grinding a lot of steel until I know what I am doing.

The #604 (with M4 blade) went well. However, the Veritas Custom #4 (on a 42 degree bed) was erratic. It cut, but I could feel it struggling. Too little clearance here, most likely.

I owe you a couple of emails but have been struggling for free time owing to long hours in Telehealth.

Regards from Perth

Derek

Hand Tools » Re: Unicorning other steel »

#4

Re: Unicorning other steel

Derek Cohen (in Perth, Australia)

Bill, I have added a unicorn profile to a variety of chisel steels: O1 and A2 (of course), but also PM-V11, M4 and 3V. The harder, more abrasion-resistant steels simply need a little different technique - more or less pressure, more or less speed, and a more or less abrasive compound.

In other words, the technique, per se, is not different, just that the set ups we use are different, and each one requires a slight variation. Bear with me as I describe my progression to date. This may help another starting out.

I've been using a half-speed grinder all the way through (when I set up the original stitched wheel, it was in a variable speed lathe but at 1425 rpm, the same as a half-speed grinder). The original wheel was a 6" and soaked in green compound, and it cut quite aggressively. Adding a unicorn profile to chisels was still okay, which goes to show how forgiving the method is with chisels.

I started a new system using a new 8" half-speed grinder (I had already planned to get another grinder before David came up with this Unicorn nonsense, one to shape curved blades and lathe chisels). There was a new 3/4" wide stitched denim wheel, initially, and then I added a 2" wide version with eyes on plane blades.

The 2" wide wheel was a mistake. Not only are the denim wheels much harder than the less-stitched cotton wheels, but the 2" wheel was difficult to use as it did not remain flat. The 3/4" wide wheels are the way to go.

Over the past couple of weekend I have been busy with painting doors and restoring the brass hardware. The latter has involved buffing away lacquer and polishing the brass (before re-lacquering and re-installing). I learned something from this buffing: the white compound is far more aggressive than the green compound. One might think that it would be preferable to use a more gentle buffing action, but the hard denim wheels then needed more pressure, and this (I think) created a variable surface on plane blades. I was struggling to unicorn BD plane blades.

All the buffing of brass destroyed the 2" wheel, and I used this as an excuse to get two more wheels, a hard felt wheel and a soft cotton wheel. And a bar of white compound.


The hard felt was just too aggressive for my liking, and it was the final wake-up I needed to recognise that gentler is better. So now I have the softer cotton wheel on the other side. This is used with the white compound only ...


I spent a little time working on the technique for BD plane blades. The plane is a Bedrock #604, and the blade is a custom M4. The wood is Hard Maple ...


The blade has its existing 30 degree hollow grind. This was freehanded on a fine diamond stone (600 grit) to raise a wire, then smoothed a smidgeon on a worn extra fine diamond stone (possibly around 2000 grit. Then over to the wheel ...

I use the bottom of the wheel as it is easier to track the angle of buffing. I start with the primary bevel parallel to the circumference of the wheel. Then gently drop the end of the blade by about 10 degrees and lift the bevel into the wheel. This process lasts about 5 seconds. There is a very fine wire, which is removed on a hardwood-green compound strop.

The result was consistent full-width shavings with the existing very fine camber. I would call this a success.

Hard Maple is easy to do this ... :)


Regards from Perth

Derek

Hand Tools » Entry hall table for a niece: Part 7 »

Edited #5

Entry hall table for a niece: Part 7

Derek Cohen (in Perth, Australia)

As a reminder, we are building a version of this table ...


The plan is to attach the legs, which were made near the start of this project.


The attachment method is by inserting the legs into compound angle mortices in a base, which will be fixed to the carcase with a tapered sliding and stopped dovetail. We don't mess about here! :)

It will be necessary to do this over two articles, the first being the base for the legs, which will be dovetailed (tails). The second will be the socket (pins) for the base.

Before we begin, I want to mention what I did at the end of the last session. I had replaced the central drawer dividers as the grain ran in the wrong direction. The spacers at the ends also did so, and my response was to cut out half the spacer ...


Well, I fretted over the end spacers, and just could not leave them this way. Encouraged by the way the halves had come out cleanly, I removed the remainder and replaced the spacers with correctly grained versions ...


OK, onto the leg base ...

I spent a while playing with angles for the legs, and finally accepted this (mocked up base) ...


I have drilled angled mortices with a brace on a number of occasions. This time I decided to used a drill press and some Japanese Star-M augers, which are specially designed for this type of work (no lead screws). I built a 10 degree ramp for the resultant angle. The auger is 30mm ...


[

The tenon is straight, but the mortice will receive a slight reaming, and the tenon will be glued and wedged. This is probably overkill since the weight of the case rests on the legs.


These are the bases for the legs. The final prototype is at the rear ...


Drilling the bases ...


The design requires that the legs do not go over the boundary of the case (to avoid tripping over them) ...


This is how they should be ...


There was a small dilemma: The base at one side measures 3" from the end ...


... and the other side measures 1/4" further ...


I could not work out how this occurred. The angles are the same. In fact, I made another set of bases, and the same error showed up again - exactly the same!

So what to do? Actually, the decision was obvious after a little think - make the bases the same. What is more likely to be noticed is if the bases are different distances from the sides. No one will notice a 1/4" difference where the legs hit the ground. So be it.

This is one of the bases for dovetailing ...


First step is to remove a 2mm taper from one side. The taper will be on the inside of the base, with the outside parallel to the side of the case.

Taper line drawn ...


Easiest way to do this is with a [hashtag]#604[/hashtag] smoother ..


This is the one end of the base ...


.. and this is the other end ...


mmmm .... 0.39 mm oversize. What to do ...? I'm kidding :)

The dovetails will be 7mm deep. A shoulder was planed with a rebate plane ...


The squareness of this rebate is important, so check ...


The dovetail is now to be created, and the preparatory step is to colour the outer edge of the rebate with a sharpie. This will warn that the planing does not lower the external edge of the rebate.


The dovetail is created with a modified Stanley #79 edge plane ...


The fence has a 1:6 ratio wedge ...


Details of this dovetail plane here: http://www.inthewoodshop.com/ShopMadeTools/SlidingDovetailsWithTheStanley79.html

The result of planing. That is a 1:6 dovetail marker ...


So what are the numbers for the taper? This will give an indication of the accuracy of the joint.

One end is 44.12mm ...


... and the other is 46.46mm, which is a difference of 2.34mm.


This will work - the pin socket is measured from this (in the same way as dovetails for a drawer.

The reason for the 7mm depth? The case is 20mm thick. the dovetail should be about 1/3 of this thickness. I decided to take it to the depth of the rebate for the rear panel ...


So, here is one of the completed bases ...


And this is where it will be fitted ...


Regards from Perth

Derek

#EntryHallTable

Hand Tools » Re: Few more years of experience gives question for lv »

#6

Standing on the point of a pin.

Derek Cohen (in Perth, Australia)

I still have 3V and M4 blades for the Veritas BU smoother, from testing PM-V11. I also have 3V and M4 in a chisel, gave away a 10V as it was impossible to sharpen well, and M4 in a Stanley #604. Unless one is testing for endurance, they all work well and I would be quite happy to have just one if that was all that was available. Oh, all right .. I have a vintage Clifton iron in a Stanley #3 (it fits!), and it is wonderful for the 20 strokes it makes before needing resharpening :)

It begs the point that we tend to make a song-and-dance about "the best", but much of the time I bet that most of us will just grab what is sharp, and make it work.

Regards from Perth

Derek

Hand Tools » Re: The A2 Steel Debate Going on Elsewhere »

#7

Galoot Tools blades

Derek Cohen (in Perth, Australia)

Chris Scholz, who posts here, used to market a handmade Chinese laminated blade under the name of Galoot Tools made specifically for Bailey planes. No longer available, sadly. This is a great blade. It lives in a #604.

Chris also brought in (single iron) Chinese parallel laminated irons that Steve Knight would offer as a premium blade choice. I have one from Steve, and use it in my HNT Gordon planes. The technology exists.

Hopefully Chris sees this and responds.

Regards from Perth

Derek

Hand Tools » Re: LV replacement cap irons...... »

#8

Re: First one I saw...

Derek Cohen (in Perth, Australia)

I think you're fishing, Charlie :)

My preference back in 2003 were the high angled woodies from HNT Gordon. I still have them and like them. The LN chipbreaker was an improvement on the Stanley in the #604, which I only used in softwoods. Performance wise, the combination of the #604 plus LN chipbreaker did not compare with the HNT Gordon because, back then, I did not know to use it with the chipbreaker closed up.

Regards from Perth

Derek

Hand Tools » Re: Now we know how, how do we know when »

#9

Re: Modern Steels

Derek Cohen (in Perth, Australia)

Hi Gary

The local hardwoods I use are very abrasive. They speed up wear, so increasing the longevity of a blade is of interest to me, and consequently I am open to trying out new steels.

One comparison: One of the smoothers I like is a LN #3. The Clifton O1 blade is one of the last of the hammered versions (before they went to a more modern casting style). It is as "old school" as we can get today. Many rave about this blade - how buttery smooth it is. It is indeed a nice blade .... but it will last about a dozen strokes before it is dull.

The standard LN A2 steel is actually quite nice. I hone all my plane blades at 30 degrees, and this A2 does not chip (but then I do not experience any of the chipping that David reports. I am not sure why. Perhaps he notices things that I do not). Anyway, the A2 is a little more effort to hone than the O1, but not significant on either Sigma Power stones or Spyderco ceramic. In performance, the A2 will last at least twice as long as the Clifton.

I am also able to pop in a Veritas PM-V11. It is a little thinner, but with the chipbreaker closed up, the wider mouth is not relevant. The PM steel is about the same overall, possible a little less effort, than the A2 .... A2 steel has this slight resistance when moving on a stone. It feels a little chewie. The PM feels very similar to O1, sliding more smoothly. In action the PM feels like the Clifton, however I will get at least 50% more from it than the A2.

The question is 'is the effort in honing a more advanced steel worth it for the extra longevity?'. There is no point in driving a blade past the point when it becomes a lot of work to bring back to sharp simply because of an aversion/fear of sharpening it. I have a M4 blade in a Stanley #604 and it hones like any other when the appropriate media is used. In this case I use a 600 diamond stone to start, and finish on Spyderco. No big deal. However, and the point is, unless you are prepared to use appropriate media, some of the steels will be too much work to gain the advantages that lie with using them.

Regards from Perth

Derek

Hand Tools » Re: Observations: Veritas Low Angle Smoother Plane »

#10

Re: channeled blade?

William Duffield

When you drove to Seattle, did you try out the plane in the store before you bought it? Was there someone in the store who was willing and able to show you what you needed to know about the plane? If so, I can't imagine your needing to return it.

Anywhere you can buy a Veritas or Lie-Nielsen in person, they will have someone who can show you how to set up, tune and use any plane you may be considering. There are lots of opportunities, but you'd have to wait until about this time next month and go all the way to Port Townsend to try out a Lie-Nielsen. And you might want to take a ferry, very relaxing, beautiful scenery, to Victoria to try out a variety of Veritas planes. L-V's website doesn't seem to be updated right now with show schedules in the U.S. beyond the end of this month.

When you say "channeled blade", do you mean the toothed blade? If so, the toothed blade has nothing to do with rapid or gross stock removal, at least not in my hands. Its use is for preparing surfaces for gluing veneer with hot hide glue. It is reputed to also be used for preparation of stock with radical grain reversals, such as burl, if you cannot plane it with a properly setup iron without getting radical tearout. I at least partially agree with you on this one, though, because I prefer a scraper plane configuration for toothed blades, over of a low angle or even a Bailey pattern. I might suggest you try a L-N #85 if you can't find an antique wooden scraper plane.

A 3/4" blade on most 10" bandsaws, including my Delta, is well beyond overkill: It is totally dysfunctional. The spring and frame are not strong enough to properly tension it, the bearings are not robust enough, and most importantly, the 3/4" wide tires leave no room for tracking adjustment. You would immediately take the set out of the blade and destroy the rims of the wheels.

The Wood River #4 is not a clone of the Stanley #4, and does not in the least resemble any Stanley plane that anyone currently working for the garage door opener and hinge company has ever ever had a hand in manufacturing. You might argue that it is a clone of the 1930's era #604, but I would argue that it is a clone of the Lie-Nielsen #4, and I think you would lose that argument.

Hand Tools » Chip breaker experiment: session four »

#11

Chip breaker experiment: session four

Derek Cohen (in Perth, Australia)

Rationale

The conclusion after Session Three was (1) I had either not found the sweet spot for the very hard Jarrah I was planing, or (2) the effect of a chip breaker deflecting shavings is wood dependent.

Session Four

The plane is an unmodified Stanley #604 with LN chipbreaker (given a 70 micro bevel and slightly cambered) and a custom M4 blade.

This time around I chose a piece of Tasmanian Oak. For non-Aussies, this is (in my experience) similar in density to USA White Oak and also to European Oak. Tassie Oak is not an oak, however, it is a eucalypt. As such, it tends to be a little more interlocked. This piece was fairly typical.

How would I know if I was in the "sweet spot"? Well the video shows the shavings coming off the chip breaker vertically. This is why I have begun to think of the chip breaker (never again a "cap iron"!) as a "chip bender".

I set the chip breaker at a modest 0.3 (keep in mind that the chip breaker readings are slightly larger at the edge of the blade compared to the centre of the blade) ...


The mouth was "wide" at about 1mm. No effort was made to close it down as I normally would do for a smoother.


Here is the result ..


This was a good result. In the background you can see shavings from a chip breaker set back about 3mm. Those shavings are curled.


Of particular relevance here is that the planing took place into the grain.


The surface result was also superior - a shiny, clear and tear-out free finish ...


A close up around the knot reveals the absence of tear out ...


The second part of this session now moved to closing up the chip breaker to about 0.1 - 0.2mm ..


The result of this was very similar to Session 3, where the plane struggled to cut.


Clearly the chip breaker is now too close. However this is further evidence that it has a significant effect on the way the plane cuts.

For Part 3 the chip breaker was returned to the position of Part 1 ..


That particularly nasty piece of Jarrah (which is almost like end grain in the one section) was brought back. The #604 proceeded to plane this. The result was a little better than on the previous occasion, but not really that noticeably so. The board had some straight grained sections that were softer, and where the plane met this area, the shavings where long and straight. The surface quality was poor.


The LN #3 (with 55 degree frog, chip breaker set back 3mm) had its turn. The result was the same as before: decent surface to the touch, a noticeable improvement over the common angle #604 ...


The chip breaker in the LN was now adjusted to 0.3mm and the board planed again. The result was a significant improvement in the quality of the surface ..


This was repeated with the Veritas Small BU Smoother (with a 62 degree cutting angle). In the previous experiment the SBUS left a clearly better surface than the 55 degree LN #3. This time the SBUS was shaded ...


Neither LN nor SBUS produced shavings that were vertical. THis must be due to the high cutting angle.

Conclusions

There does appear to be a performance difference in the woods used thus far, indicating that the technique is likely to be wood dependent. The chipbreaker does, nevertheless, appear to be capable of improving the performance regardless of the wood type. However cutting angle does play a part as well, with a higher cutting angle still seen to be important for hard woods with interlocked grain.

Regards from Perth

Derek

Hand Tools » Experimenting with chip breakers »

#12

Experimenting with chip breakers

Derek Cohen (in Perth, Australia)

After all the discussion I thought I must do my own experimentation. The ability to plane interlocked grain is my bugbear (sorry BB :) ) in Oz. Not that all timber here is like that, but much of the West Australian hardwoods are. Hence my need for high cutting angles in the smoothers I use.

Now I posted a few segments on SawMillCreek and UK Forum recently, but no here. There were identical ongoing discussions there at the time (currently).

In brief, I had compared a Stanley #3 (using both the original blade and a Mujingfang HSS blade, ad original chip breaker) with a LN #3 with 55 degree frog (and A2 blade) and a Veritas SBUS (and PM-VII pre-production blade) with 62 degree cutting angle.

The chip breaker on the Stanley was place about 0.3mm from the edge.

The original Stanley blade was a joke. It just chattered on the Jarrah test board. The Mujingfang blade constantly choked. I even filed the mouth open!! No change.

The performance of the LN #3 was very decent, and only bettered by the Veritas SBUS as the latter had a higher cutting angle.

I have photos, but will only post them if you are deadly bored.

I really did not want to give up .....

OK, once more back into the fray dear friends, once more ...

This time with pictures.

I elected to use a Bed Rock #604. This has a LN Chip Breaker and a M4 blade honed to 13000 on a Sigma. Let no one criticise the components! :)

The chip breaker was given a microbevel of around 70-80 degrees ..


This is the Jarrah surface I am trying to tame. It looks worse here since it was last planed by the Stanley #3 in the abortive last effort.


For the first effort with the #604 - call it a baseline - I set the chip breaker at about 0.4 - 0.5mm, which is typical of my usual position.


The shavings were nothing spectacular and nor was the wood surface (I would not usually use this plane on this wood), but it was an improvement over the Stanley #3 ..


Soooo ... now the chip breaker was repositioned at about 0.2mm ...


... and I started planning, waiting for the smooth surface to appear ... but it was a major anticlimax as the mouth clogged ...


OK, here's the culprit ... the chip breaker is not absolutely flush (although I did smooth it on a fone diamond stone.


Back to the waterstones.

This is the only chip breaker in existence that is honed to 13000 grit!


The mouth has clearance ...


But in spite of all this, the plane would not make shavings!


So I pulled the chip breaker back again ..


... and took a slightly deeper shaving than before. Now you see why I do not do this with Stanley planes ...


It is not a pretty sight. Sigh.

OK, out came the LN with a 55 degree frog I used before. Keep in mind that the Veritas SBUS, with a 62 degree cutting angle, produced a better finish yesterday.


The finish is clearly better to the touch.

There needs to be a summing up of the three experimental sessions: I think that the bottom line is that I just cannot get the chip breaker effect on this piece of Jarrah. By contrast, I was able to achieve a better finish with a 55 degree LN #3, and decent finish with a Veritas SBUS with 62 degree cutting angle. Perhaps some types of wood will not respond to changes of chip breaker projection, and the case for high cutting angles remains the alternative?

Regards from Perth

Derek

Hand Tools » Re: CPM 3V vs. CPM M4 ? »

#13

Re: CPM 3V vs. CPM M4 ?

Derek Cohen (in Perth, Australia)

Did you have any difficulty with M4 otherwise, cost, sharpening, sourcing?

Hi Tom

My apologies for the late reply. Just back from three days in Bali .... no emails ... no internet ... no telephones ...


OK, I know it looks like any other beach, but this one was across from the hotel. I will post a little of the woodworking I saw there.

With regards the M4, it came from John Payne, whom I see has written a piece here. Sharpening was straight forward enough on diamond paste. Just 10 and .5 micron old-based paste off eBay. Nothing special. Cheap. I have really only just started working with it so it is too early to report anything really substantial. The edges are sharp, as sharp as anything else I use. I am impressed with the plane blade, which is in a #604. It has soldiered on and on working Jarrah (which has a high level of silica) .. when other blades would have needed re-sharpening. However I have not yet quantified this. Similarly, the chisel shaves end grain Tasmanian Oak - after chopping mortices - and leaves behind a shiny surface.

Regards from Perth

Derek

Hand Tools » Re: Assistance with choice of replacement irons... »

#14

Re: Assistance with choice of replacement irons...

Derek Cohen (in Perth, Australia)

Hi John

While they are not advertised, I gather that Lee Valley are now offering M2 (HSS) blades.

John Payne may also make one for you - contact via WoodNet. I have a M4 blade of his on test in my #604. It certainly gets as sharp as anything, and as quickly, using diamond paste, and then holds it a l-o-n-g time.

Regards from Perth

Derek

Hand Tools » Re: *** SURVEY: THE IDES OF JULY *** *LINK* »

#15

Re: *** SURVEY:  THE IDES OF JULY ***

David Miller from Iowa

Woodworking related:

Treated a big lot of superb cherry wood for powder post beetles using Borax (thanks Stephen Shepherd � search the posts here) It really worked, although I should have picked a better spot to do it in the yard as it also killed the grass.

Made a workbench (see �Quick Bench� from last week)

Bought a vintage Delta Unisaw, bandsaw, scroll saw and drill press - refurbished & sold at a good margin

Gave my 20-something son a completely tuned #604 Bedrock plane and showed him how to use it (very gratifying to see that �ah ha� and know he is planing boards until they are gone just for fun)

Bought a great Stanley Bedrock 606C plane at auction for cheap � I needed the corrugated one.

Non woodworking related:

Put 300 square feet of 19th century salvaged tin ceiling up in my porch � turned out great, but was a lot of work (although very cheap).

Made a bunch of yard art out of found metal things and did pretty good at a fancy schmancy art show � bells made from welding cylinders sold very well.

Continued to look for a �real� job � been 2 years now.

Hand Tools » WHOO HOO! Look what arrived today!! »

#16

WHOO HOO! Look what arrived today!!

Dominic in Buck's County PA

>Look what was waiting for me when I got home!!

Photobucket

A spiffy (almost) new LN 4 1/2 and a bronze LN 140 courtesy of Alan Cohen's recent sale. These bad boys look pretty much brand spanking new. Besides being in damn near new condition, they came complete with their original paperwork and boxes. For operational purposes, these don't matter much. But it just goes to show you how "complete" these are.

I'm pretty excited about these two planes. For a long time I'd been looking on Ebay for a Bedrock #604 1/2 or a Stanley #140 but I could never find either for less than a brand new LN, or in good enough condition to warrant the expense. These two were also a present to myself to celebrate the new job I started today. But I pretty much exhausted the "tool fund" (generated by recent tool sales) with these guys. I might have enough left for one more purchase.

See ya around,

Dominic

Hand Tools » Re: York or Middle Pitch »

#17

Re: Derek, please critique my rationale

Derek Cohen (in Perth, Australia)

>Hi Hank

An unused Norris, eh? Yeah, nasty planes, aren't they! :) Actually, I think a 50 degree LN #4 1/2 could well better it in most respects.

I was under the impression that you already had a 45 degree LN #4 1/2 ... ? If not, then I would agree with your decision to go for the 50 degree frog bearing in mind the wood you will use. I expect a 45 degree LN to better a 45 degree #604 (I have a highly tuned #604 with LN blade and cap iron - nice plane but, compared with other planes with high cutting angles, it is limited to softer woods and straight grain). And of course you are correct, if you are willing to purchase another frog if needed, then it is not really worth making an issue. Which ever frog you get, you will have a great plane. Enjoy!

Regards from Perth

Derek

Hand Tools » Re: Puzzler Price on Ebay Plane »

#18

Re: Puzzler Price on Ebay Plane

William Duffield, on the Cohansey


>A #4 or #4 1/2 from the same era would make an excellent donor of adjuster, tote and knob, genetically indistinguishable from the original equipment on the much more valuable #604 1/2. Those replacement parts, some discreet rust removal and a bit of pontypool could result in a Frankenplane that could successfully pass the handplane olympic drug tests and bring $400 to $500 from a serious collector.

Personally, I'd prefer a L-N 25th aniversary special bedrock, even with freely acknowledged cryogenic steroids, A2 steroids, magnesium bronze steroids, and genetically enhanced amphibious steroids. It's purdier, works better, and comes NIB, with impeccable provenance.

Hand Tools » Re: Combination planes - which one should I get? »

#19

Re: Combination planes - which one should I get?

paul womack


>Hi Denis, if I'm not mistaken Lee Valley and L-N are developing metal plow planes. So I'm holding off for 6 to 9 months to see what they're going to offer.

Given the prices of combo planes in old catalogues, they have an unavoidably high build cost.

In UK, 1935, a Stanley #604 was 16/3 and a #50 30 shillings, or 195 pence vs 360. On this pricing basis, a LN #50 would cost 250 * 360/195 = 460 dollars.

Conversely, common combination planes are quite cheap in the s/h market, since they are quite plentiful and their value is percieved by many people to be low (in the age of the router).

On a finite budget, I'd definitely try an old '50'

BugBear

Hand Tools » Re: L-N Planes on Back Order - How Long? »

#20

Re: L-N Planes on Back Order - How Long?

Hank Knight in SC

>Hoa, I ordered a LN Jack form LN in early January. I was told two weeks ago that they were temporarily "out of stock." It arrived last week. In all fairness, though, I ordered a custom chipbreaker for my #604 at the same time and asked that they be shipped together. It took a little while for them to get my chipbreaker on the produciton schedule, so that might account for some of the delay.

Hand Tools » Re: Chipbreaker/blades »

#21

Re: Chipbreaker/blades

Hank Knight from SC

>Chris, I upgraded several Stanely planes recently with Lie-Nielsen A2 blades and chipbreakers. I've been very pleased with them. One word of caution, though: my planes were Bedrocks and some of the LN chipbreakers didn't fit. I sent LN the specifications for the original chipbreakers and they made the new ones to order for no extra charge for machining. I don't know if their off-the-shelf chipbreakers will fit a Bailey #3; they might. Call and speak to one of their technical people. They are very helpful and friendly, and they should be able to tell you right off the bat if their chipbreakers will fit your plane.

I also have one Hock blade on a #604 that is very good, but I don't have any experience with Hock chipbreakers.

Hand Tools » Re: Recommend One Smoothing Plane Please »

#22

Re: Print and frame Mr. Lee's post!

dave caudill

>You are getting a lot of good, although conflicting advice and I'm sure I can't do much other than muddy up the water a little more. I've been fortunate enough to have been able to try a lot of nice smothers in the last few years. Although there are many here being mentioned that I have not tried and that includes all of the LV tools. I just can't get myself to warm up to these aesthetically. On the other hand I have had time with LN planes and really enjoy my #164 as it does work quite nicely on certain figured woods. I also have an old type 10 Stanley 4 1/2 which is an incredible smoother and has a wonderful heft and feel in my hands. It is outfitted with a Hock blade and makes pretty fine work of many a figured wood. I also have a Clark and Williams smoother and it too is pretty impressive smoother. I have not owned a Knight smoother but those who have them swear by them. Then there is ther tried and true Stanley #604 which I love and a #603 that I feel the same about when working smaller areas which is often the case with figured wood. I have heard little mention of the older Stanleys in this thread and think you should give them as careful consideration as many of these newer planes. I think for the money they are hard to beat.

I think much of what we all have found is that you get yourself a reasonable tool and then you work on your technique. I find that no one plane works in all woods in all conditions, all of the time. I tend to have several lying on my bench at any one time and play with them until I find the one that suits the current conditions. Sometimes its not the plane I thought would work and I don't put much thought into it I just move on. I would suggest that any of these suggestions are reasonable choices that will work a good bit of the time. Look at all of the choices and choose the one that you think will be the most versatile and that speaks to you. Like I said the LV planes do not do a thing for me even though they from all reviews I've read here are very functional planes. I tend to lean towards old Stanley planes and fiddle with them until they work as well as I think they ever have or will and then go from there.

Have fun with the hunt and I'm sure you will make a great choice.

Dave

Hand Tools » The Sounds That Planes Make »

#23

The Sounds That Planes Make

Derek Cohen (in Perth Australia)

>I have slowly, but increasingly, become aware of an interesting phenomenon about the sounds that planes make. Now I am speaking about the difference in sound made by Bevel Down and Bevel Up planes.

This appears to occur among all the equivelant versions I have, such as LV LA Smoother vs #604, LV BU Smoother vs #4 1/2, LV LA Jack vs #5 1/2 and, this past weekend (which finally inspired me to write this), the differences in sound between a LV BU Jointer and a #7.

I do not think it has to do with the type of wood used (hard vs soft), nor with sharpeness (both planes had freshly honed blades) or the thickness of the blade (although the BUJ used the standard 3/16" blade while the #7 used a Smoothcut blade - 4mm? - and a thick Clifton two-piece chipbreaker). The two planes did have different cutting angles, 62 degrees verses 45 degrees, and this may have influenced the outcome, but I recall that it is present on various BU angles anyway.

OK, so what was the sound?

The #7 (along with other Bevel Down planes) goes "Schhhiiiiik", a high pitched, clean sound (that we are all familiar with).

The BUJ (along with all other Bevel Up planes) goes "Schhhok", a lower pitched, slightly muffled sound.

Does this reflect a more solid, energy-absorbing bed in the BU design? Mmm, I should try this out with an Infill design, shouldn't I?

This is "Work in Progress". Your thoughts?

Regards from Perth

Derek

Hand Tools » Re: LV Bevel Up Smoother - a review *LINK* »

#24

Re: LV Bevel Up Smoother - a review

Derek Cohen (in Perth Australia)

>Gad, Dan - you have a good memory! Yes I do have a #604 with LN set. I chose not to include it since it would have been a match in size for the LA Smoother, but not for the BU Smoother. As it happens, I have been asked to do a review of the LV LA Smoother for a magazine, and I will include it there.

Regards from Perth

Derek

Hand Tools » Re: plane facts on planeing? »

#25

Re: plane facts on planeing?

Derek Cohen (in Perth Australia)

>Hi Bob

You wrote:

"1)Can good results come from the more common and less expensive older stanley planes if properly tuned and sharpened? "

Absolutely! Yes! Maybe. It depends ...

Firstly, I assume that you are referring to smoothing planes, such as the Stanleys benchplanes (#3 or #4 or #4-1/2) or the Bed Rocks (#60X versions).

You probably would get very mediocre results from one of these if it is used without some tuning. But with a flat sole (OK, flat toe-mouth-heel), a stable blade-frog set up, a small mouth, and a very sharp and smooth blade, you should have no difficulty producing good results in undemanding, straight grained timber.

I would not recommend the 45 degree cutting angle of the Stanley bench planes for anything that has interlinked grain, since it will be likely to tear out, but even such timber may be handled reasonably with modifications to the planes. A thicker (= more stable) blade with a backbevel can help noticably here. Nevertheless, there is a ceiling at which Stanley bench planes will no longer produce satisfactory results. Of course, at this point you could just break out your card scrapers ...

"2)What is the marginal improvement of a plane blade flattened and honed to a mirror finish and sharpened on a 8000 grit watersone versus say a plane blade which has a relatively smooth, shiny back and an edge honed on an 800 grit oilstone."

Your reference to Tage Frid using a chisel sharpened on 220 grit (60 microns) paper is not pertinent here. Keep in mind that Tage further honed his chisel on a motorized strop, and it was the strop that created a mirror shine on the bevel. Also, the chisel was used to chop out dovetails, not to smooth timber.

A bevel edge for a smoother needs to be more than sharp - it needs to be smooth as well. Whatever irregularities (i.e. scratches) are on the blade surface will transfer to the timber. A blade that is sharpened to 800 (12 microns) then honed on Veritas green rouge (.5 microns) will have a shiny but serrated edge. The process of sharpening takes the metal through a diminishing range of scratches. The 8000 waterstone that you referred to (and that Rob Cosman uses) has a rating of 1.2 microns. It is not necessary to go this far. I'd suggest that a 4000 waterstone (3 microns) is probably the minimum limit I would consider for a smoother. 6000 (2 microns) is better.

As others have noted, 90 percent of the sharpening labor lies in achieving a clean primary bevel, that is, one that produces a wire edge. After this, a microbevel honed with a 1200 and then 6000 waterstone should take no more than a few minutes. Use a honing guide for reproducability of the bevel angle, and the process goes even faster.

At the end of the day it will come down to the type of timber with which you work, and the level of tuning that you are prepared to work for.

Below is an old file picture of a tuned Bed Rock #604 smoothing a pine board.

Regards from Perth

Derek


img

👍 This page answered my questions

Your vote helps other woodworkers quickly find the answers and techniques that actually work in the shop.