Re: Drawer Planing Fixture
Charlie
You've painted yourself into the most horrible of corners if the fit depends solely on planing the drawer sides.
Est. 1998 — 27 years of woodworking knowledge
Re: Drawer Planing Fixture
Charlie
You've painted yourself into the most horrible of corners if the fit depends solely on planing the drawer sides.
Re: Drawer Planing Fixture
Charlie
This sort of reminds me of the famous Mike Tyson quote: "Everybody has a plan until they get punched in the mouth."
You'd better have a plan if that ginormous carcase you're building that has 8+ drawers goes up a little out of square or with some twist. Yeah, it tested square when you put the clamps on it and all seemed fine, but it ain't so square when they come off. If this hasn't happened to you, just wait, it will. You can't ditch all that work, or can you?
Some would I'm afraid.
Re: Interesting comment on how/why we work
Charlie
Yes, if we're providing advice and pictorial tutorials to our peers then one might as well cut to the chase.
The measure of how well a drawer has been cut and assembled is the joint line on the inside. Full stop.
The advantage of making for oneself ...
Derek Cohen (in Perth, Australia)
... is being able to control where they live, what they live on, and what lives in them 
Regards from Perth
Derek
Re: The advantage of making for oneself ...
Charlie
And for my next trick, I'll live forever. ;-)
Re: The advantage of making for oneself ...
Charlie
Seriously though, the old hands, I don't think, were ever under any illusion that they were building for more than one owner/one generation. What has survived was a tiny % of the total output.
Still doesn't solve the problem of the first owner loading a drawer with the closest proxy to gold bricks she can find.
Re: The advantage of making for oneself ...
Charlie
But somebody sees a carcase full of drawers perhaps with more spacing in their openings than they've achieved on something similar they've made, and they immediately believe that they are working to a higher standard than the fellow who has to build for the exigencies I've listed.
A carcase sag of a 32nd on the side next to a low spot on the floor is enough to move a drawer blade enough to foul some pieces I've seen online. I usually just grin and think "just wait."
Drawer fitting metrics
Bill Tindall, E.Tn.
My metric for drawers is: I must be able to close the drawer, even a large drawer, from half open by pushing with my finger on one corner. If not perfectly fit the drawer will cock and bind.
Re: Drawer Planing Fixture
roger lance
Derek.....thanks for showing your jig.....I like that it is adjustable and will accommodate a wide range of drawer sizes......and can be set to a specific drawer which is a short-coming of the "comb" version that you more commonly see......and your jig is more long lived where the "comb" types are not as you eventually run out of places to cut slots......that you can also pad the two arms and help protect the inside of your just about to be completed drawer is also very desirable and would be difficult to duplicate on the "comb".
Do you prefer planing into the fixed arm more than the adjustable arm?.....I'd imagine that would be more steady. Any comments you have on actually using this design would be great.
I'll be looking at ways I might modify it and ways to store it.....but, I like a lot of things about it.....thanks for showing your planing fixture.
Re: Drawer Planing Fixture
roger lance
Derek.....in studying your picture I see you moving the jig back and forth on your bench to adjust the projection of your jig arms so that your drawer will also rest against the side of your bench while you plane.....do you find this ability vital??
Re: Drawer Planing Fixture
Derek Cohen (in Perth, Australia)
Roger, I generally place the fixed end against a bench stop ...
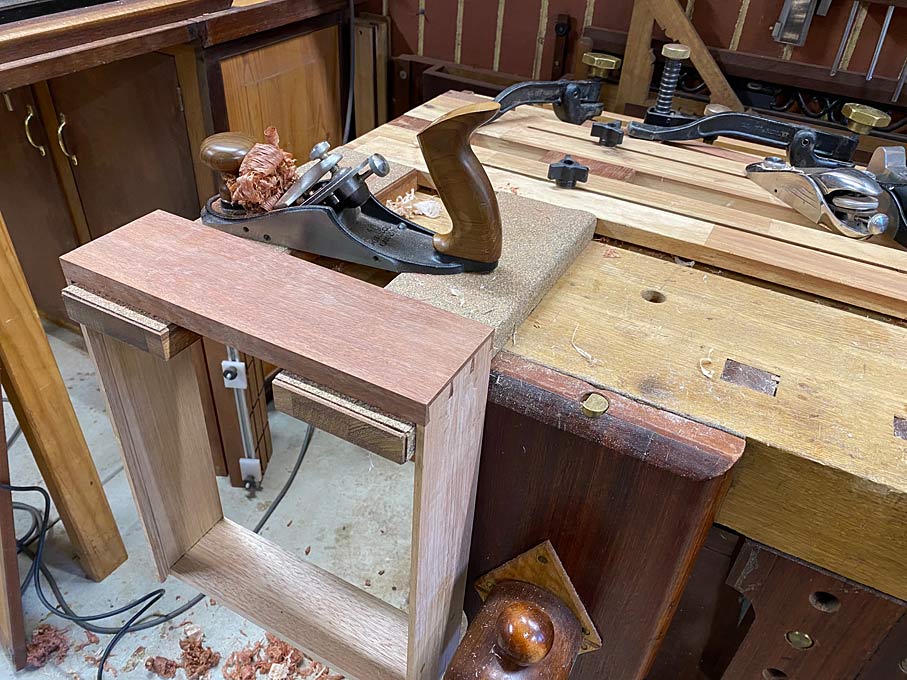
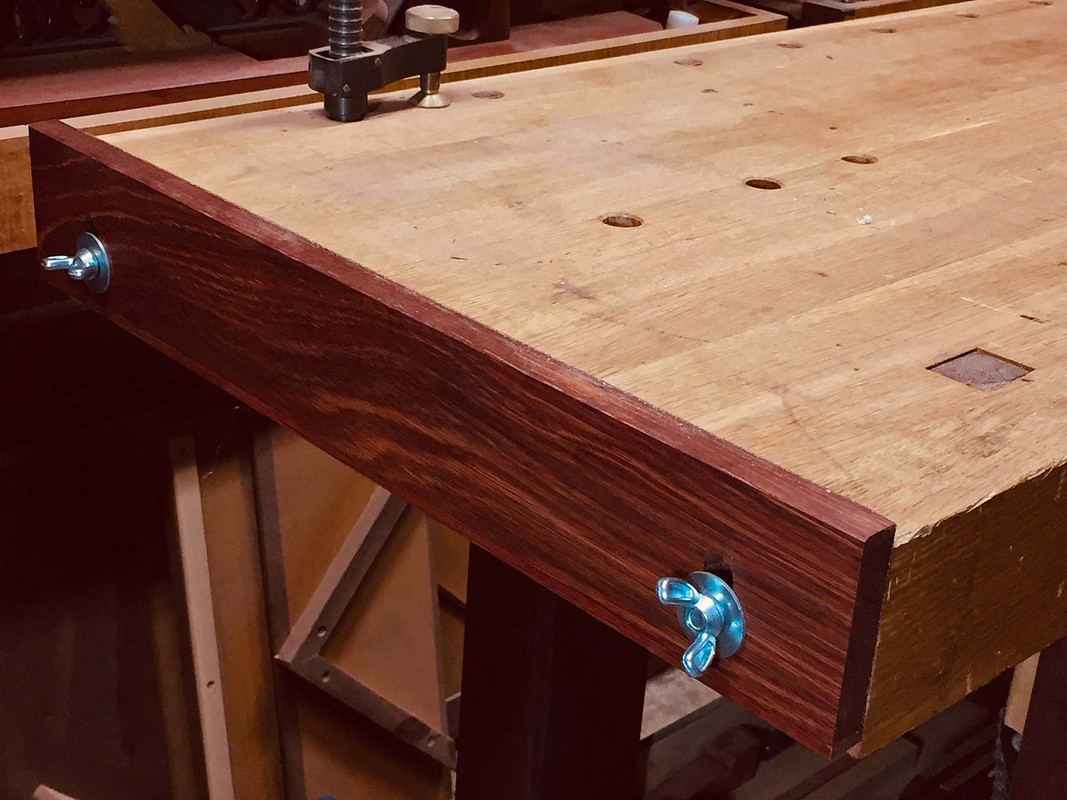
Set the drawer in against the side of the bench for stability.
Regards from Perth
Derek
Re: Drawer Planing Fixture
roger lance
Derek.....one problem issue I thought would happen with any jig intended for this task was drawers slips......remove the drawer bottom and begin planing the drawer sides.....but those slips would be an issue.
I see that you have not yet glued in your slips on the drawer you showed.....but, are making this step after this side planing. Any comment about this would also be appreciated.
John.....you are not forgotten......
roger lance
Well, John.....you started one of the longest treads that's been on this sight in awhile......unfortunately, it didn't have much of anything to do with you or your problem.....tangent on tangent.
But, I and others have not forgotten you.....and your problem. Please let us know how it's been going. I hope you thinned those fingers a smudge and that your joints went together.
Flat work is definitely different from turning. Make sure the boards you are working with are flat and square......edges and ends.....use scrap to test what you are about to do before you do it on the good stuff when you can. Just take your time.
Show a picture of that chest as you make progress.....we'd like that.....best wishes.
Re: Drawer fitting metrics
Jack Dover
Yeah, this makes sense: if a drawer binds nobody cares how good dovetails are.
I was just trying to say that if there's a drawer where a scribe line was pushed down so far it's visible from inside - chances are this drawer binds too.
And "flauntable" to me is something like "rising sun dovetails", "Bermuda dovetails", "hound teeth" or similar. A regular dovetail that fits tight and doesn't have visible defects or signs of carelessness is just, well, regular.
Flauntable dovetails
Bill Tindall, E.Tn.
These are dovetails on a piece of furniture that are triumphally shown to other woodworkers. Dovetails of equivalent perfection that are not advertised are not considered flauntable until flaunted.
I believe flauntable dovetails discourage wider practice of this valuable joint.
Fitting the drawer bottom.
Derek Cohen (in Perth, Australia)
I see that you have not yet glued in your slips on the drawer you showed.....but, are making this step after this side planing. Any comment about this would also be appreciated.
Roger, for a while now I have been fitting the slips and drawer bottom at the end, after all else is complete.
A penny dropped for me after watching Rob Cosman work. He and I do things differently, but he is good value in emphasising some points. One was in fitting the drawer. Rob would make a big fuss over the flatness of the drawer groove, using a router plane to level a groove made by a tablesaw (I use a plough plane for my grooves).
Now Rob loves the idea of "piston" fits. I tend to join Bill here in that I aim for a close-to-piston fit, but make allowance for the weather, and expect drawers to slide closed with a single-finger push at one lower corner.
A drawer which fits sans drawer bottom may not do so after the bottom is added. The groove may be either blocked or too tight or or provide enough space for expansion. The poorly fitted drawer bottom can push the sides out and cause the drawer to stick. The answer is not to plane the drawer, since this may not be the issue, but to ensure that the fit is better between bottom and sides (including slips).
Consequently, after checking that the drawer sides are square and flat, I want the drawer to first fit without the bottom. Then I will know that there is an issue with the bottom if the drawer sticks.
Regards from Perth
Derek
Same as Derek
Bill Tindall, E.Tn.
After the drawer is glued up and cured I fit it. Nothing about adding slips, or not, and the bottom can alter the drawer shape at this point.
If the bottom fit so poor as to distort the drawer, the bottom needs fixing. My experience is the bottom will not readily slide in unless the fit is loose.
For planing I just hang the drawer over a piece of MDF or plywood, as I have seen done in professional shops. It may not be obvious till you do it, but it is only necessary to have the plywood piece occupy about 3/4 of the drawer span. I always seem to have some piece of cut-off that is close enough.
Drawer Planing Fixture variation......
roger lance
Derek......I made a variation of your jig.....one that fits the workings of my bench which has dogs but no hold downs (Shaker style bench.....that's the price for having that large tool storage base)......

and the jig prepared for storage above the bench......it will hang off a floor joist.....

I'll be padding those arms to protect the inside of my drawers ; but, I'm unsure of just what I'll be using to cushion them.
I started watching a little of Rob Cosman's video series on drawer making......I now understand your comments about how meticulous he is......but, it looks like an excellent way to learn the details......thanks for the jig idea.
Re: Drawer Planing Fixture variation......
Derek Cohen (in Perth, Australia)
Roger, that looks a great design and so well made (as you usually do).
I don't use ply - pity in this case, as your design looks very stable and easier to build.
Regards from Perth
Derek
Re: Drawer Planing Fixture variation......
William Duffield
BenchCrafted and Lee Valley sell padding material made from granulated cork and rubber.
That's what I use.
Re: Drawer Planing Fixture variation......
roger lance
Thanks William.......I've put a roll in my basket.....it was interesting what BenchCrafted said about how easy contact cement was to clean up if you wanted to replace your crubber padding......used it for Formica.....never thought that stuff dried would be easy to clean up.
Re: Drawer Planing Fixture variation......
roger lance
Derek.....with this jig in use, have you had a need for additional arms.....something to go between the two arms to give added support to the drawer as you plane it??
Re: Drawer Planing Fixture variation......
William Duffield
I won't say it's easy, but mineral spirits or naptha will loosen contract cement, turning it into a goop that can be wiped off. At least it worked with 3M 77, but I haven't needed to use it yet on Super 77, so caveat. It is particularly needful for cleaning laminate trim router bits.
Roger - simple answer: no