WoodCentral Forums

Est. 1998 — 27 years of woodworking knowledge

Help from flatboard workers

Posts

Re: Help from flatboard workers

#26

Re: Not at all my experience

roger lance

BTW....I like CB very much.....he is unique in the professional woodworker world.....he has managed to make a living making furniture, writing, lecturing......and did not resort to having a school to help pay the bills.

There is another video of him (at least I think it was him) at a woodworking show doing a demo on making thru dovetails which he did completely off the saw including the removal of waste with a fret saw which he was able to cut on the lay out line and then assembled the joint and passed it around and people were confirming that the joint was flawless.....no chisel work at all. Try that.

Re: Help from flatboard workers

#27

Re: Not at all my experience

Charlie

He worked for Moser in the early years of the firm. He definitely knows how to get a piece built and out the door.

I'm not surprised at all about the dovetails he cut at the demo you mentioned.

Re: Help from flatboard workers

#28

Re: Not at all my experience

Derek Cohen (in Perth, Australia)

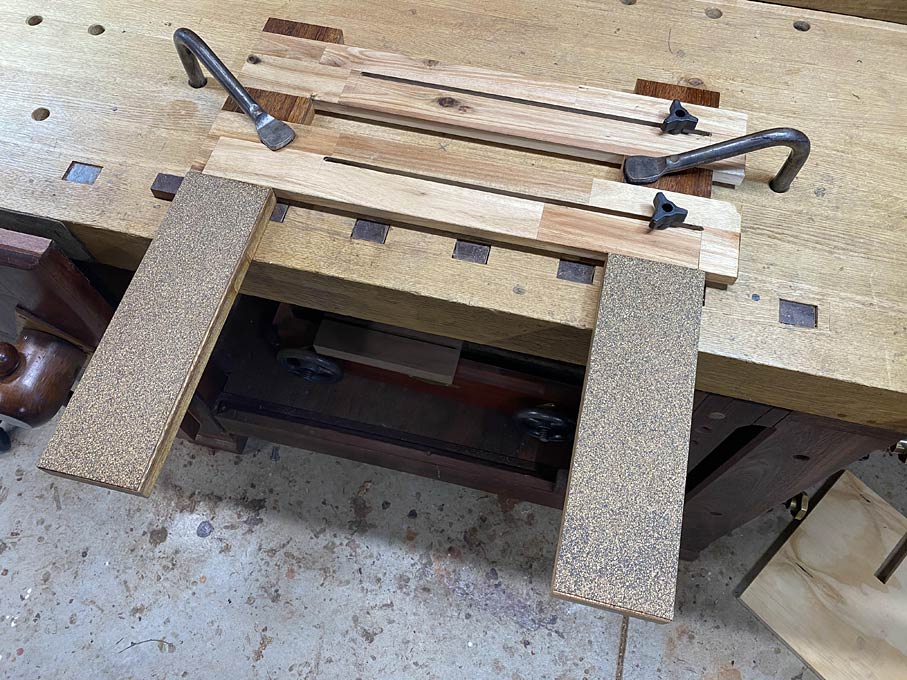
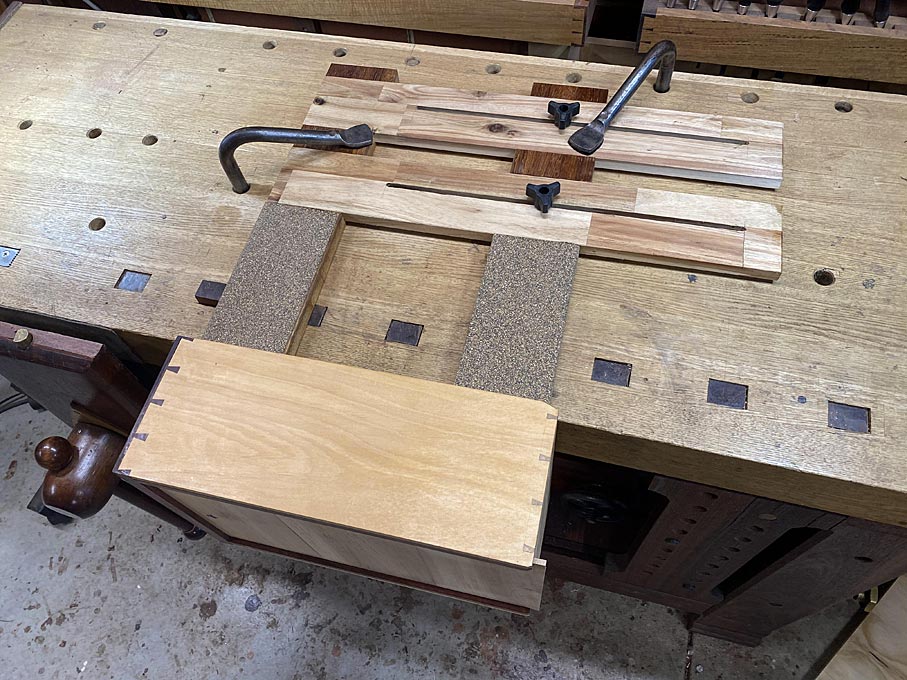
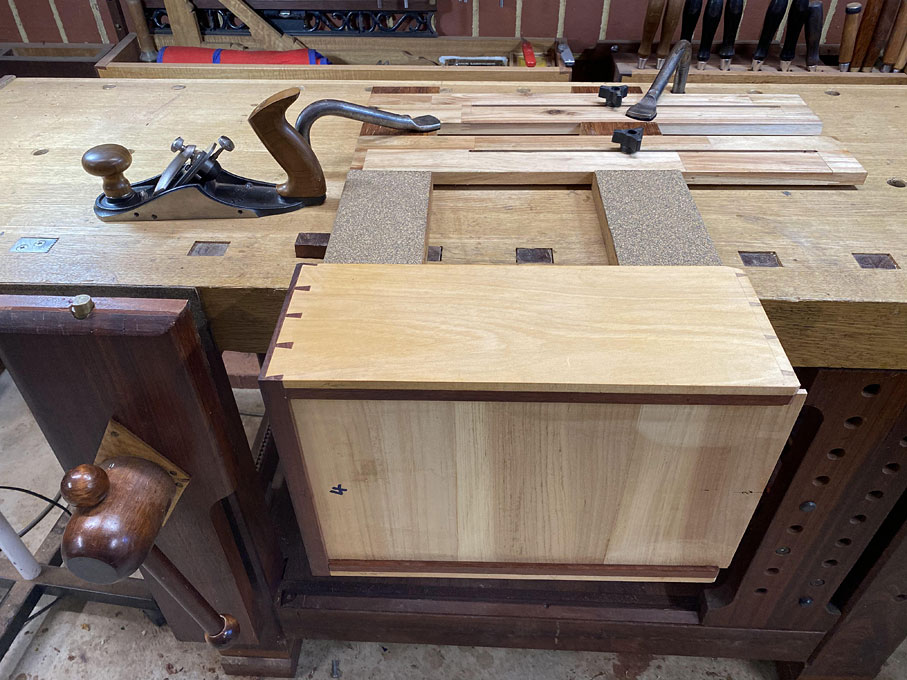
Roger, what he is doing is aligning the internal grooves using a same-thickness piece.

It’s six of one and a half dozen of the other: if you make the groove referencing off the bottom of the boards, it should align (does for me). One still needs to ensure that the sides are square to the front.

Regards from Perth

Derek

Re: Help from flatboard workers

#29

Re: Not at all my experience

roger lance

Derek......yes, he is using the grove to align the pieces.....I'll be staying with a Barron type alignment board.

Do you use this "comb" aid when you are planeing your drawer sides for final fitting??

Re: Help from flatboard workers

#30

Loosing sight of the need

Bill Tindall, E.Tn.

John asked if he could get what he had successfully assembled with glue. If I understood correctly he has assembled the joint dry.

If this information is correct he will succeed with Titebon liquid hide glue at typical room temperature. I have glued hundreds of joints with this product and I have never seen a case where the joint did not go together easier after this glue was applied (presuming the joint did not begin to dry before assembly as it might if warmed).

This discussion wandered into a discussion of what a joint target should be where the question was what can I get by with. Bonking together by hand is a good target, but not an essential result.

Re: Help from flatboard workers

#31

Re: Not at all my experience

Derek Cohen (in Perth, Australia)

Charles, I did not mean to come across as disparaging Christian Becksvoort. I admire the work he has done, his breadth of knowledge of all things Shaker, and his positive influence on cabinetmaking. He has also some "interesting" techniques, which have developed out of his need to remain viable in his practice - and who am I to question these? :\ They are not necessarily ones that are helpful for my work, and vice versa. I do like his groove joiner. I just have an alternate method.

Regards from Perth

Derek

Re: Help from flatboard workers

#32

Re: Not at all my experience

Derek Cohen (in Perth, Australia)

Do you use this "comb" aid when you are planeing your drawer sides for final fitting??

Hi Roger

I don't do this. The method I prefer is one which will align the lower edges, which are the reference edges for a drawer, case or box. To do this, I always use a square against the drawer front or drawer back (in the case of a drawer), and along the lower edge.

In the situation of a drawer back, the relationship with the sides is complicated by the gap left for the drawer bottom. There is no groove that may be used to align the parts. In any event, even when grooves are aligned with a spacer, this does not assure that the front/back and sides are square ... just that the grooves are aligned.

Align a case ...


Align a drawer back (with cut out for drawer bottom) ...


Aligning a half-blind drawer front ...


Regards from Perth

Derek

Re: Help from flatboard workers

#33

Splitting out the waste

Derek Cohen (in Perth, Australia)

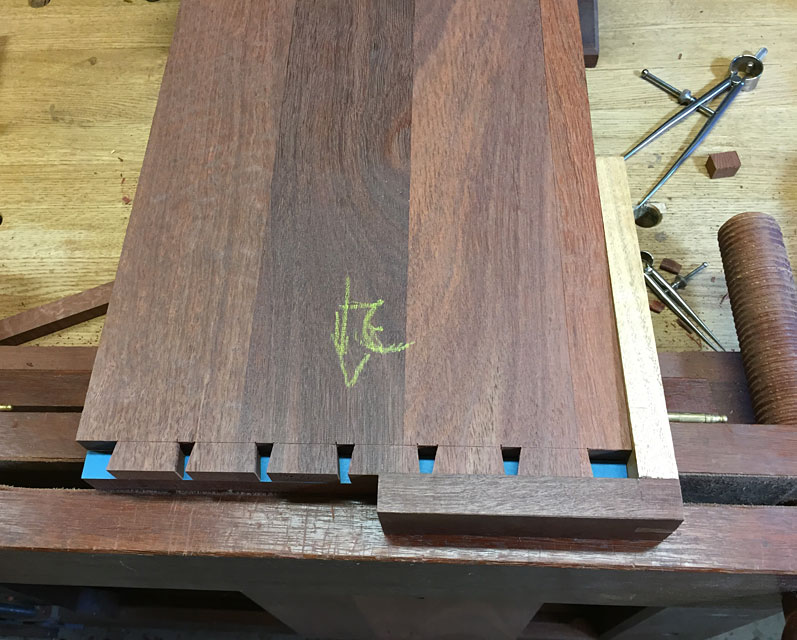
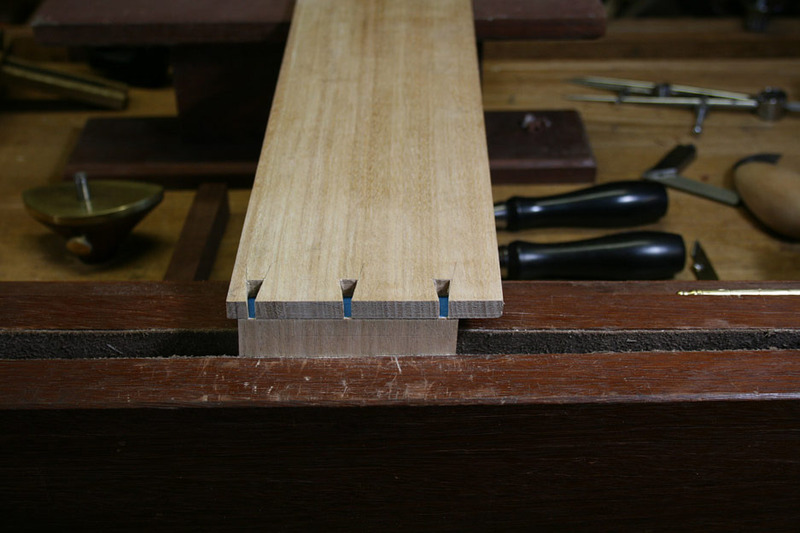
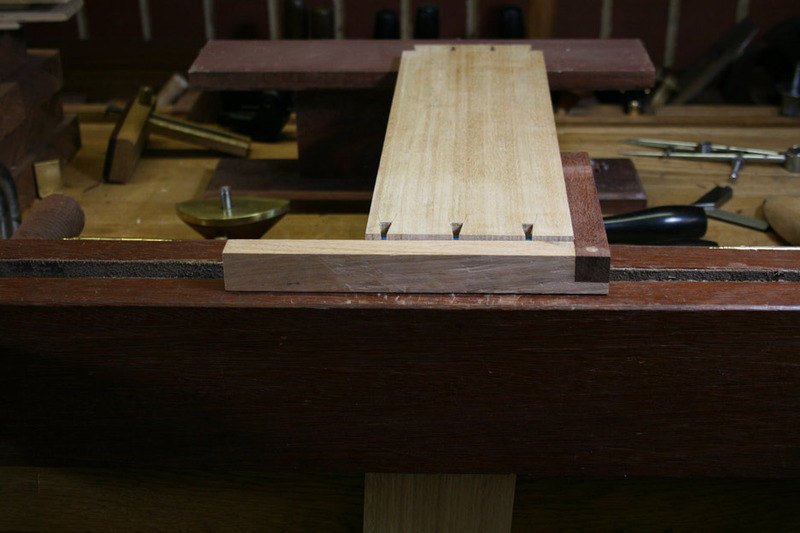
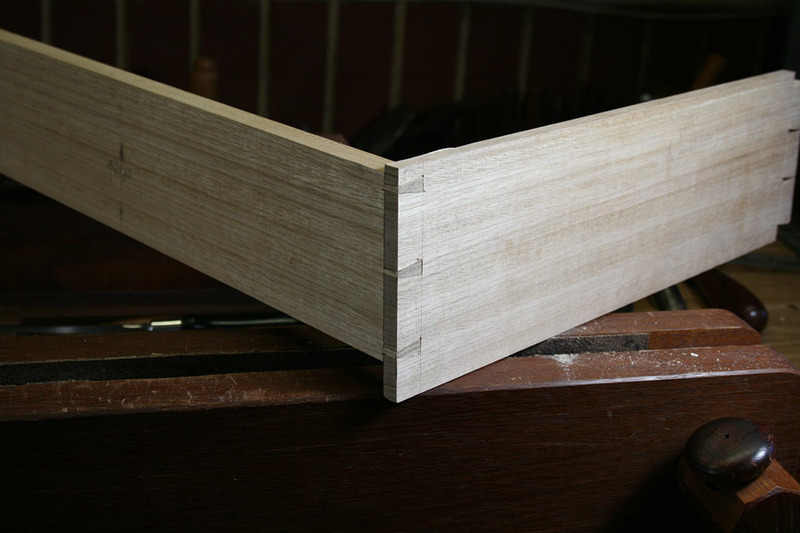
Here is a pictorial sequence of splitting out waste from half-blind pins ...

Deepen the base lines ...


Undercut the baselines to create a chisel wall for each socket ...


Chisel in the chisel wall and three moderately firm hammer blows. The chisel wall prevents the chisel moving backwards and over the baseline. This means that chiselling can start at the baseline, itself, and reduces later extra paring ...


Split out the waste ...


With hard Jarrah and a decent Japanese chisel, it takes me three rows to get within 3mm (1/8”) of the web line. I stop at this point ...


Back to the Moxon Vise: the sockets are cleared by paring the remainder in 1mm slices ..


Cleaning out the socket was facilitated by earlier extending the kerfs with a kerfing chisel, and now with a corner chisel ...


It is all about “release cuts”, as David Charlesworth has written in his articles over the years. Create a release cut, and waste will fall away without a fight. The deepened kerfs mean that there is no further paring needed at the sides of the sockets. Clearing the waste is a matter of splitting it out. The chopping is a release cut here.

Finally! The dovetailed sides are tapped into the sockets of the drawer front. The goal here is that they fit “off the saw”, and no further work is needed? Note that the small section here does not only protect the surface, but it ensures it is driven flush ...


Link: http://www.inthewoodshop.com/Furniture/UnderbenchCabinet14.html

Regards from Perth

Derek

Re: Help from flatboard workers

#34

Re: Not at all my experience

Charlie

I think Roger is talking about the large contraption CB uses to hold the drawer steady when he's belt sanding the sides.

Ghastly drawer bottom grooves in thick, clunky drawer sides, rather than slips planted on thin drawer sides, is a conversation for another day... ;-)

Re: Help from flatboard workers

#35

Re: Splitting out the waste

Charlie

Looks great, though the ultimate test in the line/gap on the inside of the drawer. If the baseline is moved at all, it'll show there, as will overly enthusiastic undercutting leaving the slop from the sloping surfaces meeting to run out inside the drawer, and any heavy-handed gauging as well.

Phil Lowe, in the video you linked, comments on the inside gap.

Customers will look at the outside of the drawer. A woodworker will look at the gaps, or lack thereof, inside the drawer.

All that said, I'm sure yours are as tidy as can be.

Re: Help from flatboard workers

#37

Re: Splitting out the waste

Derek Cohen (in Perth, Australia)

Customers will look at the outside of the drawer. A woodworker will look at the gaps, or lack thereof, inside the drawer.

Any gaps will not be caused from the half-blind sockets in the drawer back (in any event, the chisel wall prevents the chisel moving back). They will come from gaps at the baseline of the through dovetails in the drawer sides.

More important than the drawer front gaps - which are unlikely to be seen - are gaps at the drawer back. For this reason, I treat the back area "inside out", that is, the show side is inside, not outside.

Regards from Perth

Derek

Re: Help from flatboard workers

#38

Re: Splitting out the waste

Charlie

Anything more than a very trivial undercutting of the baseline or the lapline in a half-blind, especially the latter, combined with worming the drawer side around to make the outside look good will always leave a gap on the inside. In a perfectly made drawer, with perfectly prepared stock, which by the way I rarely achieve, the inside will look exactly like a perfect miter with no hint of how the joint was made. It's basically a secret mitered dovetail, perfectly made, FROM THE INSIDE VIEW.

A deeply struck baseline and/or lapline, from a tool not perfectly sharp will also leave a mark as it pushes the wood instead of cutting it cleanly -- especially in soft stuff like white pine and poplar, as will of course moving any of these lines inadvertently backward with bad chisel technique.

Re: Help from flatboard workers

#39

Re: Drawer Planing Fixture

Charlie

I got so sick of it I mark to leave the pins a hair proud, rather than the sides. Just knock 'em back with a sanding block and 220g. I might drop a little hide glue in spots so it picks up a little of the sawdust and, voila', no gaps!

Nice jig though.

I think Becksvoort marks pins proud, not sure about Lowe, Frid did, others too. Sides proud is certainly correct theoretically though. It certainly easy enough in cutting the drawer side to length to make a small allowance for leaving the pins proud in order to avoid planing the entire drawer side. In doing so, one doesn't have to worry about how the grain is running on the sides so that planing is always from front to back and all that good rot.

Needless to say, I'm a convert, with the zealousness most converts in anything have.

Re: Help from flatboard workers

#40

Re: Drawer Planing Fixture

Charlie

... block plane or a No. 3 work too, rather than paper, for those so inclined...

Re: Help from flatboard workers

#41

Re: Drawer Planing Fixture

Derek Cohen (in Perth, Australia)

I have done that with cases, and this allows for peening or bishoping, if necessary. I posted about this about a week ago.

Regards from Perth

Derek

Re: Help from flatboard workers

#42

Re: Drawer Planing Fixture

Charlie

And sometimes they actually fit, too.

Planing entire drawer sides to bring them down to pin level was always sort of cringe for me, even when properly jigged. It always felt a little like living on the edge.

Re: Help from flatboard workers

#43

Jarrah

Jack Dover

In really dense hardwoods this method works fine. In something like pine or poplar there's a risk indeed. Phil works in moderate to soft wood in the video, so he does the usual: leave some before the line and let it compress, trim this excess with a sharp chisel in the last operation. But in oak or even harder Australian woods you could chisel a notch right at the knife line, it will hold.

Re: Help from flatboard workers

#44

Re: Drawer Planing Fixture

Derek Cohen (in Perth, Australia)

And sometimes they actually fit, too.

Last year I was coming off three cabinets in a row which featured mitred through dovetail ends. This is the third cabinet ... and for the second time, every end came off perfectly straight off the saw! I must admit that I was speechless! :O Do you think that I was being channelled by Krenov? :)


This is Merbau - no compression at all.

Regards from Perth

Derek

Re: Help from flatboard workers

#45

Uber Tight Drawer Openings

Charlie

... on large case pieces are a total crapshoot. People drag them across the floor fully loaded, they're placed on uneven floors and the high leg(s) not shimmed leading to the carcase sagging to fit the floor over time, they're moved cross country, in the back of an un-airconditioned truck, in the the middle of July, stored in a POD in the middle of the summer in anticipation of a move. Put in a shed in the middle of winter during a remodel.

I could go on and on.

I did a very plain, Shaker-ish, five drawer chest (meant for clothes), it had graduated drawers, just a really nice bread and butter job that went from start to finish without a hitch. Customer called me a few months later just thrilled about the size of the bottom, largest drawer. You see, it held all of her children's school yearbooks just perfectly. Hardbound. Thick paper. Heavy. All I could do is gulp and say "that's great!" Still wondering when I'll get a call. Thrilled it has oak drawer slips and maple runners. We'll see! You never know how somebody is going to use something you make or how well they will or won't take care of it.

Re: Help from flatboard workers

#46

Re: Drawer Planing Fixture

Charlie

Living right!

Re: Help from flatboard workers

#47

Re: Drawer Planing Fixture

Jack Dover

You don't need to plane a drawer side down to the pins height, you need to plane a drawer side so that a drawer fits tight.

I leave pins proud ever so slightly, but if it's a drawer I prefer to sink pins a trifle and have sides proud. It's easier to fit a drawer this way, because a pin board can be planed exactly to an opening, even if the opening is not a perfect rectangle. It's harder to do when the front piece is longer - one side might need more planing than another, a gap on one side might be slightly wider than another, etc. And if pins are still a sunken a hair after fitting - you won't really notice it, but a rattling drawer is very noticeable. And of course planning to fit is easier, no protruding end grain and a chance to accommodate an out of square drawer well.

Re: Help from flatboard workers

#48

Interesting comment on how/why we work

Bill Tindall, E.Tn.

Customers will look at the outside of the drawer. A woodworker will look at the gaps, or lack thereof, inside the drawer. Where does this concern lead? Do we make to validate our skills to our peers?

Once socks go in it nobody looks at any part of the drawer. All the owner cares about is how well it slides in and out. If the customer has their socks in a bag awaiting the drawer to put them in they will also be interested in how long it will be to get the drawer made.

For the onlookers, there is one person making stuff that doesn't make it to impress other woodworkers. If a piece of furniture looks good from the outside at a range of 3' and functions as intended, it's good enough. I move on to the next project someone is waiting for. This approach is not for all, but it bears reminding that there is a valid alternative to the Gallery Furniture standard that mostly gets advocated here.

Early in my career of building stuff the family needed I was requested to make a Loft Bed for a college room. I set about the task mustering all the care I was capable of. Some weeks into the project my daughter came by while I was meticulously making the many M&T joints. "Dad, I am going to graduate before you get it made". Those words may have set my building philosophy for ever after.

Postscript: the bed provided a place for two daughters to sleep through college and graduate school, and then a granddaughter to expand the space in her small bedroom. The only comment that has ever been made about it was how solid it was when assembled. After being set up and taken down dozens of times flauntalbe tenon shoulders would have been long gone.

Re: Help from flatboard workers

#50

Re: Interesting comment on how/why we work

Jack Dover

Customers will look at the outside of the drawer. A woodworker will look at the gaps, or lack thereof, inside the drawer. Where does this concern lead?

My assumption that woodworking as a trade has established a correlation between things "looking right" to a woodworker and overall quality of work. Mistakes rarely come in singles, so if a baseline is visibly moved from inside, good chances this drawer is not fitted well either.

they will also be interested in how long it will be to get the drawer made.

They will, yes, but it still begs a question of why we're not pocket screwing or nailing them together then?

After being set up and taken down dozens of times flauntalbe tenon shoulders would have been long gone.

How flauntable is your flauntable? Is a tenon cheek or shoulder that's square and fits from the saw with no or minimal trimming flauntable or not?

👍 This page answered my questions

Your vote helps other woodworkers quickly find the answers and techniques that actually work in the shop.