New WoodChat!
Home Articles Forums Gallery Marketplace Videos

WoodCentral Forums

Knowledge You Can Build On — Est. 1998

If you sell to woodworkers, your customers are already here

The Veritas Shooting Plane - Reviewed

Posts

Re: The Veritas Shooting Plane - Reviewed

#76

Derek is right

Ron Harper

My experience supports Derek. I know lots of guys have messed around with studies, review, etc. but this one is almost intuitive. Glue a dowel in a hole with just a little protruding. Flush it with a sharp chisel. First go straight on. Then go askew. Significant difference. Principle is the same as with a shooting board.

Re: The Veritas Shooting Plane - Reviewed

#77

Re: Chiming in.....

roger lance

Derek.....you know, back when I was looking at shooting boards trying to figure what features I liked, Tico Vogt's board did remind me a lot of yours.....so now I know why.

That shoulder situation is such an oddity in that I had no injury....just woke up one morning and there it was.....rotator cuff problems.....and its been a number of months now....guess its not going to heal on its own....probably will have to find a cutter.

Re: The Veritas Shooting Plane - Reviewed

#78

Varieties of ramped boards

Wiley Horne--So. Calif.

Hi All,

The discussion above is very interesting. However, there are different designs for ramped shooting boards, and the consequences of each will differ. Though surely ramping has the benefits claimed whichever design is followed.

How many types are there? For reference, here is Lee Valley's unramped board and shooting plane, showing the 20 degree skew:

http://www.leevalley.com/en/Wood/page.aspx?p=70926&cat=1,41182,48945&ap=1

Derek's ramp tilts the work, with the plane running on the flat. He adds numerous other amenities as well (mitre attachment, donkey's ear attachment) and startling good looks. What is ramped here is the stick to be shot:

http://www.inthewoodshop.com/ShopMadeTools/ShootingforPerfection.html

Going back a few more years, there is Jeff Gorman's ramped shooting board. In this design, there are actually two opposing ramps. The plane is running downhill, and the work is canted slightly uphill. This design could give the effect of considerable skew*, even with a straight-bladed plane. Adding a skewed plane to Jeff's design, it appears to me that all the ramps and skews would be additive (effective skew = ramp angle for the work + ramp angle for the plane + plane skew). Am I seeing this right?

http://www.amgron.clara.net/page68.html

And are there other basic ramped shooting board arrangements?

Wiley

*"Effect of skew" means ease of entry; unlike a true skew plane, there is no lowering of the cutting angle. On the other hand, Jeff's design adds gravity to the momentum of the plane.

Re: The Veritas Shooting Plane - Reviewed

#79

Re: Rotator cuff

Tom

I really did mine a few years back. A famous bowhunter wrote an article on how to determine your max bow weight. His theory was that if you contorted your body into a really bad position and could still draw the bow, you were not overbowed. Being overbowed is a very difficult problem to spot, oddly. Anywho, guess what smatipants decided that was a stupid test (right so far), grabbed his heaviest 80 pound longbow with the view there were few bows he couldn't get back in any bad position, even though they were too heavy for him when it came to actual accurate shooting. Welcome to multiple years of bad shoulder pain.

Initially the problem settled down, and about 18 months later it was good enough that I figured I would give that stupid test another go. Can't actually remember how that reasoning went, but the results were a lot worse that time.

Yes there was a round three! All I can say is it seemed pretty reasonable at the time, and a lighter bow may have been used.

I figured I would need surgery, the problem just didn't go away. As it happens I have a friend who is a talented massage therapist, and he showed me how to release the trigger points for the rotator cuff problem, and I am back to handling whatever bows I want, though I am not going to try that test for being overbowed again...

Re: The Veritas Shooting Plane - Reviewed

#80

Re: Or 99%

Tom

All this is interesting, really. But just so nobody gets turned off by the pin heads (which I lust after myself): Grab any really sharp plane set appropriately to the task, get three pieces of MDF, and enjoy 99% of the discussed utility with the only downside being that under certain circumstances one might have to take a few extra strokes or resharpen a few percent more.

In fact, in some cases one can dispense with the board and the plane, and get joints that just vanish with sandpaper on a straight thing. That is how I do precision book matches, and I would guess I have more fine planes for longer than most people on here (not a boast I just don't need any posts suggesting I should maybe try a hand plane, and buy some decent stones, or something :))

Re: The Veritas Shooting Plane - Reviewed

#81

Dale Lenz

Re: Rotator cuff

Dale Lenz

For the past month or so, my right upper arm hurts like it been over worked, bruised about 4" below the shoulder. Is that possible sign of a torn rotator cuff?

Re: The Veritas Shooting Plane - Reviewed

#82

Re: Rotator cuff

roger lance

That's a possible indication.....I'm under the impression that docs are quick to say rotator cuff but really need an MRI to be sure.

Re: The Veritas Shooting Plane - Reviewed

#83

Re: Varieties of ramped boards

Derek Cohen (in Perth, Australia)

Hi Wiley

Here are two, opposite sloping ramped shooting boards. They were built and are used by a friend, Neil Erasmus, who is a high end and award winning furniture designer-maker (search for Neil Erasmus Designs) ..


Neil had the classical father-son apprenticeship - he comes from a long line of furniture makers - the point being that these were designs his father taught him.

The downward ramped board is for general shooting of ends. The upward ramped board is for veneer. With the latter, the plane will pull the veneer downward onto the platform of the shooting board. The same would be expected of a #51-type shooting plane with its 20 degree forward skew. The downside of the upward ramp is that only thin boards may be planed.

Regards from Perth

Derek

Re: The Veritas Shooting Plane - Reviewed

#84

Dale Lenz

Thanks, Roger!


Re: The Veritas Shooting Plane - Reviewed

#85

Re: Varieties of ramped boards

William Duffield

If you don't have a skew shooting board plane and a ramped shooting board, and need to shoot the edge of sheets of veneer, all is not lost. This is a quick explanation of how I've successfully prepared the edges of sheets of veneer for bookmatching, often highly figured veneer, and therefore subject to chipping out when planing.

First, I mark the edge of both ends of each piece of veneer exactly where I wan the book matched joint. Then, I prepare two pieces of scrap hardwood, usually about 3/4" thick, by jointing one edge straight and square. I prefer poplar for this purpose. If my veneer joints are long, I prepare a slightly convex clamping caul, because otherwise I can't apply enough pressure to the center of the stack because my clamps or holdfasts don't have long enough jaws. The caul usually isn't necessary, or at least doesn't need to be planed with a convex surface if the veneer joints are less than a foot long or so. Now I stack up a sandwich on the bench top, starting with a sheet of stuff 3/16 or 1/4" thick (a piece of plywood works). On top of this spacer goes one of the poplar boards, Its edge set with 1/8" or a bit more of overhang. On top of this go the pairs of veneer, aligning the bookmatch marks with the jointed edge of the poplar or just a shaving or two shy of the edge. If you are jointing sawn veneer, one or two pairs is all you can accommodate before you run out of plane blade width, but you can stack several pairs of sliced veneer at a time. On top of this goes the second poplar board. Both poplar boards must align vertically and horizontally with the marks you put on every piece of veneer. On top goes the caul, set back 1/8" or so, the same as the bottom spacer. You hold everything down with a pair of clamps on the ends of the sandwich. If you are careful and don't knock anything out of alignment when you set them, a pair of holdfasts work. Of course, when you set this up, the front face of your stack must be clear of all obstructions, especially your clamps. Now, you lay your jointer on its side and shoot the poplar and the veneers. When you get a continuous shaving off the poplar and are down to the marks you made on the veneer, with no chips out of the layers of veneer, you've succeeded. Your plane's sole (and blade) never touch the spacer or the caul, because if it did, it would stop the plane from cutting before the jointing was done.

Re: The Veritas Shooting Plane - Reviewed

#86

There is something new under the sun

Wiley Horne--So. Calif.

for me, anyway. Lemme see if I have this right--when the work is canted down, the plane wants to push it up; when the work is canted up, the plane wants to push it down.

Thanks very much for posting that, Derek. I did look up Erasmus Designs and found a most impressive body of work and splendid bios for the principals, Neil and Pam Erasmus!

Wiley

Re: The Veritas Shooting Plane - Reviewed

#87

Another way to shoot veneer ..

Derek Cohen (in Perth, Australia)

Hi Wiley

I attended a workshop with Andrew Crawford about a year ago. As you know, he is probably the foremost box maker in the world. Andrew does not like using planes to shoot his veneer, arguing that the blades are never sharp enough to prevent it tearing.

His method is similar to William's, but uses sandpaper instead of a plane.

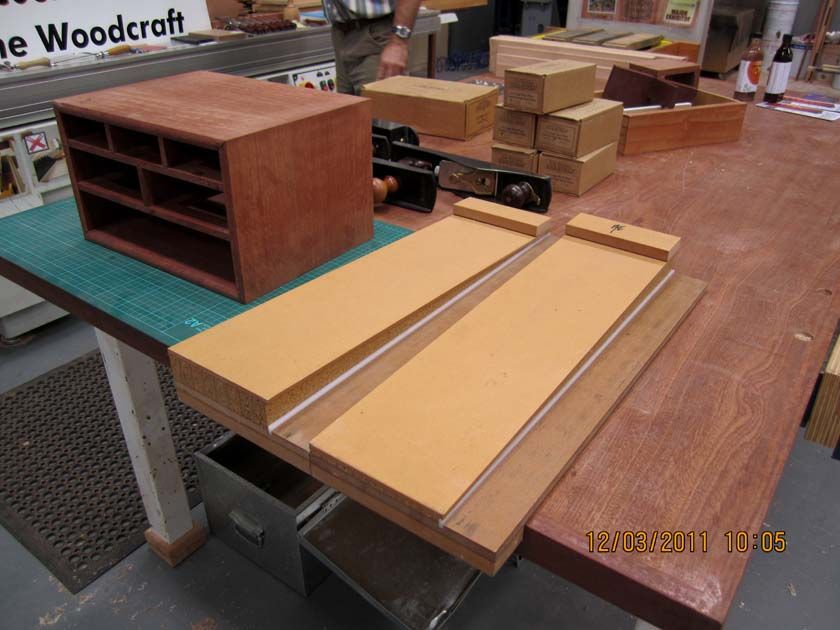
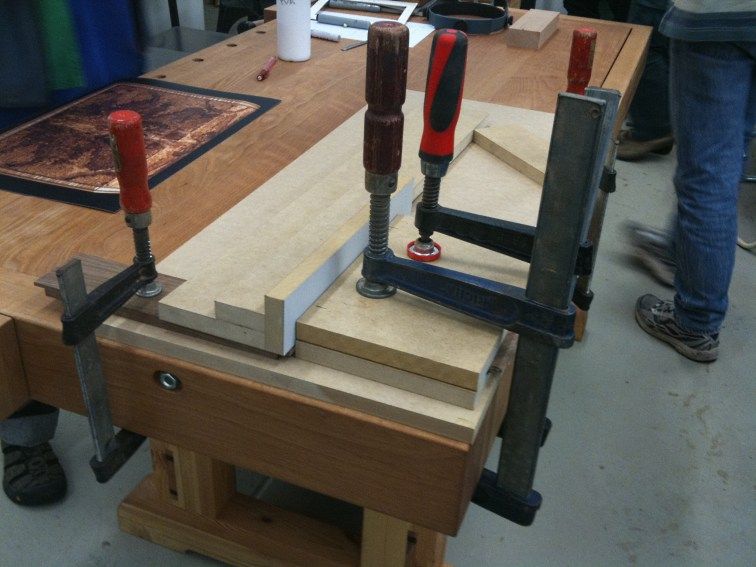
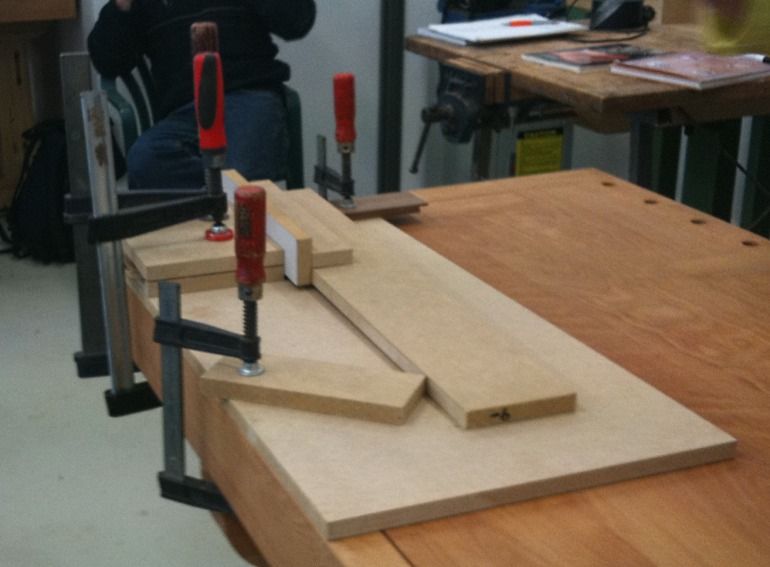
First he will clamp the veneer between two sheets of MDF ...


On his longer board the shooting sander looks like this ...


The smaller sections of veneer are the one's that pose the challenge of keeping all square ...


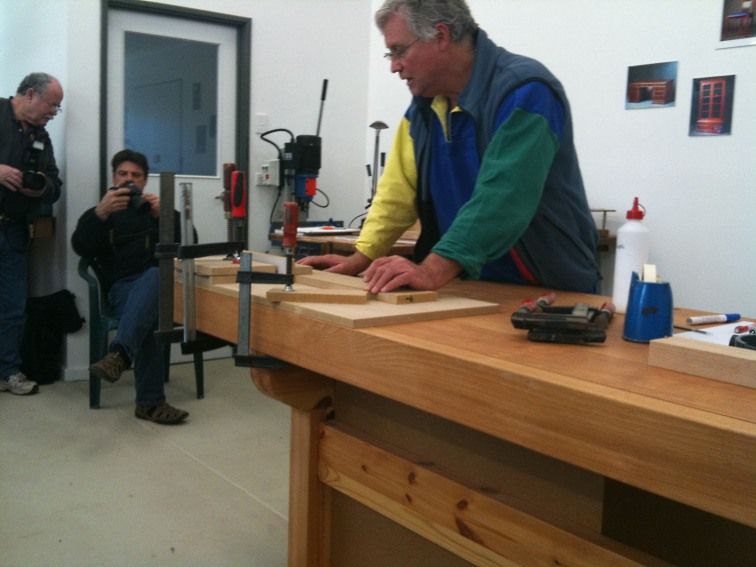
Here is Andrew and you can see a "shooting" arrangement on the bench ..


These pieces are clamped in a shorter section of MDF, in the same manner as the long sections. The sander has a long extension ...


Andrew will then carefully set up a guide for the extension, so that it remains coplanar with the MDF sandwich.


Regards from Perth

Derek

Re: The Veritas Shooting Plane - Reviewed

#88

Sandpaper shooting

Wiley Horne--So. Calif.

Thanks Derek! Another excellent and well-illustrated technique for jointing thin stuff. The way Andrew does it, he has very positive control of everything being square and plumb.

Tom, of this forum, suggested to me once that, for his guitar-back joins, he sometimes uses a 'sandpaper plane'--which I took to be like a jointer, but with abrasive on the sole. I had occasion to try something like that while joining some strips of 1/8" thick satinwood. This sawn veneer mostly went together very well with the usual planing (it is easily thick enough to edge plane), but a couple times when I was having trouble getting it perfect end to end, I used a 4-foot milled-edge level with 300g PSA stuck to one edge. With the level on its side and the paper now vertical, it was like a long jointer for thins. Worked OK, but Andrew's is better because it is important that the sandpaper be very flat and hard-stuck to its carrying surface--in other words, no plushness to round the stuff you're edging.

Wiley

Re: The Veritas Shooting Plane - Reviewed

#89

Re: Another way to shoot veneer ..

William Duffield

Andrew is probably right about anything less than a sharp plane being a problem. My method worked better on panels made from quilted cherry than from walnut burl, but when I picked a couple of small chips out of the walnut, they were easy enough to fill and scrape flush.

The more pressure, and the more evenly applied the pressure, to the clamping poplar boards, the less problem with chipping. And, it is easy enough to chamfer one end of each of the poplar clamps for a smoother entry by the plane blade.

If this method doesn't make sense to you, let me know and I'll try to produce a drawing or even some photos of the setup.

Re: The Veritas Shooting Plane - Reviewed

#90

Planing and edge stabilization

Wiley Horne--So. Calif.

Hi Derek, Sir Wm. and all,

My take on Andrew's comment to the effect that planes 'can't get sharp enough', was that he was dealing with very thin veneer, like 1/32" or less, or maybe 1/16. When the veneer gets up to 3/32 to 1/8, it'll plane just fine (super sharp is assumed). See below on mini-chipping at the edge.

One thing I found when using a plane to edge joint or edge plane 1/8" satinwood veneer recently was that coatings of hide glue on the end grain, and shellac on the face grain, stabilized the edges against spalling off little chips. To explain: After I joined the veneer to make up either the main field or the cross-banding, I left a coating of glue on the edges as a sealant--if you don't do that, water loss through the end grain will cause the seams to open up (in our dry weather). Also, the bottom of the veneer was left glue-sized. In addition, I put shellac on the appearance face to protect against miscellaneous dings and dirt. When it came time to do the final edge planing prior to glue-down, it turned out that the combination of hide glue and shellac stabilized the edges very effectively against chipping. It planed dead clean.

Later when it was time to cut channels on either side of the edge banding for stringing, I was able to scratch clean channels cross-grain with a simple ploughing tooth. Started the cut down through the shellac and glue at a low angle. Did not have to use a sawtooth type scoring tool. In trials, I found the direct cross-grain scratch to be cleaner than the LN sawtooth tool cut--probably my technique with the sawtooth, but anyway that's why I went with the direct ploughing.

OT Note: In sawing the veneer, mostly I used a panel-type saw (convex cutting edge) against a ply straightedge. Once I bandsawed it cross grain, used the bandsaw to speed up a bunch of repetitive cuts, and in that case, it was vital to make those sawcuts in a sandwich between two pieces of sacrificial scrap to avoid major chipping (DAMHIKT).

Wiley