Traditional Centerboard and Case
by Bob Smalser, Seabeck, WA
Part III—Installation

The case is dry positioned and aligned twice—once for hole layout and once for scribing the bed logs to fit the bottom rocker after the hole is cut…

…and sealed.
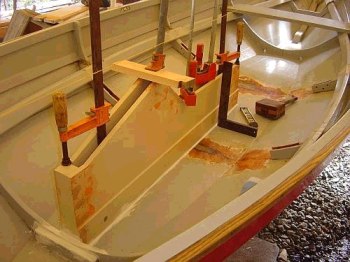
The case is clamped tightly into poly sealant, the sealant allowed to set up overnight and the clamps removed one by one the next day as they are replaced with screws.

The white oak end posts are caulked with cotton payed with red lead followed by seam compound to tighten the assembly.

A 5⁄8" knotty Doug fir false bottom is laid out…

…installed in a bed of red lead and seam compound…and trimmed (false bottoms can also be left with square edges to protect the garboard seam)…

…and the stainless skid plates reinstalled.

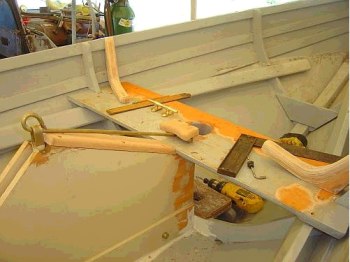
The boat is turned, the thwarts mortised to fit the case, and the mast step is laid out.

The cut frame ends are braced…

…and the mast and mast step are fitted before installing the thwart.

I didn't like the traditional oak mast step I made and switched to marine plywood, heavily fabric'd and goo'd…here the best material for the job.

All major thwart parts attached to the case are laid out for installation…

…the centerboard pin caps are installed with neoprene gaskets…


…selected functional trim is fitted…

…only to be removed for final finishing after the thwarts and knees are installed.
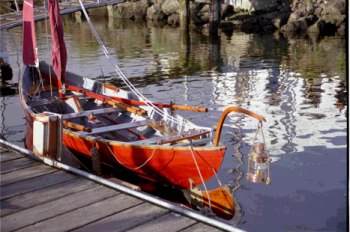
The final result?

One fine gunning dory
Comments (0)
No comments yet. Be the first!
Leave a Comment