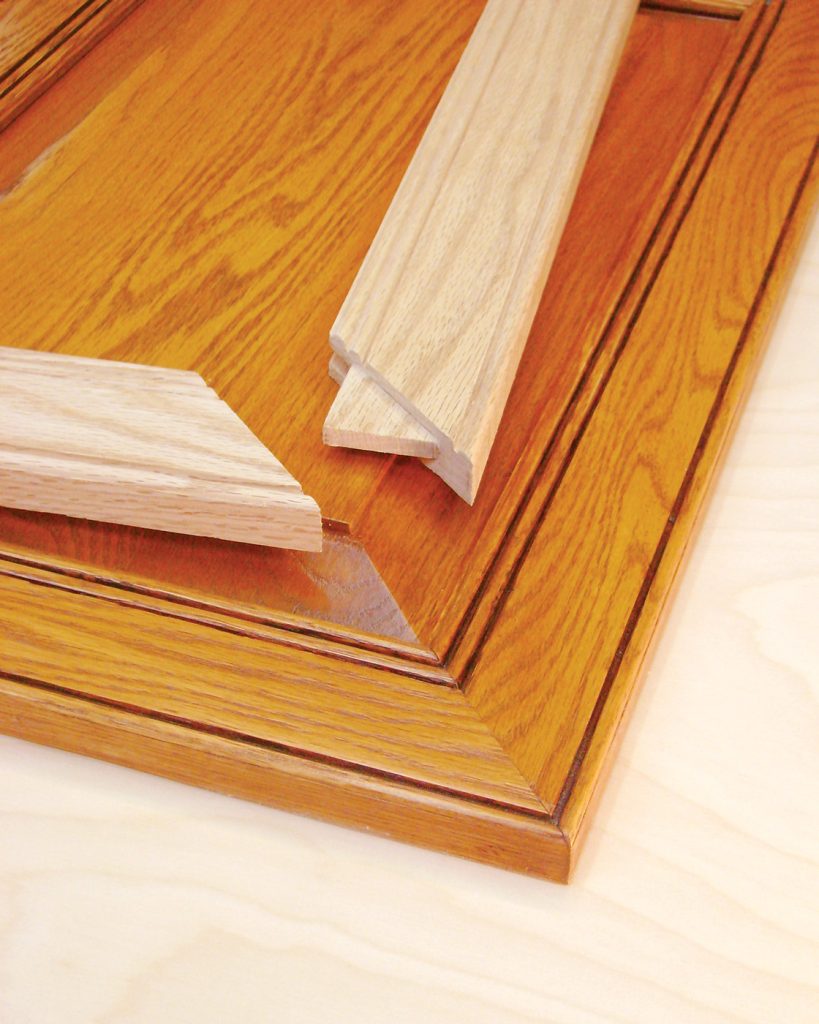
Mitered Door Frames
31 July 2025 at 17:46
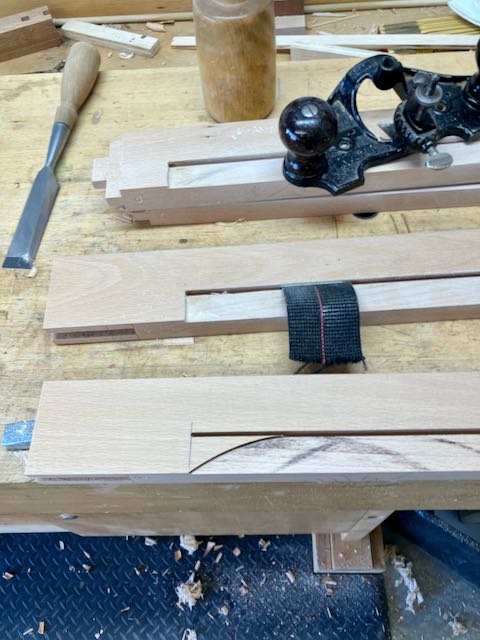
In my last post the parts and pieces were completed for the seat frame and the backrest. Since that time the slats were finished (Osmo 3043 using Mirlon abrasive pads). The top and bottom rails were finished as well but their tenons were taped off. The final step was to form the sides of the backrest with spokeshaves then glue the entire piece together and finish it completely. Before assembling that though the through mortise and tenons for the arm rests had to be fitted.
The process for making the seat assembly was similar. It consists of two end pieces which are supported by the stretchers between the two legs. The front rail is attached with a haunched mortise and tenon joint and the back and center support use mortise and tenons as well. To accommodate the webbing from House2Home, a 1/8 slot is routed for the clips. Kind of tricky, it’s best to remove about 1/8 of material so the webbing lays flat. This was done on the tablesaw with a rip blade which requires dropping the wood onto the blade and then lifting it off — care required on this operation. The recess is then squared off before I assembled and finished the entire seat.
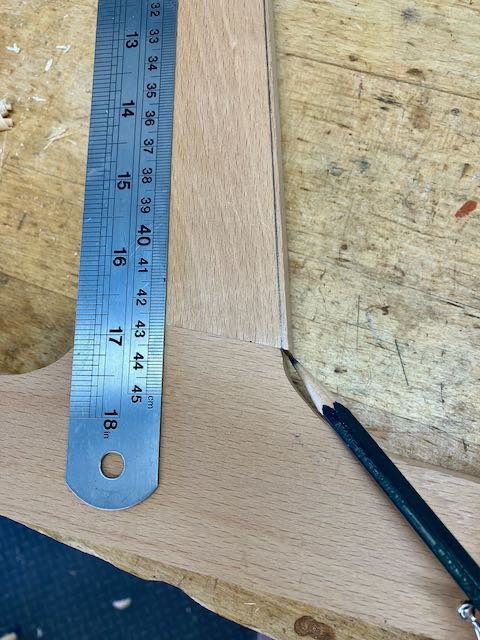
While designing this piece I looked at so many Danish Modern pieces on Pinterest it made my head spin! I wanted something graceful and not just a machined, routed piece. I had set aside a piece that had some interesting grain for the armrests so that determined how wide they could be. Even though they’re about 4′ apart it’s important to me that the grain matches. The bottom has a simple, long chamfer while the top has a slight radius. Sculpting began with my old Stanley 151 and finished up with a Bogg’s style Lie-Nielsen . The antique Stanley removes material quickly without clogging while the L-N does a beautiful job of finishing. After drawing in the “limit” lines of the bottom chamfer work began with the spokeshave, shaving to the lines. Once the cut was close a sliding bevel was set to make the chamfer uniform on the edges and the ends formed to match.


The armrests are attached with wedged, through mortise and tenon joints. The method that Mike Pekovich from Fine Woodworking Magazine uses is what I prefer too. Here’s a LINK to it but you may need to be a Fine Woodworking member. He utilizes a spacer to get the width just right, this way you only need to set your marking gauge one time. Only variation I did was to use a 3/8″ drill on the drill press to remove the bulk of the material. He uses a smaller bit and makes more holes; either way works. I could do this because my tenon is 7/16″ wide. I also used this method on the Japanese toolboxes for laying out both the mortise and the tenon. I’ve been presenting my work in a slide show format to simplify the blog — let me know if I succeeded!
At this point this project is almost ready for final assembly. The last thing that needs to be done is to apply the Osmo to the leg and armrest assemblies. We get our foam at Galaxy Foam and Upholstery Supply here in Las Vegas. They have foams of all densities and wrap batting around it which makes for a better cushion. Also bought the material there and unfortunately it’s too thick for Diane’s machine so they are currently being sewn at Oscars Upholstery. I’ll do a final blog on this when the cushions are done and the love seat is ready. I’ve been told my blogs can get long winded but appreciate any comments or questions you may have, thanks — John
![]()
Now that the knockdown fittings are in place I’ll turn my attention to the seat and back assemblies. The seat assembly is made of 1″ x 2 5/8″ pieces of Birch and joined with mortise and tenons. The seat is 46″ wide so a brace was added at the center, it’s lowered so the webbing will lay across it. Webbing is installed with clips (from House2Home) and I learned that the “professional” way to do this is to remove a 1/8″ area so the clips and webbing lay flat in the frame. You can see better pictures of it in this my previous blog. It’s now ready to go and the next step on it will be to radius the edges, finish sand, and then rub in at least 2 coats of Osmo 3043. After that the webbing will be installed.
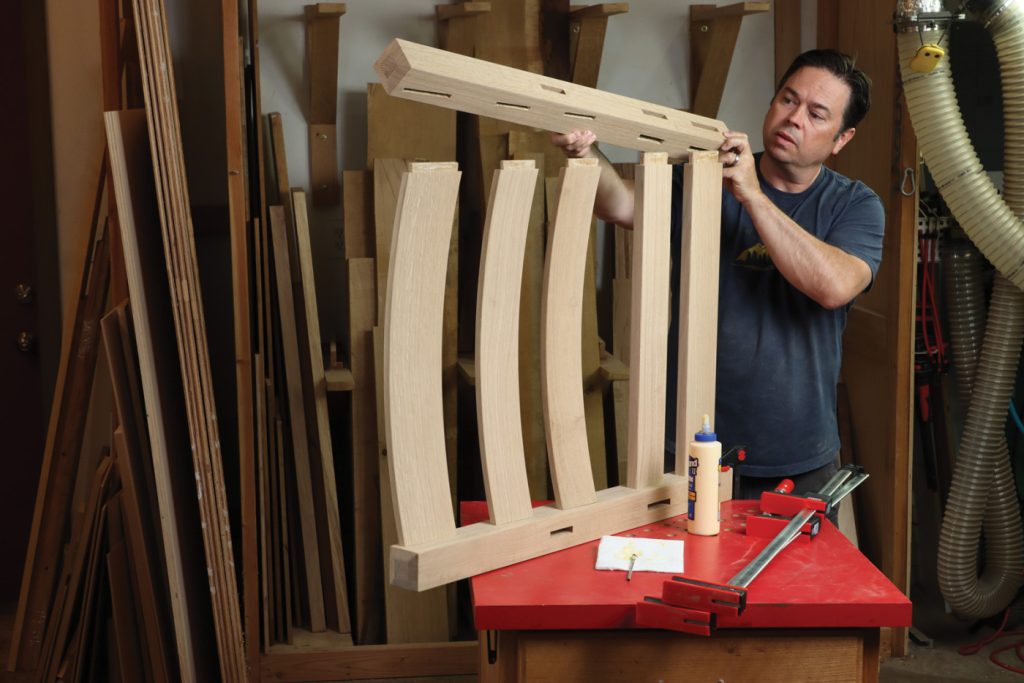
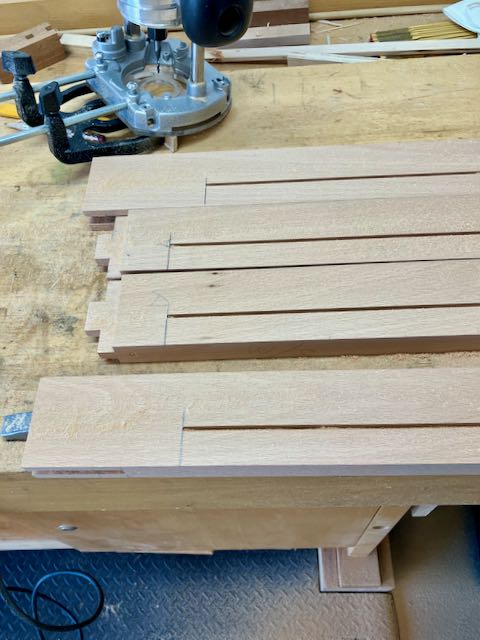
The seat back was built next. At this point the uprights for this are straight so that I have a reference point for the mortises. Once it’s complete they will be tapered and I plan to do some spokeshave work to sculpt them. The slats are 5/8″ x 1 1/2″ wide and will fit between the top and bottom pieces in 1/4″ x 3/4″ mortises. Figuring the spacing was first done on masking tape using dividers and a 1 1/2″ shim; took some time but much easier than trying to do the math required. One important consideration was that I needed at least 2″ of space at the ends to install the connecting hardware. There are 13 slats so that meant 26 mortises and 26 tenons — hollow chisel mortiser and dado head on the tablesaw made this go much quicker. For these, the slats won’t be glued in; matter of fact I think it’s better that there is some allowance so they can move freely with seasonal changes in humidity.
It’s been a hot summer so far in the desert so finishing is probably best done in the morning, by early afternoon it’s been as high as 104° in the shop! The Osmo should be fine at those temps but the Old Brown Glue I like to use may set up before I can get it clamped. Pre-finishing all of the slats makes sense, it’s always a hassle trying to dry the finish around all of those. I’ll tape off the tenons and wait to apply the finish to the sides of the backrest until it’s been assembled. It’s taken quite a bit of time to make all of these parts from 8/4 Birch but I’m sure it’ll be worth it when done.
![]()
I’m not so sure I like the term “loveseat” but that seems to be the proper name for a small couch/sofa built for two people so that’s what I’ll go with! If you’re a follower of my work you may recall my interpration of the famous Z-chair which I completed a year of so ago. Well, now it’s on to another project for the front bedroom of our home. The room currently has a queen size bed but is rarely used by overnight guests. We’ve decided to make that room a more useable space for us and use a blowup bed on those occasions where it may be needed. Making this smaller loveseat will leave plenty of room for that and allow us to use that room as part of the house. One problem with this room is the way the door opens and the configuration of the walls makes it impossible to get large furniture in the room. That means I get to challenge myself to use knockdown joints with threaded inserts, cross dowel nuts, and through bolts — hey, I love a challenge!
The only real furnishing in this room is the Birch cabinet I made previously. I decided to make this loveseat from Birch as well and who knows, maybe a table is in the future too. As the picture shows, I prefer to draw my plans out full size once the design has been worked out; and then cut pieces of Masonite to give me a true representation of the piece. There will be 6 pieces; the seat, right and left sides, front and rear stretchers, and the back. I plan to use brass inserts and black 1/4×20 hardware to assemble it.
After creating my cut list I purchased about 31 board feet of 8/4 Birch from Peterman Lumber here in Las Vegas. Since you have to buy whatever boards they have it’s challenging to get the right amount. The boards I bought were all 7″ or so in width and 8′ long. After cutting pieces to rough size I planed a working edge on them so they could be ripped and resawn as needed. The side frames are 1 1/8″ thick while the seat assembly and back are 1″ in thickness.


The stretcher between the legs has a single tenon at the front and a double at the rear. The stretcher was kept square so it lines up on the sliding arm and then tapered after the tenons were cut. The mortises are 3/8″ x 1 1/4″ deep and 90° to the leg. The tenons are angled at 15° and were cut using a flat top rip blade and my Sawstop sliding table. It was easy to set the opposite angle by adjusting the arm to the end of the board while keeping the fence set at the same location — much easier than using a wedge.
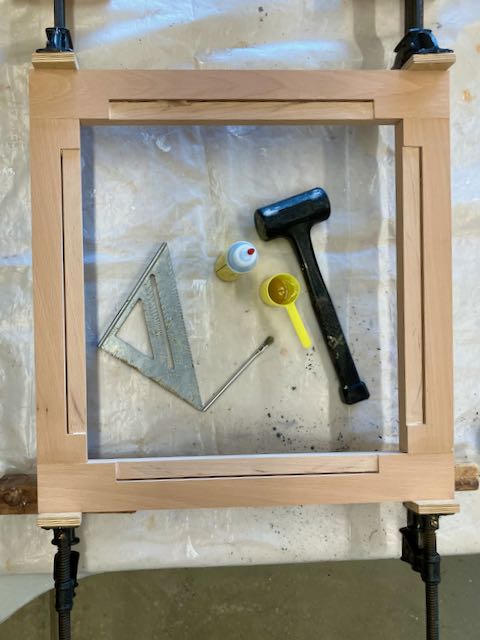
At this point, my main goal is to get the leg assemblies put together so they can be used to locate where the threaded brass inserts need to be installed the relationship of all of the pieces. The front and rear stretchers attach to the leg sections with connector bolts and cross dowel nuts — this was a challenge to drill a straight 1/4″ hole about three inches long! To add to the challenge the tops are angled to allow the seat to sit lower in the rear than in the front. The seat and back sections use threaded brass inserts and connector bolts and that too was a process. Started with 1/16″ pilot holes on the drill press to insure they are straight and then the loveseat was reassembled to line everything up. More complicated than I can write up so these pictures will help — if you want more details feel free to contact me.
To summarize the slide show basically the first hole drilled is 1/16″ and done on the drill press to get it as straight as possible. Then the parts were clamped in position so that I could use a hand drill through that hole to mark the location on the adjoining piece. Threaded insert holes were 3/8″ and connector holes were 1/4″ it all worked! In this picture you’re looking at the inside of the loveseat. Number 1 are the tenons for the eventual armrests; Number 2 is the seat frame, and Number 3 is the backrest. The piece of masonite represents the foam for the seat.
This is what the piece looks like at this point. No rush on this project, just taking my time and trying to avoid making mistakes which is easy to do — I’ll do separate blogs as work progresses.
![]()
Many of my projects have begun with a simple conversation; “I think we need to replace this chair, it’s looking worn and faded” — of course my response was “ok, I’ll make one” and so it began! My wife and I both like the mid-century modern style of furniture for it’s simple yet elegant design and it fits well with the other pieces I’ve made through the years. So began my internet foray into the world of the internet to find as much as I could about this chair credited to Paul Jensen and produced by Selig in Denmark. There are lots of pictures and furniture for sale on many websites but the actual making of them isn’t as prolific. I was able to find a number of sized drawings but the sizes referenced varied so it all became a bit confusing.
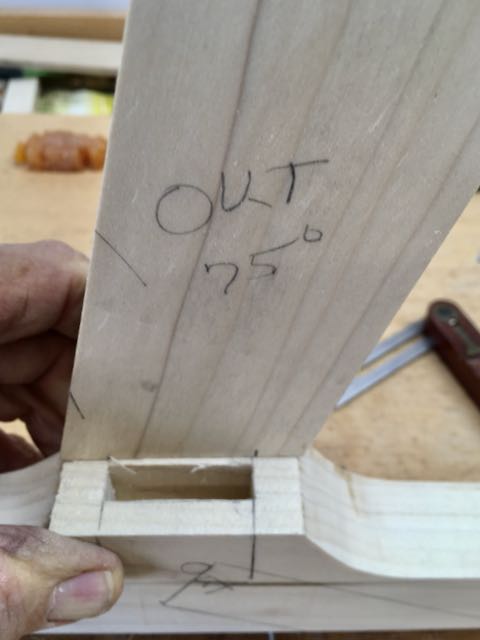
I decided the best way to go about it was to choose a couple of sites and pictures that seemed to be similar and use dimensions from them. Next was to make templates out of 1/4″ MDF and use those to create a mock up. I figured that the critical piece is the center member which is the back leg and the support for the arm rest. The picture on the left is the result and is made from 6/4 Poplar. There are some important angles too, the back of the leg is 145° while the support for the armrest at the other end of it is 30°. Leg and backrest are cut at 75°.
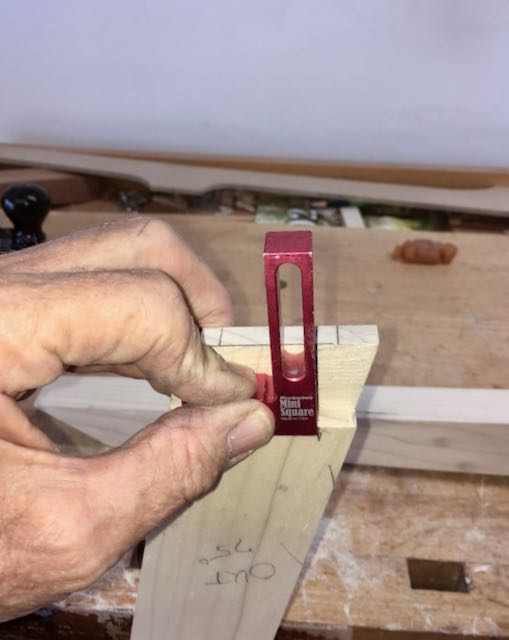
I found a set of plans from a woodworking magazine but the construction utilized dowels which I don’t like to use. Another way is using the Festool Domino system which is way to expensive for me and I’d rather take the time and use mortise and tenon joinery. With the angles used in this piece that meant that either the mortise or the tenon had to be angled. Many years ago I made a set of dining chairs and used angled tenons without any problem so that is my choice for this project. The process I followed was to start with a piece 3 1/2″ wide for the main leg and cut the angles I mentioned above. Once done, the pattern was traced, first bandsawn, and then pattern routed. The tenon’s on the prototype were all done by hand but the shoulders gave a lot of problems. After the front leg and backrest were cut at 75° I used marking gauge to lay out the dimensions. Also used the Stanley #71 Router plane to true up the tenon but not satisfied with the final outcome. I learned about a way of using the tablesaw to do this which gives more control of the angles on the shoulders which results in a much tighter joint.
There’s no way I can explain the entire process to you so will summarize the best I can. I decided to go with 8/4 European Steamed Beech. Very difficult to calculate what I’d need because of the differing shapes and sizes. Peterman Lumber won’t cut so whatever piece you find, you have to buy the entire board. God was watching over me and the two pieces I bought worked out well! After laying and rough cutting the 8/4 material I resawed each piece to 1 3/8″ which gave me a bunch of 7/16″ thick material for future drawer stock.
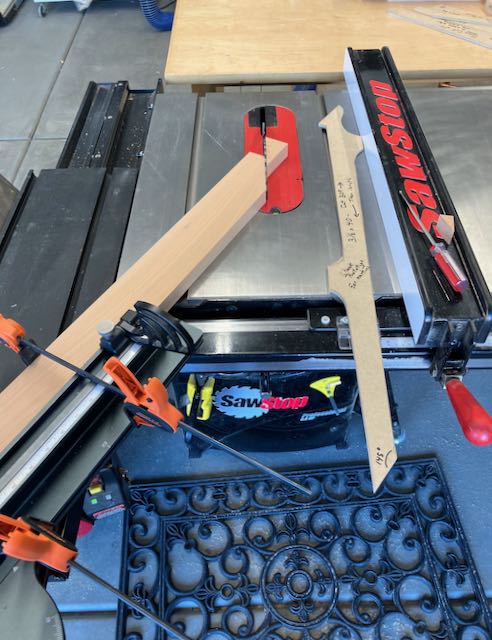
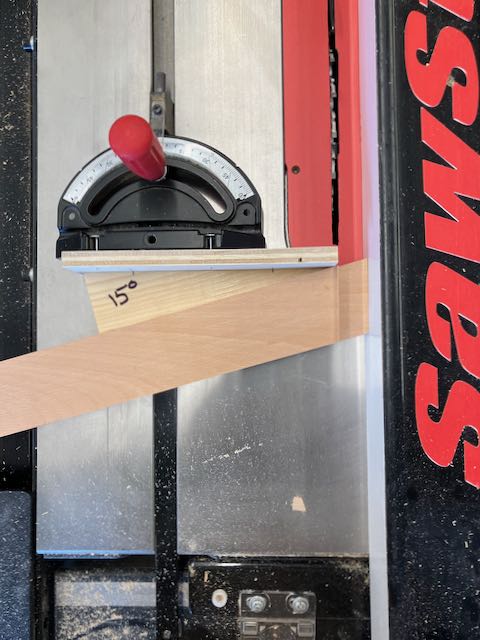
The process started by cutting the main piece to size and angling the arm rest at 30° and the back leg at 145°. This established the over-all length and the mortises were located and cut next. The pattern was traced, cut on the bandsaw, and pattern routed with a 1/2″ diameter bit from Woodpecker. The pieces for the front legs and back support were cut and the first step was the tenons at 75°. Here’s where I used the “wedge trick” from Tim Rousseau, Fine Woodworking Magazine; to cut them. My saw has a sliding table which wouldn’t allow that technique so I used my miter gauge but reversed it. My outfeed table doesn’t have a slot for the miter gauge to go through since I rarely use it. You can see how the wedge is attached to a fence, after cutting all of the tenons on one side, the wedge is unscrewed and reversed to cut the other side. The tenons were fitted into the mortises and since the pieces were still slightly over-size they were planed to fit the outside wall of the mortised area.
There are three members that connect the two sides of the chair together; the front seat support and the top and bottom stretchers for the back. Mortises were located and then the tenons were cut and fitted. The other main assembly is the seat which will fit into a 1/4″ deep dado cut into the sides. I need to wait until the sides are assembled before cutting that dado — I think! I decided to make the seat frame first. It’ll be 1″ thick and I’m using webbing and clips to support the cushion. These were bought on Etsy from House 2 Home, quick shipping and support. Few realize how many steps there are for this seemingly easy process but there are many! First the pieces need to be cut to size, then mortise and tenon’s are cut and fitted. The clips require an 1/8″ wide by 3/4″ deep groove which is routed. Then you need to remove the wood so that the webbing sits flat. This was done on the tablesaw with a plunge cut. Finally that recess is squared off and the piece is glued and clamped, whew — tired out just thinking about it!
That’s enough information for now. The back pieces need to have the slats added so I’ll go into that on the next blog. At this point all of the pieces are square so shaping via bandsaw work, pattern routing, and spokeshaves will follow. Looking forward to that step as it’s the main reason for this RABBIT HOLE!!
![]()
There are many ways to join pieces of wood, but mortise and tenon joints are the standard against which most alternatives are measured. In this comprehensive video (15 minutes), University of Rio Grande program director Eric Matson explains how mortise and tenon joints are used in typical post-and-rail construction — the type of construction often used in high-quality chairs, tables, and beds. In these applications, vertical posts (or legs) are joined with horizontal rails (or aprons). It’s the perfect application for this traditional joint.
In this video, Eric deconstructs a sample side table to show us how high-quality furniture is designed and built. Learn how to layout mortises for maximum strength, how to incorporate and work with split tenons, how to mark-up twin tenoned mortises, and how to account for reveals, offsets, and non-flush designs. Eric’s systematic approach minimizes errors and helps make layout and construction more efficient. For me, that’s the key point; understanding what makes for consistent, repeatable, quality joints. Armed with the information in this video and careful step-by-step application of what you’ve learned, you can craft better, stronger, faster joints. — (15.5 Minute Woodworking Video)
Eric Matson is the Director of the Fine Woodworking Program at Rio Grand University. Rio Grande offers a one year certificate program, as well as two year associates and four year college degree programs. Graduates have the skills and knowledge to be productive in custom furniture shops and architectural/cabinet shops. Rio Grande (pronounced rye-oh) is in Southern Ohio.
The post How to Layout Mortises: Anatomy of Post & Rail Construction first appeared on WoodTreks.I built four Krenov-style sawhorses about ten years ago and they have served me well. I made them from softwood lumber (pine, I think) using through mortise and tenon joinery. I wedged the tenons of the stretcher, but elected not to reinforce the leg-to-foot joints.
Recently, on a couple of the horses, those leg-to-foot joints failed and as a result, the horses wobbled. Still, the large shoulder of the tenon provided enough support that they would bear weight fine, and the friction between the components was enough to keep the feet from falling off when lifted. However, if lateral forces were applied (e.g. planing), the sawhorse would rack.
To fix them, I first knocked off the feet with a mallet. Examining the joint, I could see that the glue had held and the wood failed. To reattach the foot, I decided to use more wood glue and a draw bored pin for reinforcement (this is a wooden pin right through the joint in slightly offset holes so that the parts are mechanically held tightly).
After marking a suitable location for the peg, ensuring that there was adequate material on all sides of both the mortise and tenon, I drilled right through the foot (which was mortised) with a 1/4 inch brad point drill bit.
To mark the location of the slightly-offset hole on the tenon, I installed the foot on the end of the leg and used a slightly-smaller (7/32 inch) transfer punch held tightly towards the top of the mortise and gave it a tap to mark the centre of the next hole.
I drilled a 1/4 inch hole on this mark and assembled the joint with more wood glue. For the drawbore peg, riven oak dowel is traditional, but I elected to use a simple, ready-made 1/4 inch fluted joiner dowel with pre-chamfered ends. I seated the dowel with a few swings from a steel hammer.
This repair was simple and quick, requiring only a handful of tools and about ten minutes to repair four joints. I used:
I know many others like to over-build everything, and there are merits to that approach. However, by slightly under-building, we get the opportunity to learn the limits and failure points of the design and processes we use. How else can we learn these valuable insights?
![]()


![]()