Home Articles Forums Gallery Marketplace Videos

WoodCentral Forums

Knowledge You Can Build On — Est. 1998

Entry hall table for a niece: Part 12

Posts

Entry hall table for a niece: Part 12

Edited #1

Entry hall table for a niece: Part 12

Derek Cohen (in Perth, Australia)

This is the part where we begin building one-piece lipped drawers (as contrasted with applied fronts).

In preparing for this part of the build, my research uncovered exactly one article on dovetailing lipped drawer fronts. This is by Christian Becksvoort in Fine Woodworking magazine (#263-Sep/Oct 2017 Issue). Interesting that.

Why lipped drawer fronts? Simply because the three drawers must run continuously across the front, without a gap between them.
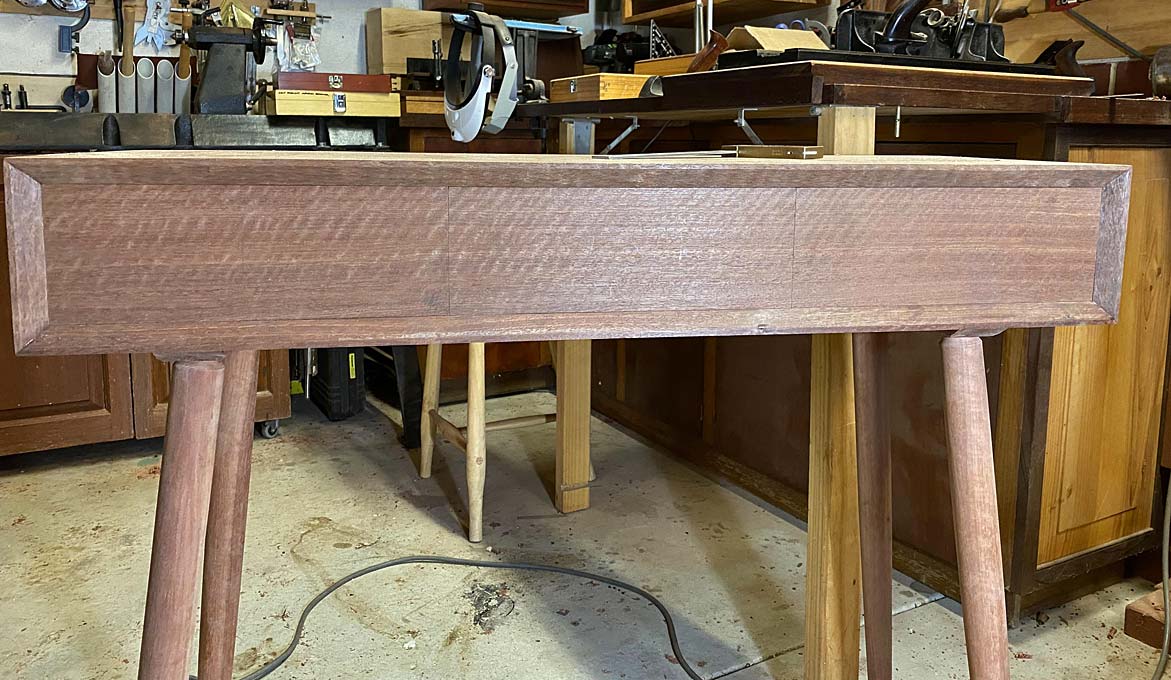

The lipped sides will wrap around the drawer dividers, and these will double as drawer stops. This will be illustrated in a short while.

The lipped ends create a challenge to form the pins/sockets for the tailed drawer sides since it becomes difficult to saw. I have a novel solution :)

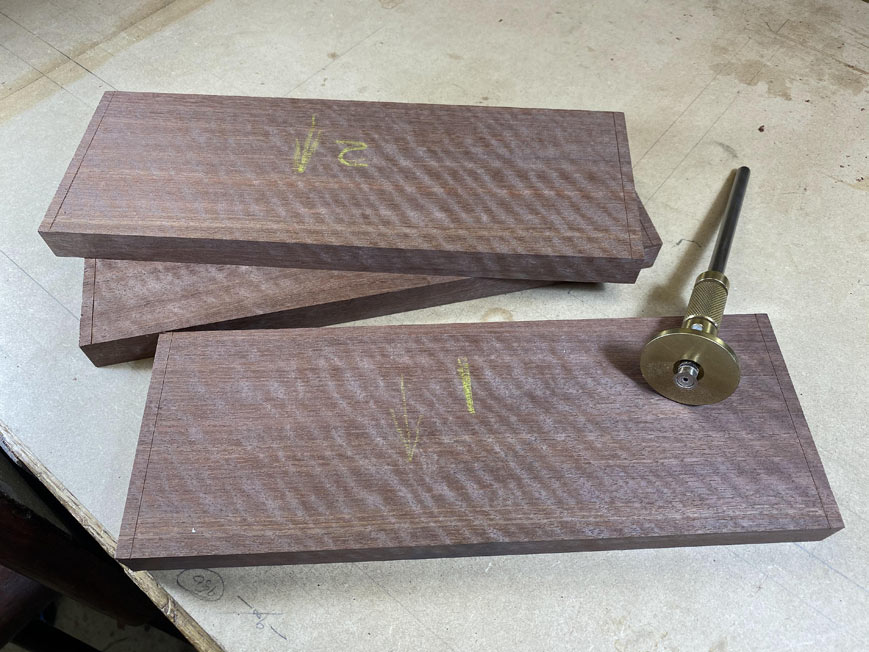
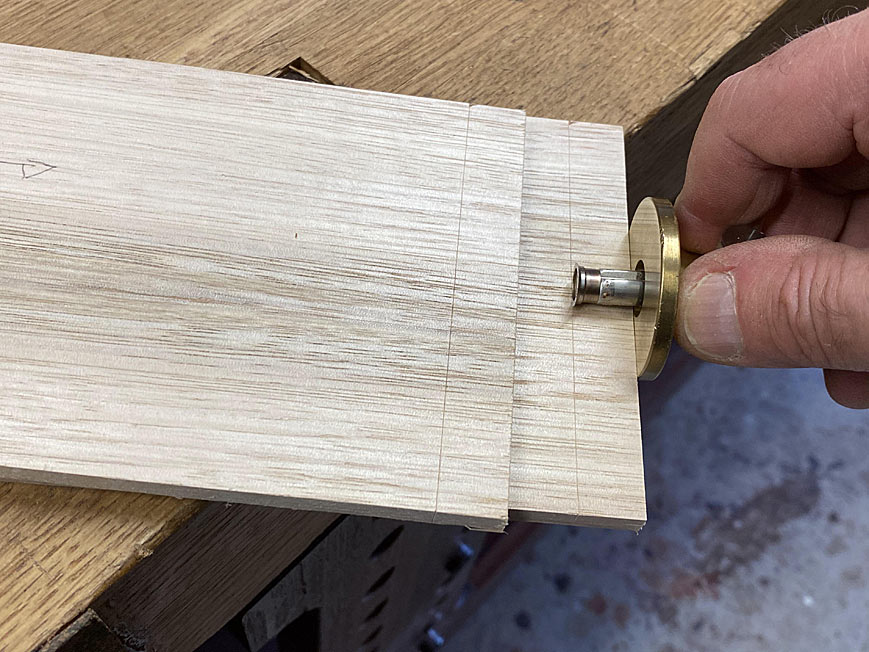
We begin by marking where the lipped sides will be. This is knifed in through from the rear of the case ...
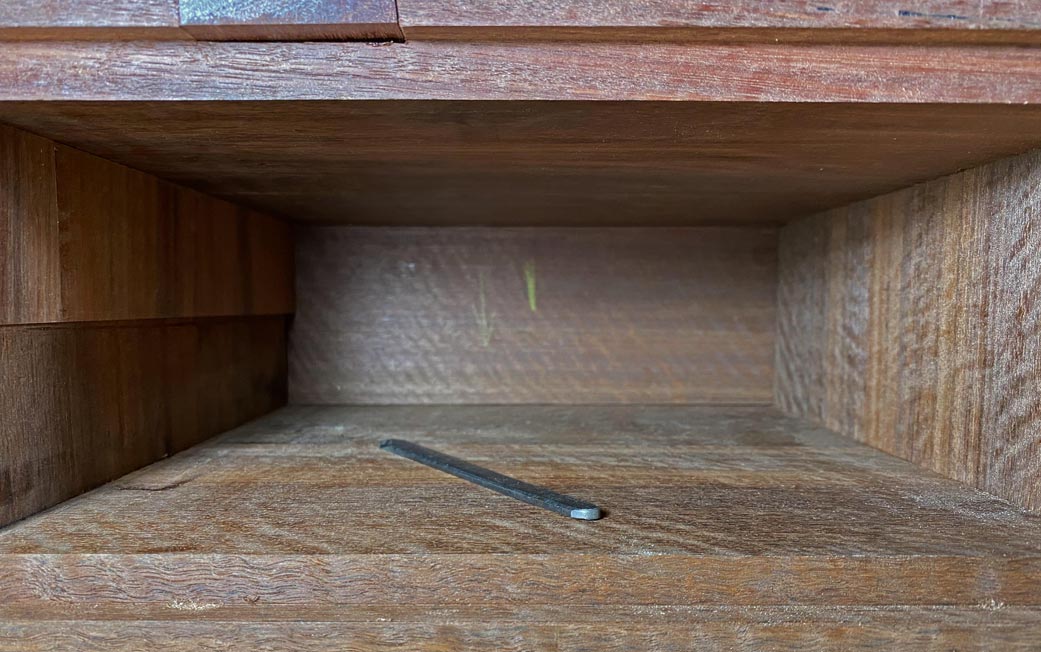

The marks are knifed with a cutting gauge.

The distance from the edge is exactly the same for each board - 6mm. The side spacers are 6mm wide and the two central drawer dividers are 12mm thick, of which each lip is half this thickness.

The drawer front is rebated with a moving filletster plane ...
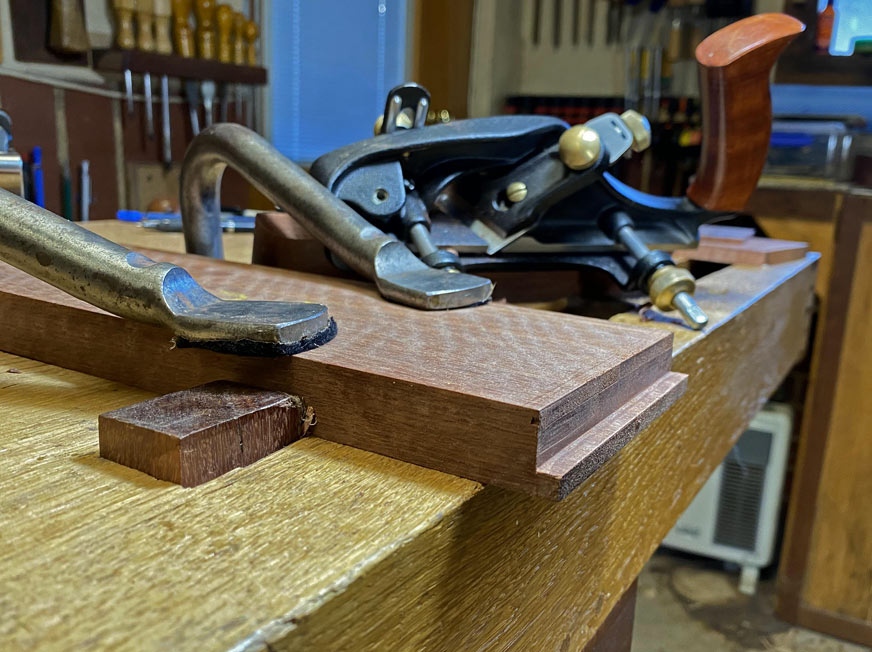

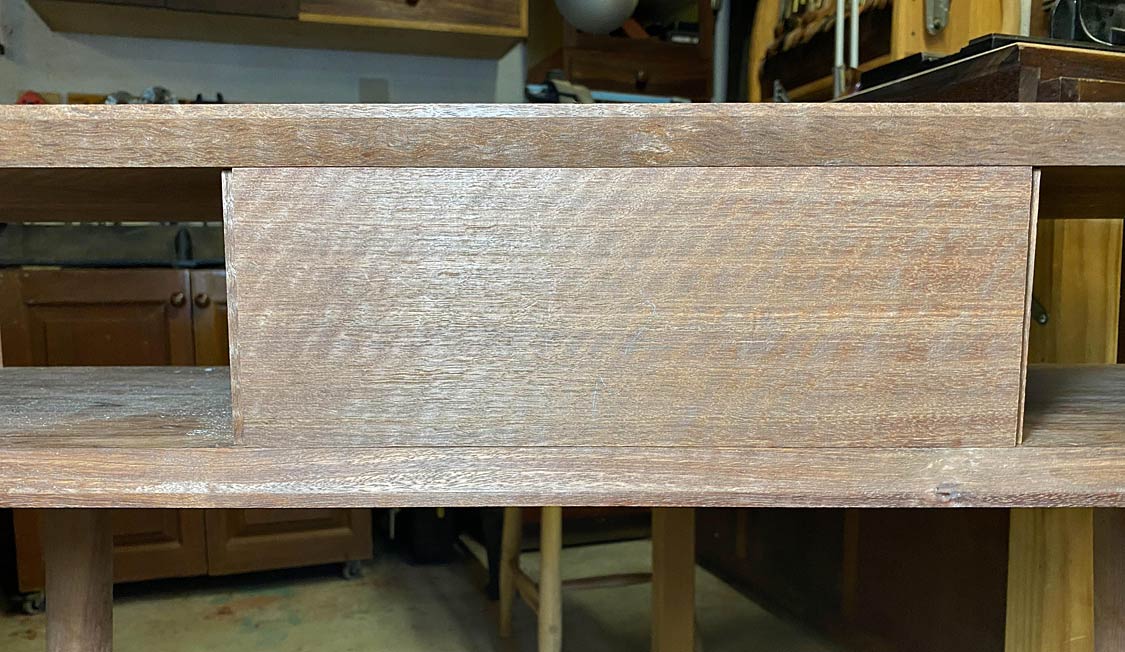
With both sides rebated, the centre must fit snuggly between the drawer dividers ...
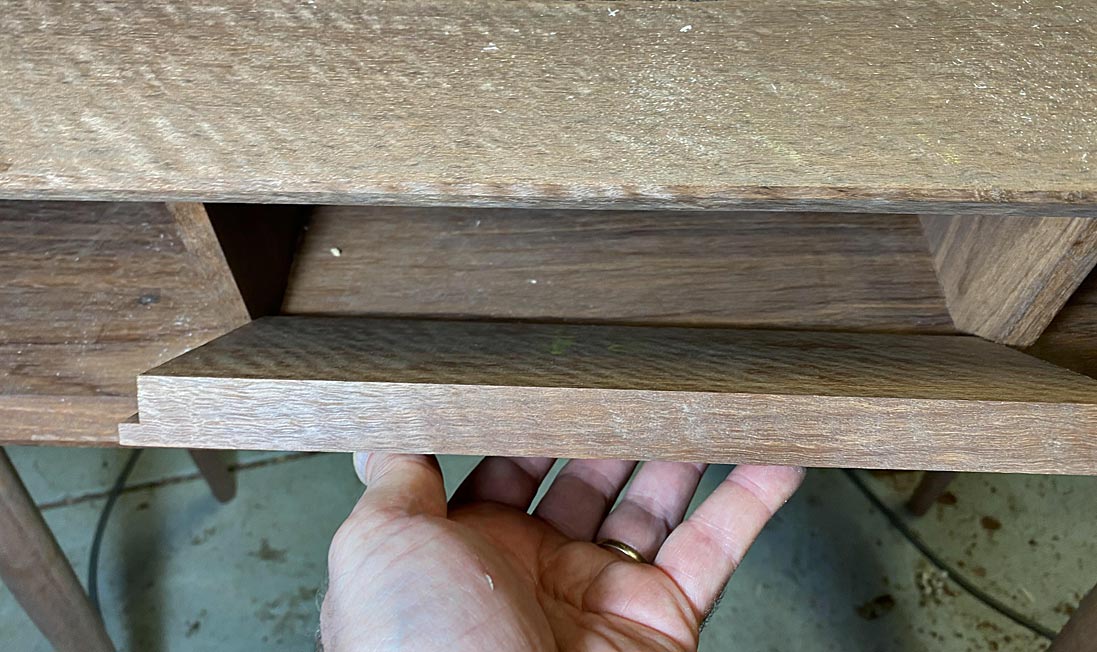

... and leave exactly half of the dividers remaining ...
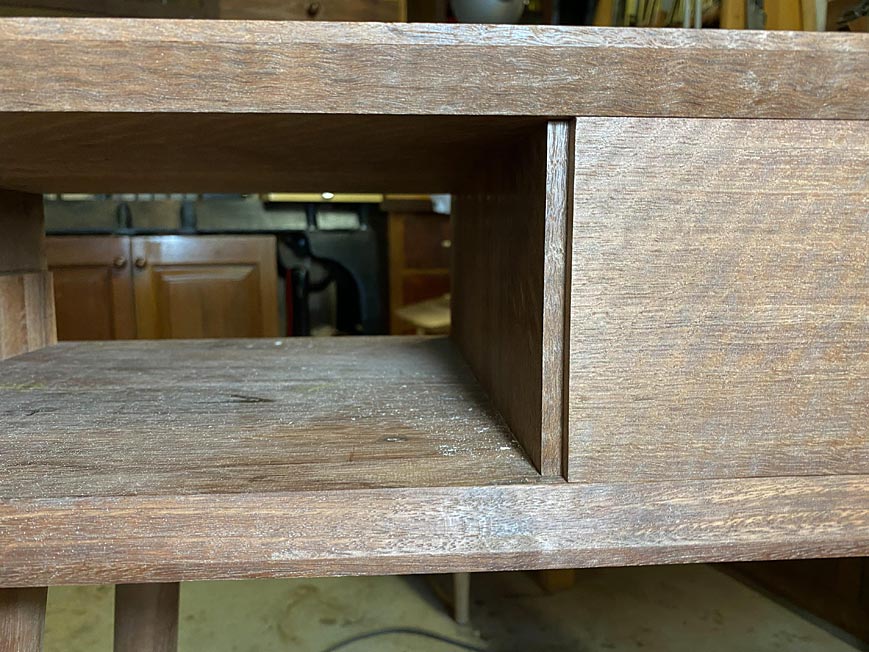


Side-by-side, perfect fit ...
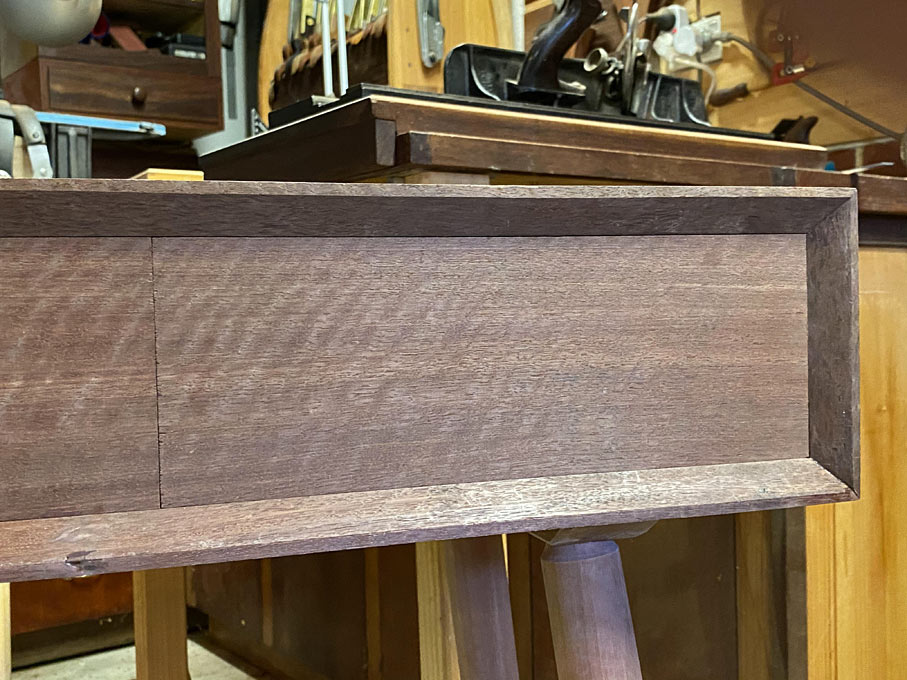

The rebates are fine-tuned with a cutting gauge, ensuring that they are even and square ...
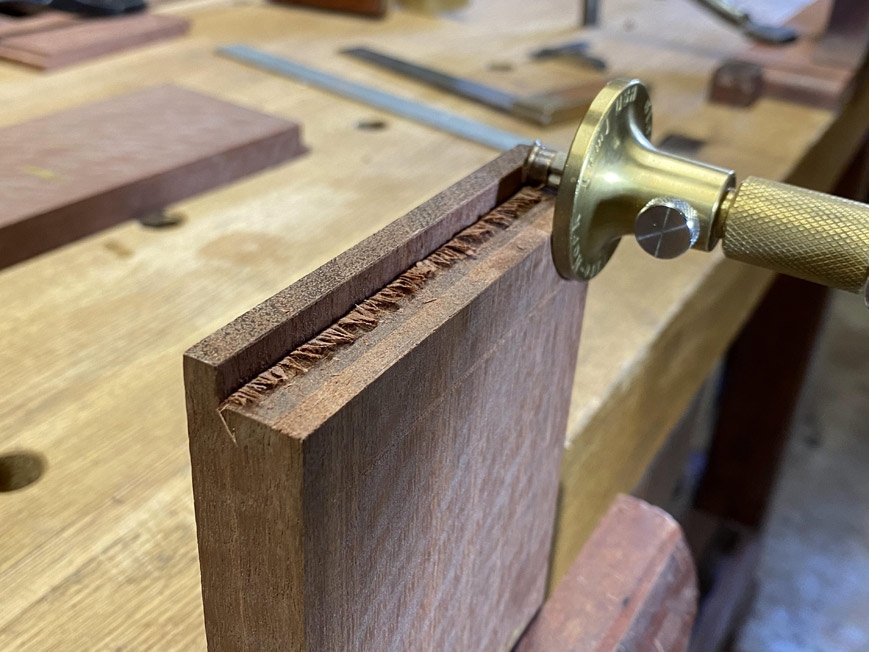

This measure is transferred to the drawer side ...

I took the time to lay out the dovetails on a scrap as a template. This saves a lot of repeated layouts ...
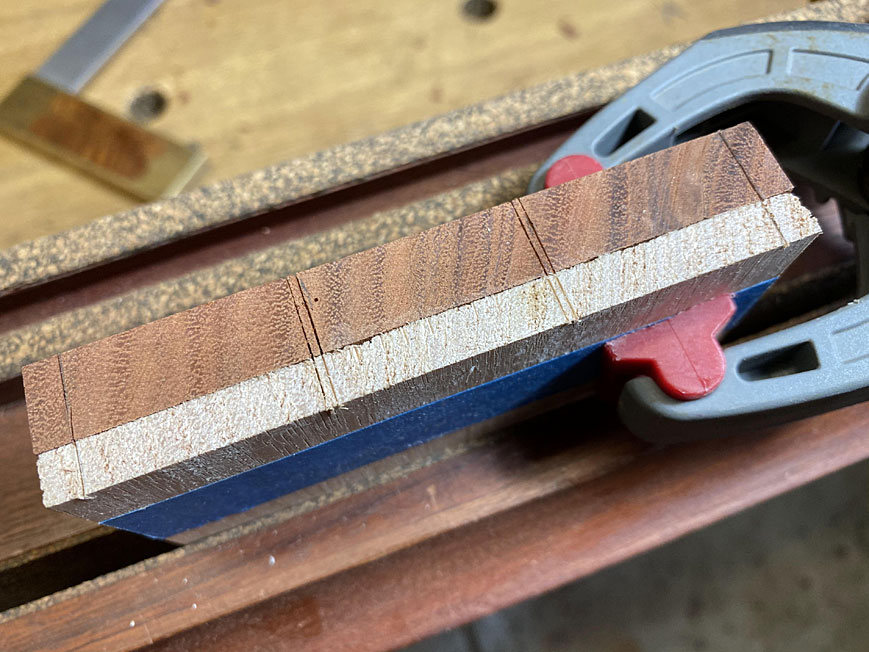

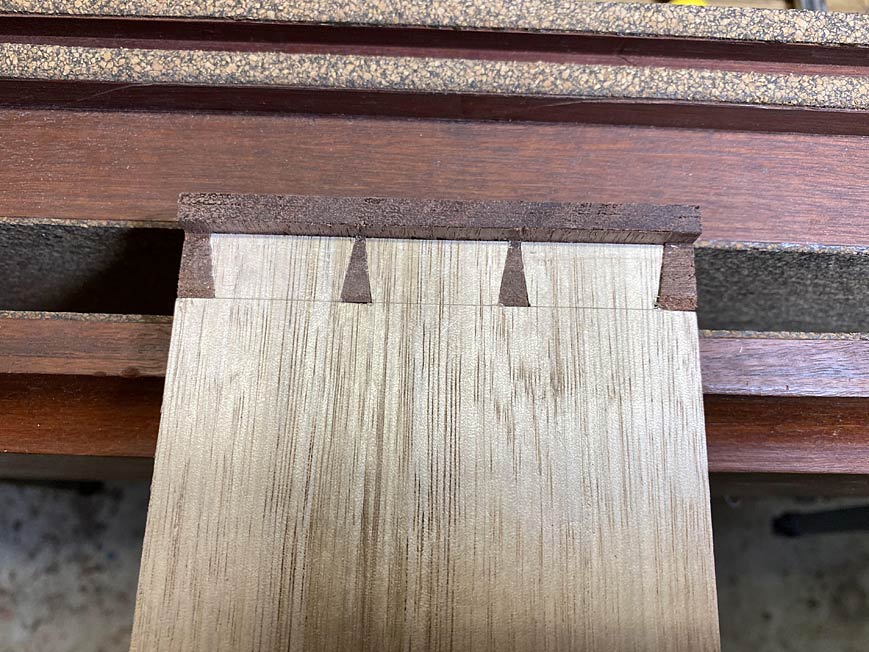
Tails done ...
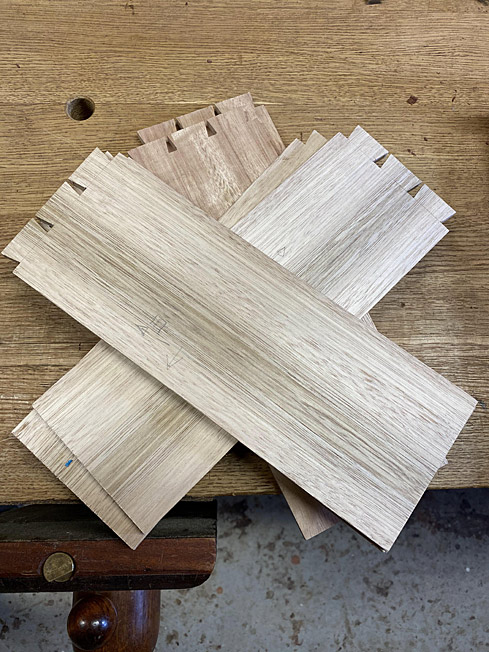

The tail board with be placed here, but with the lip extending past ...
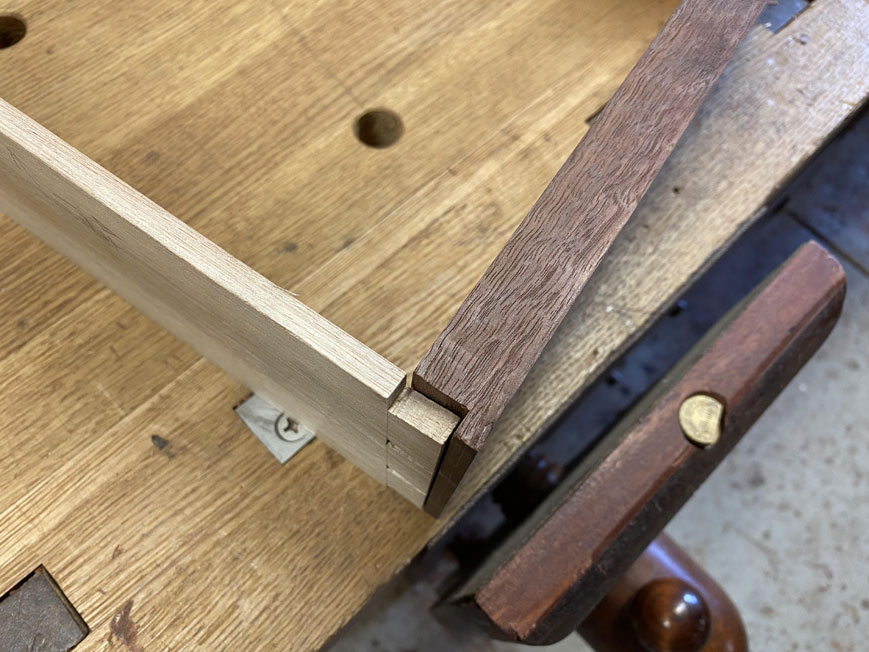

This is what it would look like if dovetailed ...


To make it easier to see what I am sawing, I am using blue tape ...
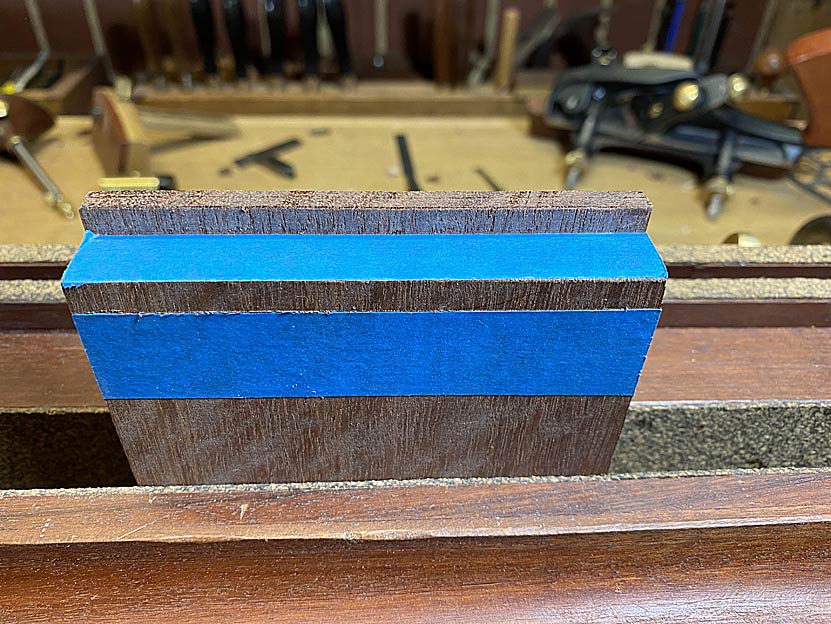

Transferring the tails to the pin board is made a little easier as the rebate is a handy stop ..
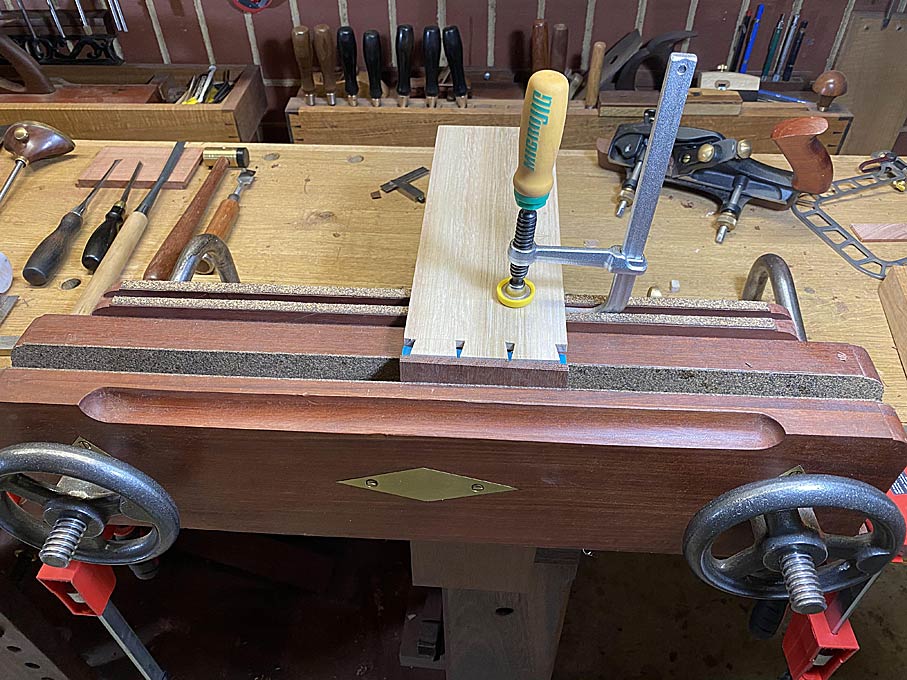
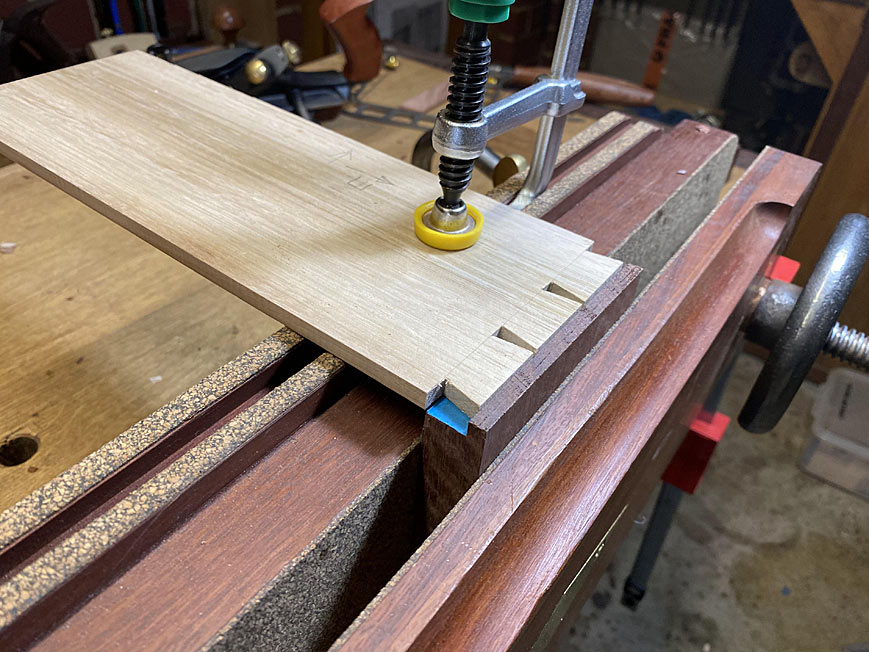

Marked out produces this ...
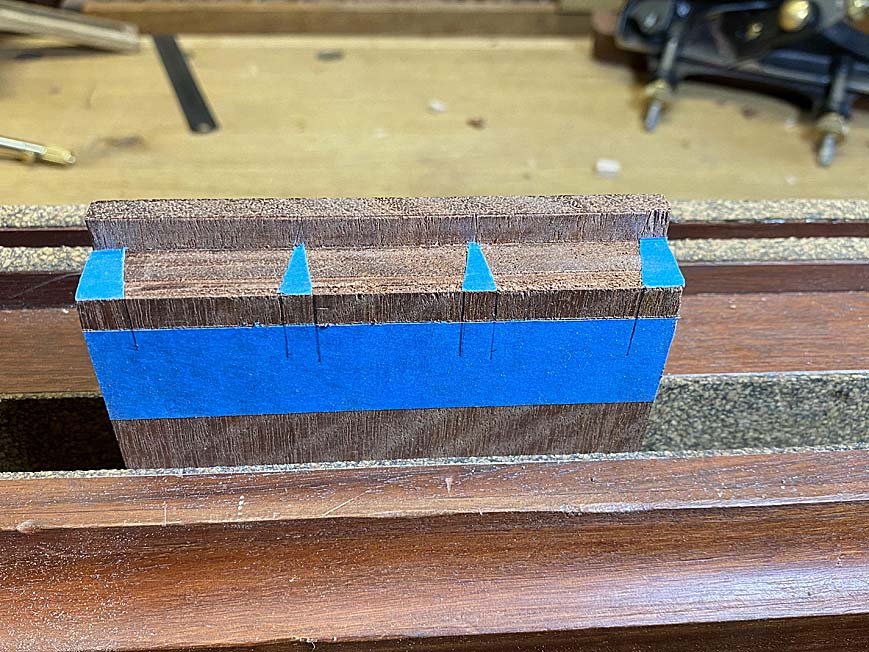

And that is where it stops being straight forward as this is as much as it is possible to saw inside the lines ...
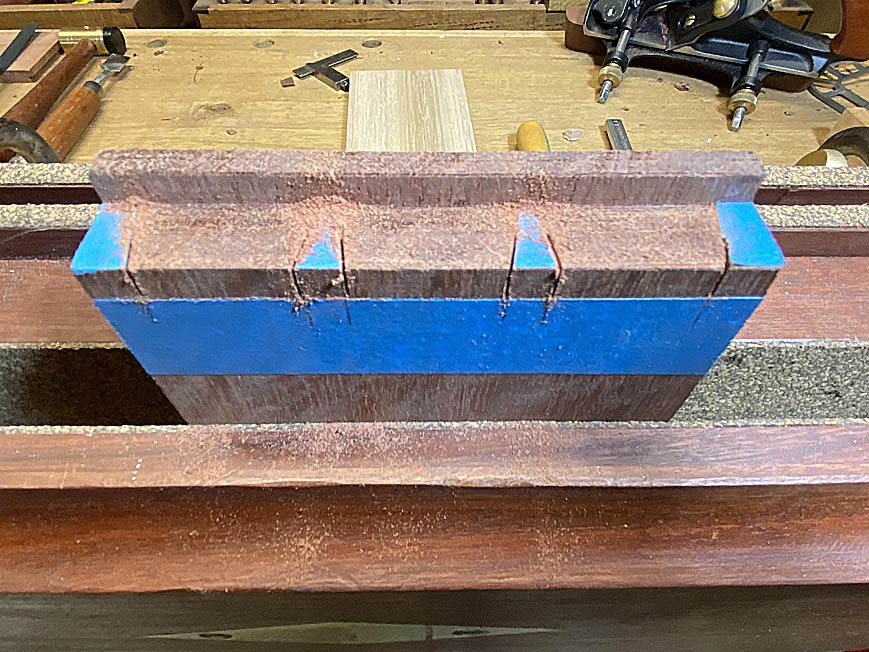

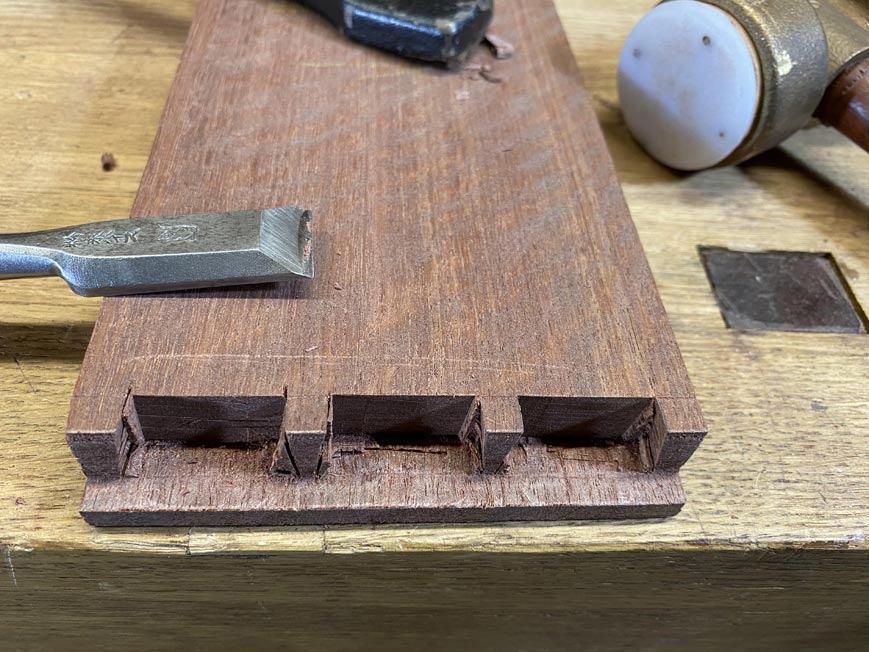
I decided that, if I could not saw it, I would chop it. This gives new meaning to "chopping dovetails" :)

The pin board is clamped (to avoid any splitting), and the kerfing chisel is used to deepen the existing half-kerf, and then extend it across the socket ...
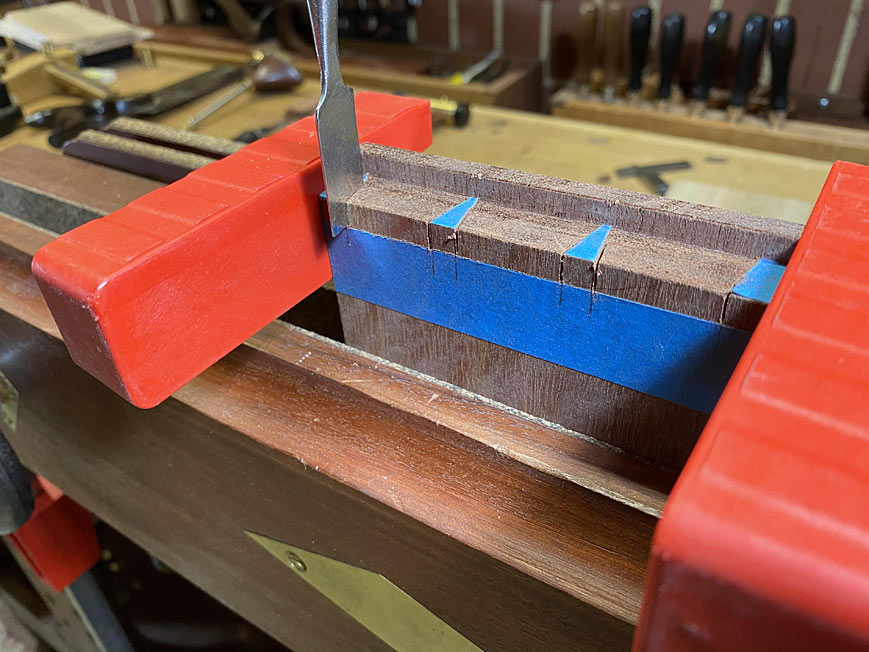
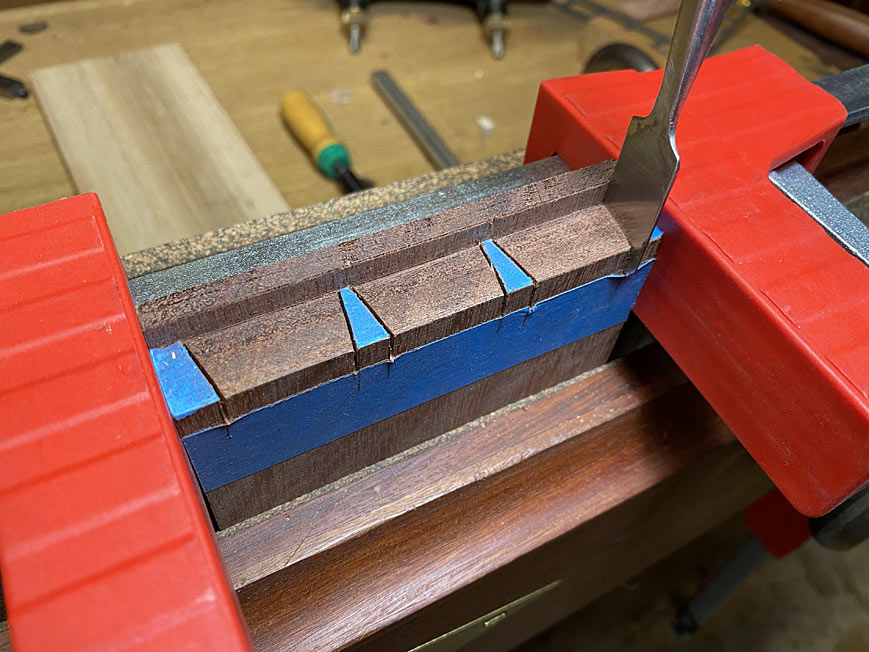

Now the waste is chopped out ...
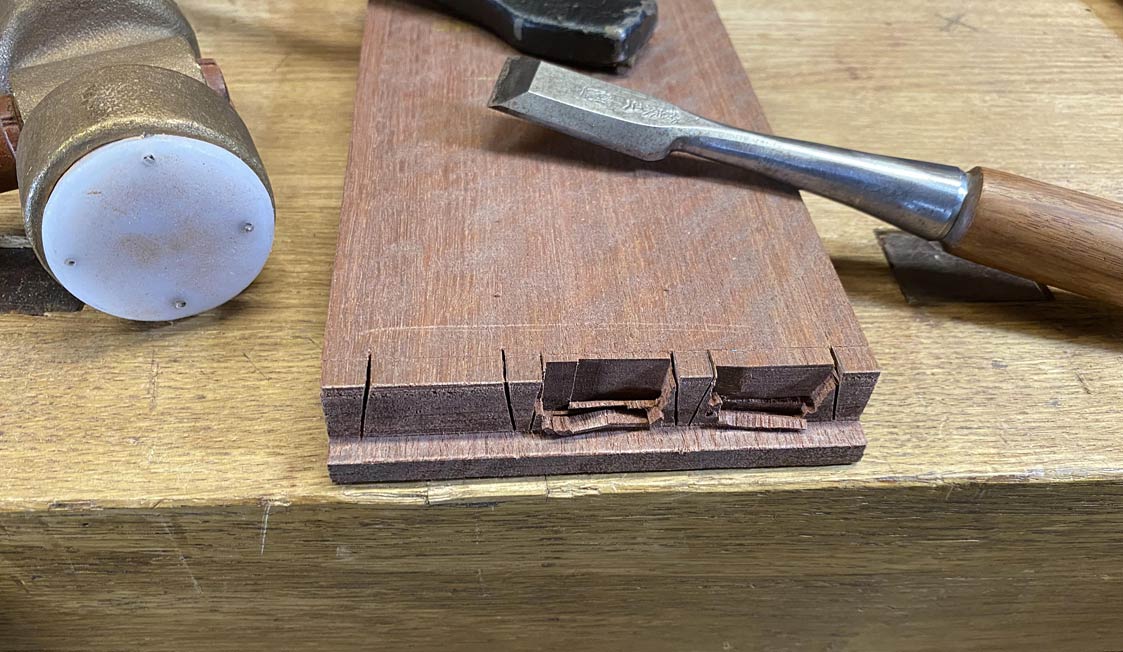


This picture of a fishtail chisel cleaning the corner of the socket is for bill :)
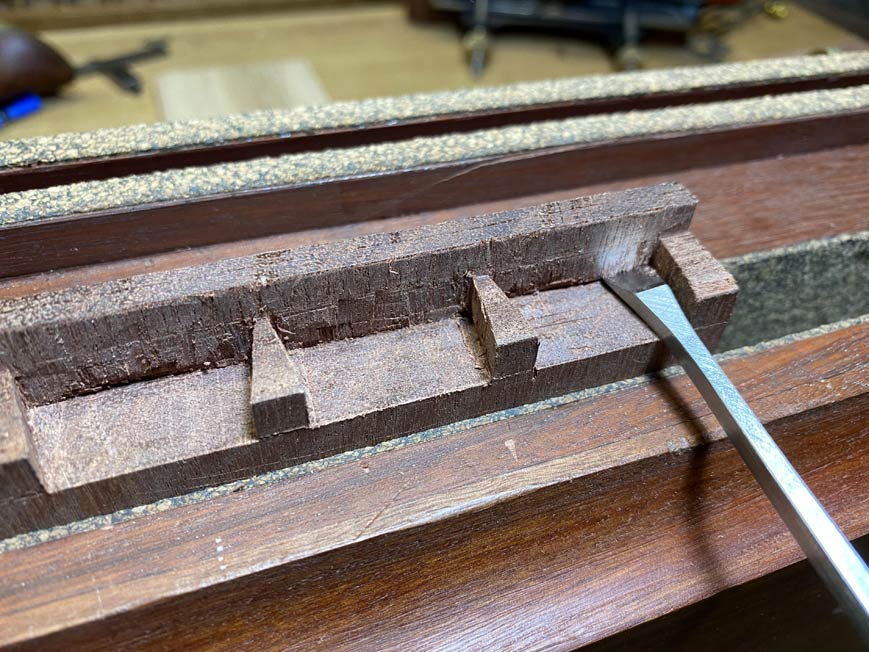

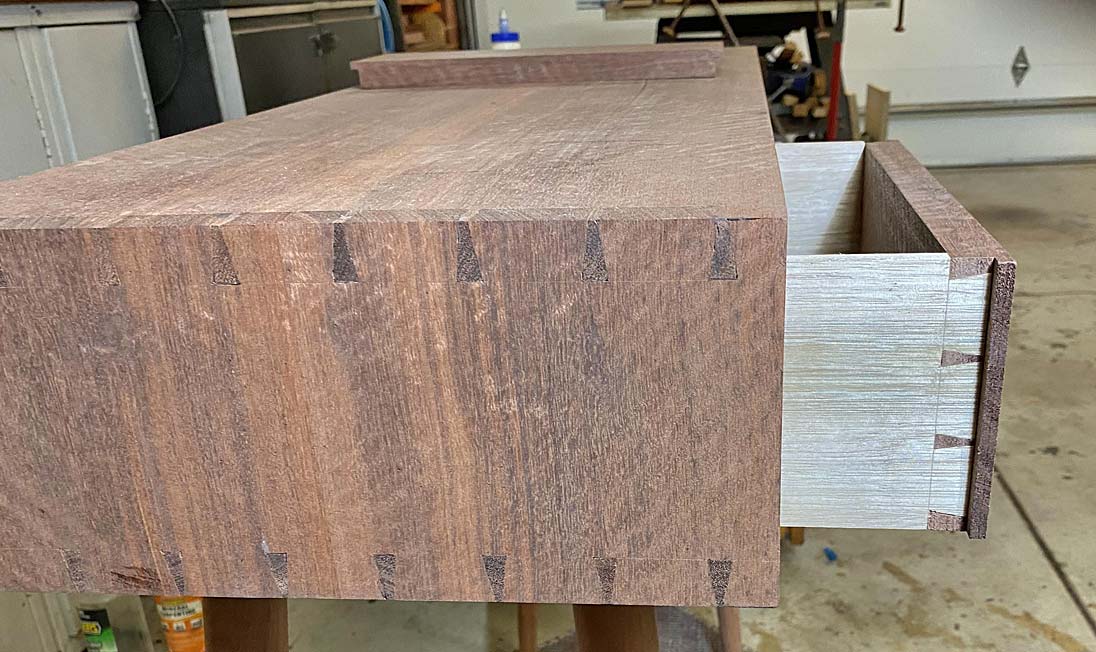
Does it fit? Oh, the suspense!


Two more to go.

Regards from Perth

Derek

#EntryHallTable

Re: Entry hall table for a niece: Part 12

#2

Re: Entry hall table for a niece: Part 12

Wiley Horne

Derek,

How thick is the cutting end of that kerfing chisel? You just made a believer out of me.

Wiley

Re: Entry hall table for a niece: Part 12

#3

Kerfing

Derek Cohen (in Perth, Australia)

Hi Wiley

The blade of the kerfing chisel is the same width as most dovetail saws, 0.02”. This is also the width of most cabinet scrapers.

The end is squared off, and does not have a bevel. A bevel would cleave the wood and cause it to split. I always use a clamp to minimise this, and take small “bites”.


I made this from a stainless steel trowel, so it is not perfectly even in thickness. :)

The article on my website is here: http://www.inthewoodshop.com/ShopMadeTools/KerfChisel.html

I emphasise small bites - no more than about 1/8” at a time after the saw kerf ends here. The existing saw kerf aids in initially directing the kerfing. It went along more easily than I expected - I was apprehensive how this would work in the hard and brittle Jarrah.

Regards from Perth

Derek

Re: Entry hall table for a niece: Part 12

#4

Re: Kerfing

Don Stephan

I may be more dense than that jarrah, but I'm not understanding how to use the kerfing chisel. By "take small bites" I'm guessing you mean 1/8" of depth towards the front of the drawer front. But that last 1/8th" is mashing down a significant height of wood, and it's going nowhere, unless Dr. Cohen becomes his alter ego Dr. Who on weekends . . .

Re: Entry hall table for a niece: Part 12

#5

Re: Kerfing

Derek Cohen (in Perth, Australia)

Hi Don

By "1/8" bites" I am not meaning depth, but rather indicating how much along the width of the kerf one must go. By chopping down too much of the width, the risk is too great force in one area, and this will risk the wood being cleaved/splitting along the grain. In regard to depth, I find that I can get to depth straight away, using the existing full depth, and then extending it in "small bites" - again horizontally, not vertically.

Regards from Perth

Derek

Re: Entry hall table for a niece: Part 12

#6

Re: Kerfing

Les Groeller

Just and observation...The fact that the Jarrah is brittle might be an advantage to the "crushing" action required for this tool to work. Have you tried it on a soft wood like pine? It may result in a finish like a dull chisel/plane on pine endgrain, tearing chunks out vs. cutting nicely. Just wondering.

Re: Entry hall table for a niece: Part 12

#7

Re: Stainless Steel Trowel (Spatula) *LINK*

Hank Knight

Wiley, you and I are both intrigued by Derek's kerfing chisel. I have a tool similar to the one pictured in Derek's blog from which he made his chisel, but mine is tiny. The blade is only about 3/8" wide at the business end. I searched online and found one that is a hair over 3/4" in width at a laboratory supply company, if you're in mind to make one (see link below). I ordered one and am looking forward to giving it a try.


Stainless Steel Lab Spatula

Re: Entry hall table for a niece: Part 12

#8

Re: Stainless Steel Trowel (Spatula)

Wiley Horne

Hi Hank,

Those are very promising. I’m planning to start with a played-out M2 lunchbox planer blade, and grind that to shape. Not looking forward to snapping that blade in two—in fact don’t know how to go about it. Think I’ll start by scoring a thin place in the middle, using the edge of a grinder wheel. Then get it in a vice and give it a lick from the side.

Wiley

Re: Entry hall table for a niece: Part 12

#9

Followup

Wiley Horne

Well, that was easy. Took a half minute to grind deep scores in both sides with a CBN wheel, then just snapped it in my fingers. Duhhhhhh.

Wiley

Re: Entry hall table for a niece: Part 12

#10

Kerfing tool......

roger lance

Rob Cosman makes and sells a tool for this purpose; but, it is expensive.....


Re: Entry hall table for a niece: Part 12

#11

Re: Kerfing tool......

Jim Matthews

Looks a great deal like a cut down cabinet scraper.

Re: Entry hall table for a niece: Part 12

#12

Re: Kerfing tool......

roger lance

It is metal.....and shiny.....and thin.

Re: Entry hall table for a niece: Part 12

#13

Re: Kerfing tool......

Stuart Johnson

Looks like a cheap gents saw could easily be cut down.

Re: Entry hall table for a niece: Part 12

#14

You can easily make a kerfing tool

Wiley Horne

You can make a perfectly serviceable tool out of most any piece of hardened steel. And it isn’t hard. And the tool will work better and more easily than one would imagine. This afternoon, I took a short length of used-up M2 planer blade to the grinder. As Derek said, you need a thickness about the same as your dovetail saw kerf. For western saws, that’s about 20 thousandths. In my case, it was 12 thousandths.

I just held the steel in a pair or visegrips and ground on the side of the wheel, and tested thickness with a micrometer. Turns out it doesn’t have to be a precision grind. Mine looks like hell, blued at the end, and varying from 10 thousandths to 13 thousandths—I just wanted a working prototype fast. Didn’t even know if a piece of steel that thin would pack the wood down...

Turned out, that ugly grinding worked great. Made a slanting sawcut, and tested it. It was easy. That little thin blade packed down or cut through the grain easily. Didn’t take sharp blows to do it. It’s easy. If you do the math, you find that a tool this size is exerting 10’s of thousands of psi on the wood column below. Bear in mind the kerf is channeling the cut and providing side support for the tool.

This grinding could be done on a screwdriver or lunchbox planer blade, or piece of sawblade. Derek used a trowel. There really isn’t much to it, and it surprised me how little force was needed to get the result you want—a deepened sawcut on the pins board.

Wiley

Re: Entry hall table for a niece: Part 12

#15

Re: Kerfing tool......

Derek Cohen (in Perth, Australia)

Rob Cosman brought out this tool about 2 years ago. Perhaps a little more recently.

I am sure that it works well. I had a "saw" design like this in my workshop about 5 or 6 years ago - I did not make it; it was sent to me by a fellow woodworker to try out.

It did the job, but I did not like it as much as the "chisel" design. In action, the narrower blade of the chisel just seemed to offer better visibility - I found it disconcerting (after using mine) that I could not see the line as the brass back obscured it. This may not be an issue for others. The wider top of the chisel handle made it easier to strike accurately, compared to the thin, saw style, which I thought was vulnerable to glancing blows.

As I recall, the Cosman tool has a very solid brass top, much thicker than a gent saw, such as one made by Pax or Crown. I suspect that re-treading one of these will not last long.

Regards from Perth

Derek

Re: Entry hall table for a niece: Part 12

#16

alternative "corner waste" removal

Bill Tindall, E.Tn.

It may well be that different woods respond differently so what I experience on walnut and cherry would not be the same as for ??


I am assuming we are talking about removal of what I will call corner waste in a half blind as shown in the picture. I don't experience any difficulty removing the bulk of this waste with the same chisel I have been using, and will be using for, refining this socket. Typically 4 rapid thrusts with the chisel on edge takes me to the saw kerf and using this kerf as a guide a final cut leaves only a few whiskers of pesky waste in the corner. We are talking seconds to achieve this result. The key to success is to make the paring cuts thin enough that the chisel glides smoothly into the socket and the fibers easily bend over and usually shear off.

What about this method has been found in need to improving? Or alternatively, what have others found to be difficult or ineffective about this approach?

Re: Entry hall table for a niece: Part 12

#17

me too

David Weaver

This is what I do, too. It's faster and involves fewer tools.

It may be dependent on the type of wood (it works well with cherry, and I'm sure it would work well with mahogany. But what about gabon ebony? don't know).

If the chisel that I'm using is too wide to get into the corner as cleanly as I'd like, I locate a narrow chisel (like 1/8th of an inch) to snip off the last few fibers in the corner.

Somewhere, I have skew chisels, but I don't use a card scraper or thin chisel at this point to do the trick of hammering down into the fibers because it's easier to do as you're showing - pare them off with or across the grain (depending on what the wood allows) and break them off.

Re: Entry hall table for a niece: Part 12

#18

Re: Kerfing tool......

Wiley Horne

Does anyone here know the history of this tool, as in first mention of its use?

Wiley

Re: Entry hall table for a niece: Part 12

#19

Re: Kerfing tool......

Derek Cohen (in Perth, Australia)

Wiley, as far as I am aware, it is associated with Tage Frid. He used both a card scraper and a section of bandsaw blade. ai first saw this in one of his videos about 20 years ago. More recently, I watched a video of Frank Klausz doing the same ... and making lipped drawers! But with power tools assisting.

https://m.youtube.com/watch?v=vKuy3NdLhlE

Tage Frid (23:40): https://m.youtube.com/watch?v=LaOqYjyH2aE

Regards from Perth

Derek

Re: Entry hall table for a niece: Part 12

#20

1977

Warren in Lancaster, PA

This technique appeared in a Fine Woodworking article on scrapers by Tage Frid. Volume 1 No. 6, Spring 1977. There are two dozen pictures with captions, and one shows this use of the scraper. Frid says "It saves a lot of chiseling." That might depend on how good you are with a chisel.

I tried it for one socket at that time. I think Frid did his half blind dovetails with a router jig.

Re: Entry hall table for a niece: Part 12

#21

One more question...fishtail chisel

Wiley Horne

Warren,

and Derek, thanks for the data on kerfing tool. I also got curious about fishtail chisels (and gouges). Moxon shows a fishtail chisel, which he grouped with the firmers, but he doesn’t discuss the fishtail specifically.

Smith’s Key, a century later, shows a fishtail gouge. Smith shows a number of types of chisels, but no fishtail.

My question: Does Roubo show a fishtail chisel? I’m curious whether this was a design that was in use in early times, then disappeared for a couple centuries before returning in our gentlemanly era.

Wiley.....still smiling over Moxon’s long discussion of how to hold a paring chisel, which he says is ‘preposterous’ until you understand why it is taught.

Re: Entry hall table for a niece: Part 12

#22

Re: One more question...fishtail chisel

Warren in Lancaster, PA

Moxon does not show a fishtail chisel. His illustration is a copy of Felibien's plate from a few years earlier.


From Felibien we have A and B are chisels, ciseaux, and C is a fermoir.

A fermoir has equal bevels on each side of the tool and the steel is sandwiched in the middle. Fermoir means clasp; the steel is clasped between the outside iron pieces. One might think firmer chisel comes from fermoir, but they are from different Latin roots.

The fermoir is sort of a roughing tool, without a flat side so it would not be suitable for half blind dovetails. When I asked Michel Auriou about this he was quite clear, "A fermoir is not a chisel." It is possible that Moxon did not know what his C3 tool was or that it was not used by the joiners he knew. Generally all chisels were wider at the edge and had some taper before 1800.

Roubo illustrates a chisel, a fermoir and a mortise chisel. He also shows a "secret mitered" dovetail.

Re: Entry hall table for a niece: Part 12

#23

Moxon chisels

Warren in Lancaster, PA


Moxon chisels. He does not reference C3 in the text.

Re: Entry hall table for a niece: Part 12

#24

Re: One more question...fishtail chisel

Wiley Horne

Much thanks, Warren! A wonderful example of clear exposition, too. Apparently, they did their dovetails without dovetail chisels.

Wiley

Re: Entry hall table for a niece: Part 12

#25

Re: Moxon chisels

Wiley Horne

Warren,

Thanks. The text I was reading is at top of p. 76, Section 10, in the Praeger version:

“Formers marked C1. C3. are of several sizes. They are called Formers, because they are used before the ‘paring Chisel...”.

He then goes on to discuss the use of Former chisels, but makes no mention at all of the fishtail shape.

As you’ve mentioned before, Moxon was not a tradesman, and perhaps made what he thought were plausible assumptions to create a readable narrative. And perhaps the tradesmen themselves passed on erroneous info to Moxon.

Thanks again for sharing your extensive knowledge.

Wiley