New WoodChat!
Home Articles Forums Gallery Marketplace Videos

WoodCentral Forums

Knowledge You Can Build On — Est. 1998

Good Hope Hardwoods - Walnut Slabs & Specialty Hardwood Lumber

Bench build update

Posts

Bench build update

#1

Bench build update

Derek Cohen (in Perth, Australia)

Here is a progress report.

It is now two weeks since I began working on the bench. I suspect that my plans to finish it the first weekend were a touch optimistic :)

What has been frustrating has been the feeling that I get two paces forward, and then move back one. This is in part due to using Jarrah I have salvaged over the years - all needs to be laminated. For example, the stretchers are three layers each to reach the desired 2" thickness ..
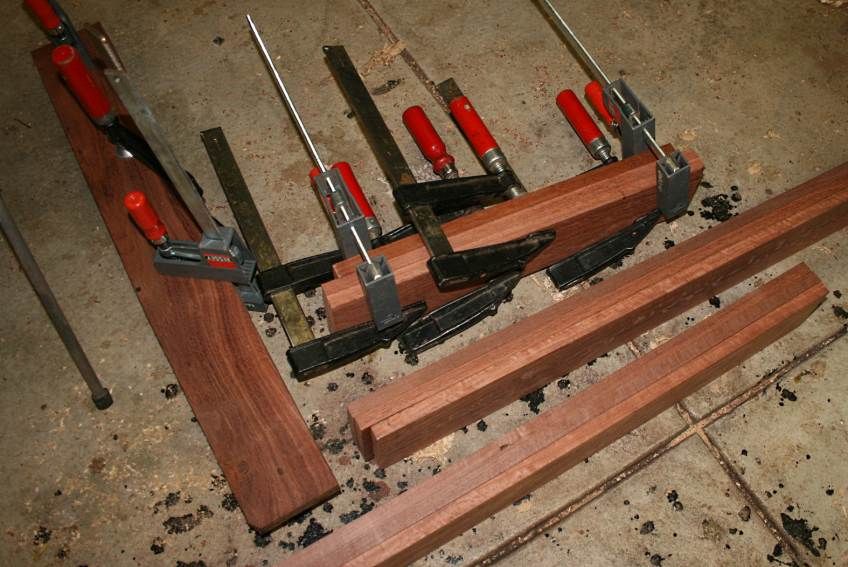

I am beginning to see a light at the end of the tunnel, however. The top is nearing completion, and all the pieces for the base are essentially ready to go. I have estimated the final weight of the bench, and was shocked to discover that it will end up 182kg or 400 lbs.

Much of the time to date has been determining how to fit the Benchcraft tail vise (wagon vise). The first issue was that the oak benchtop's final thickness is 3 1/2" (rather then the 4" ideal for which the BC was designed). This is not a big deal as it just requires spacers to align with the 4" end cap (all in the instructions).

The second issue was to decide how far out to place the dog holes - in a continuous, unbroken line outside the legs, or broken by the legs but close to the edge of the bench? I decided to go for the latter. The bench dogs are 2" from the edge of the bench, each 3" apart, except for the area of the legs, where they are 6" apart. I also decided not to include a planing stop. Either I will use the first bench dog, or I will use a jig that uses the bench dog and a holddown.

(the bench dog strips were shown in the previous report)

So the order today was (1) form the tenon for the end cap, as this forms part of the tail vise screw installation, (2) rout out the mortice for the screw, and then (3) glue in the bench dogs.

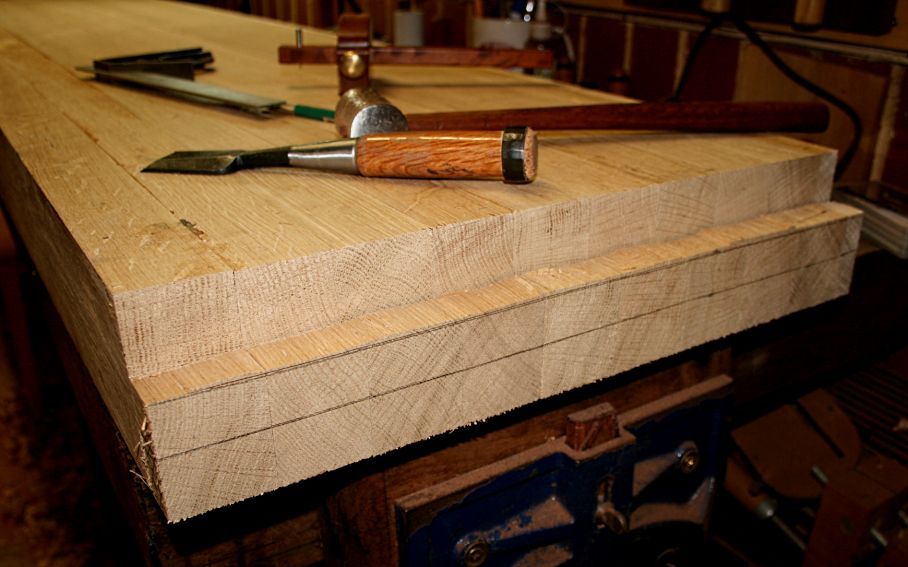
I have watched a few videos on various blogs of the end cap tenon being formed with a circular saw and a power router. I took a slightly different route.

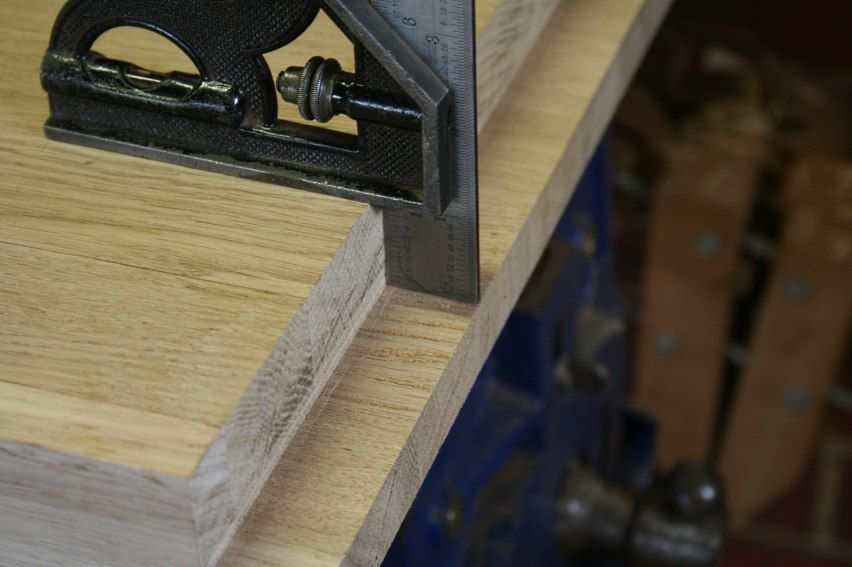
Firstly, I sawed the shoulders of the tenon on a sliding tablesaw ...
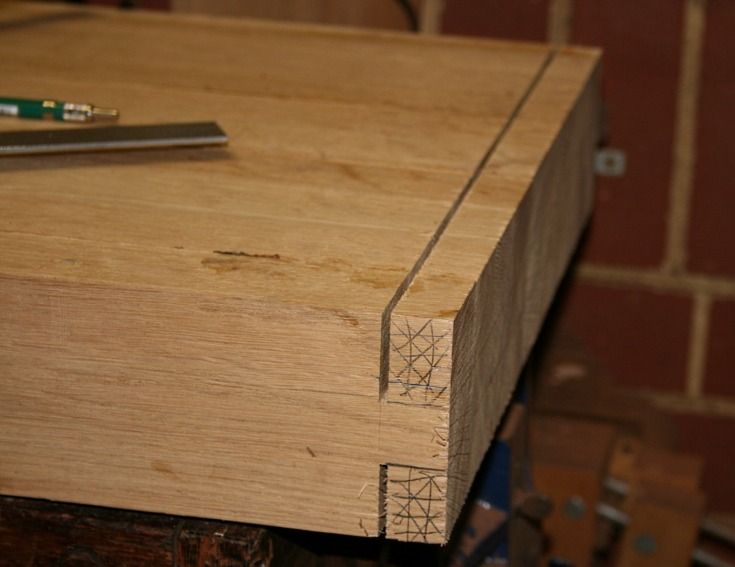

Then used a wide chisel to split the waste off ...
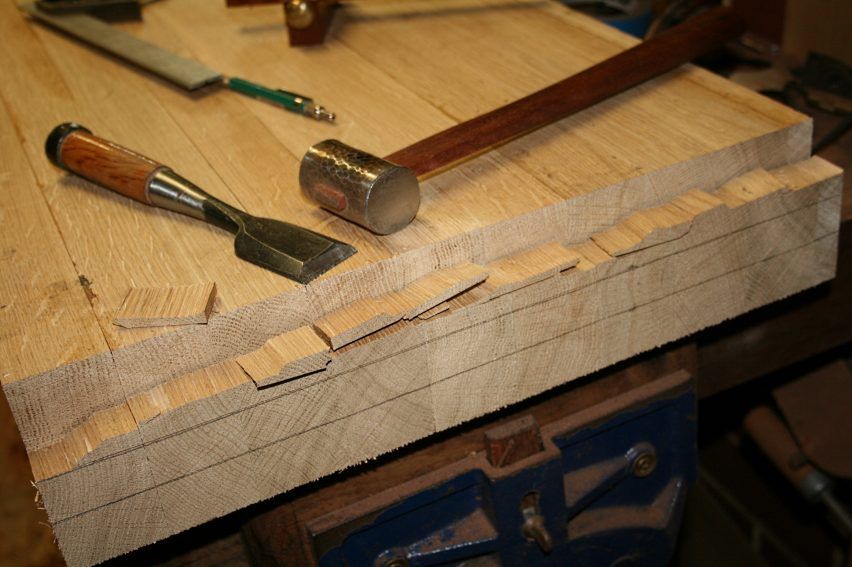


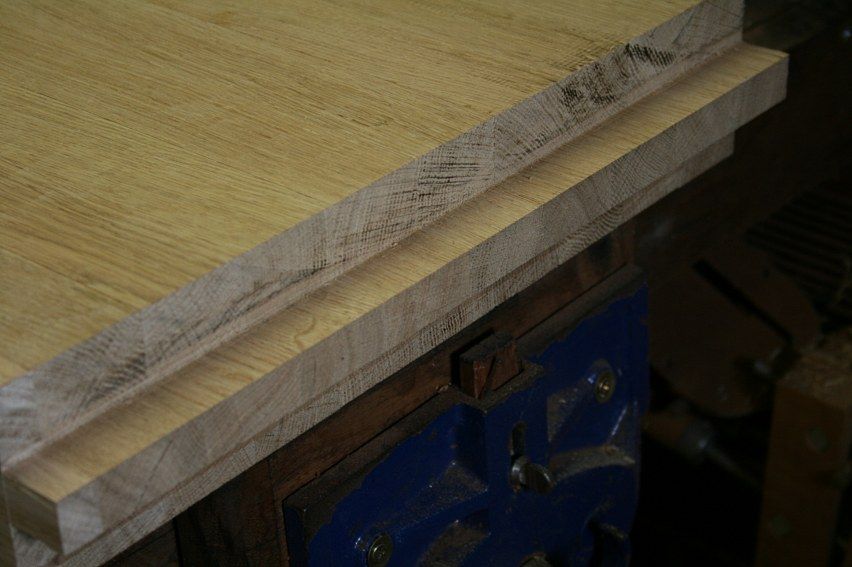
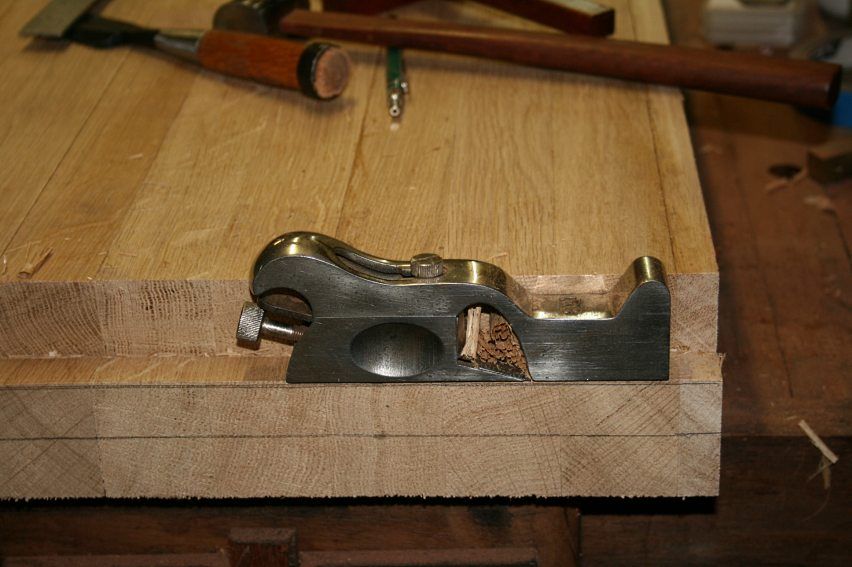
The first side I used my old Stanley #93 (perfect for a 1" deep tenon), as it could adjust from thick to fine shavings.

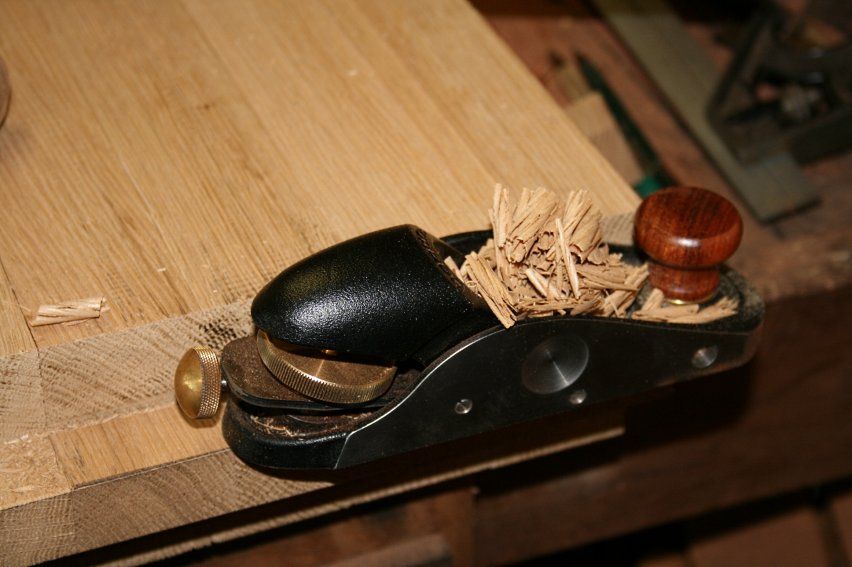
On the other side I used a Veritas skew block plane. This was a better choice.


Having then routed the slot for the tail vise screw, I was finally able to glue on the dog hole strips.
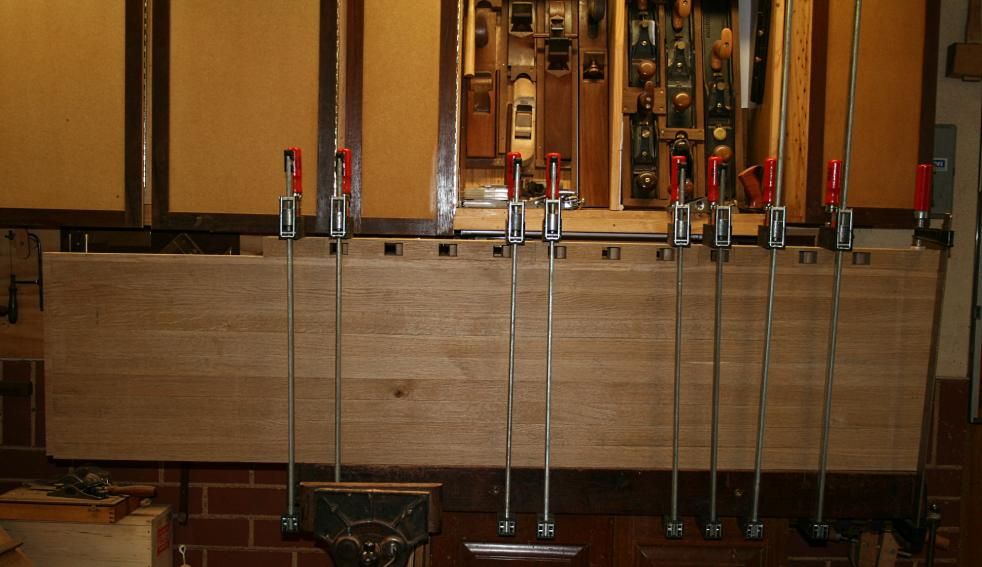

The side piece and end cap are both loose (they will later be dovetailed together) ...


Regards from Perth

Derek

Re: Bench build update

#2

Weight estimate

Bill Tindall

400 pounds, dense woods are about 50 pounds per cubit foot equals about 100 bd ft of finished lumber in the bench. Having not built a bench like this I was surprised by the amount of lumber involved. No matter what a bench is built from the material costs are going to be substantial.

Is it practical for a bench of this kind to be built with a removable top to make moving it easier?

Re: Bench build update

#3

Re: Weight estimate

wilbur

You sure can make this bench with a removable top and a knockdown base. One of my friends has done this. My Roubo bench top has mortises cut into the bottom and sits on tenons made on the tops of the legs. I was going to glue and drawbore these joints, but once I got the top onto the legs, I saw that the weight of the top and the fit of the joints would be more than enough to keep everything in place. So the top of my bench can be removed if needed, although that wasn't my intention.

As far as the cost goes, I made my bench out of Douglas fir 4x4's and a couple of 2x12's from the local home center, plus a pine 1x12 for making a shelf underneath. I didn't tally the total cost exactly, but I think it was only about $200-250 total.

Re: Bench build update

#4

Re: Weight estimate

Derek Cohen (in Perth, Australia)

Hi Bill

Here is a breakdown so far:

The top: after thicknessing, the European Oak (similar to White Oak, I suspect) weighed 7 1/2kg per length (of 75"). There are 12 lengths (for a total width of 22") at a total weight of 90 kg. (Hey, I have been lifting and carrying this alone - don't mess with me :) )

Add to the top the tail vise (7 kg) and the end cap (which I did not add in. Probably about 1 kg - that is dense timber!).

The legs are 5" x 3 5/8" and 28" high Jarrah. They each weigh 10 kg. Total 40 kg.

The stretchers are laminated to 4"x2" Jarrah. They are approximate lengths so far. Total weight for the 4 pieces is 15 kg. This does not include the pieces to add on to form an internal rebate, and then the 1/2" thick boards to form a shelf. There is probably another 15 kg there.

Now add the leg vise. The wood screw does not weigh much. I won't even add it in. However, the board for the chop and the sliding deadman is 8" wide x 2" thick. This comes in at 12 kg.

There are a few other bits-and-pieces (slide, dogs, etc). Call it 2 kg.

That's a total of 181 kg ... or (at 2.2 lbs per kg) 398 lbs!

It is indeed a lot of timber. That is what has surprised me. Every time I look round for a board to build something, I have to haul out more than I anticipated. Much of what I have used has been salvage saved over several years. I've tried to make do rather than go out and purchase more (hence the dog hole strip pieces when I ran out of oak). I mentioned costs in my last post. Wood is expensive. Good benches are expensive to build. Now I think that the vises are the least expensive part.

Regards from Perth

Derek

Re: Bench build update

#5

Re: Bench build update

roger lance

Derek....you are making good progress....that mass and longer top will be great assets to hand tool work....and another nice improvement is your new top will be so much lighter - visibility will greatly increase which can be seen in the photos already....just about all bench tops are made to be removed for helping a move including my Shaker styled bench....be careful Bill, you might get the urge to make a similar bench :D .

Re: Bench build update

#6

Re: Weight estimate

TomD

There is weight, and then there is old guy weight. I was watching this picker show and they were moving this butcher block they called 300 pound, but probably had like 4 cubic feet in it.

Not only is it practical to not attach the top. but I haven't actually attached the top on either of my benches. The second one is heavy enough it doesn't move. That said my experience with knockdown furniture to date is that I never have the time during a move to break it down.

Re: Bench build update

#7

Not likely

Bill Tindall

While I can see that someone devoted to doing woodworking in the 18th century style could get motivated to build a bench to be consistent with that style of work, such a single purpose bench would not be suitable for my needs. These benches are a life style, not a prerequisite for making stuff.

I do enjoy admiring the traditional benches, some of which are of the quality of fine furniture and attractive to boot. Even the battered and broken ones from ancient commercial shops have charm.

However, I once worked a bit in a shop with traditional vices, the only vices of this kind I have ever seen in a shop (they have since been replaced with metal vices). After having grown accustomed to quick release vices I found the tedium of slowly turning them in and out intolerable. Whatever advantages traditional vices have doesn't seem to be outweighed by the advantages of a metal vice, for it is modern vices that I see in every shop I visit.

The traditional benches certainly have their advantages in being able to conveniently fasten stuff to the bench. But immobilizing parts and assemblies is not something that occupies a lot of my woodworking time and I have never failed to find some means of fixing something to the bench as needed. I have an extravagant "clamp" collection that even includes 3-25 pound bags of shot.

Then there is acreage. Again I have grown accustomed to what most would consider a huge bench. The acreage provides room to store parts and materials, and keep tools on the bench whilst working, instead of in the tool chest.

My bench needs to be multitasking, even at the expense of efficiency which a bench dedicated to specific activities would provide. I both prepare, assemble and finish parts for furniture projects on the bench. But it also serves as a bench for house and farm maintenance. 14 stair treads and risers are stacked on it as we speak. To that end it has a 1/8" composite (white Masonite sort of stuff) replaceable covering that is immune to oil, grime, finish, abuse and it's readily cleanable or replaceable as needed.

Re: Bench build update

#8

Re: Bench build update

Guillaume Dery

I love the English language :)

Only in English can a 90 kg top be called lighter (because of the colouring).

Sorry but that made me smile...

Guillaume

Re: Bench build update

#9

Re: Not likely

TomD

"These benches are a life style, not a prerequisite for making stuff."

The bench scene is different from the bench. A real bench is a jig for efficient hand work. It may not be necessary but for the moment I don't know of many serious cabinetmakers who do without it.

In shops that are semi assembly lines, workstatiion predominate these are individual stations for doing one operation only, or at times several related ones. You take your product and break down every single step, and then you create a work station for each.

But shops that build one-off use conventional benches. On the power tool side there are stations for actions, like a chops saw station. We don't see much of that for hand tools. Some makers have set up stations for each major group of actions that a bench would do. Particularly specialist dovetail station.

"However, I once worked a bit in a shop with traditional vices, the only vices of this kind I have ever seen in a shop (they have since been replaced with metal vices). After having grown accustomed to quick release vices I found the tedium of slowly turning them in and out intolerable. Whatever advantages traditional vices have doesn't seem to be outweighed by the advantages of a metal vice,"

There is no reason a traditional vise can't be quick release Just about every traditional vise has a quick release equivalent. The exception to my knowledge being the L shoulder vise, though if it is not made it could easily be made. It is mostly a vise for making carcase dovetails and drawers where all day long you can labour with the same opening.

" for it is modern vices that I see in every shop I visit."

I do wonder about these shops you visit. Is anyone of note in them? If you go back to the Landis book, it was mainly a catalog of his roadtrip across Canada, and the US, dropping in at well known shops, and taking notes about the benches he found there. Indeed many used metal vises like Record, or Pattern maker vises. However those are not disassociated from woodwork or benches in the traditional sense. The majority of these guys had their vises assembled in standard benches, and some on workstations also. Major makers like Michael Fortune who is distinguished both as a studio woodworker, and consultant to industry, are ardent workbench users and makers. It isn't just a hobby thing.

Re: Bench build update

#10

Re: Bench build update

TomD

Only in French would the word for darker or lighter tone be the same as "Charge!"

Re: Bench build update

#11

Re: Bench build update

roger lance

you're right...."brighter" might have been a better choice....but then someone might misconstrue that with intelligence...."illustrious" then, no thats like fame...."illuminated" no that's like getting something explained....geez, I only went to public schools and we're not known for our verbal skills....you know what I'm sayin?? :D .

Re: Bench build update

#12

Re: Bench build update

Guillaume Dery

Touché :)

All languages have their idiosyncrasies.

I was just highly amused picturing Derek in his workshop going "Lighter??? WTF do you mean lighter? Did you not hear me? This #$% top weighs 90 kgs!!!"

What can I say, I am easily amused and that struck my funny bone

Re: Bench build update

#13

It's the English

Bill Tindall

A service technician sent from England to fix a machine was "buried" inside it with only his toes sticking out when he called for a "torch". In fact we kept a torch at a bench adjacent to the machine, but it seemed odd that he would be needing to melt something in there, especially so that he took wrenches in with him. It didn't help the confusion when we asked if he wanted it lit. Fortunately the situation was clarified and we passed him a lit "flashlight".

Re: Bench build update

#14

A question for all ..

Derek Cohen (in Perth, Australia)

Jameel generally advises that one bolt the end cap to the bench. The vise must create some pressure as the screw is tightened.

My understanding is that bolts are necessary as this is all that holds the end cap to the bench for most users of his tail vise. Now I would rather not bolt on the end cap (it looks ugly), so I am wondering whether a combination of dovetails at each side of the end cap along with wooden pins through the end cap into the 1" x 1" tenon (see pictures in the first post) would be strong enough to withstand the forces involved?

Regards from Perth

Derek

Re: Bench build update

#15

Re: A question for all ..

wilbur

Not having built a wagon vise (or whatever you choose to call the Benchcrafted vise), why do you need an end cap in the first place?

Re: Bench build update

#16

Re: A question for all ..

Hank Knight

Derek,

The vice does, indeed, exert some pressure on the end-cap when it it tightened. But, in practice, the pressure you need to hold a piece of stock still and flat on the bench top while you plane it is minimal; otherwise, your work piece tends to bow. Unless you forsee that you will need to really crank down hard on your wagon vise for some other reason, I think dovetails and dowels would be plenty strong enough for this application. I have a Veritas twin screw vise for my end vise. I tend to over-engineer everything, so I bolted and dovetailed my end cap to my bench. I know I'll never have to worry about the vise pulling the end cap off, but I think I could have gotten away with the dovetails alone. If I recall correctly, the old style traditional benches relied on dovetails (see the plans for the Klaus bench in The Workbench Book by Landis).

My $.02.

Hank

Re: Bench build update

#17

Re: It's the English

Alex Grigoriev

I'm afraid after the many years, French in France, and French in Quebec are very different, too.

Re: Bench build update

#18

Re: A question for all ..

Derek Cohen (in Perth, Australia)

Not having built a wagon vise (or whatever you choose to call the Benchcrafted vise), why do you need an end cap in the first place?

Hi Wilbur

The end cap connects the vise screw to the bench. Without the end cap, the screw would just turn on itself. Connected to the bench it will move forward or back.

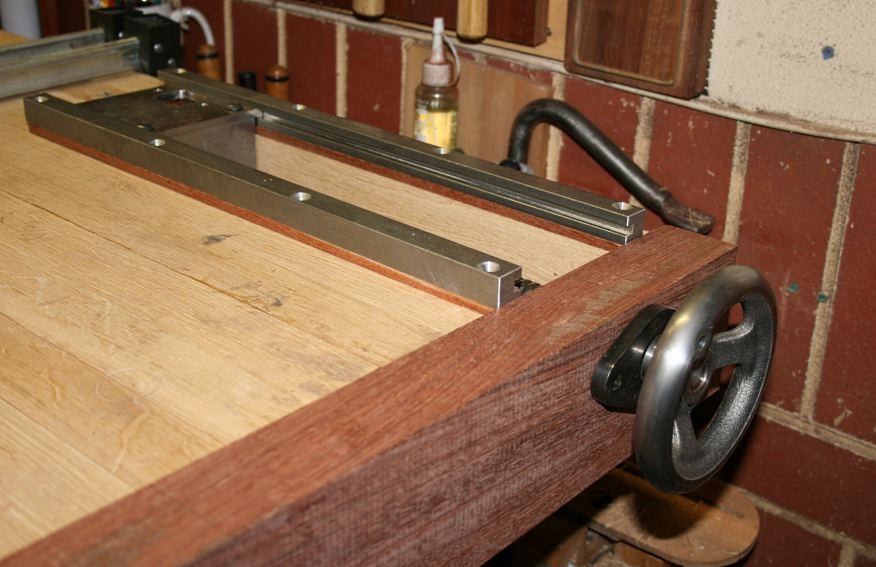
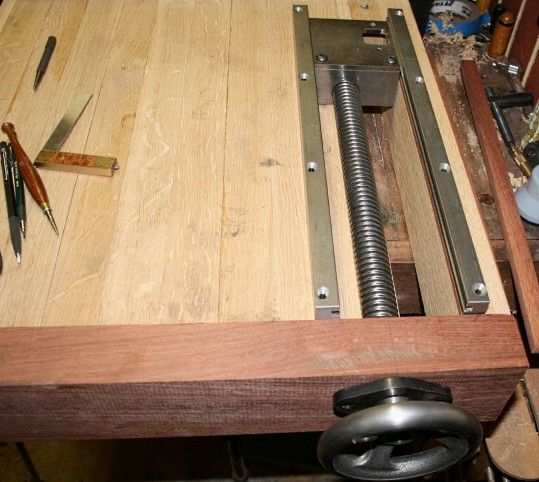
Here is the underside of the bench with the wagon vise under installation (flip the image 180 degrees in your mind to recognise the vise is on the rear left side of the bench). As the bench top is 3 1/2" thick and the the end cap is 4" high (to fit the wheel at the correct height), you will see a spacer under each steel runner (the spacers are each 1/4" high. A 4 " thick bench would recess the runner by 1/4").


Here is a view into the vise. The area for the screw was routed out. The slot for the moving dog hole was built in.


The vise, end cap and side rails are loose at this point. They have been cut to exact size. The next step is to dovetail the sides to the end cap, and then glue and pin the end cap t the bench via the tenon (shown in the original post).

Regards from Perth

Derek

Re: Bench build update

#19

Re: A question for all ..

Pam Niedermayer

Seems that if you hadn't already done a simple mortise and tenon for the end cap, you could have attached it with a sliding dovetail; but since that's no longer an option, it seems the screws holding wheel in place could be made larger, maybe to run through the cap and be bolted on the inside if that wouldn't interfere with the vise's operations. Other than all that, do you mean you want to dovetail the front and back ends into the sides of the cap?

Pam

Re: Bench build update

#20

Re: A question for all ..

Derek Cohen (in Perth, Australia)

Seems that if you hadn't already done a simple mortise and tenon for the end cap, you could have attached it with a sliding dovetail; but since that's no longer an option, it seems the screws holding wheel in place could be made larger, maybe to run through the cap and be bolted on the inside if that wouldn't interfere with the vise's operations.....

Hi Pam

Interesting ideas there!

I did consider a sliding dovetail. In the main, the tenon (or a sliding dovetailed tenon) stops before the section for the vise thread and dog strip. About 3/4 of the width of the bench top would be secured by the sliding dovetail. As a result, the one end of the end cap would still need to be secured to the bench (with a dovetail). At the other side, the edge of the sliding dovetail would look ugly if it exited the end cap. If the side board were to be dovetailed into the end cap, then the sliding dovetail must be blind, which is impossible to do.

Great idea on using the screws for the holding wheel - however, as I recall, the bench in that section is open air (it is where the bench was routed away to fit the screw).

Other than all that, do you mean you want to dovetail the front and back ends into the sides of the cap?

Yes. Dovetail both side boards into the end cap. Plus drawbore or pin the endcap through the internal tenon. I would have thought this strong enough, but want to get the opinion of others to be sure.

Regards from Perth

Derek

Re: Bench build update

#21

Re: A question for all ..

Pam Niedermayer

I see, there's nothing but tenon behind the cap at the vise opening? Is the wheel attached to the cap only? On your solution, I'd have to see a sketch to comment on it. Without that, it sounds like you'd have to lengthen the main bench to make the dovetails, or perhaps shorten it? Maybe a butterfly?

Pam

Re: Bench build update

#22

Re: A question for all ..

Derek Cohen (in Perth, Australia)

I see, there's nothing but tenon behind the cap at the vise opening? Is the wheel attached to the cap only?

Yes.

On your solution, I'd have to see a sketch to comment on it. Without that, it sounds like you'd have to lengthen the main bench to make the dovetails, or perhaps shorten it? Maybe a butterfly?

There is no need to lengthen/shorten the bench to dovetail the ends. The two side boards have been deliberately left loose for this purpose.

A solution? I don't know. I just do not want the bolts to show. Here are a couple of images of bolts being used off the Benchcraft site ...


This one is Chris Schwarz' ..


Regards from Perth

Derek

Re: Bench build update

#23

Design flaw?

Bob Hackett

If I had designed a vise like this I would have retained the screw at the opposite end with a retainer plate where it would have been supported in depth in the body of the bench top rather than two screws in the end cap. That way the clamping forces would be distributed thru the strongest part of the top and not dependent on the joinery of the end cap or the hardware holding the garter/cap assembly.

Just the metalworker in me speaking. Metalworkers usually expect far more grunt capabilities from clamping devices than our WWing peers. :D

Re: Bench build update

#24

Re: A question for all ..

Pam Niedermayer

I guess, given the problem, I'd take Chris' route; but even that is inherently fallible since all the bolts are screwed into the bench end grain. You can always veneer the end to hide the bolts.

Pam

Re: Bench build update

#25

Re: A question for all .. *LINK*

Hank Knight

Pam suggested veneering the ends to hide the bolts. I used plugs to the same effect, with "bed bolts" from Lee Valley - a small version of their Bench Bolts with brass barrel nuts. They worked great and virtually disappear with plugs covering the bolt heads.

Hank


Bed Bolts