Home Articles Forums Gallery Marketplace Videos

WoodCentral Forums

Knowledge You Can Build On — Est. 1998

ADVERTISE HERE - FREE TRIAL

help w frame&panel curved in depth and profile

Posts

Re: help w frame&panel curved in depth and profile

#76

Adam of Oakland

progress today

Adam of Oakland

My next step was to veneer the curved panels. From my experience using cauls to hold down the second layer of 1/4 wig wood ply, it seemed that a different clamping scheme would be required. the cauls I made just never appeared to deliver sufficient pressure at mid span, and no manner of wedging/tightening seemed to deliver this without causing a gap to form elsewhere.

I posed the question to you all and it quickly became apparent that I should try using vacuum bagging. I went with a canned solution from www.joewoodworker.com because I don't have much time to create my own and he seems to ahve a good option. Best part is the vinyl bag that he makes, I think. That sucker worked perfect.

I'll begin with showing where I left off with the panels today, sanded to 180grit.


All this wood started from a reclaimed cache of redwood that I found at Earthsource Lumber, harvested from an abandoned water tower in Northern California. Lots of scrub planing and wood picking ensues.


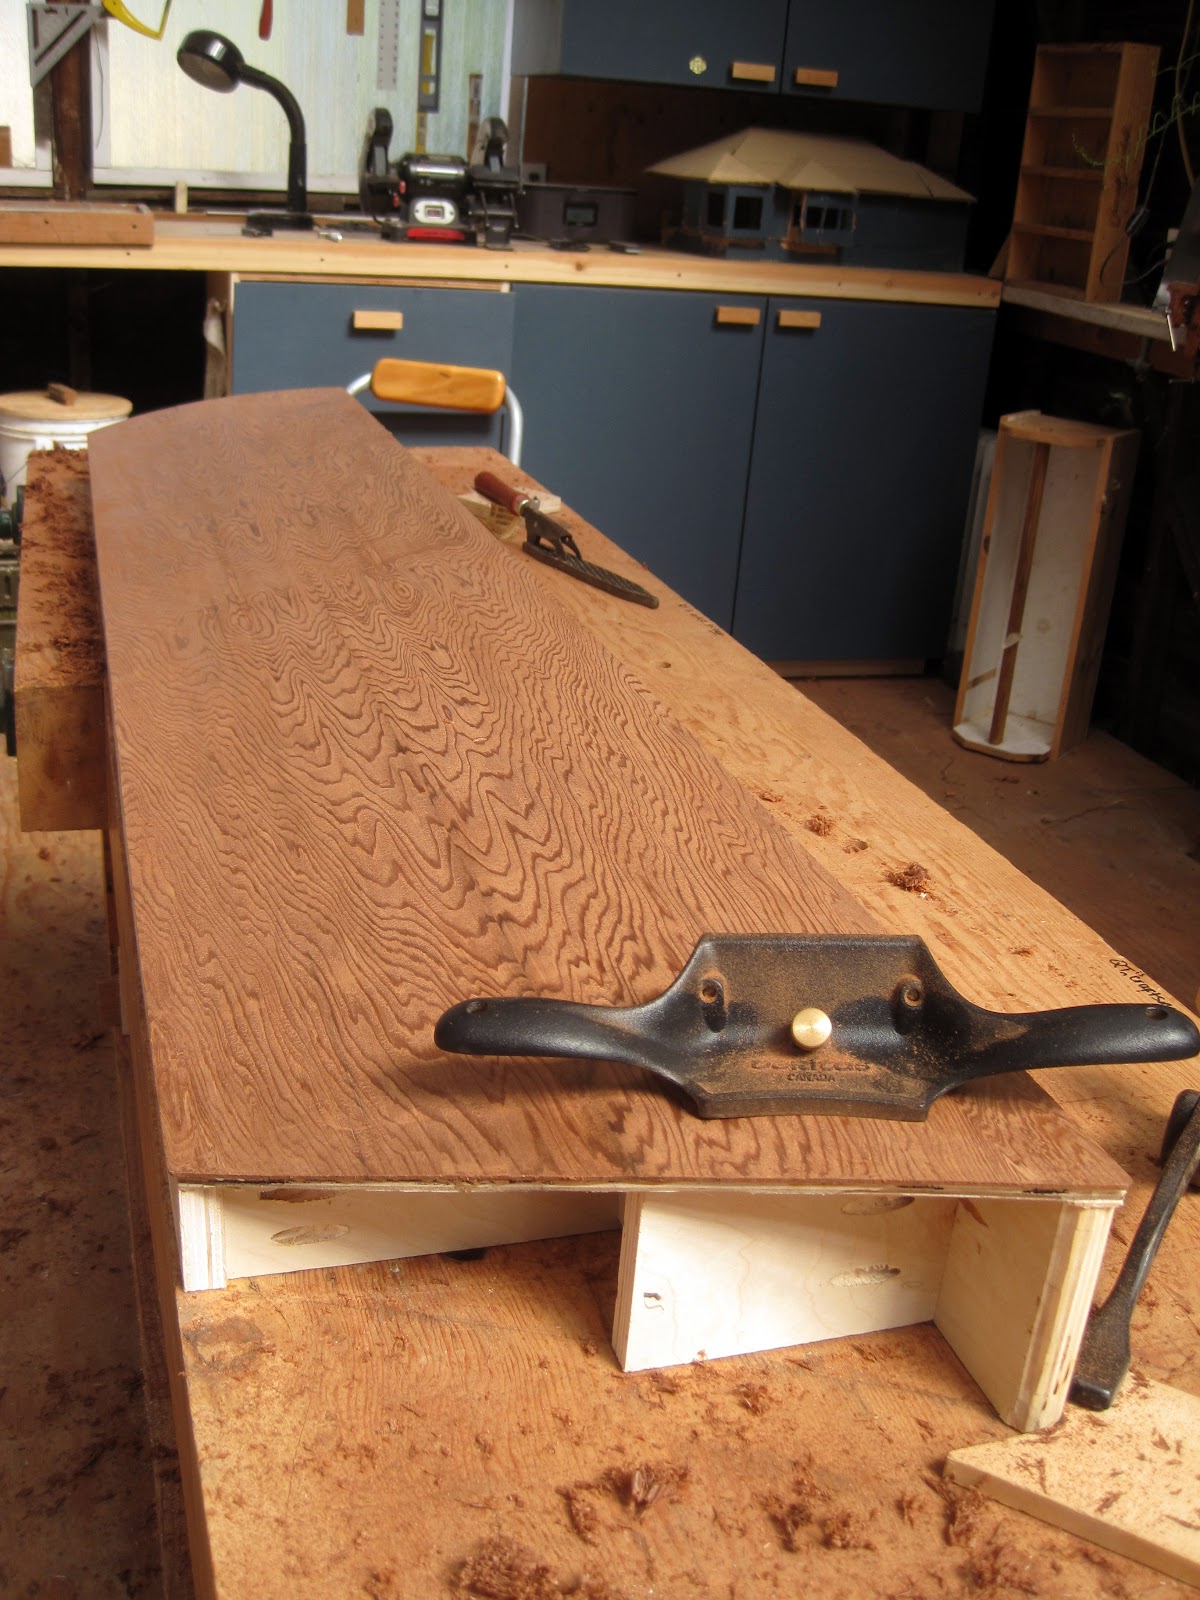
I don't have the pics on hand, but essentially I took the planks at ~8" wide, and planed them on my machine. I then resawed into 1/8" sheets, and then sent these through the planer again to clean up the sawn edge. the final milled thickness was around 3/32", So I had to send these sheets through on a strip of 3/4 plywood. I used masking tape sandwitch with hot glue to hold the sheet to the bed. I can't recall where I learned this trick but it is quite effective....Jimmy Diresta maybe?


Ellis Valentine gave the tip to use nails like so to gather enough edge pressure to join the bookmatched veneers. Ellis, i hope this is what you meant. It worked pretty good, for sure! I had to apply some weights on top of this just to make sure it didn't buckle upwards, but they were left out of the picture to show what was going on.


My ribs were too far spaced to handle the vacuum pressure, so I added extra ribs, at roughly 4,1/2" spacing and this helped prevent the panel from dipping under the vacuum pressure.


ON the short panel, after a few days of being in the hot garage, I noticed a few cracks in the veneer. I don't know why, perhaps I took it out of the bag too soon. The ambient temps were 70-80 degF in the garage and I had it in the bag for almost 6 hours. I filled the cracks with a slury of redwood sawdust and white glue. The long panel has yet to exhibit this problem, although tonight I heard a few audible split sounds in the panel, so i'm not sure where this will end up.


I used UniBond 800 Urea Formaldehyde glue which dries hard, but I don't want to inhale any of that dust while planing/scraping it off the edges.


My scraper plane worked magic on the rough sawn side of the bookmatched veneers, before using the palm sander.
Re: help w frame&panel curved in depth and profile

#77

Re: progress today

Jesse Cloud

Its been a long time since I used Unibond so I can only guess that 6 hours would be long enough. When I doubt, I usually just leave the vacuum on overnight. I figure it might do some good and won't hurt.

If the veneer is cracking, that may mean that the wood is brittle. You can buy veneer softener from Joe Woodworker (though its too late for this glue up). Glycerin will also do the job or there are lots of home brew recipes on the web. The process takes a while, though. You basically saturate the wood, then dehydrate it slowly with newsprint changed a few times a day for a few days.

Anyhow, great progress. I can't wait to see what's next. Thanks for sharing.

Re: help w frame&panel curved in depth and profile

#78

Question

Bill Tindall, E.Tn.

I have enjoyed reading about this project. Thank you for the considerable effort to post the progress.

Question, please elaborate as I don't understand: "I used masking tape sandwitch with hot glue to hold the sheet to the bed"

Book match comment: this question may be more to Ellis.....I thought it was typical to tape the back of the book match with the tape stretched to apply tension, turn over and open the fold, apply glue to joint and fold back tight. Further, at this point apply face glue and glue to substrate.

For others contemplating a bag purchase, the ease of handling a urethane bag makes its extra cost worth the benefit even for someone as frugal as I.

Re: help w frame&panel curved in depth and profile

#79

Adam of Oakland

Re: Question

Adam of Oakland

Hi Bill - Thanks for reading -

As to the tape trick. I take two pieces of masking tape, apply to opposing faces of material I want bonded, and then run a bead of hot glue on the back of one of the pieces of tape. Press together firmly, and you have a quick, and low profile double stick tape solution. I wish i could cite who i read that from, but can't right now. I believe they used cyanoacrylate glue but hot glue works OK as long as you act quickly and press firmly.


Here's the planer "sled" where I had used this approach


As to the question about edge joining the veneers, You're right, I did use masking tape, first with small pieces pulled across the joint tight, then one long strip along the joint. The tape was applied to the "show" side. I then fold along the joint, run a bead of glue, and then flatten. The nails just seem to apply a bit more pressure and are an added assurances against the tape letting go. Since the veneers are 3/32 they almost act like regular boards rather than paper thin strips.

Somewhat off topic, I am able to use virtually the same HTML source codes for my posts here that are used on my personal blog. however I do edit some of the commentary to make it more wood central specific. Hopefully that's not breaking any of the forum rules and if so i'll adjust. I don't post this on other forums if that means anything.

I figured this out serendiptitously when posting a while back because I had some questions for you all and figured I could just harvest the image links used from my blog to help illustrate. Usually forum software disallows html tags, but it doesn't seem to here (which is really cool by the way!) and I have to use the forum's tagging system. the main thing is image links. This forum uses [ img ] to embed pictures, however < img > also works.

Re: help w frame&panel curved in depth and profile

#81

Re: progress today

don stephan

To know when a pressing can be removed from the bag, a tip I picked up from Darryl at Vacuum Pressing Systems is to pour a couple tablespoons of the adhesive into a zip lock bag, put that in a second zip lock for insurance, and then put the bags on the outside of the vacuum bag. If using a heating blanket to speed curing, the bags go under the blanket. When the glue in the bag is getting stiff the pressing can be removed from the vacuum bag.

Last spring I had a marquetry pressing develop fine cracks, but the second a couple weeks later did not. I wondered if I had added to much water to the urea formaldehyde glue for the first pressing. Not sure.

Re: help w frame&panel curved in depth and profile

#82

Adam of Oakland

Re: progress today

Adam of Oakland

Hi Don - Yes! I had read something like this, too...actually what I read was just a single bag for a test dollop of glue. double bagging makes more sense as less air is allowed to circulate through. WHen I pulled the pieces from the bag, the glue was hard but not absolutely brittle which takes overnight it seems.

But in this case with the veneers popping hairline cracks, I am GUESSING that it has something to do with the brittleness of the wood. I noticed the splits this morning in my second panel, and a couple more developed as the ambient temps changed throughout the day.

I will try using some sort of softening agent next time I try this. for sure. Maybe this isn't the best wood for the application. ack!

Re: help w frame&panel curved in depth and profile

#83

Ellis Walentine

Cracks

Ellis Walentine

Adam, those cracks look to me like they're due to shrinkage. Did you check the moisture content of the redwood before you glued it down?

Ellis

Re: help w frame&panel curved in depth and profile

#84

Ellis Walentine

Re: Question

Ellis Walentine

You're right about the tape clamping method, Bill, and it allows you to proceed directly to laying down the veneer without having to scrape the glue squeezeout. I use this technique all the time with typical veneers (in the 1/28" to 1/40" thickness range). For this project, where the veneer has appreciable thickness and will be laid up on a curved substrate, it seemed that pre-gluing the seam(s) would be added insurance that the joint wouldn't open up at the show surface. It is probably overkill, but I tend to err on the safe side.

Ellis

Re: help w frame&panel curved in depth and profile

#85

Re: Cracks

Barry Irby

I can't remember which way, but doesn't wood tend to warp/cup either toward the center of the tree or away from it? Would that make a difference here? Another thought, this is reclaimed lumber. How long has it been cut? Wood's properties change over the long haul. Framing in houses changes somewhere between 75 and a hundred years.

Re: help w frame&panel curved in depth and profile

#86

Just looked it up.....

Barry Irby

The images show wood warping with the concave side away from the pith or center. If you put the fairly thick veneer on and forced it to bend the opposite way that may have been an aggravating factor.

Re: help w frame&panel curved in depth and profile

#87

Adam of Oakland

Re: Cracks

Adam of Oakland

I don't have a moisture meter so can't be sure. The veneers were pulled from 1" thick boards that had been sitting in my garage for some months though.

I have a metal corrugated roof with some translucent sections and it gets pretty hot on sunny days with (almost) direct sunlight. Not sure if that matters.

The veneer tended to cup in whichever direction was up during the day.

maybe it was just too old and brittle to be applied as thick as it was?

Next question I have is whether it will stop cracking...guess only one way to find out :/

Re: help w frame&panel curved in depth and profile

#88

Re: Cracks

Jesse Cloud

The question now is What to do with the cracks, if anything?

Have you decided on a finish yet? That will work into the decision. If you will be painting it, thin you can just fill in with Bondo or wood filler.

The problem with those is that it is very hard to make the repair blend in with the rest of the piece. Most wood fillers advertise that they are "stainable", but it is unlikely that the filler will absorb the stain in the same way that you wood will, so you wind up with an off-color blotch where the repair was.

If you are using a clear finish, such as poly, shellac, lacquer, etc. I would suggest that you fill the cracks with an epoxy that will dry black or clear. Fill the cracks a little proud of the surface, then scrape or sand it flush. The cracks will still be noticeable, but they will blend in better, looking like a natural flaw in the wood.

If the wood were not bent, I might try cutting out a patch from a scrap of the redwood with similar grain, and gluing that in, but it would be hard to get the patch to bend just right. If you go this way, rough cut the patch a little larger than the flaw, tape or hot glue it over the flaw, then use a sharp chisel to cut both the patch and the flaw - thats your best chance of making a patch that will fit well.

Good luck and let us know how it goes.

Re: help w frame&panel curved in depth and profile

#89

Adam of Oakland

Re: Cracks

Adam of Oakland

Hi Barry - Yep, i gave this a thought and then remembered that since it's a bookmatched veneer, surely one side is wrong! lol

As to your comment about the wood, i have noticed doug fir gets exceptionally harder as it gets older...given this came from some old water tower, it would not surprise me at all if it was 75+years old...

Re: help w frame&panel curved in depth and profile

#90

Adam of Oakland

Re: Cracks

Adam of Oakland

Hi Jesse - right, I plan on using a poly finish, built up just a tad for durability. So the cracks will show.

I'll have to give your epoxy idea some thought. I used a slurry of redwood sawdust collected from the bandsaw and white glue in the short panel. it seemed to work OK. When I sloshed some mineral spirits on after the final sanding, I couldn't see them, but I'm colorblind so the repair might be a bit harder for me to see.

Anyway, I do like the idea of using the black epoxy (i'd probably mix in some microspheres to improve its gap filling) since it's likely to be mroe durable. Plus the cracks add character, right?

My biggest worry now is: will it stop cracking after it aclimates? I suppose I should brace myself for another round of it when I lug this piece into the house, too :-)

If I had time to do this over again, I'd probably look into soem sort of softening agent to weaken the cross grain just enough to accept the bending.

Re: help w frame&panel curved in depth and profile

#91

Re: Cracks

Barry Irby

It would be interesting to see if one piece cracks and the other one does not. That woudl tell you something. If only one of them cracks and you can tell which way its facing you could have slip matched them. Then they woudl both be right.....or wrong. Something to file away for "next" time.

Re: help w frame&panel curved in depth and profile

#92

Re: Cracks

John in NM

The other thing I've done for a filler is to mix the dust with hide glue. It shrinks more than other binders, but it doesn't resist finish like most others do, so it seems to blend in a bit better.

Re: help w frame&panel curved in depth and profile

#93

Adam of Oakland

OK Ready as it ever will be to install

Adam of Oakland

Hi Folks - Well there were a lot of life events that slowed my progress here but I think it's nearly done. The next step is to lug 'er into the house, scribe to the walls, and skrew it into the trundle bed. I'll follow up on that process in a final post.

I tried a different finishing schedule for me based on your feedback. My standard is Watco Danish Oil but since it builds up so slowly, I liked the idea of trying poly and seeing if i could make something that didn't look like it was coated in plastic. Sand to 180, then a few coats of Minwax oil polyurethane that was thinned 3 parts poly, 1 part mineral spirits so that I could use a rag to wipe it on thinly. before final coat of poly, I skuff sanded with 400grit. After final coat, I used 0000 steel wool,and then a coat of paste wax. I wanted a finish that was somewhat durable, but still left the wood feeling like wood. It's a bit shinier than I like, you still very much feel the wood when you touch it. expecially the panels where you have the harder winter rings a bit proud of the summer growth.


Here, I'm building up a few more pieces of redwood to strengthen the crotch, and infill the area where there will be more relief carving


I scribed in some masking tape off of the panels so that I knew where to cut with a handsaw to bust off the larger chunks of the crotch


The Auriou rasp is a joy to use


The frame now finish sanded


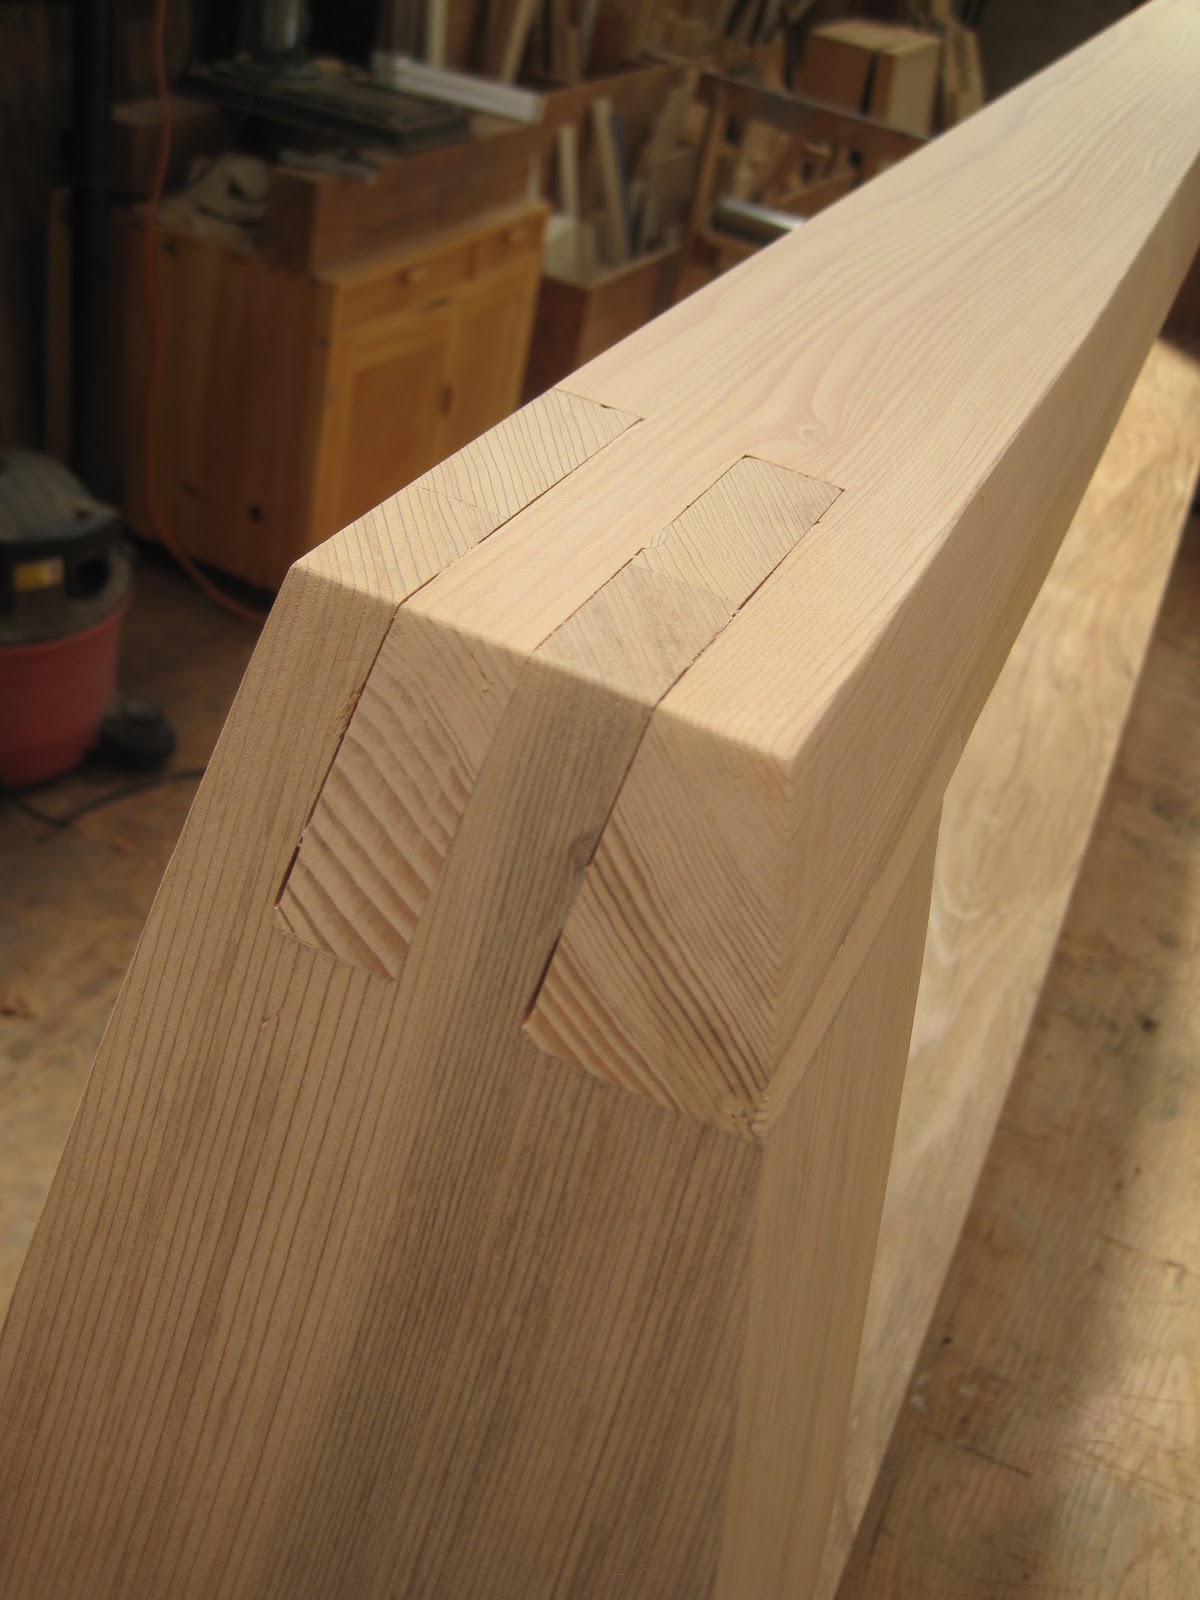
Wanted to show off the gappy teeth here, especially the wider edge, where a panicked hammer blow softened the edge a bit. This however is in better shape now if you can imagine than before applying a steam iron to the bruised wood to plump it back into place. Poor joints.


Here's my finish application tool, a waded up rag made from cotton duck of a worn out pair of carhart jeans. I love this cloth for applying finish as you can kind of burnish the wood it seems.


So once everything is finished, I just skrewed the panels into the frame like so. Notice I also beavered out a fair bit of wood along the interior edges to make scribing into the walls a little less horrible.


Re: help w frame&panel curved in depth and profile

#94

Adam of Oakland

INSTALLED (finally, sheesh!) *LINK*

Adam of Oakland

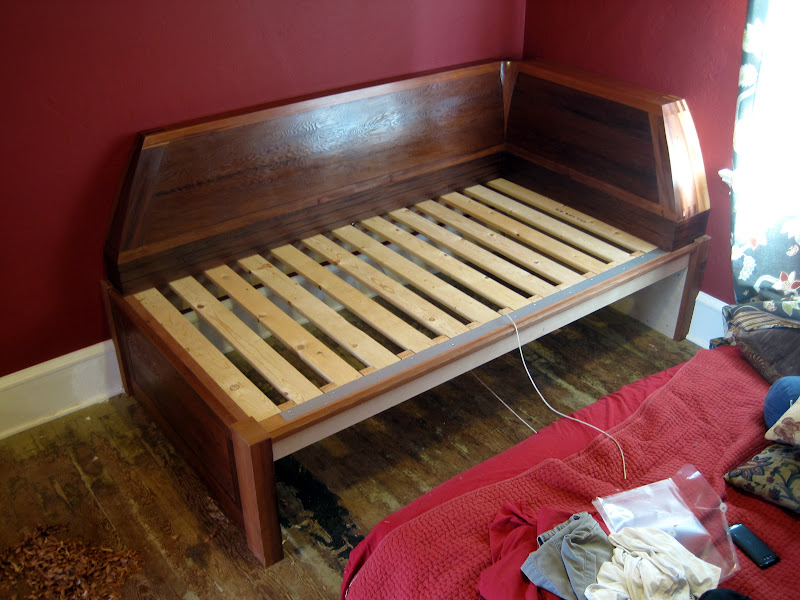
OK, here the piece rests, scribed into the surrounding wall, and screwed into base from the bottome via pocket holes I drilled a long time ago. I've dreamed of this day for a while as this is a perfect crash-pad for napping after a long ride or run. With prep for Oakland's Marathon up in March, It's nice to have this thing done when I begin the longer runs starting in December.

The walls are a deep red color and it makes for a pretty dark room. This might seem too dark and dreary, however the rest of the house is so brightly lit, that it's nice to have a room that is a foil to that. It's quiet, and also stays cooler during the summer months.


Here's a youtube on how the trundle is deployed, using pulleys rigged on the interior of the base. Sorry, can't figure out how to embed vids on WC... I still need to make a handle for the cord. The trundle rides on six 1" non-swivel casters:


Trundle Action

Re: help w frame&panel curved in depth and profile

#95

Re: INSTALLED (finally, sheesh!)

Jim Matthews

Kudos.

The faired, compound curve where the panels join is slick.

I'm intensely jealous of your obvious skill.

Jim

Re: help w frame&panel curved in depth and profile

#96

thank you for sharing the journey

Bill Tindall, E.Tn.

It has been fun watching it all come together. You have design talent. It is satisfying making stuff for your house rather than buying it from IKEA. What's next?

Re: help w frame&panel curved in depth and profile

#97

Re: thank you for sharing the journey

Jesse Cloud

Great thread! That was an awesome project.

The sculpted corner joint blew my mind.

Like Bill, I can't wait to see what's next.

Re: help w frame&panel curved in depth and profile

#98

Adam of Oakland

Re: thank you for sharing the journey

Adam of Oakland

Thanks Jim, Bill, Jesse - glad you guys enjouyed the build thread, it was fun posting progress and i received a lot of very valuable suggestions from the WC community to get this thing done. The veneering process, panel construction, finishing to name a few.

I dont know what i'll work on next. Maybe some shop furniture? I have an old emmert pattern maker's vice that needs a repair and mounting. definitely want to share that. Gotta work on some dust collection in my shop and hook up a jointer/planer to it.

My next big project is to go after our little jack&Jill bathroom. flooring, shower, cabinet are all worn out and tired. Plus the toilet is a water hog compared to the new ones...I want to get some help from an architect to design the remodel since they tend to know a lot more about what is being done today as far as shower stall, lighting, flooring solutions go.

Re: help w frame&panel curved in depth and profile

#99

Take a look at

mdclor

Houzz.com. The site has over 750,000 pix of bathrooms.