Home Articles Forums Gallery Marketplace Videos
Abingdon, VA – Tree Cutting & Portable Sawmill
New here? How did you find us?

WoodCentral Forums

Knowledge You Can Build On — Est. 1998

Manual for setting up the Veritas Skew Rabbet Plane (part one: cross grain)

Posts

Manual for setting up the Veritas Skew Rabbet Plane (part one: cross grain)

#1

Manual for setting up the Veritas Skew Rabbet Plane (part one: cross grain)

The Veritas Skew Rabbet Plane is one of the most important tools in my workshop. It is used to create fine rebates in drawer bottoms ...

... and planing large rebates for the rear panels in cases ...

There has been some discussion about the difficulty in setting up this plane, in particular, positioning the blade and nicker. This is complicated by the skew blade, which is more tricky to sharpen to the ideal profile than a square blade. There is a significant advantage for a skew blade, which makes this worthwhile, this being that the plane will plane cleanly across the grain.


You will note that the front knob has been removed on my personal plane. I will explain this shortly, and advise that others do the same.

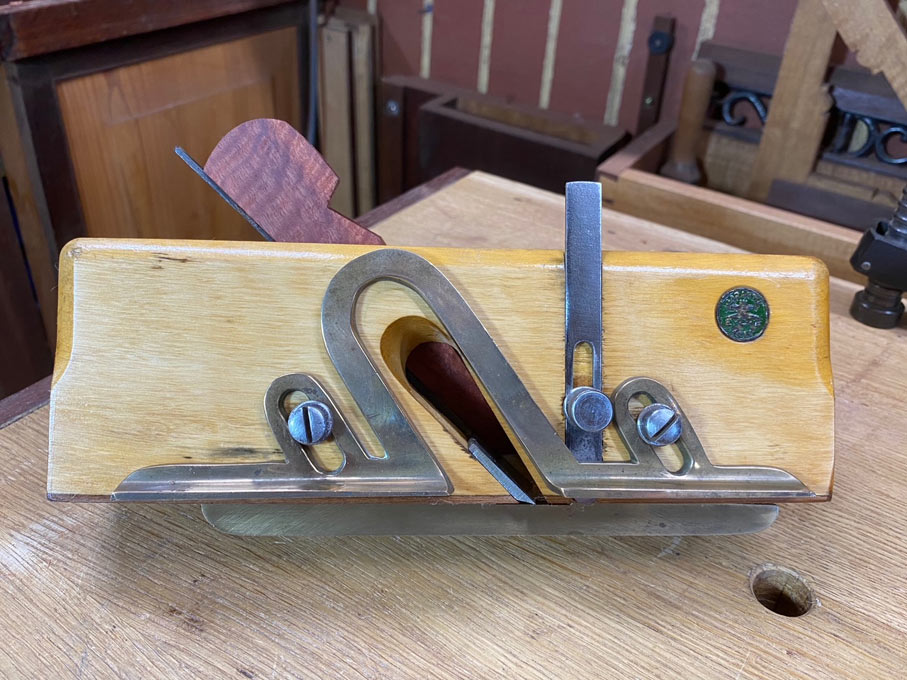
Two items here: the first is the sub-fence. This is 240mm x 40mm. It provides greater registration, while the wood offers less resistance. Secondly, the brass knob for the depth stop has been given a slot for a screw driver. This makes it easier to lock down more securely.

I have two fences, a straight one for rebate work, and an angled one for� raised panels� ...

There are two areas which are vulnerable to movement, which will be disastrous: the depth stop, above, and the fence, which is locked down by circular brass rings. It pays to tighten these further. I use a pair of plastic-mouthed vise grips (which will not damage the brass) ...

Inside the body is a screw ...

This controls the nicker. Loosen the screw and the nicker will slide in-or-out of the body. The nicker is used when planing across the grain. It sits ahead of the blade and creates a path for the blade to prevent tearout. It is not needed when planing with the grain.

It is the harmony of blade and nicker that determines how well the rebate plane with work:

1. The blade must project a smidgeon (technical term for 0.5mm) from the side of the body. This is necessary to cut into the inside corner of the rebate. If it did not, the plane will be forced progressively away from the wall, creating a slope instead of a square face.

2. The nicker needs to be at, or slightly further away from the body than the blade. If the nicker is set too close to the body, it will not pre-cut for the blade, and the result will be tearout along the shoulder of the rebate.

3. The blade projection needs to be set parallel with the sole. If it is canted one way or the other, it will prevent the floor of the rebate being square to the shoulder.

Set the nicker before you set the blade. This is the nicker. It is screwed on at an offset so that it may either project below the sole, or above the sole.

Remove the screw ...

... and sharpen the nicker. Just a few rubs on a fine diamond stone will do this. Mine is a 20 year old 1200 grit ...

Loosen the screw that holds the nicker barrel, and it will come out ...


Setting the nicker


…� with blue tape ... what else did you expect from me!� � ....

Three layers of blue tape will total about 0.5mm. Replace the nicker and barrel. Orientate the screw to the lower end for the nicker to project for a cut ...

Now place a rare earth magnet on top of the tape. This will lift up the nicker to this height ...

Once the nicker is set, install the blade. Set is just a fraction inside the nicker. Once positioned and locked down by the lever cap move the set screws into position (against the blade). This will enable for set up to be done without any fuss.

It is not that easy to see here, but both the blade and nicker project from the body ...

Now set the depth stop, and lock it down. The ruler is measuring from below the depth stop to the tip of the blade (not the edge of the sole) ...

Here is a demonstration board, where we will create a rebate across the grain. This is soft wood, which will penalise any set up errors with tearout along the shoulder line.


To set the fence, what I do is mark the width of the rebate with a cutting gauge, and then place the nicker in the cut line, and push the fence up against the side of the board.


The hand position is thumb where the knob would have been, pushing down, and palm against the fence, pushing against the side of the board ...

Start the first cut at the far end. This creates a down hill slope, which planes more easily (like planing with the grain). Also, deepening the shoulder progressively will minimise tearout.

If you notice a little tearout along the shoulder, loosen the blade screw fractionally, and use a plane hammer to tap the blade in a little. I could see this happening here very faintly, made the correction, and then all was well.

Now move back and plane again ...

This is the result we are after ...


Checking for square ...


Setting up the blade

Freshly sharpened blade. The bevel has been hollow ground, and then honed on the hollow. This blade will not need to be ground again for a long time.

Try and set the blade for parallel and side projection at the same time. If it is not possible to achieve parallel, then the bevel angle needs to be corrected. The problem is that, without the blade being parallel with the sole - not with the mouth, per se - one side will cut higher than the other. Do not worry if the blade is not even against the front of the mouth. It will still cut appropriately.


Take your time to get this right. Bevel angle of 30 degrees ...

Place the blade in the plane. Note the set screws against the inside of the blade ...

Once the blade is positioned as close as possible - it is not final at this stage - then tighten up the set screws until they touch the blade ...

Once the blade has been fully positioned, it is unlikely that it will need to be set up again.

When making adjustments, such as re-positioning the blade projection, press the blade against the set screws, then loosen the lever cap, and use the adjuster ...

Regards from Perth

Derek


Re: Manual for setting up the Veritas Skew Rabbet Plane (part one: cross grain)

#2

Re: Manual for setting up the Veritas Skew Rabbet Plane (part one: cross grain)

We usually set the fence by measuring from the nicker to the fence. Using a cutting gauge score the rabbet adds extra time and is not as accurate. 

When using the nicker, the blade does not have to protrude on the side of the plane. It does need a generous clearance inside of the nicker, as your example shows.;


Re: Manual for setting up the Veritas Skew Rabbet Plane (part one: cross grain)

#3

Re: Manual for setting up the Veritas Skew Rabbet Plane (part one: cross grain)

Warren, in regard to setting up the shoulder line, I would not disagree with you with other planes, such as a ECE woodie I owned. This used a knife for a nicker ...

The issue I find with all round blades (as used by Veritas) - both cutting gauges and nickers - is that they score a fine line, but it is shallow. For the best results, use a cutting gauge to start the shoulder cut. The nicker then will cut into the corner of the deepening shoulder.

It is also relatively easy to position the shoulder accurately using a cutting gauge. It is also very easy to set the nicker in the shoulder line and slide the fence against the side of the board. This is the same method I use for setting up a Kinshiro cutting gauge ...

Regarding the position of the blade, my experience is if it does not protrude a smidgeon outside the body, it is likely that the shoulder of the rebate will end up tapering down. 

I shall follow up this thread with a Part Two, which will be planning a rebate with the grain. There the nicker is not used but the blade still protrudes a smidgeon.

My observations are based on my experience - my examples hopefully speak for themselves. I do, nevertheless, try to keep an open mind (there are many ways to skin a cat). What is the experience of others?


Regards from Perth

Derek


Re: Manual for setting up the Veritas Skew Rabbet Plane (part one: cross grain)

#4

blue tape......what else?......you asked......

Well two things: First, there is a new tape that is thicker, stronger, and has more tack than blue tape......3M automotive refinishing masking tape.....it's even available in Walkabout Creek in the Northern Territories......

Second, Veritas has out a new sharpening jig that is designed to handle skewed blades and other blades of odd shape or size......simple to use and very effective......


Re: Manual for setting up the Veritas Skew Rabbet Plane (part one: cross grain)

#5

No

Regarding the position of the blade, my experience is if it doesn't protrude a smidgeon outside the body, it is likely that the shoulder of the rebate will end up tapering down.

No this is not true at all. It would be true for a rabbet with the grain, but the nicker sets the shoulder and prevents this problem. 

I set my moving fillister with the blade 1/32 of an inch inside the nicker and had no trouble making a clean rabbet across the grain. The blade was actually within the edge of the body of the plane.

You have claimed before that the blade "should extend minutely beyond the body and in line with the knicker if planing across the grain. This is a recipe for trouble, as shown by your own example from yesterday morning.

This is a lot cleaner.


Re: Manual for setting up the Veritas Skew Rabbet Plane (part one: cross grain)

#6

Hypothesis

Warren, your results speak for you (and that is a wonderful shoulder). My results also speak for me. The question is why the different set ups? 

I need to do a little testing specifically, but these are my thoughts: I like the Skew Rabbet plane with one exception, the nicker. Compared with the usual knife in a woodie, the little round wheel is poor. It is not only difficult to set up, but it also has limitations on the amount of projection it can achieve (perhaps mine is worn. I must check). The question I have is whether my set up and recommendations are a work-around for the nicker, which would account for our differences? 

I have spend some time with different set ups over the years, moving the nicker back-and-forth. I achieve good results. I have not published instructions before simply because I know this is one of the more difficult planes to set up, but the instructions I give are reliable for others … with the Skew Rabbet. They have followed them and achieved the same results. Why?

Perhaps others will add their tuppence?

Regards from Perth

Derek


Re: Manual for setting up the Veritas Skew Rabbet Plane (part one: cross grain)

#7

Lee Valley video

I went back to the video made by Lee Valley for the Skew Rabbet Plane (I have not looked at it in some years). It covers basic features. Lo-and-behold, LV also state that the blade must protrude from the side of the body: "by the thickness of a sheet of paper", and the video demonstrates planing with the grain ...

Regards from Perth

Derek


Re: Manual for setting up the Veritas Skew Rabbet Plane (part one: cross grain)

#8

Re: Lee Valley video

I watched the video. Tesolin has an extreme bent over stance: not something one would want to do for very long. I don't think he has any appreciable experience. I have many times suggested that the cutting edge of the iron must be outside the edge of the plane for rabbets with the grain. However, as I have said many times on this forum,  for crossgrain stuff the iron must be inside the nicker (not necessarily inside the edge of the plane body) for the plane to work cleanly.

For use of the nicker, Tesolin says to refer to the instructions, so he might set up the iron somewhat differently when planing crossgrain. It could also be that he has never used the nicker.;


Re: Manual for setting up the Veritas Skew Rabbet Plane (part one: cross grain)

#9

Re: Manual for setting up the Veritas Skew Rabbet Plane (part one: cross grain)

Record 050C has knives instead of nickers.  No need for the blade to protrude when going cross grain, in fact it seems to foul up the cut for whatever reason. 


Re: Manual for setting up the Veritas Skew Rabbet Plane (part one: cross grain)

#10

Re: Lee Valley video

Warren, let's stay with the topic - setting up a rebate plane, and the reason why a blade must be outside the body.

Here is another video, just 3 minutes long, in which an explanation is given why this is important.

Since you raised issues with the way I set up this plane, I have been looking at how others do so, and keep coming up with similar methods to the one I use. What can I say, it works for us.

Regards from Perth

Derek


Re: Manual for setting up the Veritas Skew Rabbet Plane (part one: cross grain)

#11

Remember, Charlie ...

... that we are discussing the Veritas, not the Record/Stanley. The nicker of the latter is fixed and cannot be moved in-or-out of the body. The Veritas  sets up differently.

I have just come across a review by Chris Schwarz for the Fine Tool Journal (amongst other writers). He makes note: "For a fillister plane to work, the cutter has to be a hair proud of the side of the plane’s body, otherwise it will cut a slanted rabbet."


That is what I have been saying.


Can you do this with the Record/Stanley? I don't think so.


Link:  https://woodandshop.com/wp-content/uploads/2020/07/Veritas-Skew-Rabbet-Plane-Schwarz.pdf

Regards from Perth

Derek


Re: Manual for setting up the Veritas Skew Rabbet Plane (part one: cross grain)

#12

Fillister plane

A fillister plane is a rabbet plane with a fence. A common fillister has a fixed fence, so it always makes the same width rabbet. A moving fillister has a fence that can be adjusted to various widths. 

One more person who doesn't know what he is talking about.


Re: Manual for setting up the Veritas Skew Rabbet Plane (part one: cross grain)

#13

Re: Remember, Charlie ...

The Record 050C is different from the 405 in that it has knives and not the cloverleaf nicker.  The iron does need to be a little proud on a rabbet with the grain (knife not used), but for some reason not on a cross grain rabbet when the knife is in play.  I guess the knife is functioning as a slightly proud iron when going cross grain.


× Share

Share on

✉ Email this page