New WoodChat!
Home Articles Forums Gallery Marketplace Videos

WoodCentral Forums

Knowledge You Can Build On — Est. 1998

Abingdon, VA – Tree Cutting & Portable Sawmill

Request for info.....

Posts

Request for info.....

#1

Request for info.....

Edward in Vancouver

The Dec. issue of P.W. features Underhill "introducing" the 45 and 55 planes which I found extremely interesting. One feature of both planes that Mr. Underhill found acceptable was the slitting knife. I do a fair amount of work with thin (1/8" - 1/4") spruce panels and am nervous about slicing 3/4" wide strips of thin material for floating tennons on my T.S..

No...I am NOT in the market for a 45 and definately not for a 55. But I do have a L.V. small plow that I really enjoy using and was wondering if anyone has already tried to attach some kind of a slitting knife to the L.V. plow or any similiar type (Record comes to mind).

Questions:

The knife on the 45/55 is on the right hand side, attached to the skate with it's own depth shoe. Obviously the knife must protrude past the skate, but is there any reason why the knife couldn't be some kind of a plane-iron substitute?

Is the slitting plane made to be used with the fence or not?

Thanks,

Edward in Vancouver

Re: Request for info.....

#2

Michael Donaldson

Re: Request for info.....

Michael Donaldson

The LV small plow is a great plane. I have one and I use it frequently, it is, however, very limited. It has nowhere near the versatility of the Stanley 45. I find that I use the LV when I just need a groove, and the 45 for everything else.

That being said, I have made some small boxes that I didn't feel safe cutting the tops off on the TS, so I used the LV plow to plow a groove most of the way through, then finished with a backsaw and cleaned it up with a smoothing plane. You could just set the fence 3/4" from the inside edge of the smallest iron and cut on through.

Re: Request for info.....

#3

Re: Request for info.....

Derek Cohen (in Perth, Australia)

The knife on the 45/55 is on the right hand side, attached to the skate with it's own depth shoe. Obviously the knife must protrude past the skate, but is there any reason why the knife couldn't be some kind of a plane-iron substitute?

Hi Edward

The depth stop is the obvious place to add a slitter to the LV Small Plow, should you try this out. Enough enough - just shape a HSS drill bit shank into a knife. However, I suspect that doing so would not work as easily. Probably can be done.

The slitter on the #45 is attached at the rear of the body/skate. The depth stop on the LV is nearer the front of the skate. The #45 will work by pulling the blade through the wood. The LV would have to push the blade through the wood. The method of cutting is to take very light passes, gradually moving deeper. Pulling the blade would be easier, but pushing should be doable if the passes are light.

The fence is necessary (unless you can get the plane to run along a straight edge).

Better than the above, and probably a lot easier, is to either use a sharp knife against a straight edge (again with multiple passes), or a cutting gauge (with its own fence).

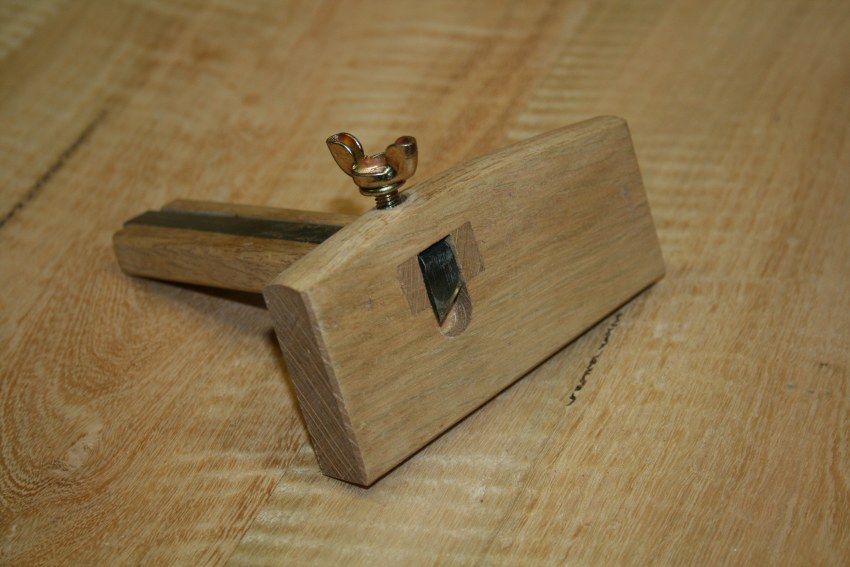
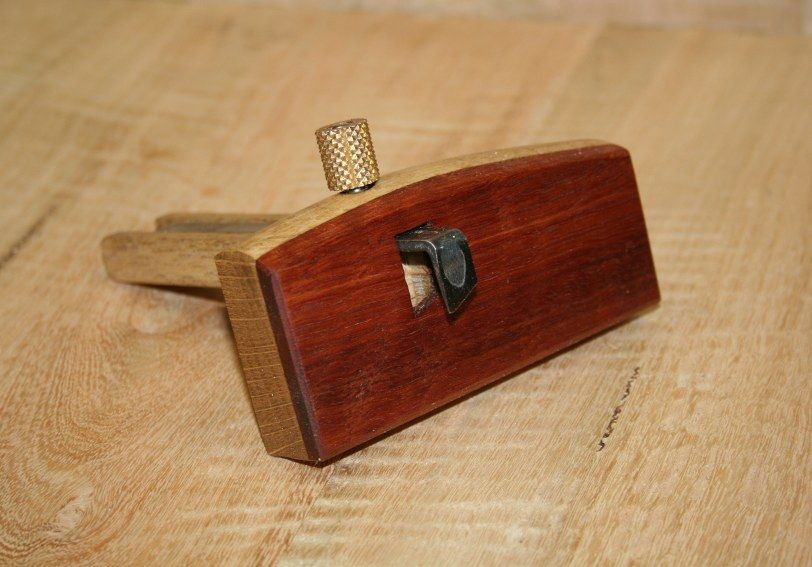
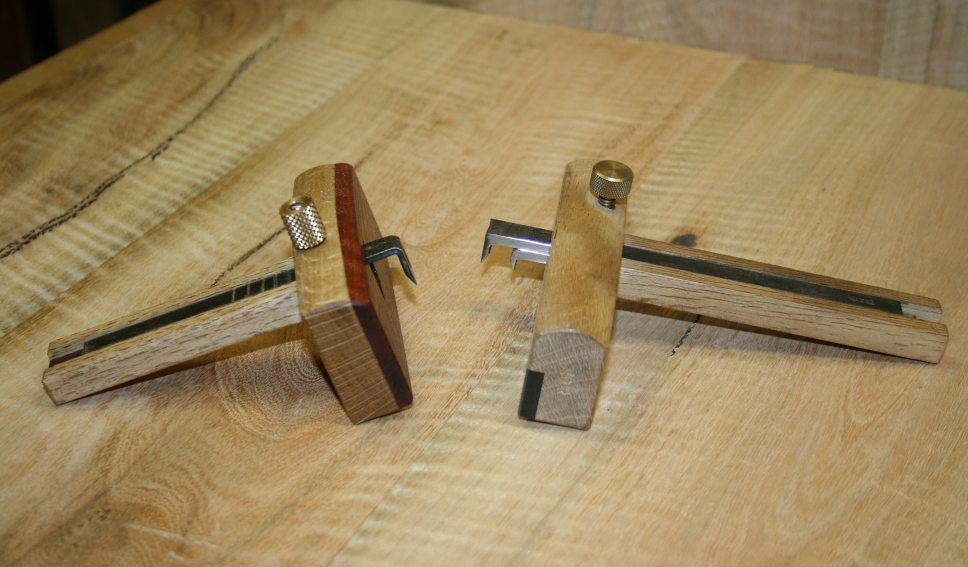
Here is a cutting gauge I made for this purpose ...


The blade was a re-purposed LV beader blade I ground to a double edge ...


The LV and Tite Mark wheel gauges work well. TM do sell a slicing wheel blade for their cutting gauge.

Regards from Perth

Derek

Re: Request for info.....

#4

craigd

Re: Request for info.....

craigd

I've seen Japanese videos where they use a marking gauge with knife to cut panels along the grain. I've done this by cutting to the depth of the knife on both sides and snapping.

edit - wow, 4 minutes apart

Re: Request for info.....

#5

Re: Request for info.....

Edward in Vancouver

Thanks for the information. A marking guage followed by a knife is something I never thought of. Derek's suggestion with a modified drill bit in the depth guage is worth the time fiddling about.

Thanks!

Re: Request for info.....

#6

Re: Request for info..... *LINK*

Patrick Gibbons

Look on p.32 of the download linked below for making a panel slitting gauge.


http://toolemera.com/bkpdf/haywardhowtobk.pdf

Re: Request for info.....

#7

Re: Request for info.....

Derek Cohen (in Perth, Australia)

Hi Edward

I don't think that Craig was suggesting using a knife after a marking gauge. I believe that he was saying the same as I - that a cutting gauge could be used like a knife to cut.

The Japanese cutting gauges are particularly good in this regard, however you need to find (or make) one with a slim enough blade. The blade is L-shaped and the cheaper ones are bevelled at a high angle, too high for slicing veneer or cutting boards.

Here are two I have. The one on the right is the fabled Kinshiro. The one on the left is a vintage version. Both are double ironed for mortice-and-tenons ..


You can purchase a cheap one like this through Stu at Tools from Japan ...


I modified one. This has reground bevels (two blades, allowing one to use bevel out or bevel in) ...


I think that any of the cutting gauges I have shown - wheel or L - would work as the slitter you want.

Regards from Perth

Derek

Re: Request for info.....

#8

Re: Request for info.....

William Duffield

The mentioned plan is really on page 28 of the book, but on the 32nd page of the PDF file, since PDF doesn't account for the cover sheet, pages numbered i, ii, etc.

Why would Hayward put a wheel in the handle? On the surface, it's just unneeded gizmosity, increasing the complication of construction and maintenance. More importantly, the concentrated pressure will mar the surface of your stock. A much better, and easier, solution is to glue a piece of very hard wood, e.g., boxwood, lignum vitae, etc., to the bottom of the handle.

I note that he specifies a beam 18" long. I think the 5" fence is too short to accommodate the slitting of panels at the maximum range of that beam. 7" or 8" would be better.

Depending on how wide the strips you are planning to make, you might also look at the slitting gauges sold by Lie-Nielsen and Veritas in their inlay and stringing tool kits. Note that these are optimized for cutting very narrow stringing and have relatively short beams and so would not be appropriate for slitting wide panels. Note also that these tools saw a kerf which has a measurable width, instead of cutting a slit. This may be an advantage, as the edge of the waste side (maybe your next part) is square, and you may save the step of planing it square.

Re: Request for info.....

#9

Re: Request for info.....

Bruce McCrory

You don't have a band saw. And, hand cutting in a box is probably an issue ... for some reason. The small plow Goldberg sounds pretty extreme to me, and I love twisting simplicity into complication.

A couple things:

1. You probably have already tried the obvious Utility knife and Straight edge. The method can be tedious, but I have had success; and your spruce would be far easier than cherry or mahogany.

2. It could be fiddly, but a Dremel jig and their small circular blades work.

With the two, you still need to shape the stripped edges.

Re: Request for info.....

#10

craigd

Re: Request for info.....

craigd

Derek is correct - we were/are talking about the same way of using a marking gauge. If you have straight grained [thin] stock, the cuts don't need to be very deep; cut both sides and snap the wood, like you would cutting glass.

Re: Request for info.....

#11

Re: Request for info..... *LINK*

Patrick Gibbons

William, you are right about the page. Sorry about the ambiguity. Your comments about the construction intrigued me. While I don't have a dog in this fight, I would argue that Haywood was a working man before he was an author and that none of these designs are original to him. I did a quick search of images of panel gauges on the internet and found the guage linked below on Jim Bode's site. He labels it made by Sandusky and, while not exactly like Haywood's, is very similar. I think you make valid points. I'll be making a panel guage one of these days (which is in a long line of get a round tuits). The proof's in the pudding.

The second picture shows the bottom of the guage and the wheel.


http://www.jimbodetools.com/Fine-Rare-SANDUSKY-Panel-Slitting-Gauge-p27426.html

Re: Request for info.....

#12

Re: More Panel Gauge Questions

William Duffield

I was not intending to pick a fight with Mr. Hayward (or with his bench dog :) ). Since I also have a panel gauge on my round-tuit list, I was offering a critique of the published design from the point of view of what I might do when I finally build one. In the meantime, I have several marking, cutting and slitting gauges, and even a Stanley #45 with the slitting cutter, that I can use for narrower stock. For wider panels I resort to a table saw.

The Sandusky panel gauge brings up a few more questions for those who have and use a panel gauge. The bottom surfaces of this gauge, that bear on the upper face of the stock, are convex. Most I have seen are flat. Does anyone have an opinion about the advantages and disadvantages of these alternative designs?

Most panel gauges have a rabbet on the inside bottom of the fence that engages the stock being cut or marked. Smaller marking and cutting gauges usually do not have this feature. At what width of stock does the rabbet become an advantage over allowing the gauge to ride on the bottom of the bar and the front face of the fence? A common reason given for this feature is that the bar needs to be lifted off the face of the panel because the panel may be less than flat.

Many panel gauges reinforce this rabbet with brass wear plates on two surfaces. I suppose this additional expense makes sense, as most marking and cutting gauges also have wear plates on their front faces. Opinions?

Re: Request for info.....

#13

Re: More Panel Gauge Questions

roger lance

Last month, I built a panel gauge whose bar is 30" long (should handle most any panel) with an 8" long fence. I used a flat bottom on the fence recess and attempted to match the projection of the cutter with the height of the bottom of the bar to the recess surface. The goal being that the cutter would be running parallel with the bottom of the fence and the bar would not be in contact with the stock. I am very happy with this design....it has proven to work well which for me is the major concern. I also attached a brass wear plate on the bottom of the fence which was mostly for show.....the fence is made of hard maple and would last for many, many years by itself.....perhaps benefiting from an occasional pass with a shoulder plane.....but the brass looks nice.


Just my opinion......I find KISS is a good principle to work by......and "does the end product work well" to be a good standard of judgement/evaluation.

After reflecting on the curved recess of the fence in the tool shown above, it makes sense to me if that tool were used to lay down a line on the inside of curved panels/work.....this could be a specialized design/tool and might not be intended for every day situations.

Re: Request for info.....

#14

Re: Another Slitting Gauge With Wheels

William Duffield

I found these pics somewhere on the web, several years ago, and just now discovered them in my files. Regrettably, I failed to record who posted them, or who made the gauge. It is obviously an antique, and I would guess not commercially manufactured.


Evidently, more than one person found value in a wheeled gauge. Maybe the need was for processing rough sawn lumber?

Re: Request for info.....

#15

Re: Another Slitting Gauge With Wheels

Steve Voigt

I found these pics somewhere on the web, several years ago, and just now discovered them in my files. Regrettably, I failed to record who posted them, or who made the gauge.

Hi William,

Not sure if you know this, but if you drag the jpeg off your desktop and into a google search window, you'll probably get a match or ten for the image.

Super-cool tool, btw!

-Steve

Re: Request for info.....

#16

Re: Another Slitting Gauge With Wheels

William Duffield

Thank you. That's a useful tool, and I didn't know about it. Google, however, was not successful at finding another picture of the gauge.

Re: Request for info.....

#17

Alternative use

Bob Hackett

I come across many antique tools up here that look very similar to woodworking tools yet in reality they came from the shoe mills. Many of them have "wheels" on them and when I talk to the folks who actually used them I find that what I think of as wheels put on to help a tool move or work more easily are actually rollers meant to pin a sheet of leather down to a bench and keep it from moving. Those same type of rollers also were installed to roll over the leather to keep it flat and prevent it from bunching up, stretching or rising up ahead of the cut.

Re: Request for info.....

#18

Re: Alternative use

William Duffield

That's really interesting, Bob. On OldTools (the Porch of the Galoots) they have, over the years, often mentioned leather working tools, especially if no one has any idea what something curious was used for. At first, I thought it was suggested in jest, or at least tongue-in-cheek, but I have slowly come to appreciate that there are useful, workable materials that are even more malleable than trees, if you have, or can invent, the appropriate tools to work them.