We value your privacy.
We use cookies to enhance your browsing experience, analyse site traffic, and personalise content.
By clicking “Accept all”, you consent to our use of cookies. You can also choose
“Essential only” or learn more.
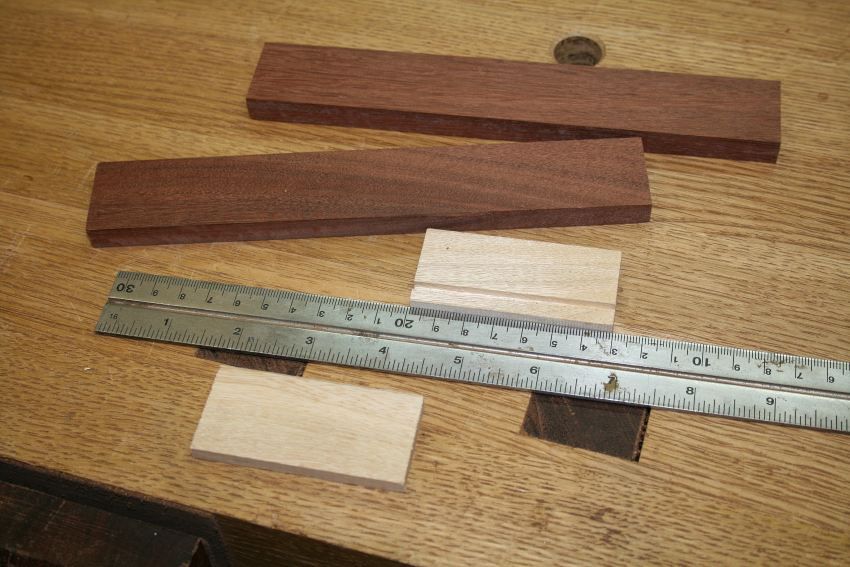
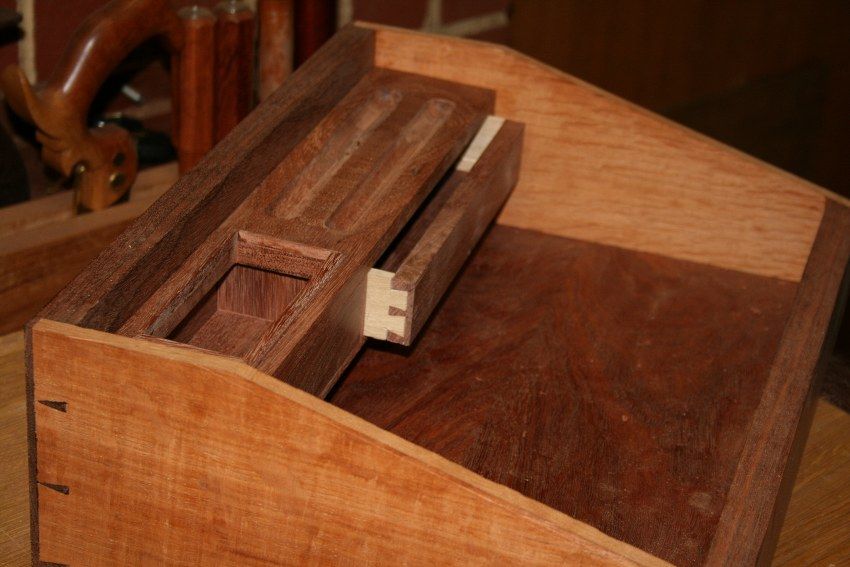
A little more time with the lapdesk. It is a while since I have made really small drawers, and I forgot to add the grooves beforehand. This left me with a few dinky pieces (each is only 1 1/2" wide). How do you plane a groove on work this small?
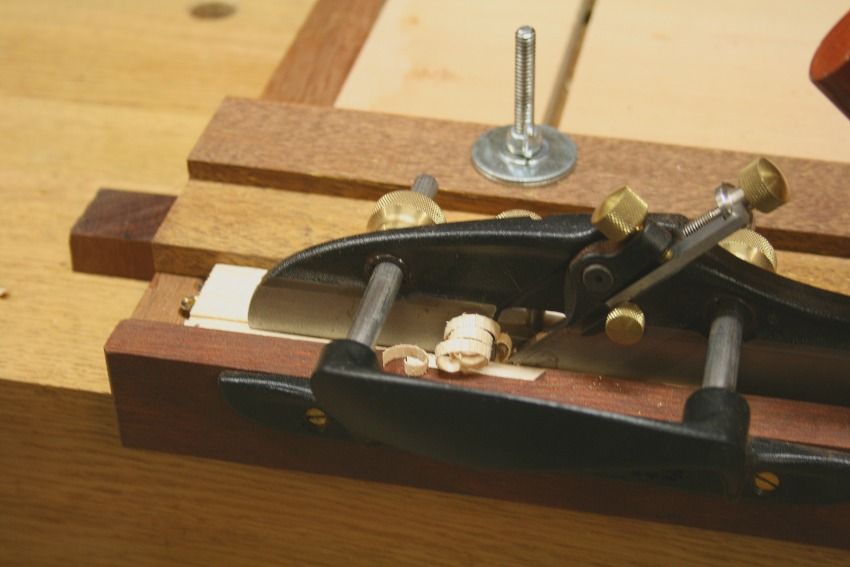
The base of the drawer requires a groove that is 1/8" wide ...
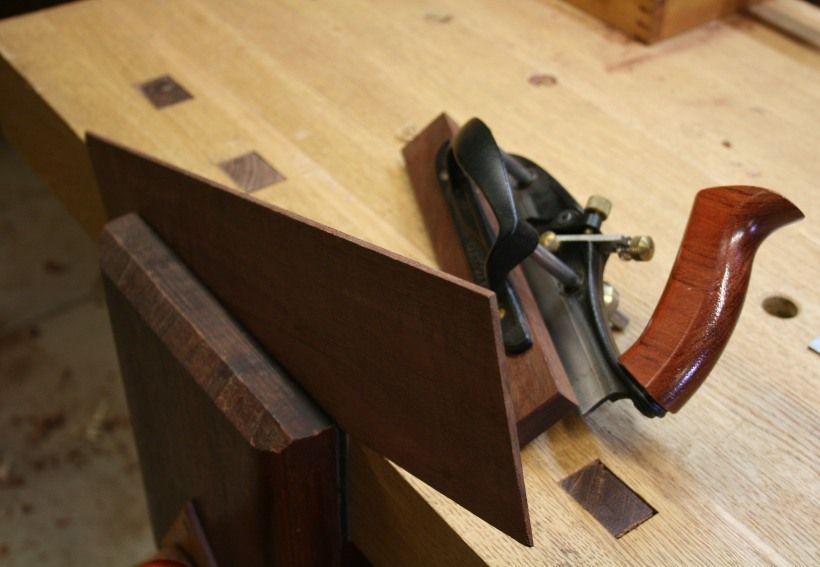
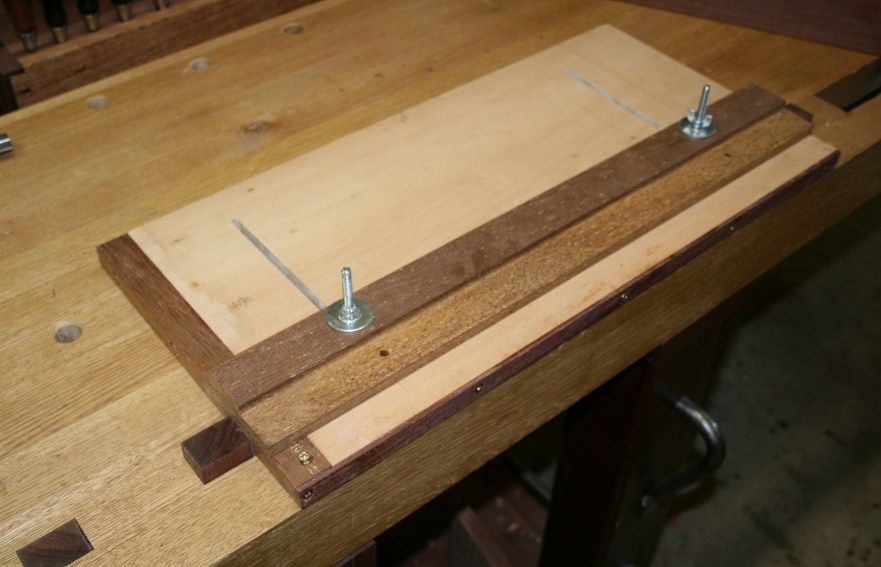
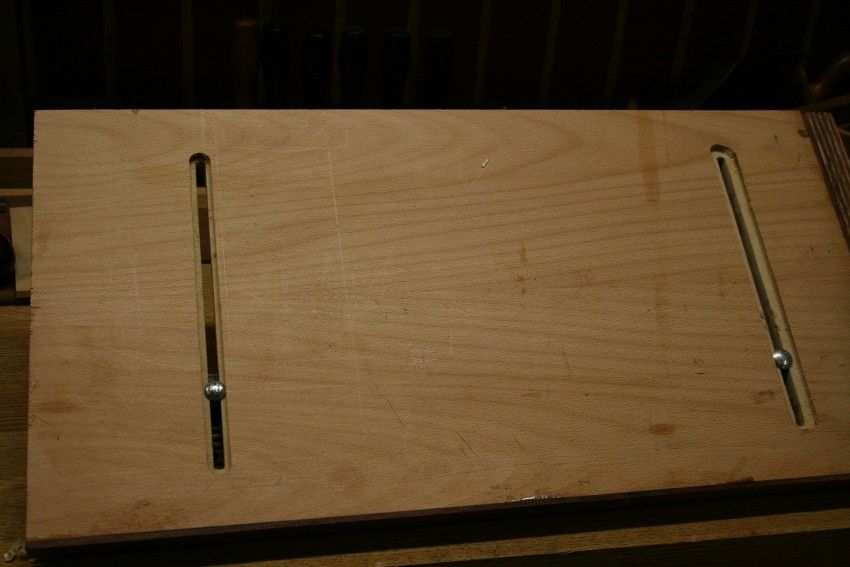
I realised that I could not put it off any longer - a sticking board was needed. However I chose to build one that has an adjustable fence. This would enable all boards to be placed against the side of the bench to use the fence on ploughs, rebate planes, etc.
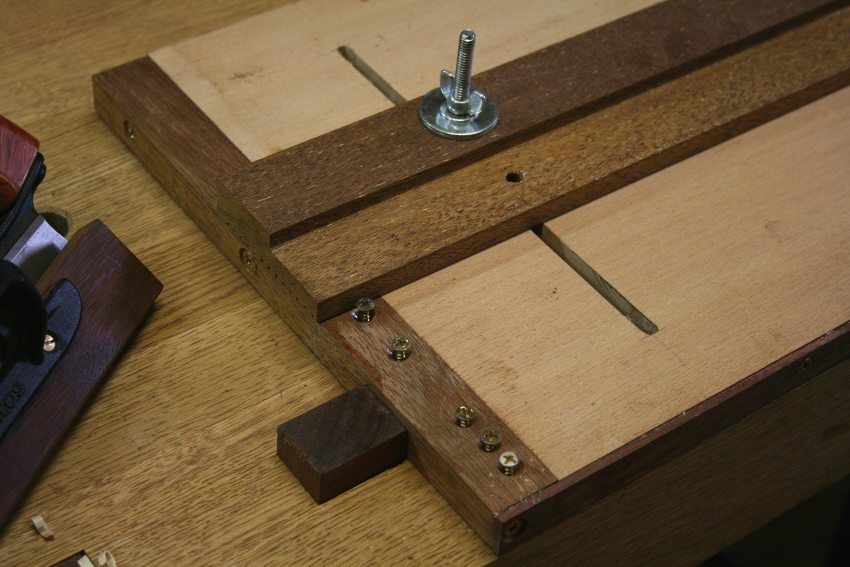
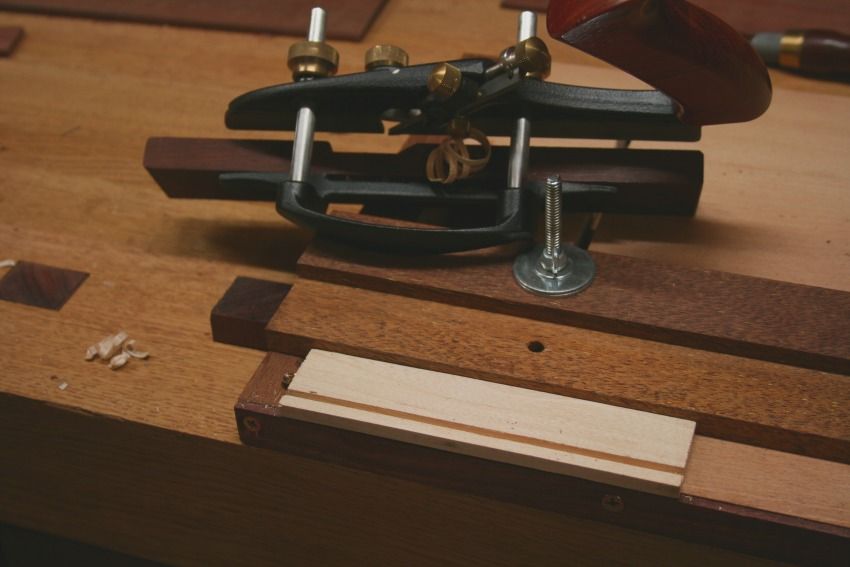
The fence is also reversible, with low- and high sides. The low side is needed to avoid the arms of the LV Small Plow plane.
There are several stops. These need to be aligned and the screw tops ground to sharpen the edges.
The disadvantage of making small drawers like big drawers is that the useful space gets ever smaller from the groove cut above the drawer side bottom. I solve this issue by first making (about) 1/8" "plywood" from what ever veneer is laying about and then just gluing this plywood to the drawer sides to create a bottom. It is a simple matter to trim the overhang to the drawer size and done. One does have to plan in advance to arrange the front to overhang the sides on the bottom so as to cover the plywood edge. I don't fret the side edges showing.
Nice, I like what your scrap wood looks like. Seems to me a wedge would be more woody and far less dangerous that those nasty metal bits standing up. Sure you can avoid punching into them, but I can`t imagine that making it into production so maybe given that a wedge is so woody anyway, I would probably prefer that route, or maybe some could rig it with with some kind of hold down.
I didn't think of the dropped shelf for fence rod clearance when I build my modular sticking board (posted here a couple months ago). But, I hadn't considered its use with my Veritas small plow plane. I would have found out soon, however, so I appreciate the heads-up.
Note that on the Stanley #45, unlike the Veritas, the rods are threaded into the plane body and therefore protrude out the fence side of the plane, so rod clearance is not a problem. (The Veritas rods are threaded into the fence.)
Note also that with the Veritas, the closer the plowed groove is to the edge of the board, the further the rods are extended. The narrower the stock, the more interference between the rods and the sticking board fence.
Being somewhat clumsy, I would probably run my hand into the thumbscrews and fence bolt of your sticking board. I would be tempted to replace the thumbscrew with a through threaded plastic knob, and would cut the bolts off much shorter.
Another, very minor, concern is putting dents in the channel with the screw heads. This may be much less of a problem with jarrah than with the woods I usually use for jigs, but dents tend to give the jig memory of previously used fence settings. to mitigate this, one might consider using T-track and a pair of T-bolts, but only after the concept had been proven in the prototype.
Again, this is a great idea, and I will be sure to adapt it to my shop.
BTW, even Wilbur uses a row of Phillips FHWS as a planing stop. As you are porbably aware, we spent last weekend demonstrating at a woodworking show and promoting our association. I asked him, and he confirmed that his screws have left hand threads. Since you got to them, his kids are now trying to saw and plane upside down.
In my tulip poplar, the planing stops tend to work their way loose in short order. I may have to glue in a strip of something a lot tougher to mount them in, like you did.
Derek....I always like to see a good jig build....to alleviate William's concern with having the plane rods hit the fence hold down hardware, simply make a wider fence.....and I've found the following router bit to be invaluable in making jigs....
The concern is with my hands hitting the hardware. The rods hit the fence.
I've got one of those bits. It works great for this application, but better in hard maple, etc., than in tulip poplar or pine. Note that the narrow shaft doesn't cut, so you have to start with a dado (1/4" wide, IIRC) at the center of the intended T-channel. Also, since there's nowhere for the chips to go, they tend to clog the excavated channel, and you have to clean them out manually, unless you make a special purpose vacuum exhaust port. Even that doesn't work very well with a solid (unperforated) router sub-base. If you get the chips packed too tight, the router bit can easily overheat.
When I am set up making guitars or multihulls I use vac jigs and fixtures, then there isn't anything around the part, it is just sucked down by the weight of the world, though with small pieces there can be insufficient suckage.
I am not so sure about this for our applications, Tom. It's great if you are carving, or even free planing. However the sticking board can be aligned with the side of the bench, which allows one to use the plane's fence to guide the plane. You cannot do this on the sets ups you present. There is potential there, but I doubt I will go in that direction.
Another, very minor, concern is putting dents in the channel with the screw heads. This may be much less of a problem with jarrah than with the woods I usually use for jigs, but dents tend to give the jig memory of previously used fence settings. to mitigate this, one might consider using T-track and a pair of T-bolts, but only after the concept had been proven in the prototype.
Hi William
I agree with this. Now that I know that this is going to become a valuable jig for several tasks - rebates, grooving, moldings, etc - I want to built something a little more substantial, especially in regard to the track. Wider boards go between a dog and the tail vise, but for small or narrow board, there is little else to improve on this work holding method. A wooden track will eventually dent, as you describe. A T-track and T-bolts is the way to go.
What you say is correct. In fact, I chose not to nail/glue on bottoms only at the last minute. The reason? The dimensions involved are tiny. The total "lost" is about 1/4", which is made up of a 1/8" groove and a tad over 1/8" up. And, of course, I do thisngs the hard way!
Well I don't expect you to do it, because for one thing there is a large set up in pumps and switching, and valves. It is like early computing, one needs to have a killer app one can't escape and then the rest is gravy. But in your application, if it could work, it would be the exact same thing you have: an endstop, a piece sitting on top of the jig at the edge, and rather than it being stuck, one just has air pressure holding it down. They hold stuff on lathes that way, and there is quite a bit of pressure there, but if your parts were 8 square inches, then you would have 100 plus pounds holding it to the jig. That probably overstates the effectiveness on a small piece like that. A good example is a soundboard, where one wants access to the whole thing for planing, and in the ideal case there are thousands of pounds sucking it to the table top. Yet no hard points of pressure.
many specialty planes are sold in both a right and left handed version for the ability to work in any grain situation.....although the LV small plow (plough) comes in both right and left versions, it is not marketed as a pair....any problems owning just a right hand version??.....do you always plane with the grain or can you go against the grain with a plough??
many specialty planes are sold in both a right and left handed version for the ability to work in any grain situation.....although the LV small plow (plough) comes in both right and left versions, it is not marketed as a pair....any problems owning just a right hand version??.....do you always plane with the grain or can you go against the grain with a plough??
Hi Roger
Good question.
I hand the right-handed plough. You cannot always choose the direction that the grain runs - for example, when selecting a particular figure to run on the face of a drawer.
I often do have to plane into the grain. When I do so, the concern is not tearout inside the groove (as no one will see this), but tearout at the groove edges. To minimise that, use a mortice gauge to scribe the outer lines of a groove, and deepen with a knife. Then plough the groove.
We'll have to see if it matches Derek's observations:
I bought the Veritas left handed plough plane, because I'm left handed. In general, most plough planes come in a right handed version, because back in the good old days, us sinister folks were discriminated against, even to the extent of getting our knuckles rapped for trying to write with our left hands. That's not the case anymore. However, after learning how to use right handed moulding planes, hollows and rounds, L-N #140 skew rabbet block plane and Stanley metal joinery planes (e.g., #45, #78) I now have to retrain myself.
I wonder if Rob will give me a trade in on my L-N #140 for a pair of Veritas skew rabbet block planes?
Since usually the bottom of the groove doesn't show and because you usually choose straight grained wood for pieces that are joined with grooves, tearout is not as important. It can make a difference with the tongue and groove blades, since when cutting the tongue, the blade cuts to the show face on one or both rabbets. Sometimes, you can fix the tearout with a pair of chamfers on the show faces of the two mating boards.
Rabbet planes are a horse of a different feather, since in some but not all applications, they are intended to leave a show surface. If I get tearout that shows with my Veritas left handed skew rabbet plane, I either chose the wrong piece of wood or I can fix it with a shoulder plane or maybe the Stanley #78.
Thanks to Derek, I'm now forced to build a pair of boxes to store these planes and all their attachments.
My father turned his hand over to write from the right side with his left hand. For some reason ( !), he had very strange, spiky writing.
I just wound up with ink and pencil graphite all over the side of my left hand.
My (older) brother had one old-school teacher who tried to get him to use his right hand, telling him it was wrong to use the left hand. That lasted about 24 hours, until he told my parents - after Mom read the principal the riot act, my brother had a new teacher.
My sister was born right-handed, and avoided all the struggles my father, brother, and I faced. That's OK; it made us stronger.
My father is left handed. I am right handed. My mother gave my father a beautiful silver Parker fountain pen for their silver wedding anniversary. He could not use it without smudging across the page. It wound up in a drawer for years, and eventually he gave it to me. I use fountain pens all the time. Note-taking as much as I have to do is such a chore that I began to create a little fun and pleasure by collecting and using fountain pens. My regret is that my son is left-handed and will never use them.
I probably had that same Parker fountain pen, received as a college graduation gift, throughout grad school. I wore out one nib. It's a wonderful pen. Somehow, I also ended up with a Lamy and Mont Blanc as well. Hey, I just like fountain pens.
Derek, I'm left handed and own 8 or 10 fountain pens that I used quite a bit. I'm of the age that was taught in the 4th grade how to use a fountain pen, something my children have no experience with. My daily life seems no longer to require using a writing instrument for much more than a signature now and then. I find I don't use my fountain pens anymore. I do carry a pen with me, a habit that people of a certain age don't share with a younger generation.
Yes, that is the silver Parker 75 (made for their 75th anniversary, I believe).
I try and rotate my fountain pens every week or so. My two favourites are a 1980 Mont Blanc 146 and a 1952 Mont Blanc 344. Smoooooth as silk, with wonderful line variation.
 Since you got to them, his kids are now trying to saw and plane upside down.


