New WoodChat!
Home Articles Forums Gallery Marketplace Videos

WoodCentral Forums

Knowledge You Can Build On — Est. 1998

VPS-Level Performance. Fully Managed. No Hassle.

I meant to build it this way!

Posts

I meant to build it this way!

#1

I meant to build it this way!

Derek Cohen (in Perth, Australia)

That is what we all say to disguise a mistake ... yes?

I should title this "How not to build a bench"!

There has been some progress, but it has been a lot slower than I planned owing to changes made, and the repairs to these changes, and then being in two minds about the installation of the tail vise.

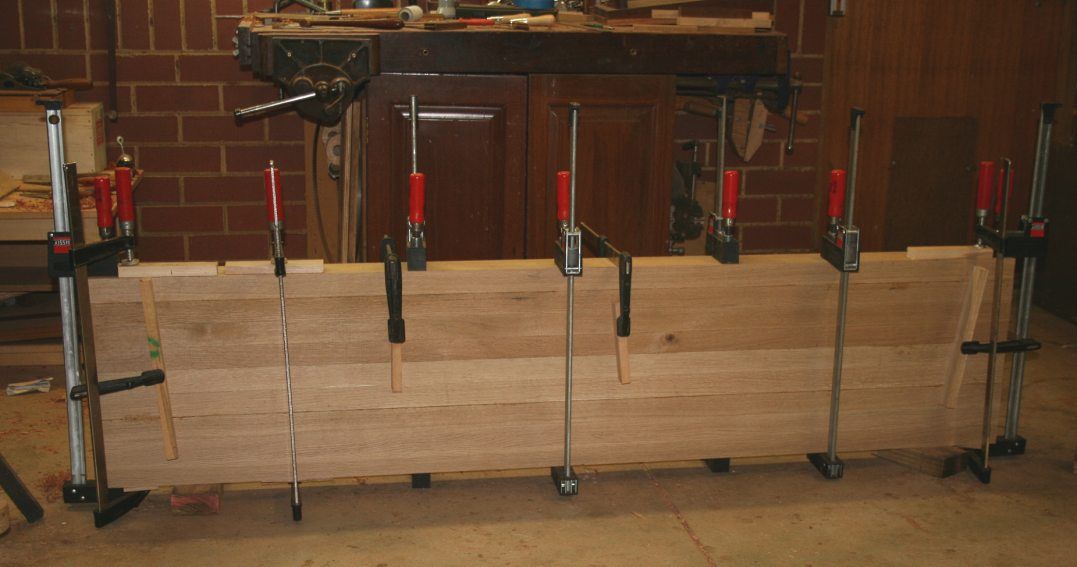
First of all, the bench top has now reached the stage where it is recognisable as a bench top. I glued the sections together to look like this ..

Next comes the dog hole strip. This was a little more complicated than it needed to be owing to the absence of the requisite board to build it. I searched Perth high and low for more timber, but there is no European Oak to be had in small qualities. So I decided to use the off-cuts from the bench build and create a modular system of dog holes. The advantage here would be the freedom to fit them into the system I will finally decide on. System? More on this later.

Building dog holes: The dog holes are 1" wide and 1 1/2" deep across the top. They are angled towards the vise at 2 degrees. The dog in the BC tailvise is the same size, and also angled forward by 2 degrees.

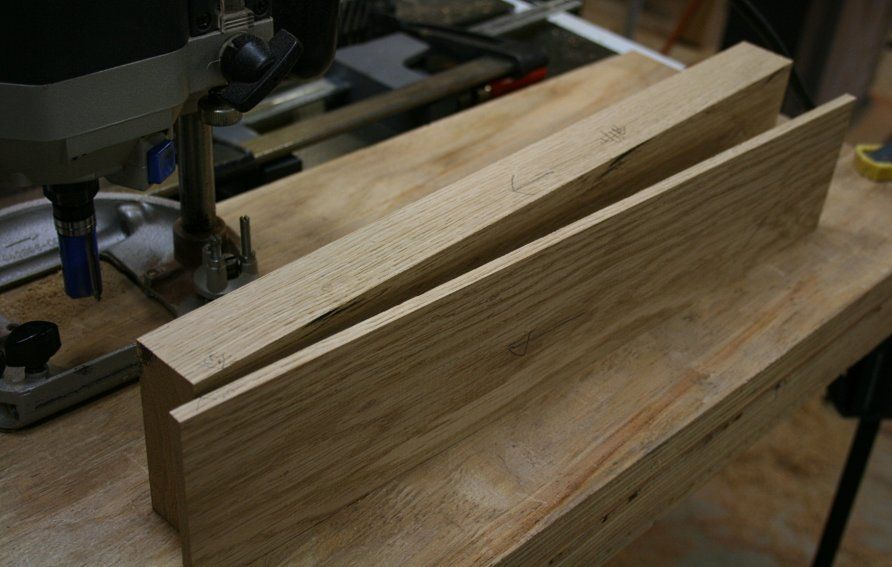
The dogs need to be centred in the dog strip. First the dog strip board is resawn ...

Then a jig was built for the router ...
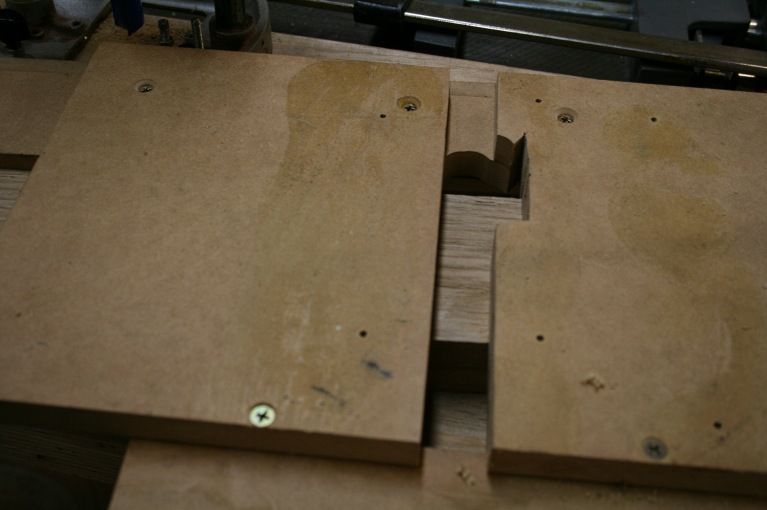

... and the dog holes machined out ..
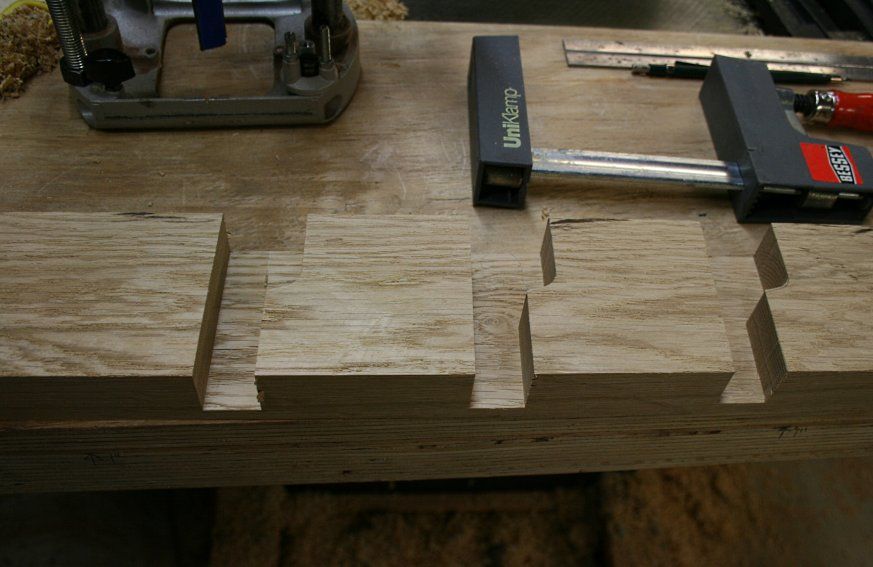

The "bumps" are to prevent the dogs dropping out of the dog holes.

Finally, the two boards were glued together ..


The result was a bunch of dog hole strips with each dog hole 3" apart ..
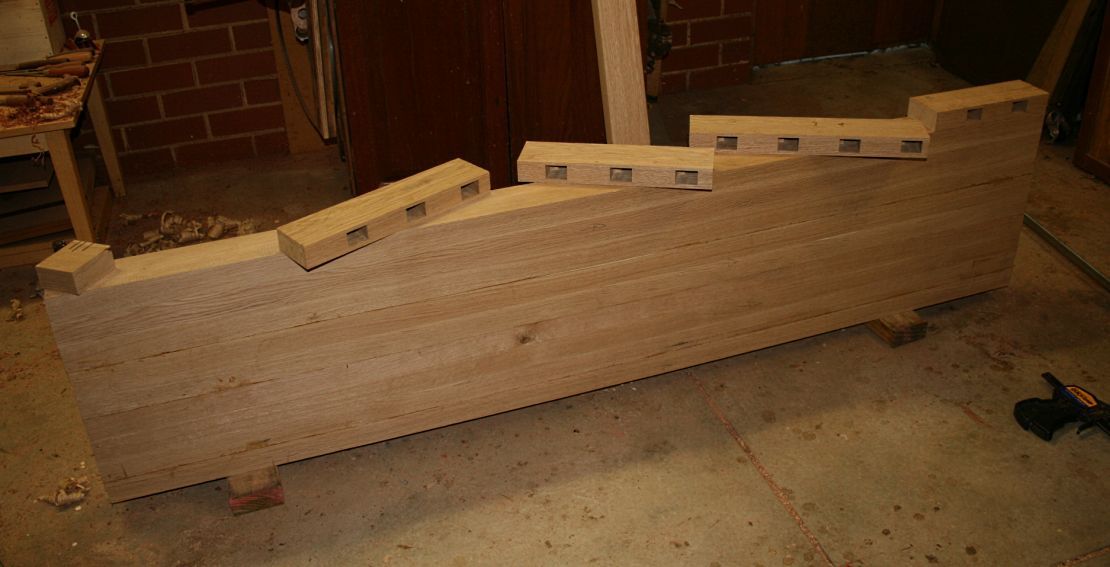

... which I cut to fit the length here, but which I can re-configure as I wish later on (also, note the difference in size of this 75" bench top length versus the <60" length of my old bench) ...
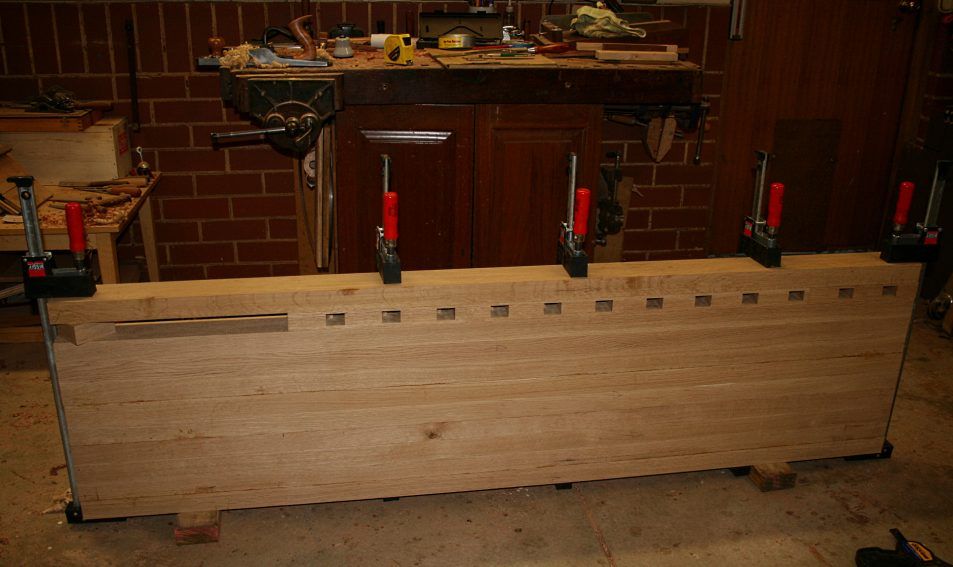

The width of the bench here is 20". The final width is expected to be between 21" and 22".

What is the issue?

Essentially, there are two choices. Either the dog holes are placed as close to the edge of the bench (say 2 1/2", as above), which makes it easier to use when rebating, planing moldings, and other edge treatments ... or, the dog holes are arranged so that the vise can hold work over the rear leg, which is useful for work that requires hammer blows, such as morticing.

The problem is that you cannot have both systems. You have to choose. In the situation where the dog holes are close to the edge of the bench, they will be interrupted by the legs (which are 5" wide and 3 5/8" deep). Consequently, there will be dead spots along the edge of the bench. In the case of the dogs being situated at a distance to the inside of the legs, they will have to be about 3 1/2" - 4" out from the bench edge.

My question to the forum is which is more important for you?

In the case that I go with the second option, I shall need to extend the width of the bench by 1 1/2". And no more European Oak. I decided I would use Tasmanian Oak as a substitute. It is interesting that Tassie Oak is not an oak but a Eucalypt, yet its colour and grain of the edge grain is very similar to the European Oak ...
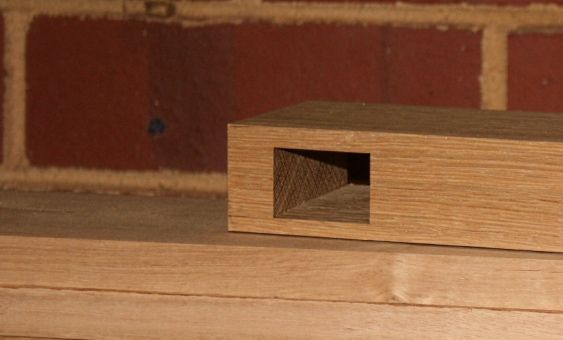

The Tassie Oak is a little lighter in colour, but after a year I doubt that anyone would pick it out.

Now the other area I had a change of mind was the bench height. In an earlier post I wrote that a height of 30" appeared to work when planing. This was a result of using Chris Schwarz' "pinky test". Over the next couple of days the thought began to firm that planing is just one activity - I prefer a higher bench for detail work, such as the moldings I made with H&R planes - and that I have become used to a 34" bench height. I decided to compromise at 32".

Unfortunately ... I had already cut the legs for a 30" high bench. To make matters more stressful, the bench top thickness is going to end up closer to 3 1/2" than 4". The slight difference in thickness does not bother me, but this affects the bench height.

So now I began to obsess about how I could fix the legs.

Fortunately, when I cut them to length I left the tenons long - 2" in total. The final tenon length will be 1".


Here is one idea, which I shelved: molding made with the above-mentioned H&Rs ..
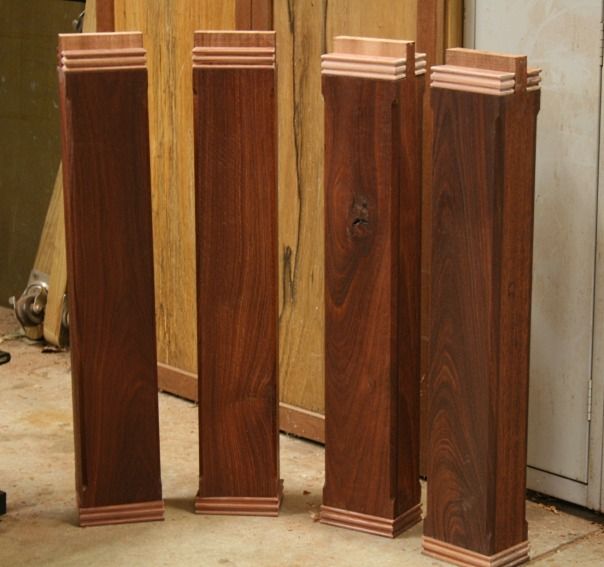

This was too busy for my taste, even if I stained the pieces dark.

I ended up with this ...
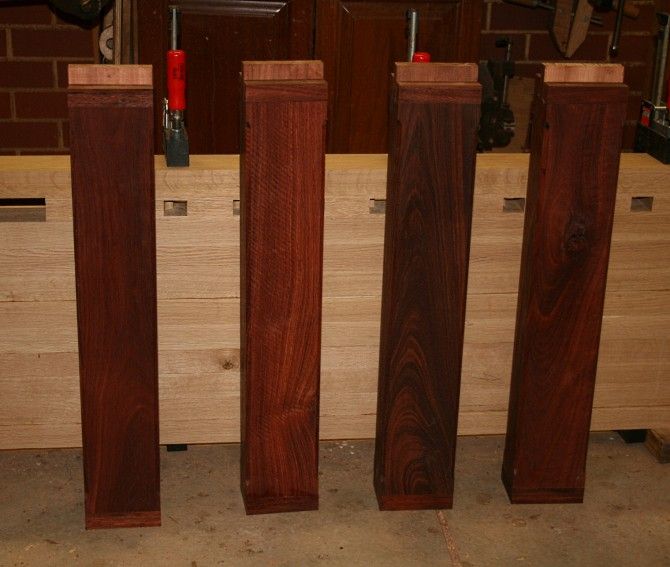

Back to the bench top. Here is the BC end vise (with dog hole strip) ready for installation. Just a final decision to make about the choice preferred ...


What are your thoughts in that area?

Regards from Perth

Derek

Re: I meant to build it this way!

#2

Re: I meant to build it this way!

TomD

Am I to conclude that you are making an English style bench with straight legs? Both your height built up and load take off to the legs issues could have been dealt with by using a sled foot base.

Re: I meant to build it this way!

#3

Re: I meant to build it this way!

Derek Cohen (in Perth, Australia)

Am I to conclude that you are making an English style bench with straight legs? Both your height built up and load take off to the legs issues could have been dealt with by using a sled foot base.

Hi Tom

Yes, it's a Roubo-type bench (I posted on this about a couple of weeks ago). I did consider a sled foot base,but it would not have been appropriate in this case.

Regards from Perth

Derek

Re: I meant to build it this way!

#4

Re: I meant to build it this way!

wilbur

There's a third choice. Don't use the tail vise for holding boards for chopping. Use a holdfast instead. (I'm pretty sure you have one, no?)

My vote is to put the dog holes close to the edge of the bench. For chopping tasks, drill a hole for a holdfast in a position where the board being held by the holdfast will be over the leg. I'd wait until you have your bench put together, and chop some mortises/dovetails/whatever to figure out where to put the holdfast hole.

Frank Klausz did this on his Scandinavian style workbench, and has said that it was the best alteration he has ever done with his workbench.

Re: I meant to build it this way!

#5

Re: I meant to build it this way!

david charlesworth

Derek,

How well I remember all these conflicting dilemmas.....

I think you will enjoy the extra height.

My advice would be to keep the dogs close to the front edge.

best wishes,

David Charlesworth

Re: I meant to build it this way!

#6

Re: I meant to build it this way!

roger lance

Derek....I prefer having the dog holes located about one board in from the edge of the bench as opposed to 4-5" in....I plane between dogs and have better balance as I'm not having to reach for the work piece....some people make a wood dog for each dog hole....maybe for the dog holes that fall over your legs, you could make a modified dog with shorter length that would still hold the work...being a blended woodworker, I have a hollow chisel mortiser so I'm not chopping mortises on the bench but I can see an advantage to hoidfasts for securing drawer parts while dovetailing (I secure those parts to the bench with clamps for chisel work)....if your bench was out away from the wall, you could position holdfasts to secure work over the rear legs for chopping....but the idea of holdfasts is a good one and Wilbur stating that Frank Klauz liked this modification to his bench is a big endorsement as Frank K. is said to regard his bench almost like an altar (cannot imagine anyone else feeling a little bit this way).

Re: I meant to build it this way!

#7

Why not? and...

Pam Niedermayer

I don't understand the "appropriate" part. sleds/trestles have all sorts of good uses. I also think things go a little screwy when you talk about "dead zones." Maybe you've put it out of your thoughts, but you will have pieces of wood, some long, clamped for mortising, etc. Do these pieces comprise dead zones?

Pam

Re: I meant to build it this way!

#8

Re: I meant to build it this way!

Pam Niedermayer

Maybe a Kingshott refresher is due (M&T, iirc). On it Kingshott shows chopping mortises facing from the end of the bench, thus chopping with his bevel in line rather than side to side. I've found this works better, too, feels more right.

Pam

Re: I meant to build it this way!

#9

Re: I meant to build it this way!

Bill Tindall

I don't have any solutions but it was comforting that others have these problems.

Is there no American white oak to be found where you live? It is common and cheap here. Lots of it get exported somewhere.

Re: I meant to build it this way!

#10

Re: I meant to build it this way!

TomD

I did recall you mentioning it was a Roubo bench, but there the legs mortise and dovetail into the top. No 1 inch mortises. Not quibbling R. bench could mean anything these days.

Re: I meant to build it this way!

#11

Re: I meant to build it this way!

Guillaume Dery

Derek, not to be obtuse but why do you pose your question as an either or. Were it me, I would get those dogholes as close as you can to the edge and then have strategically placed holes for a hodfast which would allow me to fasten a piece right over a leg to mortise as in your example. My holdfasts cover a 9" radius approx so it's no biggy to drill 2 holes (right and left positioned) so you could work above any of the 4 legs.

I can't think of a quicker way to hold a workpiece for morticing or drilling operations than a holdfast.

Cheers,

Guillaume

Re: I meant to build it this way!

#12

Re: I meant to build it this way!

Derek Cohen (in Perth, Australia)

Is there no American white oak to be found where you live? It is common and cheap here. Lots of it get exported somewhere.

Hi Bill

By-and-large, wood is very expensive in Australia. We simply lack the variety and costs that you are used to and take for granted.

In Western Australia there are a number of hardwoods, such as Jarrah, Karri, and She-oak. All are very hard, endangered, and expensive.

The closest wood to US white oak is Tasmanian Oak. I use it quite a bit. It is very similar to white oak from what I can work out (I've only ever built one piece from imported US white oak). Just to give you an idea of costs, if I built this bench top from dressed Tasmanian Oak, I estimate it at close to $600.

The local alternative is Radiata Pine. There is nothing inbetween (a bunch of other pines, all imports and softer).

There are a great many timbers around Australia that are stunning for furniture, many from Tasmania such as my favourite Tasmanian Blackwood (exactly the same as Koa), but all are too expensive to use to build a bench.

Rats.

Regards from Perth

Derek

Re: I meant to build it this way!

#13

Re: I meant to build it this way!

Derek Cohen (in Perth, Australia)

Derek, not to be obtuse but why do you pose your question as an either or. Were it me, I would get those dogholes as close as you can to the edge and then have strategically placed holes for a hodfast which would allow me to fasten a piece right over a leg to mortise as in your example. My holdfasts cover a 9" radius approx so it's no biggy to drill 2 holes (right and left positioned) so you could work above any of the 4 legs.

Hi Guillaume

I tossed out the question for a discussion topic and to raise awareness that there are choices and decisions to be made when designing a bench.

For myself, dog holes at the edge of the bench is more important than over the leg (if the latter means the dog holes are moved inboard). I use holdfasts when morticing.

Here's another question: who uses a planing stop ala Roubo?

Regards from Perth

Derek

Re: I meant to build it this way!

#14

Re: Why not? and...

Derek Cohen (in Perth, Australia)

I don't understand the "appropriate" part. sleds/trestles have all sorts of good uses. I also think things go a little screwy when you talk about "dead zones." Maybe you've put it out of your thoughts, but you will have pieces of wood, some long, clamped for mortising, etc. Do these pieces comprise dead zones?

Hi Pam

Can you say more about your first sentence. I am a bit dense today and do not understand what you are saying/

With regard to the "dead zones", I am referring to a the 5" or 6" that is taken by the width of the leg where one cannot place square dog holes without compromising their design. This should not affect the ability to clamp something for morticing, since the board here is likely to be longer than 6". It also should not prevent one clamping a board that enters the "dead zone", since all one needs to do is use a spacer.

Regards from Perth

Derek

Re: I meant to build it this way!

#15

Re: I meant to build it this way!

roger lance

Derek....that new bench top looks to be more than 15" longer than the old bench....just an optical illusion ??....I guess its like an ole fisherman's trick....hold the fish out closer to the camera and the fish looks bigger.

Re: I meant to build it this way!

#16

Re: I meant to build it this way!

Derek Cohen (in Perth, Australia)

There's a third choice. Don't use the tail vise for holding boards for chopping. Use a holdfast instead. (I'm pretty sure you have one, no?)

My vote is to put the dog holes close to the edge of the bench. For chopping tasks, drill a hole for a holdfast in a position where the board being held by the holdfast will be over the leg. I'd wait until you have your bench put together, and chop some mortises/dovetails/whatever to figure out where to put the holdfast hole.

Frank Klausz did this on his Scandinavian style workbench, and has said that it was the best alteration he has ever done with his workbench.

Hi Wilbur

All good points.

Yes, I use (Gramercy) holdfasts where possible on my (old) bench. In this regard I can echo Chris Schwarz' argument against underbench cabinets, since they interfere. So my positioning has only been at the overhangs. This will now change!

I also plan to get a Veritas Surface Clamp for the sliding deadman. It looks to be the one to use here.

Regards from Perth

Derek

Re: I meant to build it this way!

#17

Re: I meant to build it this way!

wilbur

I use the planing stop, either by itself, or using it to back up a piece of scrap wood which is also held at the other end by a holdfast when planing wider boards.

Re: I meant to build it this way!

#18

Re: I meant to build it this way!

wilbur

Try your holdfast in your sliding deadman. For me, it works well. My sliding deadman is made from a 1-3/4" thick piece of cherry.

Re: I meant to build it this way!

#19

Re: I meant to build it this way!

Derek Cohen (in Perth, Australia)

Hi Roger

Guess what? I've just measured the old bench at 54". Is it really that short?! The top of the new bench is 21" longer. Do you think that this will make a difference to my woodworking? :)

Regards from Perth

Derek

Re: I meant to build it this way!

#20

Yes!!


Re: I meant to build it this way!

#21

Planing stop

Derek Cohen (in Perth, Australia)

Thanks Wilbur.

I planned to include a planing stop in line with the dog holes, essentially as a wide "superdog" across the width of he doghole stip.

Where did you place yours? What dimensions?

Is one really any advantage over a standard dog?

In the past I have used a board attached across the end of the bench (on bolts for adjustable height). In practice I find using the full width to be both unnecessary and a pain to adjust. So I end up using just the corner (board at an angle). One dog on this position should do the job.

Regards from Perth

Derek

Re: I meant to build it this way!

#22

Re: I meant to build it this way!

TomD

Wood can be expensive all over. My probably bad idea is you should be looking for your bench wood now. Then when bench 3 comes around you will be ready, and hopefully spend the 50 bucks I spent on this plus a lot of other stuff for planes. When I built my first bench maple was about 1.5 bucks. when I bought the wood for my second it was around 2.20. But by the time I got around to building the base, it had shot up to around 10. Seems to have settled down to earth since. That is why I cut the last piece myself.


Re: I meant to build it this way!

#23

How come.....

Bill Tindall

.....the Chinese manufacturers can ship a container of stuff to the US for less per pound than it costs me to mail a letter and our hardwood lumber industry can't figure out how to ship a container of hardwood to AU? In these quantities the top grade of white oak costs not much over $1/bdft at the mill. A business acquaintance has saw mill contacts in Africa and he has developed a thriving business importing containers of African woods. The plentiful African species don't sell for much more than domestic species.

If there is demand for wood where you live there is a business opportunity awaiting someone. Our export market to Europe is hurting (the reason cherry has become cheaper and the grade better) so our export supplies could meet demand.

Re: I meant to build it this way!

#24

Re: Planing stop

wilbur

My planing stop is 2" x 2", and is set back 5" from the front of the bench. I wish it was a little closer to the front.

I think the extra width does give the planing stop a big benefit over a standard dog. I can plane a board up to about 5-6" wide with the 2" stop by itself. For wider boards, putting a scrap piece of wood down in front of the planing stop held by a holdfast helps a lot. I'm sure that there are people with really good planing technique who won't need the extra help.

I'll post pictures later.

Re: I meant to build it this way!

#25

Re: How come.....

TomD

People learn to live without wood, so there isn't necessarily a mass market at every level. I have this book on Australian shops, and they are mainly steel or concrete. The are boatloads of timber going to Japan and other places that want it at scale. There could be a small scale business for a guy there, like your guy over here.

Wood isn't always better. I have a friend who builds boats over there, and wood is not entirely out, but not price superior as here. That just means they get great prices, on glass carbon, foam, balsa, plantation kiri and epoxy from China.