We value your privacy.
We use cookies to enhance your browsing experience, analyse site traffic, and personalise content.
By clicking “Accept all”, you consent to our use of cookies. You can also choose
“Essential only” or learn more.
I enjoyed this review, particularly the comparisons to other planes in the same category. Your treatment of the ergonomic issues is also excellent. Thanks for posting.
everyone of their BU planes has received very favorable reviews. I expect that LV and Rob Lee will be mailing buyers a nice brass stop screw to replace the one in the current plane model....because, they are classy like that.
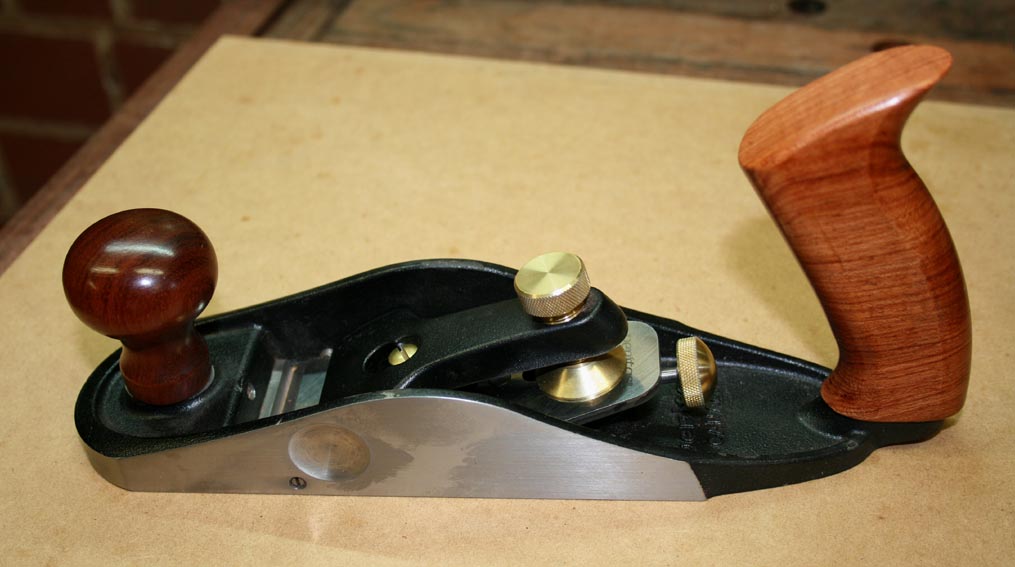
I'm a little disappointed in LV for the design changes that they have made on this plane. LV had established a design language with their other BU planes and I expected that they would continue in that language especially since it was pretty darn good as was. However, LV decided to deviate from their own themes and I don't see any real improvement to the product by these changes. There should be a brass "washer" under the front knob. There should be a brass stop screw not a cheap set screw to set limits on the travel of the mouth. The tote should be attached with two brass bolts as on other models. And while an improvement of sorts, the screw (not sure it is a screw...got to get the magnifying glass out to be sure) that now prevents the Norris assembly from leaving its confines now requires a bit of a hassle if you ever want to make an adjustment to that assembly. So, if need be, I'll get some brass and make my own "washer" and stop screw but I don't like to finish the manufacture of a tool that I assumed would be done by the people who are trusted to make it in the first place.
I commented on the brass washer and mouth adjuster in my review. I would like to see these changed, as you do, however it does need to be said that neither are actually vital features. The knob moves freely without the washer, and it could be argued that the mouth only needs adjusting larger rather than smaller - so set it for its minimum size and use the knob to open the mouth when required.
I do not know if the handle will be prejudiced by the new attachment (below). All I pointed out was that it is different from past handles. I have no details about its construction. Let's ask ...
With regard to the Norris adjuster being fixed now (by a screw) that is a GOOD thing, not a source for criticism in my opinion. There is nothing to adjust there, and only irritation when a loose adjuster comes out with the blade, as the earlier designs are wont to do.
Derek....The missing brass fittings are certainly not vital to the functioning of the tool. However, LV's line of tools are generally considered to not be as attractive as LN's planes....at least this is one of the constant things written about the two lines. Evidently, the issue of tool attractiveness is a valid issue as it is certainly not dismissed in review after review. Therefore, as a tool maker who is considered to be in second place on the attractive scale....why take away some of the bling that is normally on your planes??....not a good move....especially as these brass parts are not very costly given you are already set up to make them. Hopefully, you are right and I will never have to remove the Norris adjuster....because it looks like it would be a PITA to do so. And finally, may your great, great grandson hold that tote attached as is.
In the course of building typical furniture I have never encountered a situation where I was wishing I had something smaller than a #4 hand plane. What does anyone use these dinky planes for- a # 3, or the LV plane in question? The question presumes one already owns a #4 or is contemplating either buying a #4 vs #3 or 3 equivalent.
In the case at hand, I would be building the cabinet drawers with a #5. I could imagine planing drawer sides with a #4 if that is all I had. For a # 3 size, the weight, size relative to hand size, short registration between blade and toe would all seem inadequate, if not inconvenient, for adult male hands and the task of drawer making/fitting.
Frame of reference- for the most part I only use hand planes for fitting furniture parts and assemblies. The planes are tasked to removing wood. Planing is a means to an end, not a leisure activity. If I was limited to owning one hand plane it would be a #5. If I was limited to two it would be two #5's, one set fine and the other coarse. When I am fitting I don't want to be bothered by blade adjusting. Three hand planes and the third #5 would be ground to a scrub plane. Maybe at four hand planes I would add a #4, set fine for small parts.
Frame of reference- for the most part I only use hand planes for fitting furniture parts and assemblies. The planes are tasked to removing wood.
Hi Bill
For your purposes a #5 suits well. Removing wood is what a #5 is designed to do.
A #3 on the other hand is designed to remove as little wood as possible. It gets closer to the size of a traditional coffin smoother, which ranged between 6 1/2" and 7 1/2" in length so as to follow the surface undulations as much as possible.
Derek has mentioned the advantage of using a narrower plane for smoothing difficult Australian timbers using a high cutting angle. Under those difficult conditions a narrower blade reduces the amount of force needed to push the plane.
My favorite smoothing planes are short with wide blades. A typical coffin smoother or British infill smoother has a relatively short sole and the mouth is located closer to the toe of the plane than in Bailey pattern planes. This allows the plane to follow the contour of the wood, sort of like a potato peeler follows the shape of the potato. Since the purpose of a smoothing plane is to produce a high-quality surface on the wood by taking very thin shavings, the ability to follow the surface makes it a more efficient tool.
For twenty years my go-to smoother was an Ulmia with the mouth located pretty far back from the front of the plane. It acted too much like a jointer plane, removing only the high spots, but I didn't realize that until I got an infill plane with a wider blade and a shorter sole. Now I use the Ulmia more like a jack plane.
A few years ago a woodworker I greatly respect described how he sets up his #4 smoother with a cambered blade that would take a 1-inch wide shaving when set for a fine cut. That means only half the blade is cutting. When I use my smoother with a 2-1/8” blade I want to get a 2-inch wide shaving even when the blade is set for a fine cut. Instead of a camber I hone the blade straight except for a little relief at the corners.
One of the several reasons I don't surface plane is the annoying fact of the plane often not planing where I want/need it too. A short body plane would alleviate some or all of this annoyance and then I would be left with the annoyance of STS (sudden tear out syndrome) to be overcome. However, a short, narrow, lightweight, small handled plane (AKA #3 or 3 like) hardly seems like what you prefer for surface planing.
I remain puzzled why someone would buy the plane in review unless they were fitting small pieces or they had small hands.
You've brought up the issue that got me into research on sharpening, chipbreakers, etc. This was the factor that limited my use of planes on the exotic veneers I was using in my day job. Even for simpler tasks like flushing up the face frame on a cabinet it's tear-out that causes the worst problems.
As for the small bevel-up smoother I don't see any particular advantage to it except for someone with small hands. I've found that with the unhandled infill planes I like a 2-1/8 blade width feels right but a 2-1/4 blade makes the plane a little awkward to hold. The one that takes a 2-3/8 blade feels like it was made for a giant.
If your long or trying plane isn't planing where you need your stock either isn't flat or isn't properly supported. You should try to get your final surface off the trying plane because it's the truest surface you'll get. When the surface is true you should be taking light, full length and full width shavings with the trying plane.
The smooth plane allows you to go in and lightly deal with trouble spots, ideally in very localized areas while introducing a minimum of surface irregularity. For this you want a small, agile plane. I don't understand the desire for wide road grader type of smooth planes and I think most smooth planes are just too wide and clumsy for this work.
I use a #3 plane for smoothing (cleaning the work prior to gluing or finishing). I like this plane because it is light and, like Larry says, agile; you can really whip it around. I use all full length strokes, all in one direction so that the wood looks good when finished. If there is tearout, the plane is not well adjusted.
Each year I turn several hundred bdft of hardwood lumber into stuff. It is just not going to happen that I will abandon my huge thickness planer for stock preparation. I have too many things I want to build to spend tedious hours hand surface planing rough stock.
So after I get a top assembled, for example, the next step is to remove machine burnish and maybe some knife ripple. I would find it unacceptably tedious to have to hand plane the whole top coplaner to XXX thousandths of an inch just so the finish plane touched every part of the surface to smooth it. A short plane would overcome some of this objection to hand planing a surface. But STS is a fatal flaw for me. An unexpected grain tear takes considerable time to fix and if it is deep it has to be patched, and I hate patches. I see plenty of STS in antique pieces made with domestic woods so I simply don't believe that it is easy or even possible to entirely avoid.
I was fitting a quarter sawed drawer side, a place where I don't care if STS occurs, and one growth ring unexpectedly tore from end to end on this side in spite of the overall grain being oriented favorably. If this event could have been prevented by more advanced plane preparation or planing technique than I have mastered to date then what ever is required is beyond my skills or patience and I am at peace with accepting this fact.
I never get STS with sand paper or a scraper. This reliability is compelling. Using finishes that build a film I do not believe that it makes any difference in appearance if the surface is hand planed or sanded. So why bother with the aggravation. It seems to me to be too much diddling for marginal or indiscernible benefit. I do agree that hand planing is superior with the minimalist finishes some use- wax, thin shellac.
There is no substitute for a hand plane in fitting, but I don't ever see myself hand planing surfaces in preparation for my finishing schedules.
.. STS is a fatal flaw for me. An unexpected grain tear takes considerable time to fix and if it is deep it has to be patched, and I hate patches. I see plenty of STS in antique pieces made with domestic woods so I simply don't believe that it is easy or even possible to entirely avoid.
... I never get STS with sand paper or a scraper. This reliability is compelling.
...There is no substitute for a hand plane in fitting, but I don't ever see myself hand planing surfaces in preparation for my finishing schedules.
Hi Bill
THIS is why planing with a higher cutting angle is relevant.
Try a common angled Stanley with a 15-20 degree backbevel, a half-pitch BD smoother, or a BU plane (even a low angle block plane) with a 50 degree secondary micro bevel.
A #3 plane is 9" long, the same length as a #4, in most Bailey planes. The only difference is the width of the blade. The handles are not that much different. I don't know how long the new Veritas is but I suspect it's similar to what I'm talking about.
I believe that people hand plane surfaces it takes exceptional skill, experience, and equipment to get a good surface from this approach. Consistent with this theory, the few people I know that attempt it are quick to point out that their surface was hand planed (I would not have been able to tell otherwise unless STS revealed itself). One would not likely take such pride in something trivial like hand sanding or scraping.
If you can successfully hand plane surfaces for finishing on the time scale of your work I admire the perseverance and the result. However, I will challenge claims that the approach is either better, easier, quicker or more reliable given the rareness that I see it practiced in either a hobby or commercial environment.
I once did a demonstration with a 1X6X12 piece of rough sawn curly maple (Acer rubrum). I flattened one side, smoothed it, stained it, and applied shellac and then wax all in ten minutes time. My $30 in "exceptional equipment" consisted of a jack plane (home made, 1978), a beech trying plane (Sandusky, c 1900), a Bailey smoother (c 1915) and a cheap hair dryer to dry the stain.
That this method takes experience I do not deny. But I don't think it is profitable throw up one's arms proclaim it just too hard. In skilled hands this approach is reliable. I suspect it is also cheaper, quicker, and results in a surface with greater clarity and vibrancy.
I believe that people hand plane surfaces it takes exceptional skill, experience, and equipment to get a good surface from this approach. Consistent with this theory, the few people I know that attempt it are quick to point out that their surface was hand planed (I would not have been able to tell otherwise unless STS revealed itself).
Hi Bill
It does not take "exceptional" skill to achieve tearout-free surfaces. In Warren's case, I believe he must display exceptional skill because he uses very ordinary equipment to produce extraordinary results. However for the mere mortals of this world, such as you and I, using equipment that is set up appropriately takes up the lee way.
There are two set up factors of note, and which I included in the review of the SBUS. The first is a high cutting angle. This will eliminate the tear out you dread. The second is to camber the blade so that the surface is not marked with track lines.
This combination also certainly assures one of perfect results.
A planed surface is clearer than a sanded surface to my eyes.
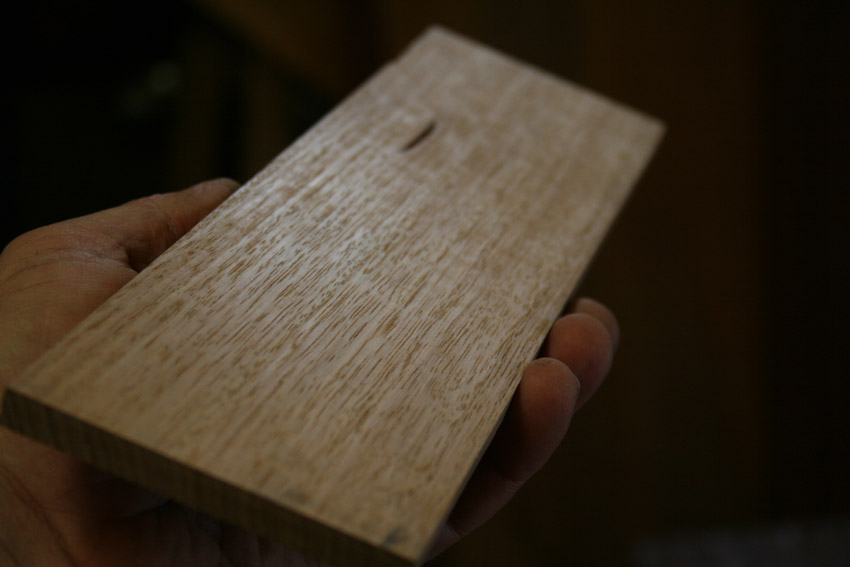
Here is the example I posted in the article ..
.. zooming in (and this Tasmanian Oak board is not without its reversing grain) ...
(this entry kinda got away from me, so I apologize for the length)
-I love my Bailey #3. Early handles from Stanley were a little smaller, and I don't like those... but they moved to one that was more like a #4 around type 11, I think. I wasn't a fan until the day I wrapped my index finger around the iron. Once I did that it was almost instantly intuitive, and it became my go-to plane back when I was at North Bennet. I don't always use it for smoothing, typically it's more for fitting, and edges and the like, but I do smooth smaller surfaces with it, and do other detail tasks. I wasn't planing large surfaces with it. Heel to toe, it's not really substantially shorter than a #4, but I find it more comfortable to hold.
I also think that, in the range of smoothers, (3, 4, 4.5) that the 3 is the easiest to adjust laterally. I had a 4.5 in school, but the iron would pivot around a point that was probably an inch back from the edge, and the corners would almost always swing out. Inevitably I'd end up with plane tracks from one side of the iron or the other, and eventually I just put the plane away. Set screws on either side of the mouth fixed that problem eventually, but the die was pretty much cast at that point. But part of the issue was blade width... small moves on a narrow blade will move the corners a little bit. On a big iron, the corners will swing WAY out there, if it's not pivoting at the mouth.
For the average hobby guy, I think the 3's and 4's are going to be a lot easier to get set up, and that translates into not needing to camber the iron quite so much.
-Derek makes a valid point about high angle planes. I put up a post a few months ago about a couple of slab tables that I made with some very curly maple. I didn't do my final surfacing with hand planes. BUT, I did joint the back of one with a high angle #4, before sending it through a sander. The board wasn't flat, and no way in hell do I trust a powered jointer or planer to handle curly maple like that without tearing the whole thing out and trashing the project. Once I found a planing direction that the wood was happy with, and skewed the plane a little bit, that big hunka wood settled down like a kitten, and gave me no problems, and NO tear out. That was with a 50 degree L-N#4. Since then, I dusted off the Gordon plane I gushed over a while back, (which is bedded at 55 degrees) and I've been saving pennies for a L-N#3 with a 55 degree frog. But I'm with you on one thing... I think some #3 planes have small handles. I emailed L-N about this, and they said that the higher angle frog will provide clearance for a bigger handle, like the one they use on the 4. So, that'll be part of the order when I place it, along with a corrugated sole and O-1.
L-N is extravagant, but not really necessary... I've met people who glue small blocks of wood to the top of their plane irons, to keep the iron at an angle on the stone while sharpening the backs... it's basically a built-in back-beveling jig. Same idea, similar results as a high angle frog. I haven't put one onto the iron in my Stanley #3... yet. But that doesn't mean I won't.
-I think understanding the process of making shavings helps more than technique or equipment, because it can help guide the process of learning technique and setting up equipment. With a tight enough mouth, the front of the mouth holds the chip down, and the blade peels it up. Most of us in here already know that. BUT, with a high enough angle, the forces involved will push the chip forward and lever the wood fibers down, instead of levering it up and splitting it out. This is why a high angle is important. Angling the plane a bit while you push will shove the fibers to one side while they're cut, and the adjacent fibers will lend a little bit of support, too, an help keep from tearing out.
But in the end, I think you're right... on a large enough scale, sometimes there's no substitute for a sander... and I love my Festool sanders.