New WoodChat!
Home Articles Forums Gallery Marketplace Videos

WoodCentral Forums

Knowledge You Can Build On — Est. 1998

200+ woodworking book reviews

Update on chests: halfblind dovetails in Jarrah

Posts

Update on chests: halfblind dovetails in Jarrah

#1

Update on chests: halfblind dovetails in Jarrah

Derek Cohen (in Perth, Australia)

I thought I'd try something new (to me) when dovetailing the drawers.

First of all, here is my dovetailing bench. I set up a moxon vise on an extension table. It is higher than my bench and easier to direct light over the work.
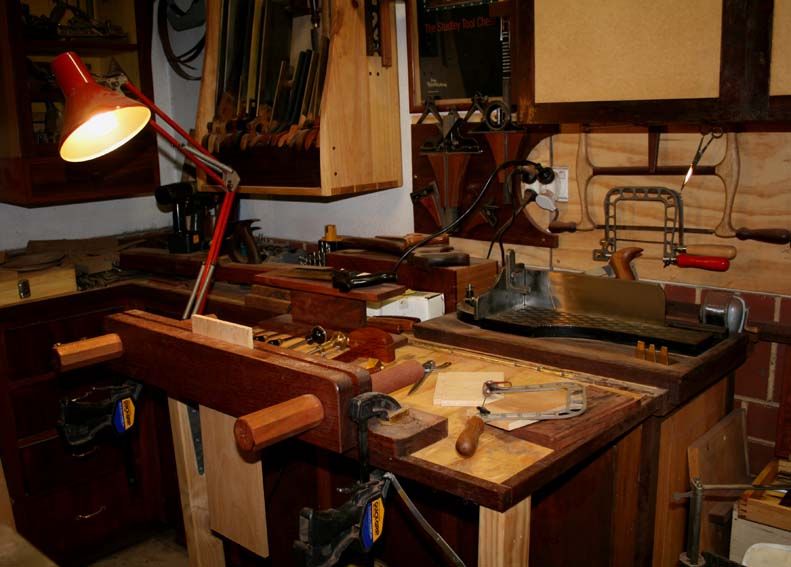

There are 12 drawers in all. All have dark Jarrah fronts. Even with extra directed light, it is difficult to see the lines transfered from the tail board to the dark endgrain of the Jarrah. Jarrah endgrain is hard enough to chop away. Struggling to see the lines makes it hell. 24 sides to do ...

I recalled reading a tip about a year ago that involved using blue tape. I do not recall the name of the individual (my apologies), nor the details of his method - for all I know he was marking through dovetails. Anyway, I thought I would give it a go on the first drawer, and would use it for the others if it helped.

The pin boards were sawn and chiseled in the usual manner. Then it was time to transfer the marks to the pin board.

The pin board was clamped in the vise. As seen, it has a scribe mark to denote the depth of the pins ...
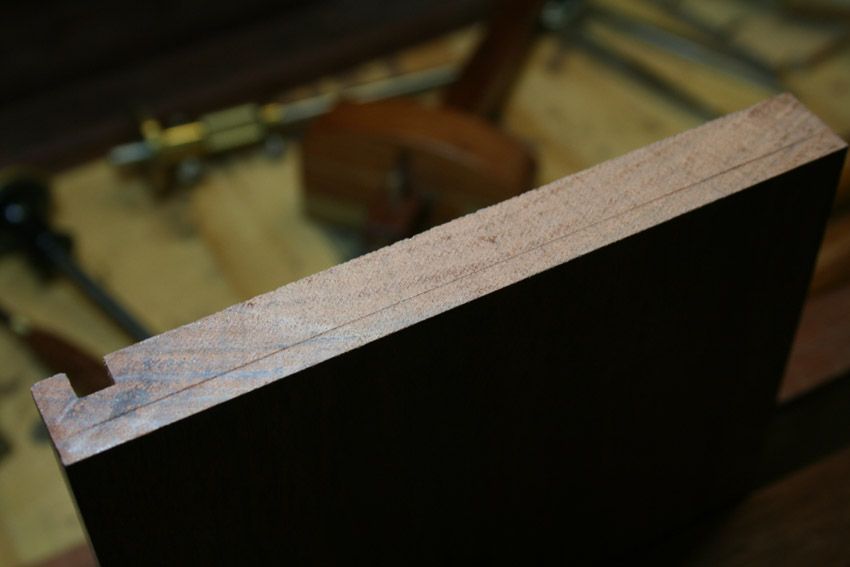

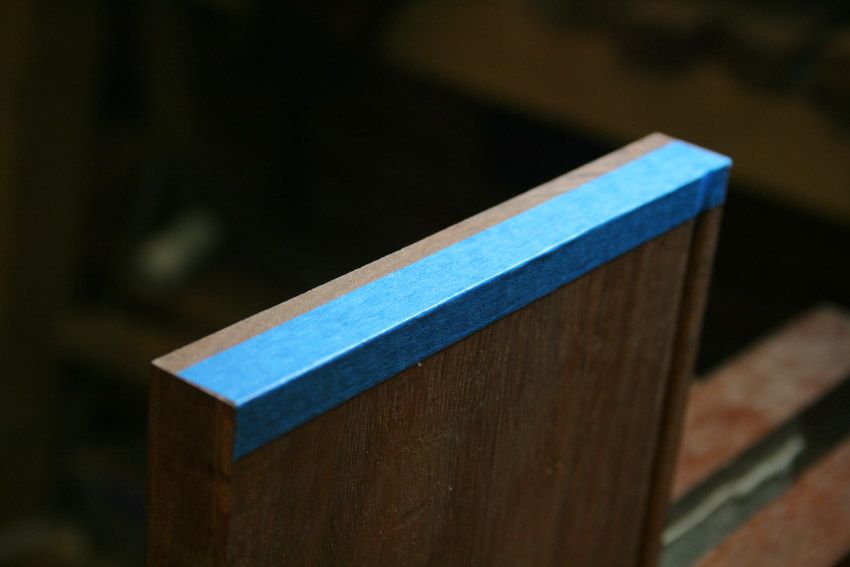
The blue tape is added, running between the two boundaries. Cut it away from the sides as the edges will later be needed for registering the tail board.

Now you can place the tail board over the pin board to transfer marks ...
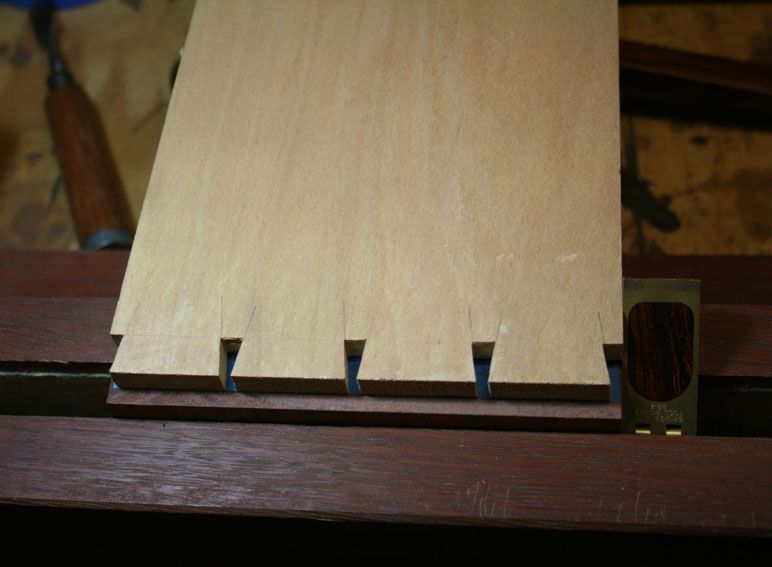

Remember to use a Vesper knife!!! :)


It is not easy to see the cut lines ...
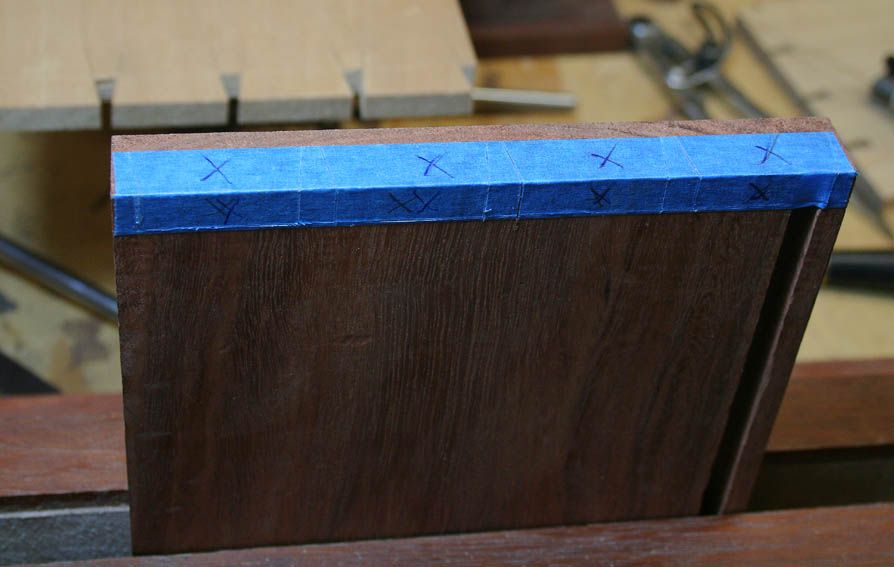

... until you peel away the waste areas ..
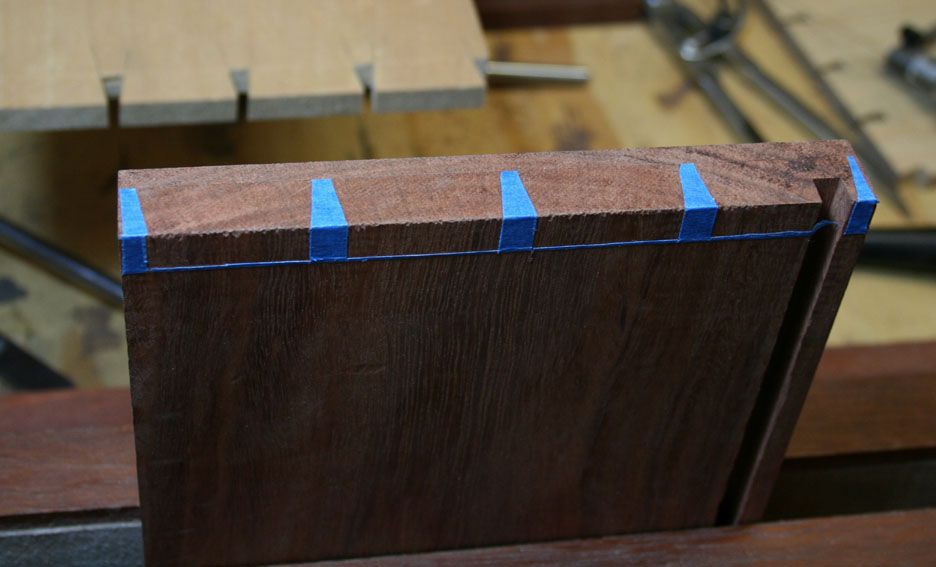

The lines stood out so clearly that sawing to the lines was really easy.
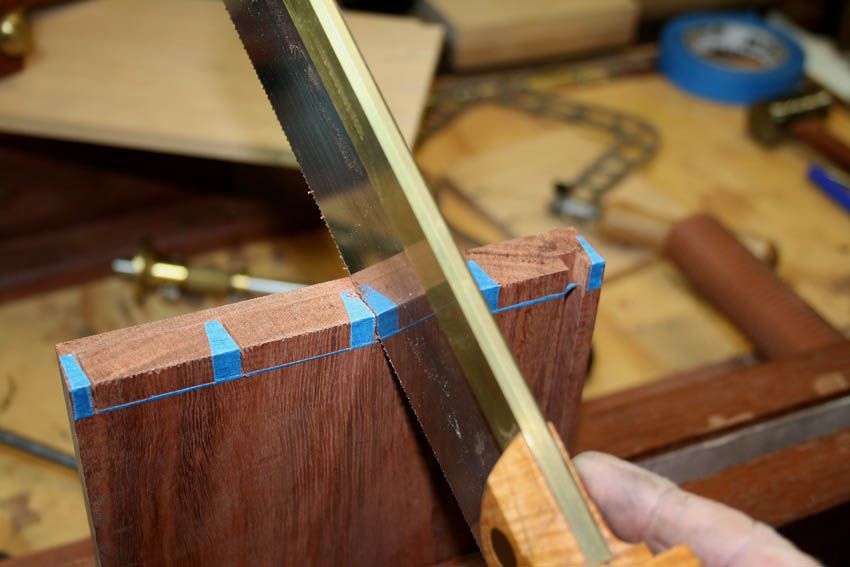

Here you can see how close to the lines I managed to get ..
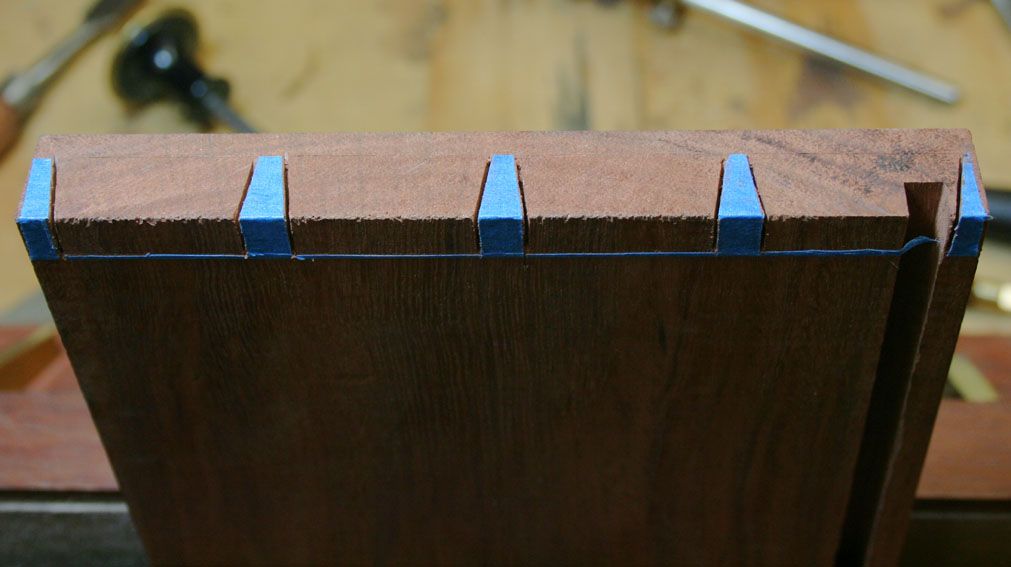

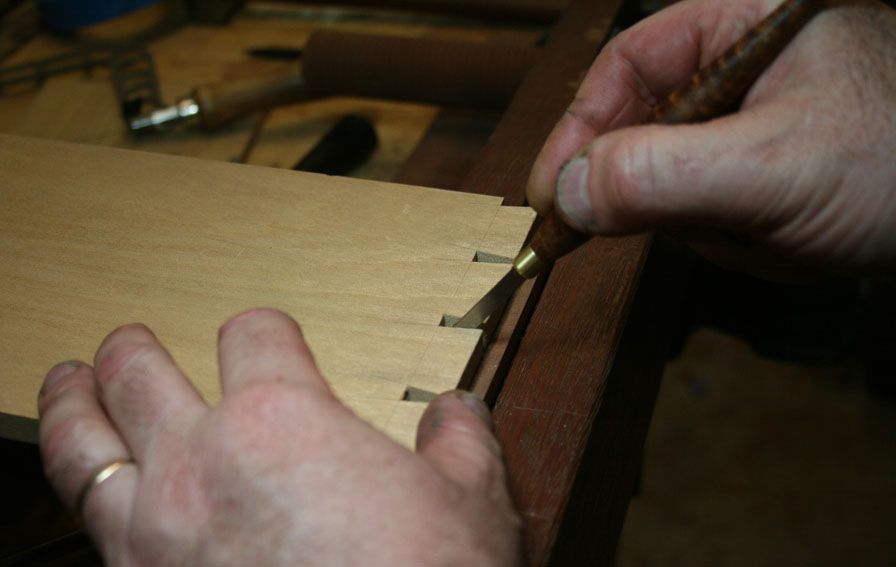
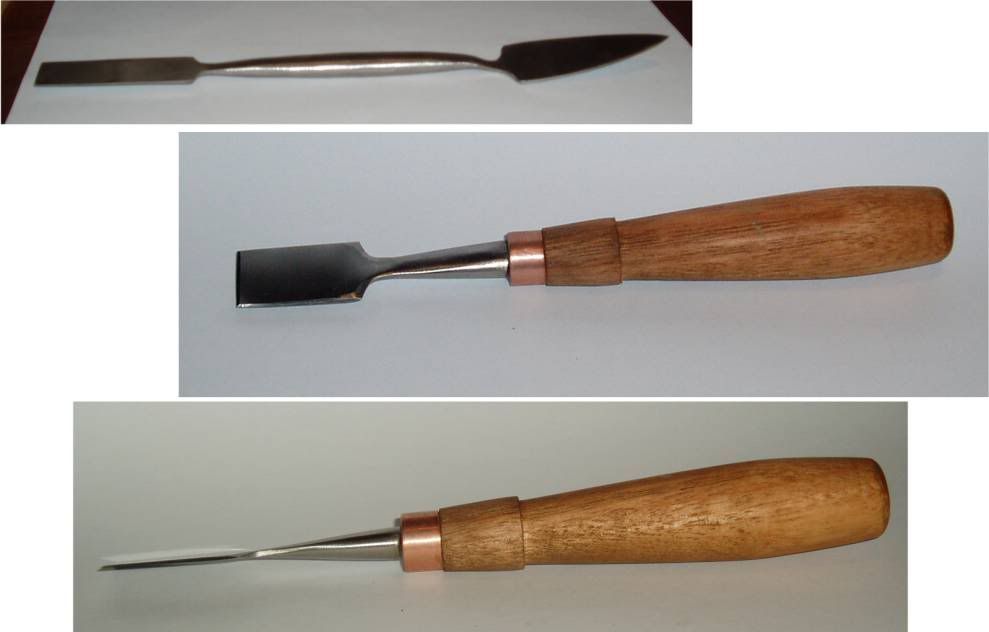
I've posted this before but I'll show it again. Several years ago, influenced by Tage Frid, I made a "kerf chisel" to deepen the kerf on the half-sawn pins. This has a blade the same thickness the saw. The end of the blade is square to prevent splitting the grain. As a precaution I add clamps to prevent any blow out.
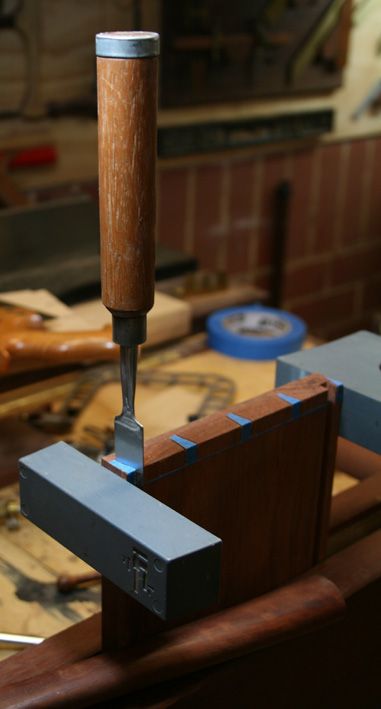
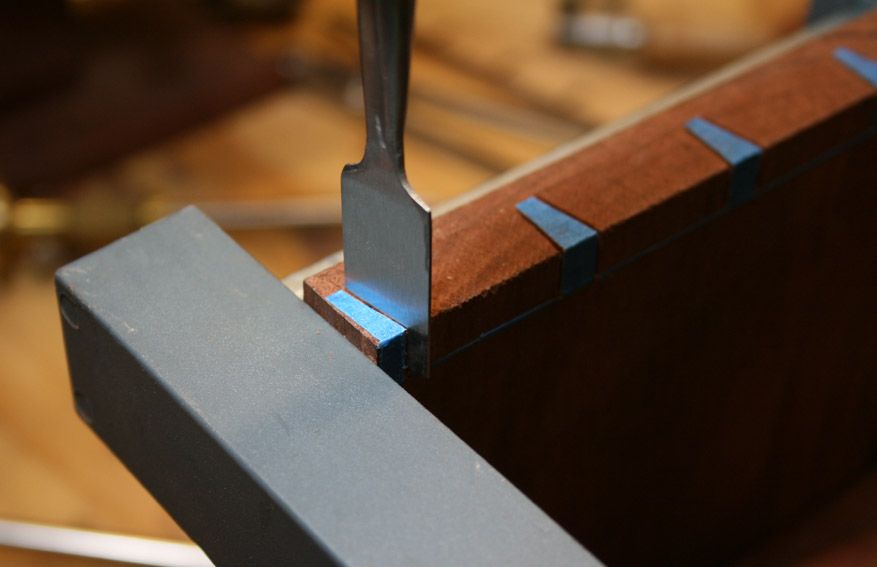

The pins were chopped out ...
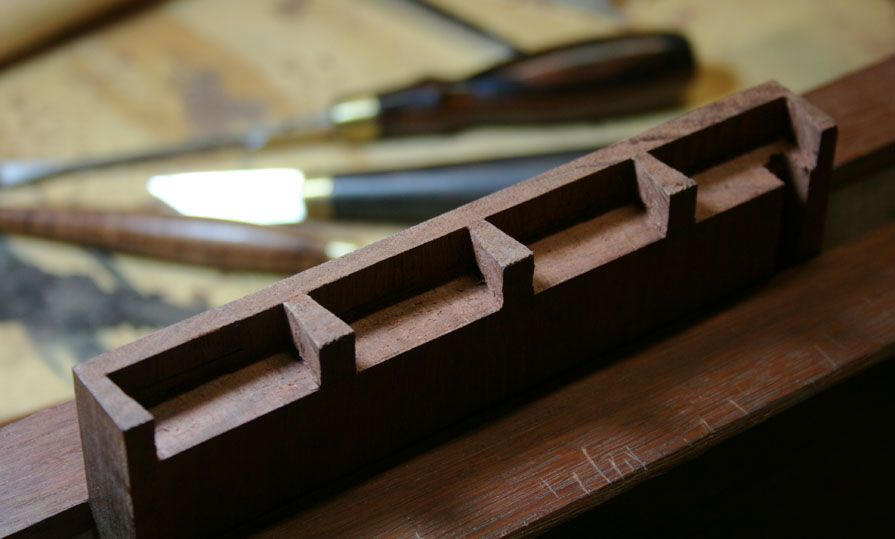

... and the tail board given a trial fit ...
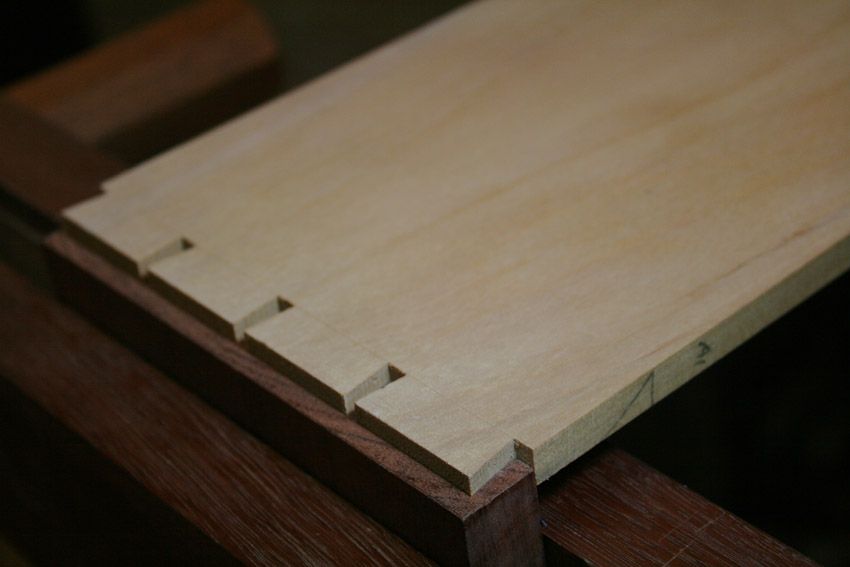

That is a nice fit! No adjustments required. Easy peasy.

Regards from Perth

Derek
Re: Update on chests: halfblind dovetails in Jarrah

#2

Masterful .


Re: Update on chests: halfblind dovetails in Jarrah

#3

Re: How about a closeup of that chisel


Re: Update on chests: halfblind dovetails in Jarrah

#4

Re: How about a closeup of that chisel

Derek Cohen (in Perth, Australia)

Hi George

It started life as a stainless steel trowel. Here is an early picture. Since then I have replaced the handle and fine-tuned the blade (thinner, parallel, square ended) ...


Here is a more recent picture (at top) ..


Regards from Perth

Derek

Re: Update on chests: halfblind dovetails in Jarrah

#5

Comment on the kerf chisel

Bill Tindall

I have encountered various approaches to removing half blind waste. On American Period furniture it was common to saw well below the base line so as to make the kerf deeper, a technique I personally abhor. Others drive a card scraper into the kerf. And there is the chisel.

This is not meant to be critical of the kerf chisel, just an alternative.......

For all my bumbling when it comes to dovetails this isn't an operation I have ever felt needed assistance from a tool other than a typical beveled chisel. I find it easy to orient a chisel parallel to the saw kerf, fix the butt against my hip and with but a few paring slices the waste in this corner is gone. If the dovetail angle is not extreme the corner fibers break off so there is no need to pick up another chisel to get into the back corner.

Re: Update on chests: halfblind dovetails in Jarrah

#6

Re: Comment on the kerf chisel

Derek Cohen (in Perth, Australia)

For all my bumbling when it comes to dovetails this isn't an operation I have ever felt needed assistance from a tool other than a typical beveled chisel. I find it easy to orient a chisel parallel to the saw kerf, fix the butt against my hip and with but a few paring slices the waste in this corner is gone. If the dovetail angle is not extreme the corner fibers break off so there is no need to pick up another chisel to get into the back corner.

Hi Bill

I wish you could see my grin ... just so you know I am smiling.

One of these days I will send you some of the concrete we call wood ... :)

Jarrah is interlocked and the corners need to be pried out with a skew chisel. "Fibres breaking off .." ... indeed ... :D :D :D

Regards from Perth

Derek

Re: Update on chests: halfblind dovetails in Jarrah

#7

I still don't see the benefit, regardless of wood

Bill Tindall

After sawing the half blinds and removing what can be removed with the drawer front with its back side facing up, then it gets mounted vertical in the vise. At this point the visible saw kerf establishes the outside boundary of the triangular corner of the "tail" that still needs to be removed. I, and I am presuming everyone, next pares this waste away with alternating chisel cuts parallel to the length of the drawer (long grain paring) and chisel cuts across the base of these fibers to shear them off even with the bottom of the tail socket.

It is a simple matter to just keep paring to the outside of the saw kerf. The skiny chisel hasn't removed any wood. It just has made the boundary deeper and more defined, an extra step I find unnecessary. I find I can pare to the outside of the original saw kerf as well as a kerf deepened by the skinny chisel, card scraper or what ever. I question that deepening the saw kerf has accomplished anything useful toward the task of removing the triangular piece of waste.

Re: Update on chests: halfblind dovetails in Jarrah

#8

Overview for context

Derek Cohen (in Perth, Australia)

I post on other forums and try and coordinate the information/discussion for benefit of those that do not venture elsewhere. A few points came up ..

Keep in mind here that the post was about seeing scribed lines on dark, hard endgrain.

I use white and yellow pencils when marking on dark wood. I gather Rob Cosman (of DVD and dovetail fame) advocates using a red ink pen. Now this is fine when it is the initial laying out marks, such as the tails (if you go tails-first, as I do). However, you then cannot mark the pins from the tails using a pencil. Even a fine pencil/ink mark is wider than desired, and there would be too little space to fit a pencil if the tail was narrow to begin. A marking knife is the best solution in this situation. Another alternative is, of course, to mark the pins first (I bet that will bring some out of the woodwork! :)

I have experimented with wiping powdered chalk into the scribed line. It does make the lines clearer. The reason I decided to try something else here is that the Jarrah endgrain is so hard that even repeated knife strokes (way more than I would want to use as too many just widen the line) are very shallow. I also find that the scored lines start to close up very rapidly. That is a nightmare then - you just do not want to try and redo markings by starting all over again, and you do not want to guess where the lines are! One of the reasons I make a big deal out of sawing the tails straight and getting the angles spot on (for most it would not matter as the tails become the master template for the pins), is that if necessary I can use the marking gauge to guide a reinforcing cut line, that is, go over the old line and deepen it afterwards.

NOTE: the time it takes to use the blue tape is inconsequential. It added about 30 seconds. Even if it added 1 minute or 5 minutes, the dividends in the visiable lines that make this joint making easy are clearly demonstrated here.

Kerf Chisel: PLEASE please please be careful when using this technique, especially on hard and brittle woods! There is always potential for blowing out or splitting the grain. I am not sure what Tage Frid would have written, if he did, but I am confident he would have stated the same.

ALWAYS always use a either a backing board or back support, and clamps on the ends. Hit the chisel gently. Listen/feel the feedback you are getting.

The blade is thin and even in thickness. I would have used a card scraper or a saw blade if it had been possible to add a handle. As it was not, I ground down the blade of a steel trowel. The ends are square. This crushes rather than cuts the small triangle of unsawn kerf. A bevel at the end would act as a wedge!

That said, this is a really helpful strategy for clearing out half-blind pins. Especially, with dark and hard wood where sometimes you feel you are working by feel rather than sight.

By the way, terminology ... I refer to it as the "pin board" as I am making pins - half-blind pins. This is no doubt excessly influenced by the US. Some may call them "sockets" ... yes? That sounds as good to me as anything. Then again, I do not have a problem using "half-lapped" for half blind, or "lapped" for through dovetails. All just semantics ... but important perhaps?

Lastly, I like experimenting and do all this for fun. The tutorials record my efforts and are aimed at those who are looking at woodworking the same way. Those that are clear as to the way they prefer to build - not necessary the only way or even the correct way - are unlikely to pay my articles any attention.

Regards from Perth

Derek

Re: Update on chests: halfblind dovetails in Jarrah

#9

Re: I still don't see the benefit, regardless of w

TomD

I use various tools for this, sometimes a paint scraper.

Anyway. With respect I think you are looking at this the wrong way. You seem to be asking whether this will do something your paring will not. And whether it is an extra step/time. The purpose of this technique as described by frid's was to reduce the excavation of the sockets to a simple choping out procedure as it is with other forms of the joint. To do that, the kerf needs to be fully in place. Frid was all about making the money as far as his methods are concerned, and in the popularizing video he is joking about how doing it his way puts more money into his wife's pocket, his sole apparent aim as far as woodworking was concerned. He accompanied this technique with significant undercuting to make apparently tight, glue filled joints. I haven't hear that his parts come appart.

From Frid's perspective, I am sure that the would consider your paring a waste of time compared to his kerfing and undercutting.

Frid used a big honking bowsaw, and he was able to tightly match that kerf with a bandsaw blade made kerfer. Main limitation as I see it is that if a person just spend a fortune on a really expensive boutique saw, they might not have a large enough kerf to accomodate a stiff enough piece of stock.

I just want to say "patent applied for" on the soon to be offered LV type version with interchangeable blades in a variety of one thou spaced sizes. Kaching!

Re: Update on chests: halfblind dovetails in Jarrah

#10

lapped dovetails

Andrew F in Australia

Hi Derek,

"Lapped dovetails" is the Australian/UK trade term for the US "half-blind dovetails." Through dovetails (aka full dovetails, or just plain "dovetails") seems to be in use across both countries. The terminology's fairly well established and specific.

I think that the comment you refer to re: chopping out the pins vs chopping out the tail sockets is that, in the picture, you've removed the wood from the tail socket (I saw it on the other forum,) so, technically, you've cut the tail socket and left the pins behind. The pin sockets are cut into the other board/drawer side, leaving the tails behind.

Regardless, it seems easy to follow. I mark out the pins with a fairly sharp snap-off OLFA craft knife, and put the light at a fairly shallow angle to pick up the shadow of the knife line/reflection of a pencil line in something like Jarrah or Red Gum, either that or cut them in the middle of the day when you have stacks of light. One day when I was having trouble seeing, I used masking tape. It moved and I scrapped the joint.

Cheers,

Andrew F

Re: Update on chests: halfblind dovetails in Jarrah

#11

Re: I still don't see the benefit, regardless of w

Derek Cohen (in Perth, Australia)

Hi Tom

I don't disagree with what you say. The theme of my post was marking to and paring in Jarrah. Just looking at a way to make this easier. Jarrah is hard work. In other woods I would not go to this trouble.

Interesting about Tage Frid, but not surprising. Professional woodworkers are not expected to dilly-dally as I do. I am sure all shake their heads in horror! :D Still, if someone else can use my ideas productively ... or if they lead to some interesting discussion that promotes other ideas ...

Regards from Perth

Derek

Re: Update on chests: halfblind dovetails in Jarrah

#12

Experimenting

Bill Tindall

you said, "Lastly, I like experimenting ". I can relate.

Experimenting is what leads to better ways of doing stuff. Because we have greatly different skill and experience levels and use woods of different properties there follows a variety of "best" ways to do this or that. Experimenting and discussion of the experiments helps each of us find what is best for us.

Re: Update on chests: halfblind dovetails in Jarrah

#13

Still not clear...

Bill Tindall

First let me be clear. I like quick and reliable. In this regard Frid is my hero. If he used a technique it must be productive. Hence, I would like to understand the details because I may find them useful.

I still am not sure I understand how driving a card scraper (or what ever) into the kerf speeds up waste removal. Is it because it avoids relocating the board vertical for paring this waste? Saw to define pins, bash the scraper (or what ever), remove board from vise and lay with back of drawer facing up. Chop ALL the waste with chops perpendicular to back of drawer. Done. Board does not have to be relocated to vise and no paring cuts involved?

If the above description is correct then this technique is of no value to me because I am not sufficiently skilled and/or experienced to make a joint without paring some to get it to fit. And thanks to all that have helped in the discussion.

Re: Update on chests: halfblind dovetails in Jarrah

#14

Re: Still not clear...

Derek Cohen (in Perth, Australia)

Hi Bill

Yes, this technique benefits from accurate sawing. The aim is to be accurate enough not to have to pare - then chopping out the waste is quicker because can work straight in.

I'm about to post pictures of the completed drawer, so you can determine for yourself how well I did (noting that the tape helped me see the lines clearly, which aided significantly).

Regards from Perth

Derek

Re: Update on chests: halfblind dovetails in Jarrah

#15

Pictures at an exhibition

Derek Cohen (in Perth, Australia)

Well not quite Emerson Lake and Palmer, but this is music to me. :)

I've got a long way to go, and I did not get much time this and last weekend. I have the afternoon free tomorrow. Perhaps I will get one or two done, now that the first is completed and the pattern is there.

A while ago I asked advice about dovetail number and sizes. Now you will see what I plan ...

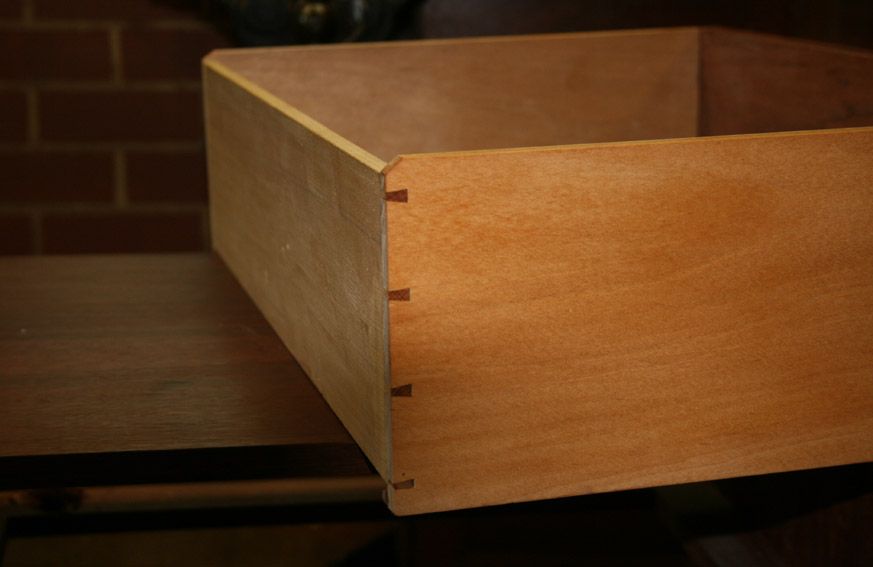
The drawer is complete save for the base. I will do these all later.


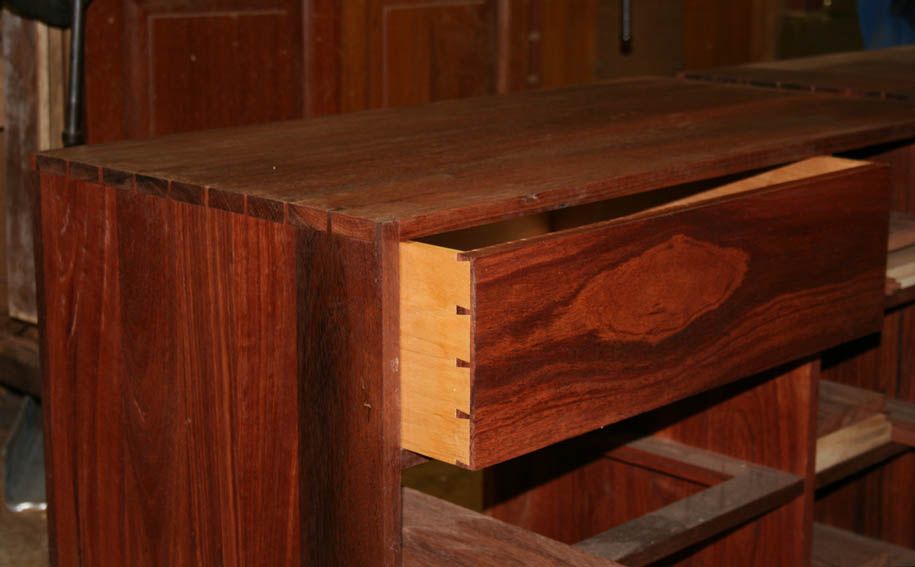
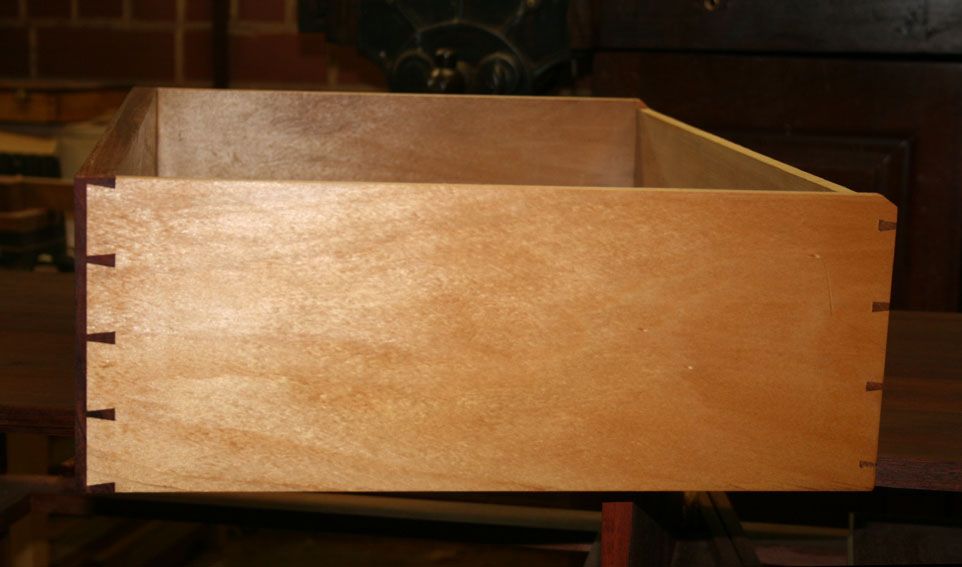
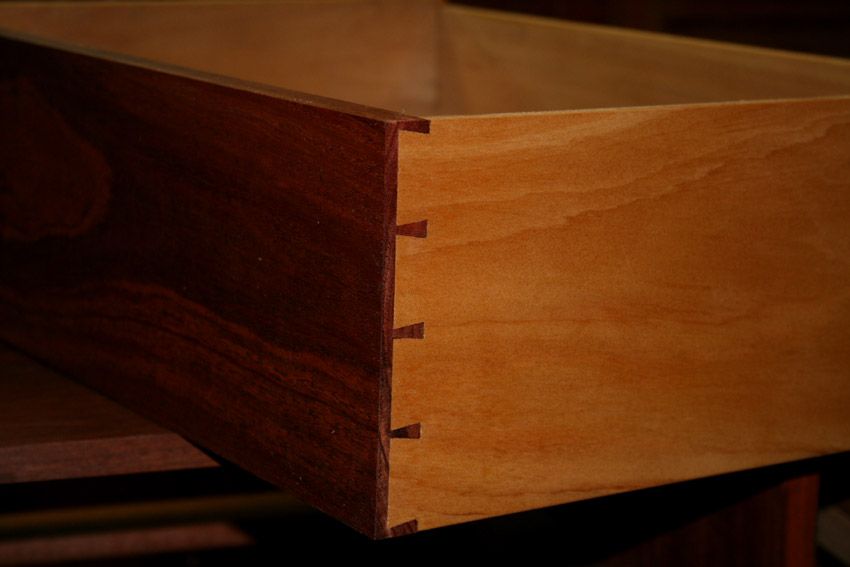
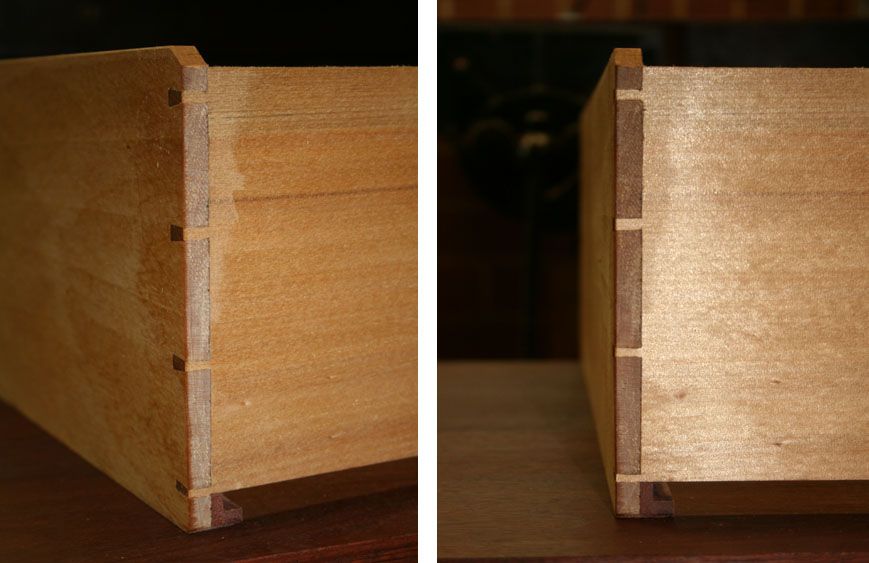
A front ...


... and a rear ...


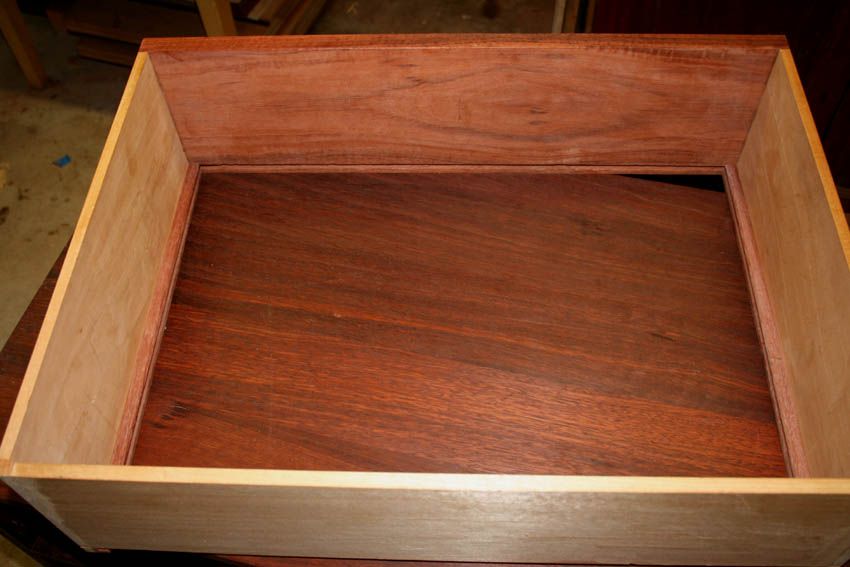
Here are images of the slips:

From the rear ...


Through the drawer ...


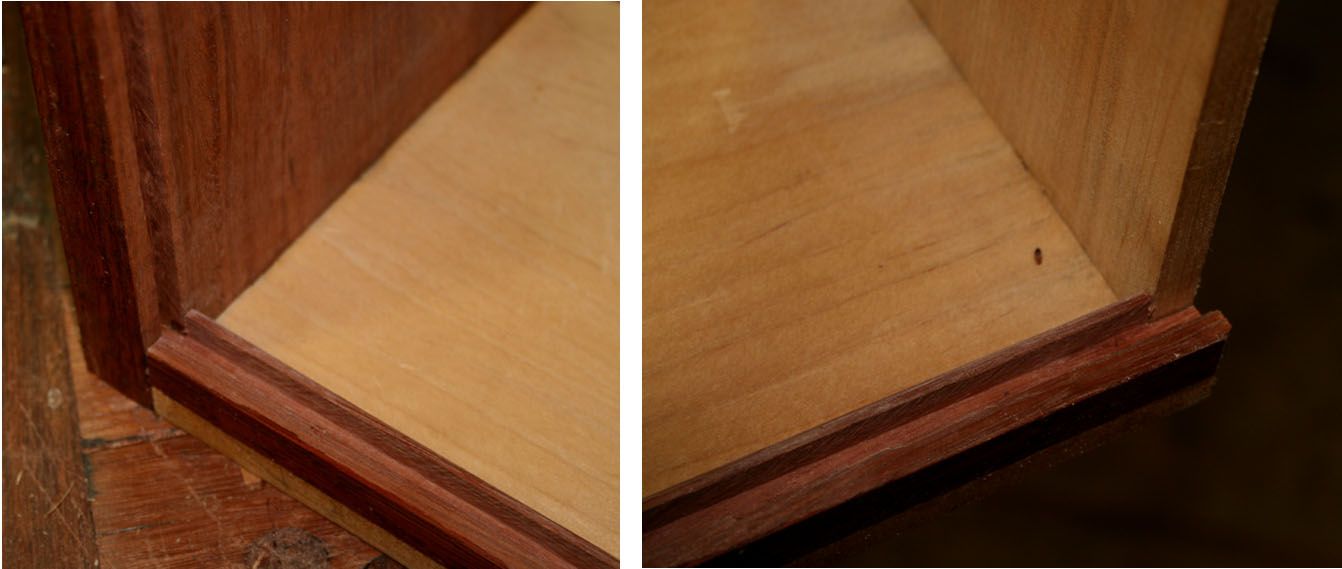
.. and internal details (note that the ends are tenoned into the front groove) .. front (on lefty) and rear (at right)...


One last item, a jig I used. I had planned to use the drawer opening to square the drawer as the glue dried. However the sides did need a little planing, so I turned to this jig that I got from Andrew Crawford, when I went on a box-making course with him.


Just clamp two sides and all four must end up square ..


Regards from Perth

Derek

Re: Update on chests: halfblind dovetails in Jarrah

#16

Question

roger lance

Derek....why the cut down on the top of the rear portion/back of the drawer ?....to reduce any potential rub?....or just a style choice?

Re: Update on chests: halfblind dovetails in Jarrah

#17

Re: Question

Derek Cohen (in Perth, Australia)

Hi Roger

Good question.

It simply makes it easier to insert/replace the drawer - avoids a sharp edge wacking the carcase frame.

Regards from Perth

Derek

Re: Update on chests: halfblind dovetails in Jarrah

#18

Tradition as well

Andrew F in Australia

Hi Derek/Roger,

Derek has one of the two reasons listed for the drawer back being ¼" lower than the drawer side, that it's easier to put in. The other reason that drawers are made with the back lower than the front is to give an air gap, so that, as the drawer is pushed in, the air has somewhere to go. (it also flows under the drawer bottom and out under the drawer front.

They're well made drawers, Derek.

Perhaps you might like to consider the following as suggestions for the next project.

Pin sizes on the back: The lowest pin on this image appears skinnier than the rest, looks as though it's half width. Traditionally, all pins are the same width at the thickest point, with the skinniest part of the lowest dovetail pin being a little wider than it's mates. Gives a stronger drawer back and visually is a lot less significant. (it's the drawer back, so, being honest, it's neither here nor there as nobody really sees it, just a distinction that was obvious to me.)

Drawer glueup: Occasionally, carcases and drawer runners aren't square. It's a better option to glue up the drawer; clean up all surface glue completely; let the glue gel within the joint (10" or so), and then; put the drawer into the opening with the drawer front parallel to the drawer blade/rail, but about ¼" proud so it doesn't glue itself into the opening. In this way, the drawer glues up with the sides parallel to the guide rails and the front parallel to the carcase front. This significantly reduces muck-around when you're fitting the drawer compared to making a perfectly square drawer that is meant to fit in a slightly out-of-square opening.

Drawer sides: Are planed to fit opening on traditional drawers (made a tight fit intentionally, then loosened off slightly.) To avoid blowout, one of the considerations during manufacture is that the drawer side grain is intentionally selected so that it can be planed from front to back.

All the little tips that make life easier.

Was going to post this on the Australian site, but saw Roger's question, so answered here first.

Cheers,

AF

Re: Update on chests: halfblind dovetails in Jarrah

#19

Question

Bill Tindall

I thought leaving the drawer back full height was the thing to do so that when the drawer was closed the compressed air would blow the dust off the dust panel. (just kidding of course)

I know these two cabinet makers that inhabit the same shop. They agree on everything except this drawer back issue. One lowers the backs a 1/4" of so, the other hollows the back a tiny bit for clearance with a few whisks of the hand plane. They seem quite determined to disagree about this feature.

I do subscribe to the idea of curing the drawer in its place in the cabinet. If for no other reason it is easier and it certainly ensures a good fit.

Re: Update on chests: halfblind dovetails in Jarrah

#20

Answer

Andrew F in Australia

Hi Bill,

Tradition is the splayed back, with the drawer back, top edge, rounded over, not square.

The splay is more at an angle of 15° to 30° to the horizontal, not quite as steep as Derek's there. Rounded top of drawer back to avoid clothes or other things being caught on the arris and torn/raising a splinter.

I don't know the answer to your question, just that it's based upon about 300 years of practical experience. Maybe it's the US system of training that's slightly different to UK/Aust.

Cheers,

AF

Re: Update on chests: halfblind dovetails in Jarrah

#21

Re: Question

TomD

"the other hollows the back a tiny bit for clearance with a few whisks of the hand plane. They seem quite determined to disagree about this feature."

That's the right answer, I hope that is helpful. :)

Re: Update on chests: halfblind dovetails in Jarrah

#22

Re: Still not clear...

TomD

"I still am not sure I understand how driving a card scraper (or what ever) into the kerf speeds up waste removal. Is it because it avoids relocating the board vertical for paring this waste? Saw to define pins, bash the scraper (or what ever), remove board from vise and lay with back of drawer facing up. Chop ALL the waste with chops perpendicular to back of drawer. Done. Board does not have to be relocated to vise and no paring cuts involved?"

Frid's actual method is to saw with the board vertical, place it back down on the bench and chop out the waste, then put it vertical again for pairing. The reason he uses the saw blade is to make it so all the waste comes out in the usual chunks without any of it being held up because it was only half sawn. Think of it this way, if only sawing half way thorugh was such a good idea why not do that with through dovetails also, and with the tails on half blinds? But it isn't a good way to go so why not fully extend the cuts.

Also, what happens is that often there is a little shaving to pair off, but what there isn't is substantial stuff that is awkward to get out from the corners and requires awkward chisel work to get free.

Also Frid is a believer in the undercut endgrain. He angles his chisel at almost a dovetail angle. YOu might think he was working on the sides of pins, rather than the perp surfaces of the sockets. If he was not going to undercut endgrain, as I don't, he would likely be done with the board form the position on the bench.

"If the above description is correct then this technique is of no value to me because I am not sufficiently skilled and/or experienced to make a joint without paring some to get it to fit. And thanks to all that have helped in the discussion."

I don't buy that. You just have to set the paring chisel aside. As I have said before, I have been cutting dovetails for 30 or more years, but I was a long time getting comfortable with it. I read this article in Woodworking about a guy who was at the same or earlier stage, but volunteered to do a clinic for other woodworkers, as a means of finally applying himself to the task so he would get on top of it. Franz Klaus had a similar episode when he had to build an appothecary drawer set with like a hundred drawers. Even he was not firm at one time. Anyway, I liked the idea and did the same thing. Put off practicing until the last moment, and still nailed the presentation Rob COssman style (before his time). Had one TV woodworker attend, and even got private gigs off it. That was probably just before everyone could cut dovetails. The last hurrah. It just isn't that hard, one simply has to practice the right way, and not much at that.

I would say on the way into that demo I had problems in all possible areas, Sawing, chopping particularly, and worst of all having a feel that makes what are fairly crude reference marks lead to the proper offset for a tight joint. When I go through what was the first demo in a full day seminar covering 4 separate approaches, and it had gone well, I wrestled with the idea of whether I should confess that only a few days before I had been hacking it up with the best of them. I decided that really wouldn't serve anyone's interests. But I still wish I could have told them how I knew that it only takes a little real practice to get on top of it.

Re: Update on chests: halfblind dovetails in Jarrah

#23

Re: Question

roger lance

Derek....would you accomplish the same thing if you were to clip the bottom back corner of the sides and slips given the back and bottom are already recessed?

Re: Update on chests: halfblind dovetails in Jarrah

#24

Re: Question

Derek Cohen (in Perth, Australia)

Derek....would you accomplish the same thing if you were to clip the bottom back corner of the sides and slips given the back and bottom are already recessed?

Hi Roger

Partly - the bottom corner is also chamfered. As Andrew noted, the chamfer at the top is a traditional feature, linking in with the low back.

Regards from Perth

Derek

Re: Update on chests: halfblind dovetails in Jarrah

#25

Re: Question

roger lance

Yes....I had to go back to the pictures and look closer....the bottom chamfer is there....details details :) ....I've been reading various tool reviews etc on your site....thanks for that, its been a real guide for me in picking out hand tools....I'm becoming a Lee Valley guy....bought the dovetail saw package and am very interested in their BU planes....thanks again, you are very helpful.