New WoodChat!
Home Articles Forums Gallery Marketplace Videos

WoodCentral Forums

Knowledge You Can Build On — Est. 1998

ADVERTISE HERE - FREE TRIAL

First stages in drawer building.

Posts

First stages in drawer building.

#1

First stages in drawer building.

Derek Cohen (in Perth, Australia)

I put in several hours this weekend on the chests, and yet it feels no further along. There is a question I have for you about management of work. It's a good topic here for discussion, especially for us weekend warriors who are limited for time and have to deal with longer builds.

It had got to the stage where I was ready to build the drawers. My first reaction was "Oh Boy!". I love dovetails. Generally I like making drawers. Then I began to plan out what was needed to build 12 drawers, and how to manage this area. Building one or two is relatively simple; building 12 is quite a different proposition.

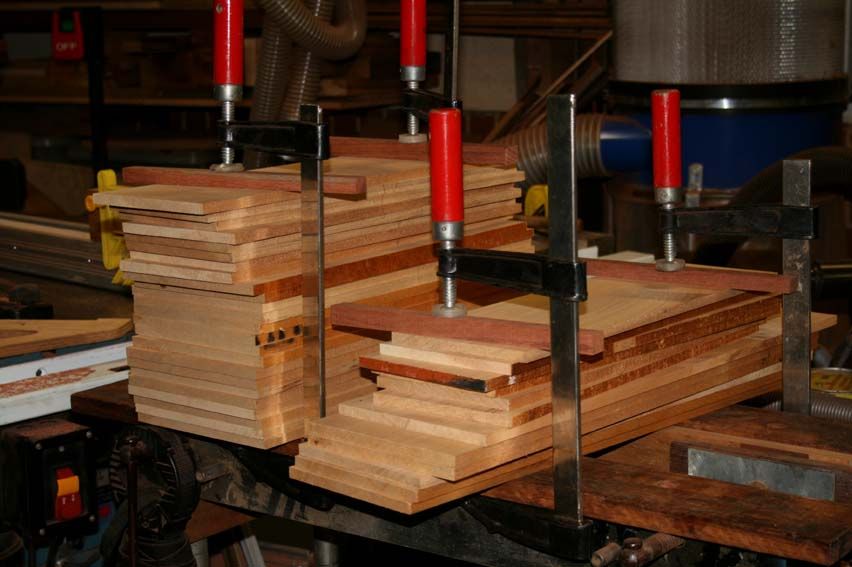
Here is where I ended off last weekend - a pile of thicknessed Kauri Pine boards for the drawers, along with drawer fronts that I had painstakingly fitted to an exact, tight fit ...

Here are the drawer fronts now planed (but unfinished) ...
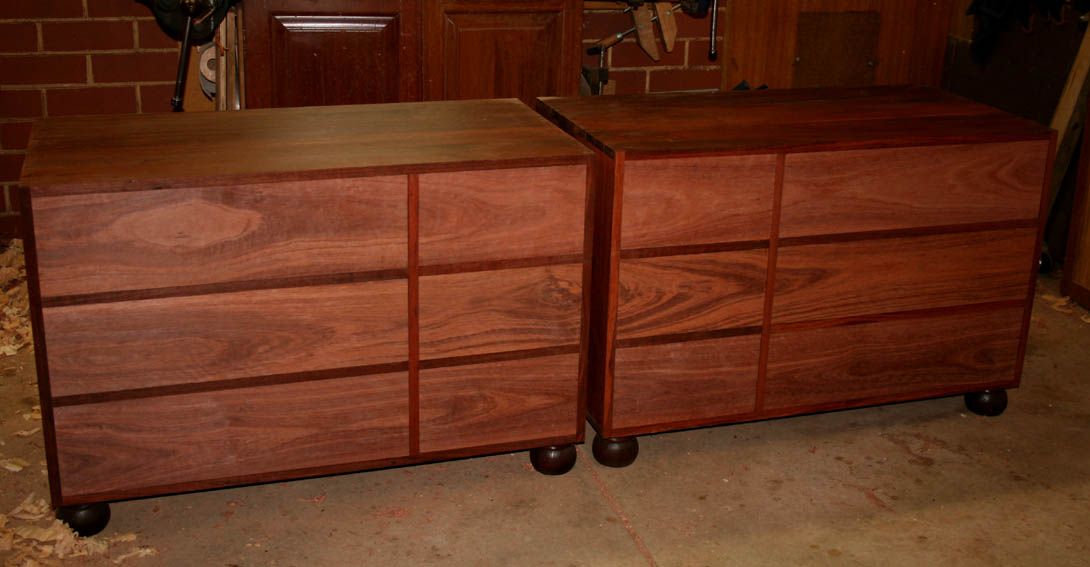

I was asked why fit the drawers fronts this way (the alternative is to shape them after the drawer is completed)? Now I can only offer my thoughts and method, and I put them out here for critique. This is how I learn.

Basic answer, I use the drawer fronts as a template for the rest of the drawer. I aim to work with as much precision as I can muster so that minimal adjustments are needed, and then these will only be required to the drawer sides.

One of the pleasures of working with wood is seeing the grain appear with the first swipe of a handplane on a rough sawn board ..
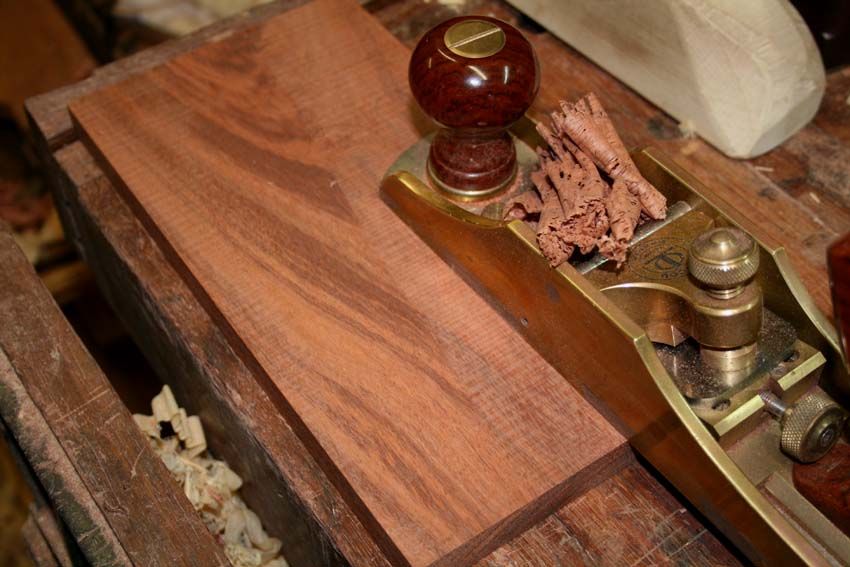

After the drawer fronts are done it is the turn of the drawer sides. I am using Kauri Pine. This is a light but strong and straight-grained wood. I have hand planed it to 3/8" thick ..
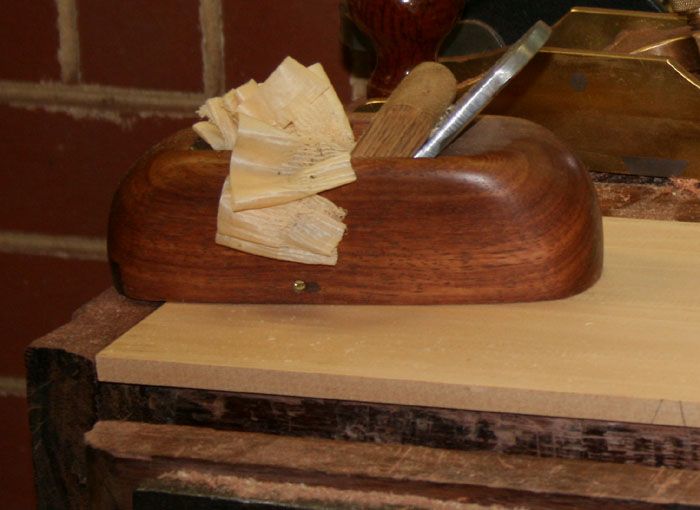

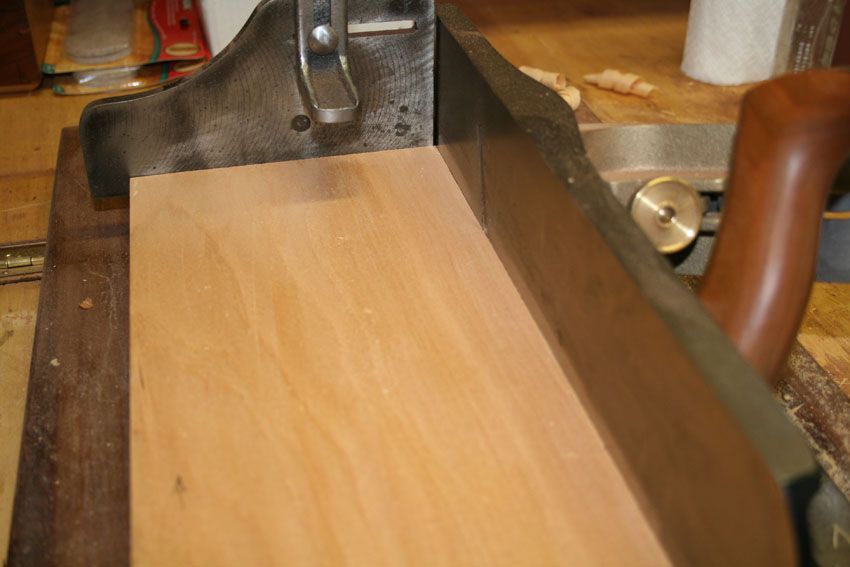
... and dimensioned it on the tablesaw and shooting board ...
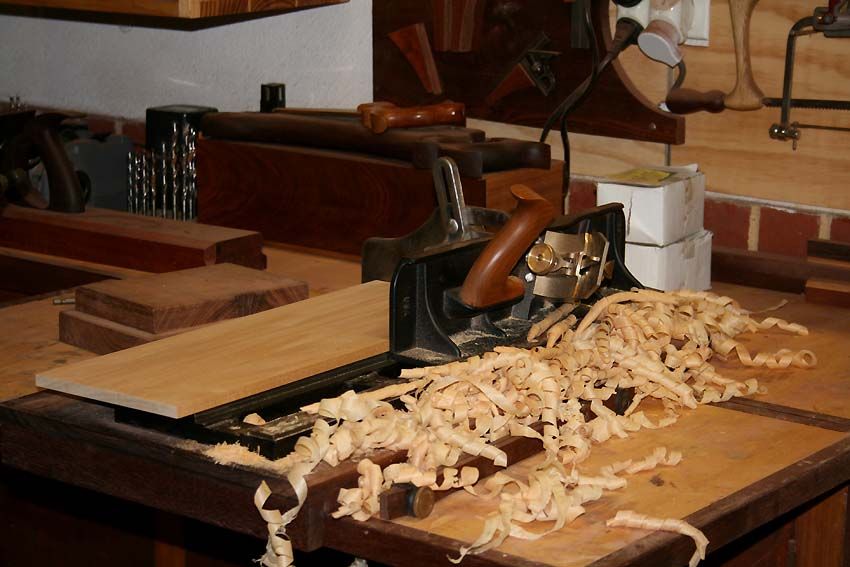

A reference edge and end are chosen. The grain is optimised to run from the front to the rear of the drawer so not to threaten the halfblind dovetails when planing the sides ...
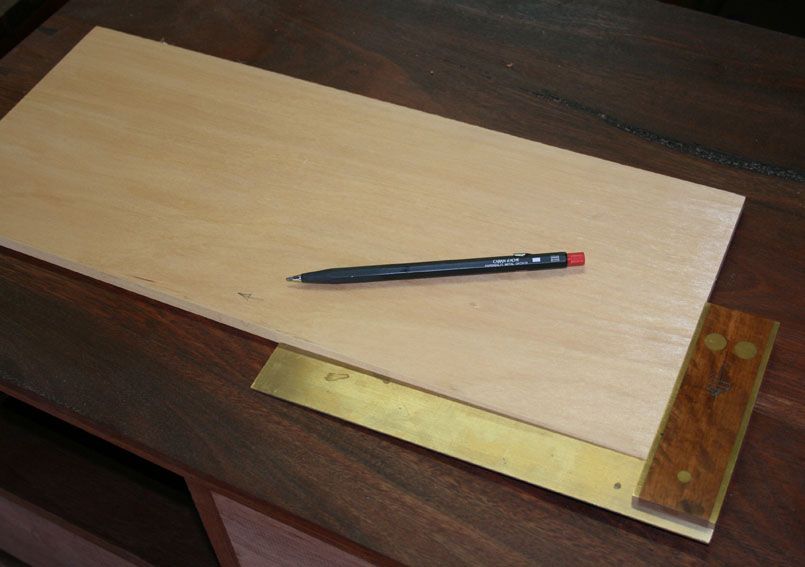

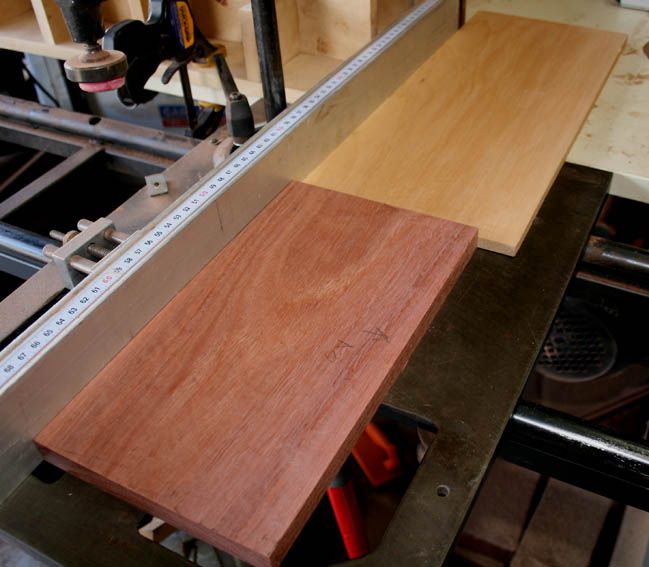
The drawer front and side are placed against a straight edge. I am using here the fence of my sliding table ..

Now it is easy to transfer the same height with a straight edge ..
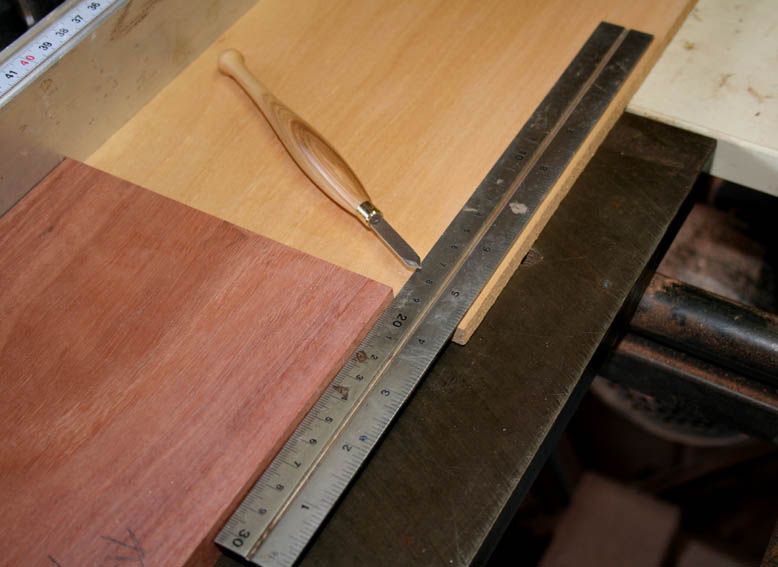

I used the tablesaw to get close to the line, then fine tuned with the shooting board ...

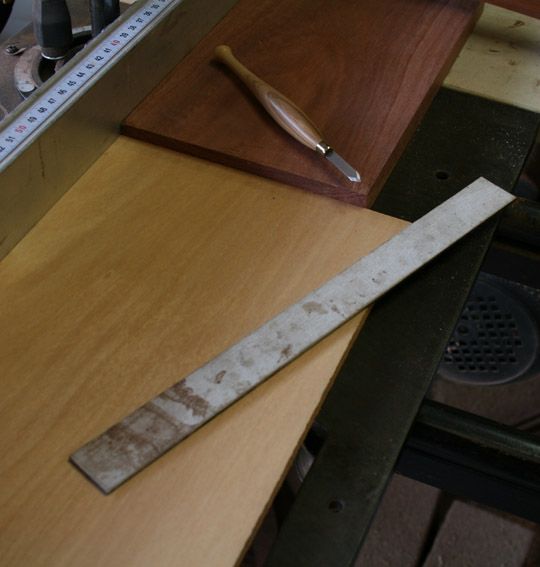
Do the other side. A tip for the rule is to glue 240 grit sandpaper as nonslip. Fantastic!

Finally I ended with a 24 drawer sides, 12 drawer fronts and 12 drawer backs ...

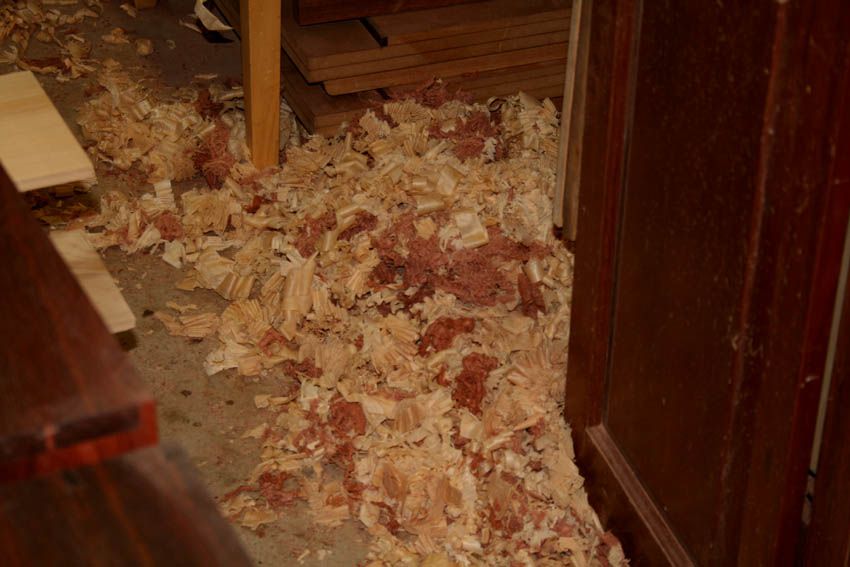
It left a few shavings behind ...

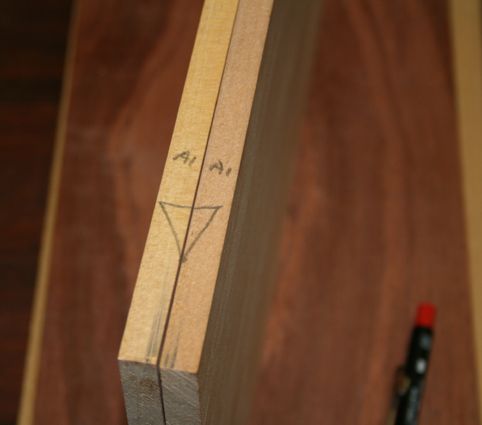
I spent time carefully marking every piece, drawer-by-drawer, coding each drawer ...

The drawer backs have been thicknessed but are left oversize at this point. They will only be sawn to size once I have completed the slips for the drawers. The slips have to be completed before I can be certain where the groove will be placed at the rear of the drawer front, and of course the drawer back will be sawn to end at the top of the groove within the slip. So the slip comes next.

I decided on Jarrah for the slips. This will be hard wearing, and the contrasting colour will link to the carcase. The slips are 3/4" in the vertical (although I may shorten this), 3/8" in the horizontal, and have a 1/4" x 1/4" groove. The slips follw the guidelines of Richard Jones (thanks Richard).

I prepared 3/4" thick boards. The grooves were created at the edge on the router table (I can live with this), then sliced off on the bandsaw. Out came the jointer to plane them to flat and to size ..
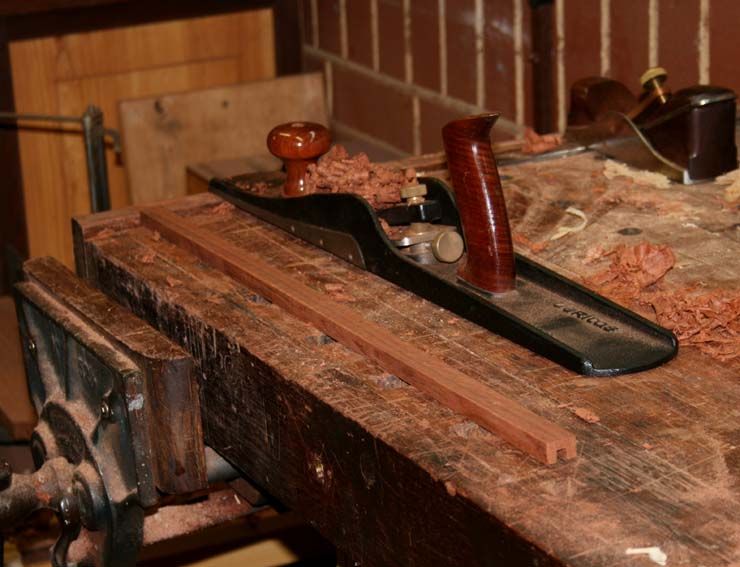

And the result was 24 lengths of slips in the basic shape (yet to be finsihed to the final shape ... next weekend) ...
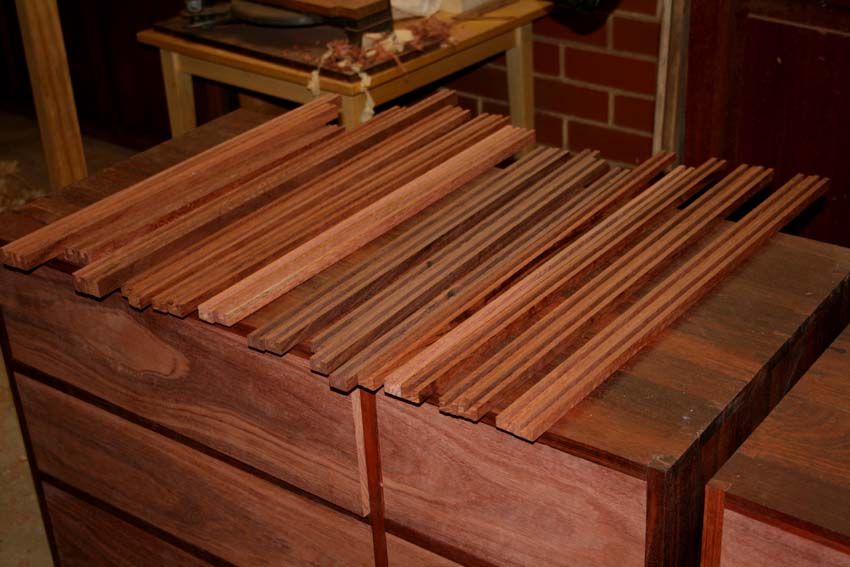

I have also still to make the drawer bottoms, which will be 3/8" thick Kauri Pine. I am planning to use muntins for the longer drawers (about 600mm wide). Is there a rule about when they are to be included? It just makes sense to me here.

In addition to comments about the work order and methods, how would you do to store the pieces until the next work session?

Regards from Perth

Derek

Re: First stages in drawer building.

#2

Moses Yoder

Re: First stages in drawer building.

Moses Yoder

I have never made 12 drawers at one shot, I think maybe 6 is the most I've done, but I always store the boards set on edge on my work bench with about 1/2" space between each board. Alternately, I set them flat on the bench with scrap pieces between each one for air circulation. If they move a little they can still be worked with, if they move a lot you needed a new piece anyway.

Re: First stages in drawer building.

#3

comments

Bill Tindall

I also exactly fit the drawer fronts to the opening first. I assemble and glue the drawer in the hole it goes into, positioning it with thin wedges until the glue dries. Guaranteed fit.

A worn drawer is easy to repair. Just plane off the bottom and add a new strip to the bottom. A worn drawer blade is impossible to repair and not show. Hence, the drawer side should be made of a soft wood relative to the blade. I have seen all sorts of English antiques where the white oak side has milled a groove into the mahogany blade. Without exception Period American furniture was made with pine or poplar drawer sides.

I think it is risky preparing drawer parts too far in advance of assembling the drawer. I like to get a drawer assembled shortly after milling the parts.

A 60 cm drawer doesn't need a divider. I wouldn't put a divider in a 100 cm wide drawer I see dividers with some frequency in English antiques, where they would be absent in an American equivalent. But the "proof is in the pudding". Assemble a drawer with a one piece bottom and see if you can flex it unacceptably. Once it is captured on all fours sides it will hold all but your gold collection, in my opinion.

I prepare sides more efficiently. Your process seems unnecessarily precise. I nail two sides together and mill, fit and dovetail them as a pair. I usually need to add a bit of additional clearance on the back part of the sides (slight height taper to the rear) so I don't go to the effort you went to to precisely do top edge before the drawer is assembled.

This Forum might attract more traffic if there were more posts about making stuff. For all the "planing and sharpening" that goes on here there are few results to show for it.

Re: First stages in drawer building.

#4

Question on side thickness

Bill Tindall

The source of this question is that I find myself drifting toward English drawer construction, but using American materials. I feel there may be some future peril in this journey.

Traditional English drawers are built with, compared to Period American drawers, exceptionally thin sides. However, the English drawers are typically quartered white oak, while the American drawers are invariably some softer, weaker (and less expensive) wood, rarely quartered. The obvious question is whether the quartered oak enables the thin sides. Were thin sides a result of the expensive material? Is there a reason that American drawers built from pine or poplar are seldom less than 1/2" in a typical chest of drawers(larger drawer)?

If one scales it out a 1/2" poplar drawer will weigh about what a 3/8" oak drawer will weigh. So the desirable goal of making the drawer as light as practical would not be compromised by a thicker softwood side.

Re: First stages in drawer building.

#5

Re: Question on side thickness

Derek Cohen (in Perth, Australia)

Hi Bill

I wonder whether it has to do with the hardness/toughness of the wood or whether it is about economy of construction. There is no doubt that the thicker-drawer-with-grooves-all-round is a simpler and far less demanding construction. Building slips is both time consuming and complex. Those itty bitty thingies take time. A thicker drawer side makes it possible to do away with them.

Of course, thick drawer sides, wide dovetails, and plaid shirts have about the same degree of aesthetic. :)

Regards from Perth

Derek

Re: First stages in drawer building.

#6

Re: First stages in drawer building.

Robin Corell in Atascadero

I too prefer to store thin boards on edge with an air space between them but for large numbers of boards I will store them in a pile with a scrap board on the top. The boards will absorb or loose very little moisture through the sides and the scrap board on the top of the pile prevents the top board in the stack from taking on or loosing moisture from one side and warping. Just something I learned when I was an apprintice.

Robin

Re: First stages in drawer building.

#7

Re: Question on side thickness

Sgian Dubh

Bill, one possible useful response to your question for consideration relates to the percentage of movement to be expected in the material choices. Take a typical drawer in a high quality British made antique (your area of interest-- antiques that is) of quarter sawn European oak and plain sawn South American mahogany (whether veneered or not after construction.)

At this point I'll let you do some research on what I call the 'Shrinkage Factors' in wood as it dries from 30% MC to 0% MC. You might be a little surprised by the results. I do wonder if those old cabinetmakers knew something, or had learnt something through observation and experience about mixing those two timbers in one item even if, perhaps, our contemporary timber technology and its testing and its reliance on empirical data hadn't really been invented back in the 18th century. Slainte.

Re: First stages in drawer building.

#8

are you sayin plaid shirts ain't cool ??


Re: First stages in drawer building.

#9

A potential flaw in this approach

Bill Tindall

The moisture transport along the grain (longitudinal) is 10X faster than across grain (radial). If the ends aren't sealed short boards will equilibrate with the surroundings almost as fast through the ends as the faces.

Saran wrap is an exceptional water vapor barrier. For some complicated reason water moves through this plastic unusually slowly. So, if you want to keep a stack of parts from changing moisture content wrap them in a Saran type film (poly(vinylidine chloride)).

Re: First stages in drawer building.

#10

I have the result , yet......

Bill Tindall

American cabinet makers mated mahogany drawer fronts with poplar or yellow pine and occasionally cedar sides with no adverse effects. The colonies had ample white oak. It remains a puzzle why English drawers never made it across the ocean (that is until modern times where our Antique dealers started pillaging- by the shipping container full- the Empire of its antiques)

Re: First stages in drawer building.

#11

White Oak

Warren in Lancaster, PA

I have seen all sorts of English antiques where the white oak side has milled a groove into the mahogany blade. Without exception Period American furniture was made with pine or poplar drawer sides.

I can't agree with this. I think I have seen about half a dozen different woods for drawer sides in 18th century Pennsylvania stuff. About five years ago, Bill, you were making a Chester County chest and asked for information about the interior. The next weekend I looked in a similar walnut chest with frame and panel sides (ca 1740). I emailed you about the runners etc. Here is what I wrote about the drawers:

The drawer sides were riven white oak with quarter

figure. They were 1/2 or 9/16 thick with half round

molding on top edge.There was little apparent wear.

The dovetails were rather large and unequally spaced,

not so unusual for early 18th century.

As I told Bill, this chest was pretty handsome. In Pennsylvania we are kind of fond of this early 18th century stuff.

Re: First stages in drawer building.

#12

Coming from maritime Maine

Bob Hackett

Where there is much Mahogany and Oak furniture as well as varying softwood construction applications I see little of the wear you talked about Bill and I have had the pleasure of access to much of the furniture in storage for the Maine State Museum.

Knowing how the frugal and practical Yankee mind works if that sort of wear were to appear in an item it would be considered a mistake and not repeated. I have seen many drawers with either wide sides or those with worn narrow sides repaired by way of modified hardwood slips to make the bearing surface of the drawer sides wider.

Re: First stages in drawer building.

#13

Shop Inventories Chester Co.

Bill Tindall

Margaret Schiffer's book on early Chester County cabinet makers contains the inventories of all the shops of record in Chester Co. While small amounts of oak are occasionally mentioned as a lumber in inventory the following inventory from John Hartman is most typical in species representation:

348' mahogany, 320' maple, 955 cherry, 369' walnut, 1054' poplar

(the inventory was more detailed with respect to the thickness of this lumber but I summed the species entries for brevity) Considering how quick these shops turned out pieces and how long it would take to dry lumber in that day, I was surprised at how little lumber the typical shop kept on hand. Apparently larger amounts were at hand and at least partially dry at the saw mills.

As an aside, from the valuation placed on the lumber, mahogany was a very expensive material.

Re: First stages in drawer building.

#14

better Drawer Slips

Ian_N

Derek

the method of morticing slips into the drawer front, mentioned by Richard in a posting some weeks ago, is superior (in terms of appearance) to the way I was taught to attach the slips, however the steps you're following in making the drawer are, I believe, in the wrong order

This is what I believe should be the construction order

1.) select and thickness the boards for the drawer fronts

2.) determine the show face of each board and cut to approximate (say +1mm or a fat 1/32") height

3.) mark the top edge of each board

4.) turn the face boards over and cut the groove for the drawer base in the back -- up say 1/2" from the bottom edge :)

5.) cut the boards to length and individually fit to their openings

6.) mill the drawer sides to thickness, height and length for each opening

7.) mill the drawer backs to thickness, height (which should be the drawer height less about 3/4" or 20mm). The length should be the same as the drawer front less about 1mm (say 1/32")

8.) dovetail and assemble the drawer -- the backs should be dovetailed to the sides so the bottom edge of the back is IN THE SAME PLANE as the groove in the drawer front, and the top edge is about 3/8" below the top of the sides

I'll try and post an image after I reread the instructions :)

9.) make the slips -- they should be deeper than required, so when attached to the drawer sides they extend beyond the bottom of the drawer

10.) attach the slips to the drawer sides so that the the groove aligns with that in the drawer front and the TOP of slip's groove aligns with the underside of the drawer back

11.) plane the slips flush with the drawer sides and complete the final fitting

Re: First stages in drawer building.

#15

Re: Shop Inventories Chester Co.

Warren in Lancaster, PA

"all the shops of record"? These inventories are interesting and valuable, but are nothing like a complete record. Some shops have very little documentation at all, perhaps only a single reference, and cabinetmaker Richard Riley's estate inventory listed only "sundry lumber".

I looked through Griffith's Pennsylvania Spice Box (I think you have this book also). Of the 26 spice boxes attributed to Chester County, 19 had oak, white cedar, or chestnut among their secondary woods; only 7 boxes were limited to pine or poplar.

Tulip poplar, Liriodendron tulipifera, is a native pioneer species, growing quickly in areas that have been logged. In Pennsylvania it was probably much more common in 1780 than in 1680. On the other hand white cedar, Chamaecyparis thyoides, which was a common secondary wood in Pennsylvania in the early furniture, did not regenerate well after logging. In Pennsylvania it was extirpated in the 18th century.

Re: First stages in drawer building.

#16

Re: better Drawer Slips

Derek Cohen (in Perth, Australia)

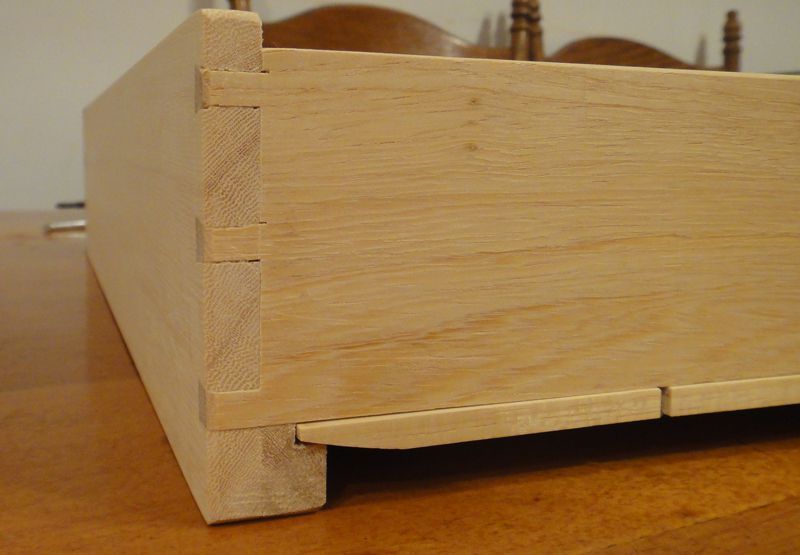
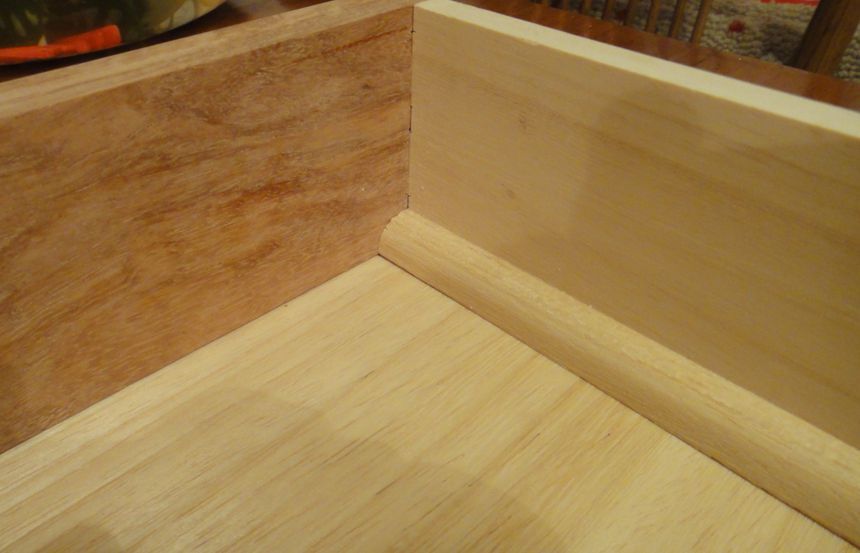
Here are Ian's pictures of drawer slips (he emailed them to me as he could not upload them)...


For comparison, here is a drawer I built a while back (drawer sides were 3/8" and drawer bottom was 1/4") ..


Hi Ian

Thanks for the detailed description of planning the drawer and slip. Staying with the slip construction, there are two points of relevance.

The first is that the groove in the slip must align with the groove in the drawer back. The router table has the identical setting for both slip and drawer back. I did not have time to make these in time for my report, which is why they were not mentioned. In fact Richard asked me whether I had cut them yet as he does them together (either before or after the slip grooves). I elected to do them after.

The second point is one we do differently, and others may wish to comment on ...

9.) make the slips -- they should be deeper than required, so when attached to the drawer sides they extend beyond the bottom of the drawer

I suppose one could adjust the groove in the drawer back to be 1mm lower, which will lower the slip by the same amount below the drawer sides. Or, one could simply leave the settings, which will place the lower edge of the slip flush with the drawer side - and no adjustments to make.

Regards from Perth

Derek

Re: First stages in drawer building.

#17

the story on cedar drawer parts

Bill Tindall

A few years ago I was fortunate to get a chronological "tour of drawers" at the Philadelphia museum led by the museums cabinetry conservator. Indeed, as we marched forward in time we hit a period where the drawer parts were white cedar, a curious choice I thought.

It was explained that at this time white cedar shingles were being imported to Philadelphia. The riven shingle pieces were cheap and a useful size and used for drawer parts while this source of material lasted.

Re: First stages in drawer building.

#18

Fool proof slots

Bill Tindall

By the time I precut a slot in the drawer front, cut the back to width such that it was in the same plane as the front slot, applied the slips, dovetailed and assembled the drawer, something would be out of alignment at least some small amount at least some of the time. The sure fire way to assure all the slots and back are in a plane is to assemble the drawer, set it on the router table and mill the slot using the Lee Valley bit that cuts a 1/4 x 1/4 slot. Then adjust the back as, or if, necessary. It isn't a problem if the bottom edge of the drawer back is up a slight amount.

As for slips, as reported by Alan Batty who worked in an English furniture factory making drawers, the segmented slips were rubbed in under the drawer bottom after the drawer was assembled. The bottom was dadoed into the sides in a shallow dado. Indeed many of the drawers in the shop that specializes in English antiques were made this way.

Re: First stages in drawer building.

#19

Re: better Drawer Slips

wilbur

Hi Ian,

Why is there a notch/kerf in the bottom of this drawer?


Re: First stages in drawer building.

#21

Local availability

Bob Hackett

That would explain the proliferation of Mahogany indoor furniture and Teak outdoor furniture (and bathmats/drainboards) around the boatyards up here. :D

Re: First stages in drawer building.

#22

Re: better Drawer Slips

Sgian Dubh

... make the slips -- they should be deeper than required, so when attached to the drawer sides they extend beyond the bottom of the drawer.

I suppose one could adjust the groove in the drawer back to be 1mm lower, which will lower the slip by the same amount below the drawer sides. Or, one could simply leave the settings, which will place the lower edge of the slip flush with the drawer side - and no adjustments to make.

Regards from Perth, Derek

Derek, I've done them both of the ways you describe. Probably 97% of the time I go for running the groove the same distance up from the bottom edge of the slip and the bottom edge of the drawer front. This is because the tenon at the front end of the slip and the notching at the rear end to go under the drawer back line up the bottom edges of the drawer front, the slip, and the drawer side.

However, if you feel less confident then you can make an adjustment to the setting of the tool used to cut the drawer front groove, but only about a 0.25 mm offset is required really, not a whole millimetre. However, this does mean you should make a similar offsetting allowance at the rear end of the drawer side where the bottom pin in the drawer back goes into it. This is because you need the top edge of the groove in the slip to line up with the bottom edge of the drawer back, and this, remember, is in the same plane as the bottom edge of the half pin. I set a marking gauge to mark this line on the face of the drawer sides, and of course the stock of the marking gauge runs on the bottom edge of the side. So if there's an offset you need to allow for it to prevent the drawer bottom being a tiny bit squint at the end of the job.

I think this last method is more of a guddle than the first, and could lead to more small discrepancies than you really want. Slainte.

Re: First stages in drawer building.

#23

Re: for the screw

Ian_N

Bill has it

Re: First stages in drawer building.

#24

clarification

Ian_N

I'm sorry Bill, I'd didn't mean to confuse, but it was after midnight (here) when I posted.

what I meant is that the bottom edge of the drawer back should line up with the TOP of the groove in the drawer front

so my step 8 should read

8.) dovetail and assemble the drawer -- the backs should be dovetailed to the sides so the bottom edge of the back is AT THE SAME HEIGHT as the TOP of the groove in the drawer front. The top edge of the drawer back should finish about 3/8" below the top of the sides

Re: First stages in drawer building.

#25

Re: the story on cedar drawer parts

Warren in Lancaster, PA

There were very limited stands of white cedar in Pennsylvania; Philadelphia, Bucks, and maybe Chester counties had some white cedars near the Delaware River. Most of the cedar for shingles and furniture was imported across the river. Because the cedar did not easily regenerate, New Jersey ran out also and large trees were rare within a hundred years.