Frank Klausz Finger Joint How-to [Video]
3 June 2026 at 15:15
 |
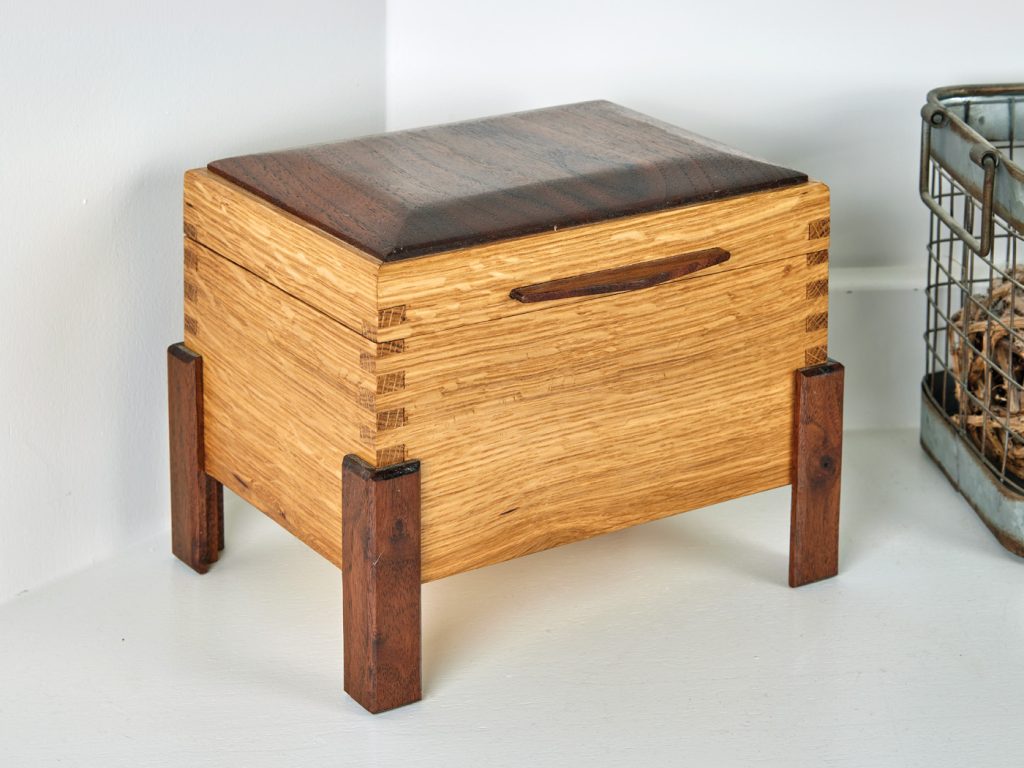
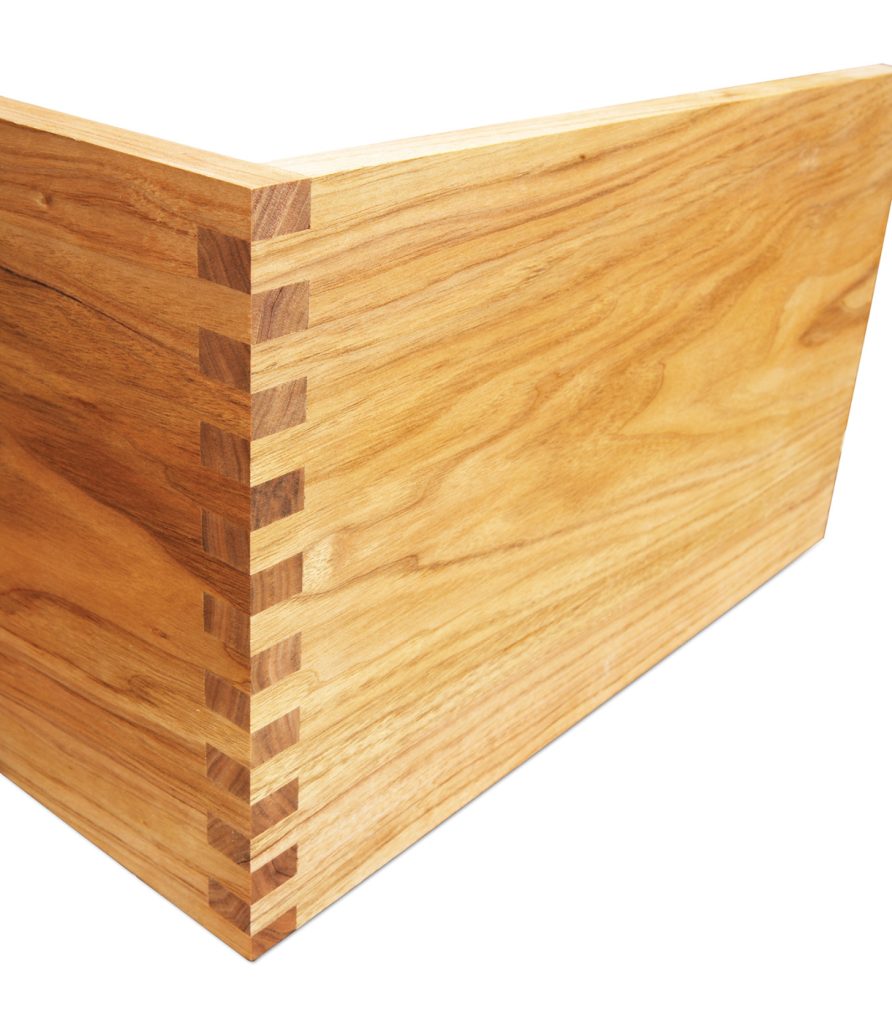
| UpDn Diamond Interlock |
 |
| Female Side. Walnut |
 |
| Male Side. Red Oak |
 |
| Both Sides Cut. |
 |
| Nice Contrast |
 |
| Almost |
 |
| Fit is perfect with a 0.003" gap for glue. |
 |
| With one coat of Tung Oil |
![]()
 |
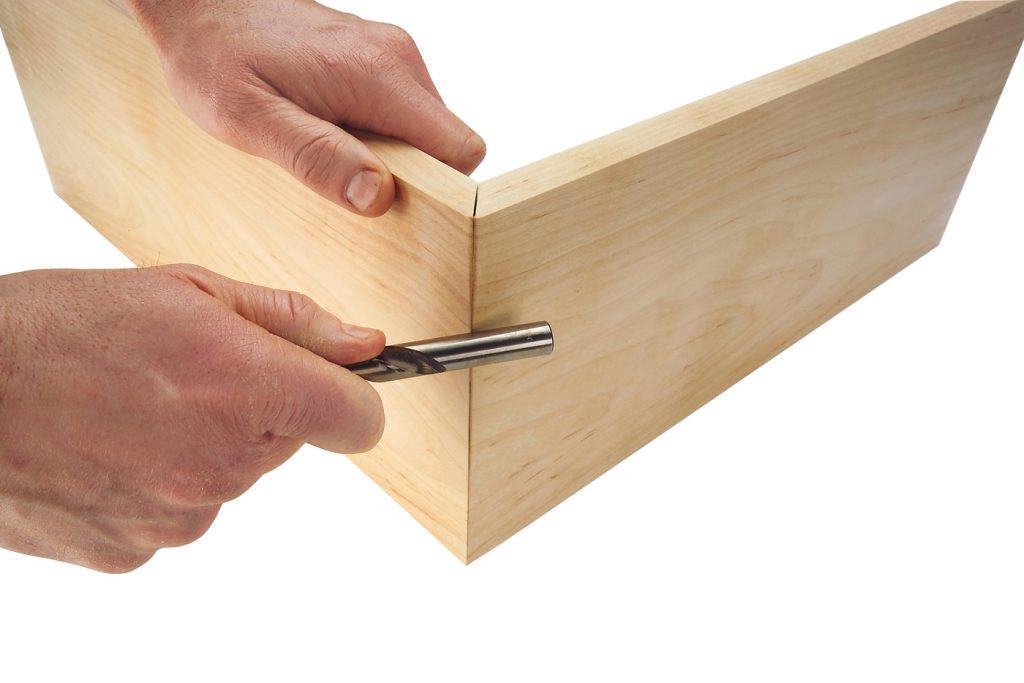
| Square Interlock Joint |
 |
| Side A. Clamped Vertically |
The other side is cut on the end of a board clamped horizontally.
 |
| Side B. Clamped Flat. |
This joint is half blind, showing only on one side of the corner.
All the corners are rounded to account for the 3/16"diameter end mill used to cut the joint. A sharper cornered version could be cut with a 1/8"diameter bit if the cutting length of the bit was as long as the boards are thick.
This sample I made from some pine board scraps. When both sides were cut they slipped together easier than I expected. This suggests that the bit I used was a little bit larger than .1875" in diameter. More than enough room for some glue.
 |
| Sample Ready to Assemble |
 |
| Partly Together |
 |
| Glue Together and Sanded Flush |
![]()
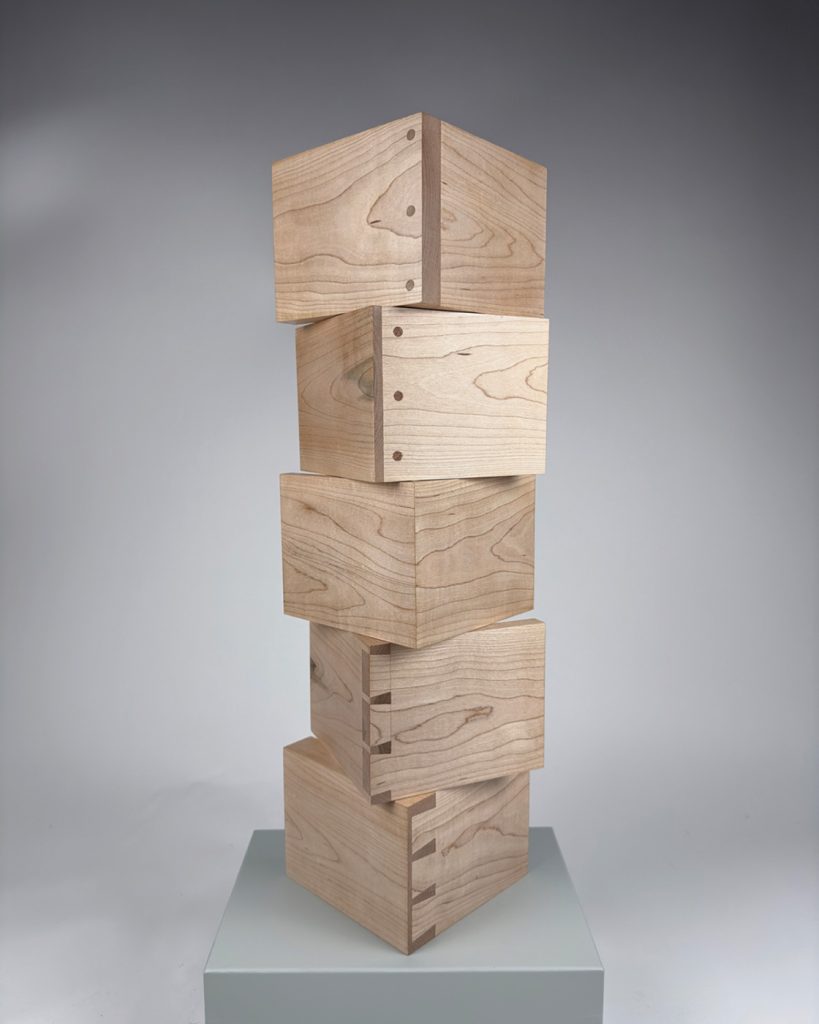
I found this joint sample hiding in a box of CNC-cut joinery samples I made for students to consider when designing their project.
 |
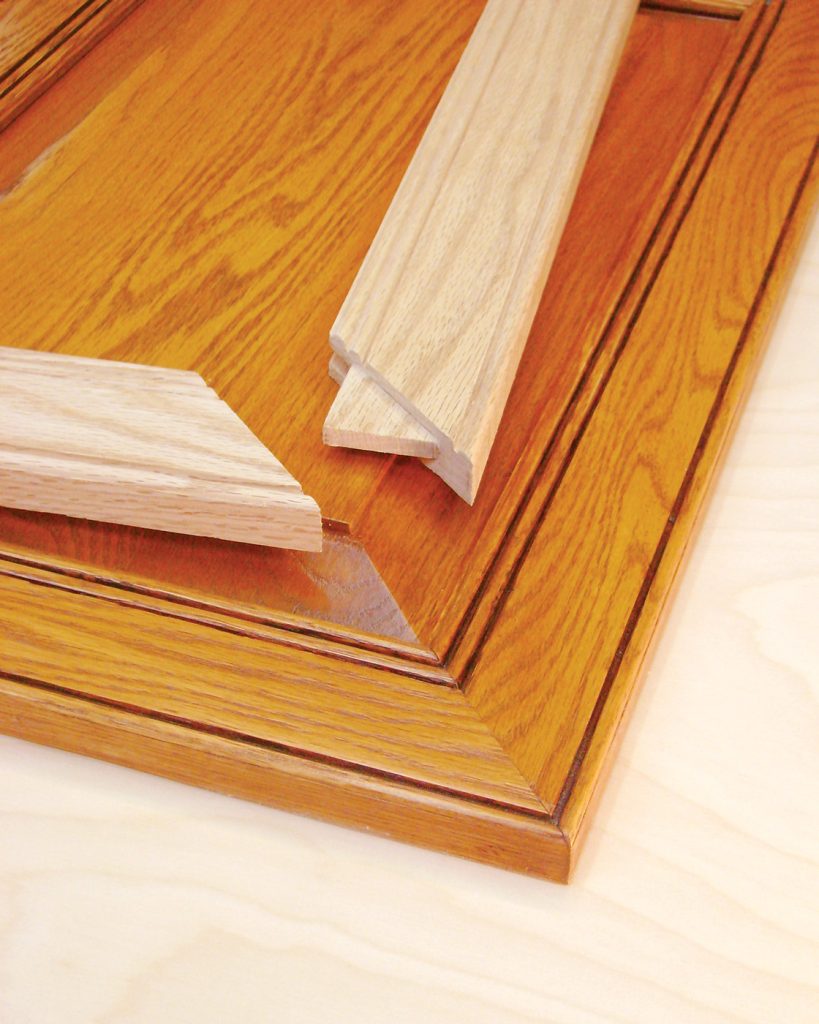
| For Low Angle Corners |
 |
| One half slides into the other half. |
 |
| Not quite as simple as it looks to cut |
This sample will return to the box I found it in to wait hopefully for the day when it can come out to inspire a real corner connection on an actual project.
4D
![]()
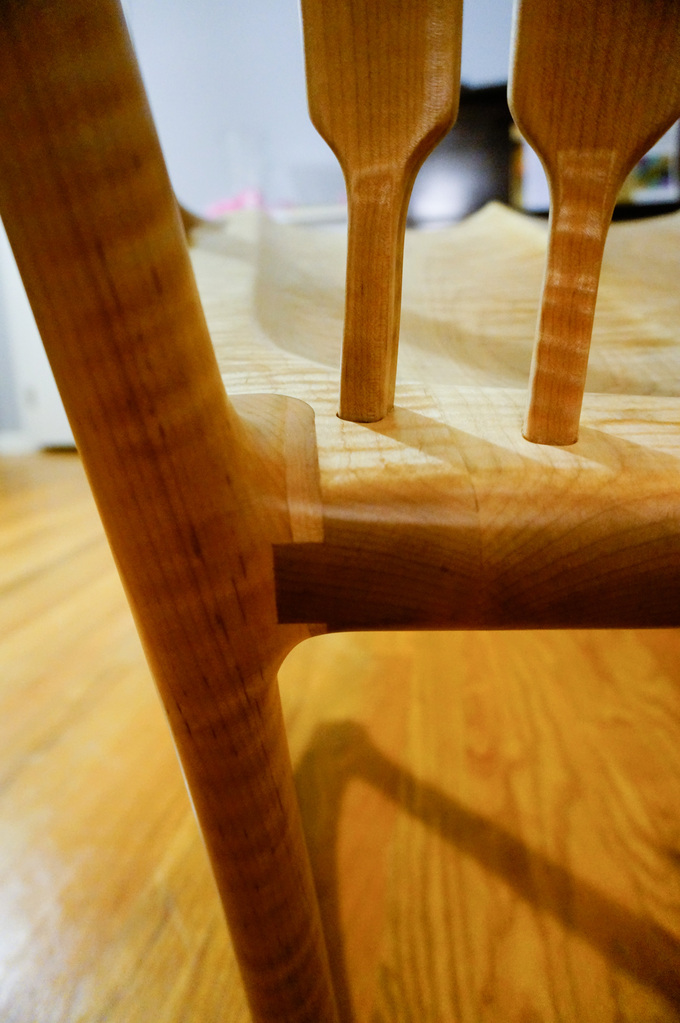
In my last post the parts and pieces were completed for the seat frame and the backrest. Since that time the slats were finished (Osmo 3043 using Mirlon abrasive pads). The top and bottom rails were finished as well but their tenons were taped off. The final step was to form the sides of the backrest with spokeshaves then glue the entire piece together and finish it completely. Before assembling that though the through mortise and tenons for the arm rests had to be fitted.
The process for making the seat assembly was similar. It consists of two end pieces which are supported by the stretchers between the two legs. The front rail is attached with a haunched mortise and tenon joint and the back and center support use mortise and tenons as well. To accommodate the webbing from House2Home, a 1/8 slot is routed for the clips. Kind of tricky, it’s best to remove about 1/8 of material so the webbing lays flat. This was done on the tablesaw with a rip blade which requires dropping the wood onto the blade and then lifting it off — care required on this operation. The recess is then squared off before I assembled and finished the entire seat.
While designing this piece I looked at so many Danish Modern pieces on Pinterest it made my head spin! I wanted something graceful and not just a machined, routed piece. I had set aside a piece that had some interesting grain for the armrests so that determined how wide they could be. Even though they’re about 4′ apart it’s important to me that the grain matches. The bottom has a simple, long chamfer while the top has a slight radius. Sculpting began with my old Stanley 151 and finished up with a Bogg’s style Lie-Nielsen . The antique Stanley removes material quickly without clogging while the L-N does a beautiful job of finishing. After drawing in the “limit” lines of the bottom chamfer work began with the spokeshave, shaving to the lines. Once the cut was close a sliding bevel was set to make the chamfer uniform on the edges and the ends formed to match.


The armrests are attached with wedged, through mortise and tenon joints. The method that Mike Pekovich from Fine Woodworking Magazine uses is what I prefer too. Here’s a LINK to it but you may need to be a Fine Woodworking member. He utilizes a spacer to get the width just right, this way you only need to set your marking gauge one time. Only variation I did was to use a 3/8″ drill on the drill press to remove the bulk of the material. He uses a smaller bit and makes more holes; either way works. I could do this because my tenon is 7/16″ wide. I also used this method on the Japanese toolboxes for laying out both the mortise and the tenon. I’ve been presenting my work in a slide show format to simplify the blog — let me know if I succeeded!
At this point this project is almost ready for final assembly. The last thing that needs to be done is to apply the Osmo to the leg and armrest assemblies. We get our foam at Galaxy Foam and Upholstery Supply here in Las Vegas. They have foams of all densities and wrap batting around it which makes for a better cushion. Also bought the material there and unfortunately it’s too thick for Diane’s machine so they are currently being sewn at Oscars Upholstery. I’ll do a final blog on this when the cushions are done and the love seat is ready. I’ve been told my blogs can get long winded but appreciate any comments or questions you may have, thanks — John
![]()
I’ve been seeing these boxes on Pinterest, Instagram, and other places on the net so decided to make a pair of them for my grandsons Christmas present this year. They both are collectors of “things” so think they will like Opa’s interpretations of them for their “treasure chests”! I mail ordered some Ash from Woodworkers Source and they sent some beautiful pieces, one especially will be destined for the lids. With this blog I’ll break down the process to not only illustrate it for anyone else that may build one of these but also to remind me in case I make another! I hope that Connor and Rory will look at this and possibly be inspired to explore this world of woodworking that their Opa loves so much.
Working with the Ash has been an experience, it is very hard and the grain structure also makes it difficult to scribe clean, crisp lines to work to. Mike Pekovich from Fine Woodworking Magazine has a video series where he uses tape along with marking gauges and spacer blocks to accomplish this. You may need to be a member of the magazine to access it. For my project I could only mark the outside of the boards because the inside has a dado cut to accept the side pieces, this meant I really needed to be accurate on the layout and his technique really worked great, the Ash — well that’s a different story!
If the mortises had cut cleanly each on them should have been exactly the same size, however; not being able to obtain clean cuts meant that they were slightly different so couldn’t use all of the techniques Mike Pekovich showed in his project.
To add versatility each box will have a sliding tray made from 1/4″ thick Beech left over from another project. They’re about two thirds the length of the box and 1 3/4″ deep. No pictures but simple mitered construction using packing tape for assembly. The plywood bottom sits in a dado and the bottom of the box is covered with a heavy fabric on mat-board.
There’s not a lot of exact information that I could find about the battens and the wedge. I’ve read that traditionally the boxes didn’t have a locking wedge. Tradition also has them assembled with nails and the bottom is nailed on. I chose to set the bottom in a dado and also join the battens with glue, screws, and plugs. Some show the wedge without an angled cut but I choose angling it make it more secure. Since these are going to a much more humid location than Las Vegas left a good 1/16″ gap between the lid and the sides of the box. The first step was creating the pieces for the top of the box and lid battens.
Fitting the lid required some experimentation. One end of it has a fixed batten that I located 1/4″ from one end. A spot of glue at the center and screws at each end secured that. I used a piece of plywood to fine tune the length of the lid and I’d recommend doing that if you make one of these. Much easier to screw up a scrap of plywood than a beautifully figured piece of Ash! Basically, after that first batten is attached you insert the lid and slide it so that it’s against the box piece. Then place the other lid batten and wedge in position, draw a line to locate it. A trick I saw and used was to put blocks inside of the box that held the lid at the right height. Now I was able to drill the pilot holes for the screws directly into the lid and attach it in place.
One change I made was to drill a 3/8″ hole in the locking wedge piece and then glued in a short dowel. These boxes will probably not be stacked and with the higher humidity that wedge could become difficult to remove. I don’t want them tapping it with a hammer! My finish of choice is Osmo #3043, two coats applied with nylon scotch pads. This was a good, challenging process; here’s a slide show of the finished Japanese Toolboxes.
![]()
![]()
Dimensioning rough boards by breaking them down into smaller, precisely sized parts is one of the key first steps in any woodworking project. This preliminary process certainly isn’t the most glamorous part of working wood, but virtually every skilled artisan will agree it’s one of the key steps for achieving consistent, high-quality results.
In this video, artisan Eric Matson, who is the Director of the University of Rio Grande’s Fine Woodworking Program, walks us through the same eight steps Eric’s students must master early in their college training. Eric explains how even twisted, cupped, bowed or kinked boards can be quickly and safely broken down into smaller rough parts, which can then be milled to tight tolerances and made ready for jointing and other more refined processes. In part one of this two part series, you’ll learn how to rough cut boards to length, rip to rough width, joint one face flat, and plane both faces to thickness. But there’s more to Eric’s approach than just these basic steps. Eric also shows you how to stay organized and mill parts in batches, and why it’s important to prepare extra parts for set-up, testing, and disaster recovery. His entire approach offers you a comprehensive strategy that will help you achieve the tight tolerances essential for master quality work. — Keith (11 Minute Woodworking Video)
Click here for Part Two, the final segment in this series. Watch steps 5 through 8..
Eric Matson is the Director of the Fine Woodworking Program at Rio Grand University. Rio Grande offers a one year certificate program, as well as two year associates and four year college degree programs. Graduates have the skills and knowledge to be productive in custom furniture shops and architectural/cabinet shops. Rio Grande (pronounced rye-oh) is in Southern Ohio.
The post Precisely Dimension Rough Lumber in Eight Steps (Part 1 of 2) first appeared on WoodTreks.This video is the second half of a two part series on the quick, easy, repeatable way to prep rough lumber. In Part One, (view Part One here) instructor and furniture maker Eric Matson demonstrates how he breaks down rough boards , step-by-step, into smaller rough parts. Now, in this final segment, Eric takes us through the last steps of squaring edges and cutting to precise lengths & widths. Along the way we learn tips, tricks, and secrets that help eliminate errors.
If you take away anything from this series, I hope you’ll agree that guaranteeing consistent results only comes with a proven system. Eric shows us his system, the same proven method that Eric says quickly elevates his students’ work to the next level. See if it works for you. (10 Minute Woodworking Video – Part 2 of 2)
Eric Matson is the Director of the Fine Woodworking Program at Rio Grand University. Rio Grande offers a one year certificate program, as well as two year associates and four year college degree programs. Graduates have the skills and knowledge to be productive in custom furniture shops and architectural/cabinet shops. Rio Grande (pronounced rye-oh) is in Southern Ohio.
The post Precisely Dimension Rough Lumber in Eight Steps (Part 2 of 2) first appeared on WoodTreks.