I'd like to throw this one out for discussion.
This is table I have just replaced ...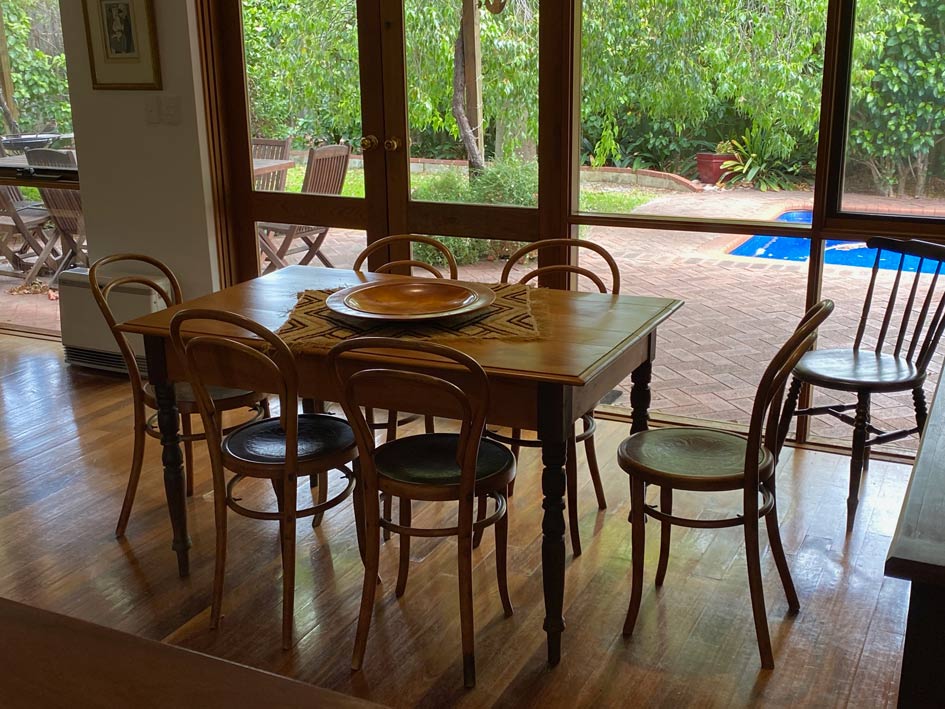
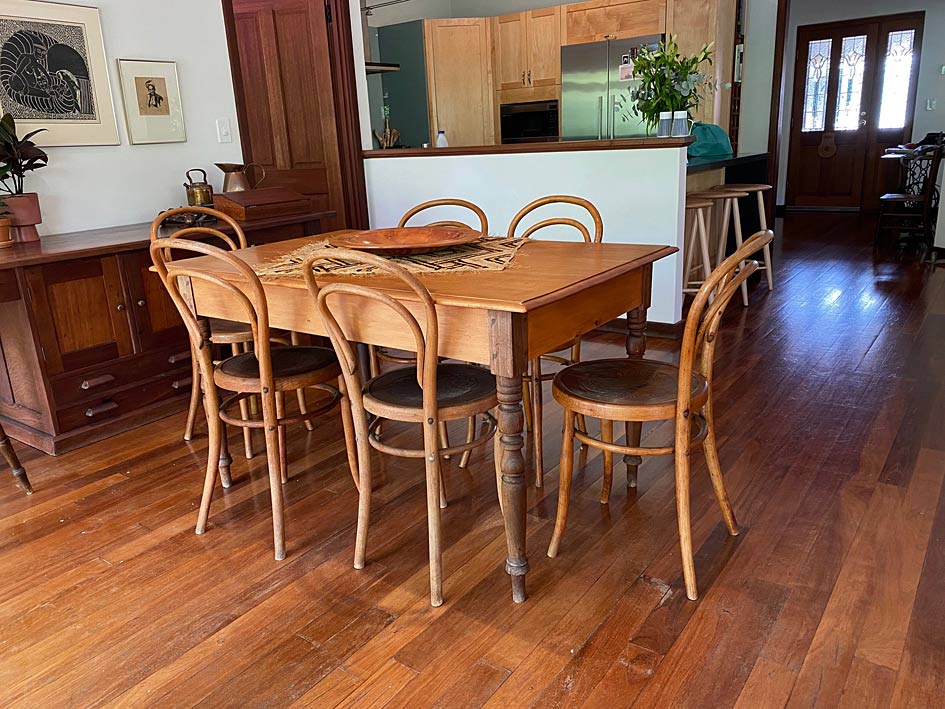
The plan is to restore it and give it to my son and daughter-in-law.
My wife and I purchased it shortly after we married, some 42 years ago now. At that time it was said to be 150 years old. The table is a kitchen table typical of those built in farming communities in the Eastern Cape area of South Africa. The timber is Yellow Wood, a much prized and now rare light softwood, found only in Southern Africa and South America, and Stinkwood, which is a hardwood similar to Teak.
When we purchased the table, it had undergone a "restoration" by a local furniture maker, amateur I suspect. It held up well, but over the past five years began to develop cracks and splits. I aim to repair these. So for discussion is the extent of the finishing, the repair of the splits, and modifying the way the table top is attached. Glue(s) to use? Photos below ...
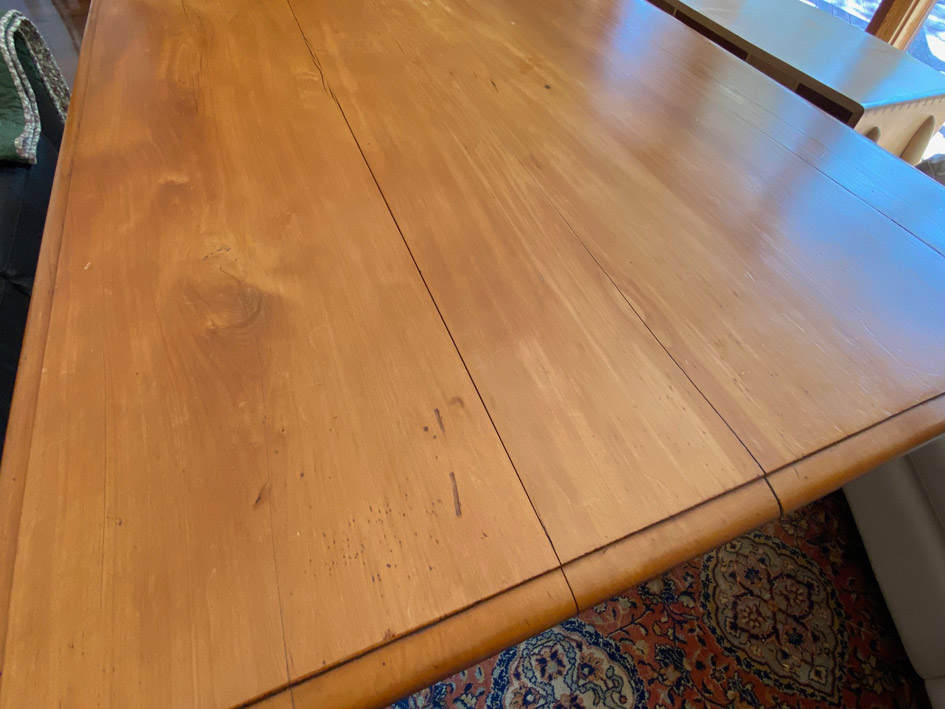
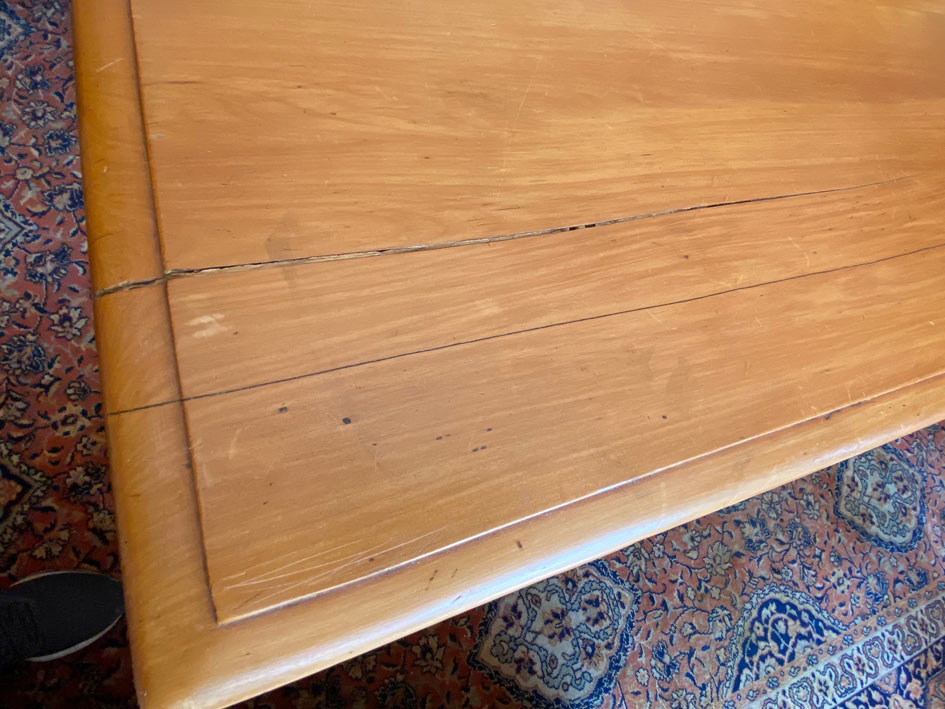
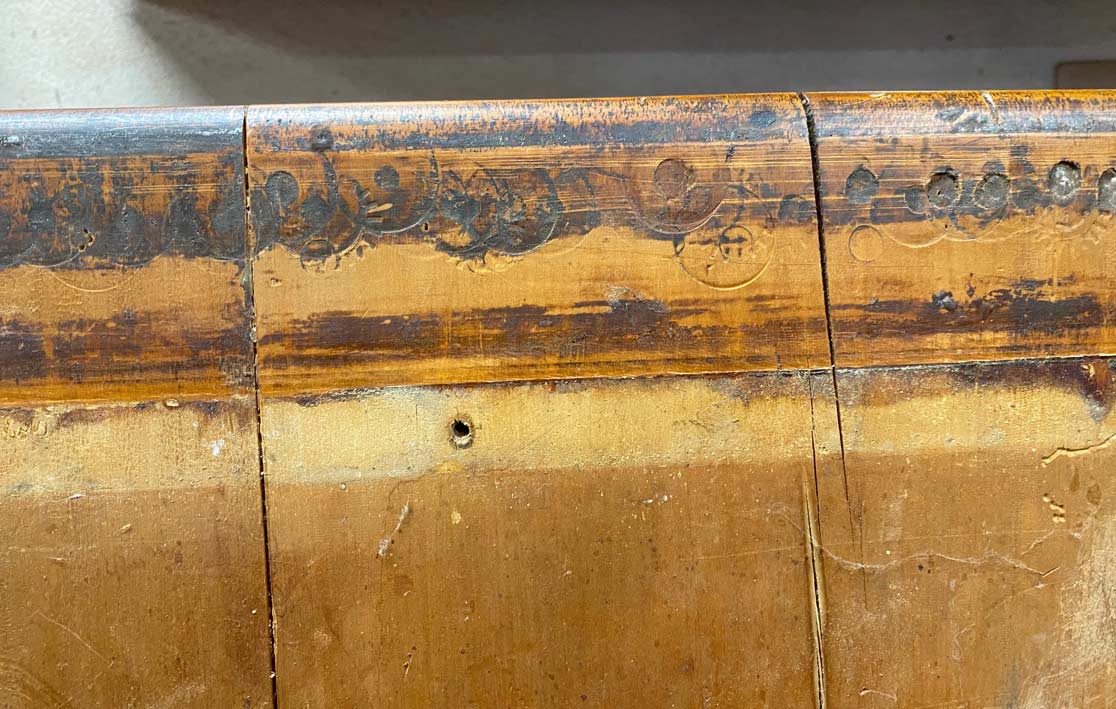
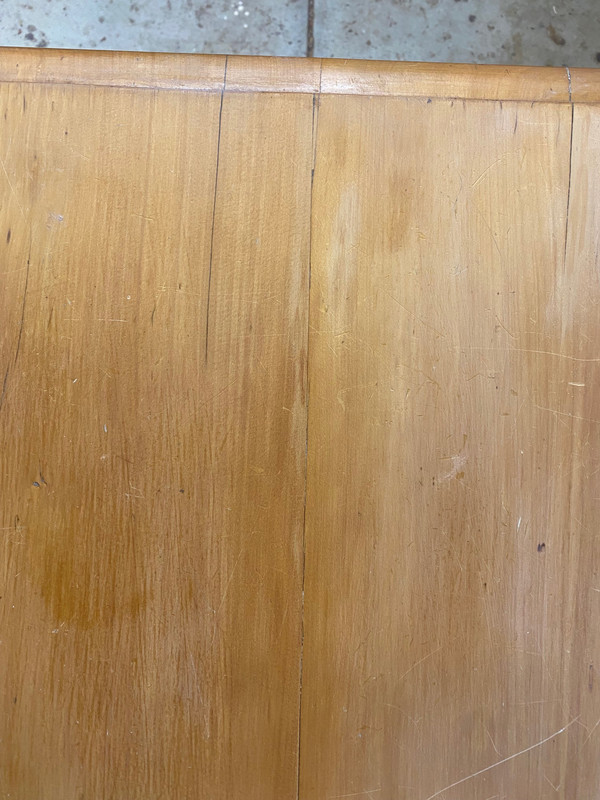
Splits in the table top ...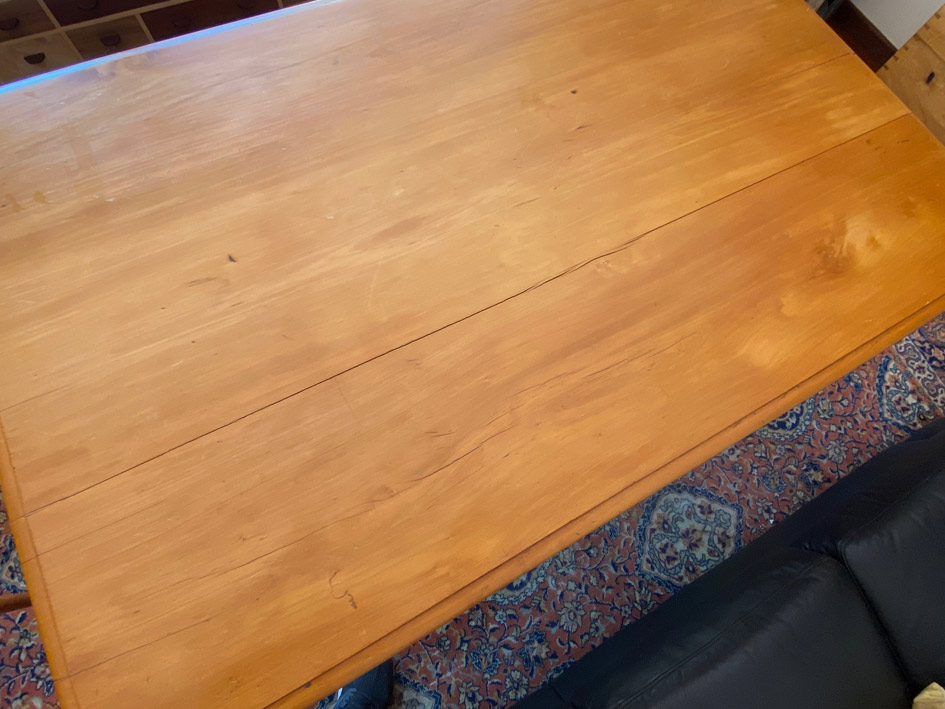
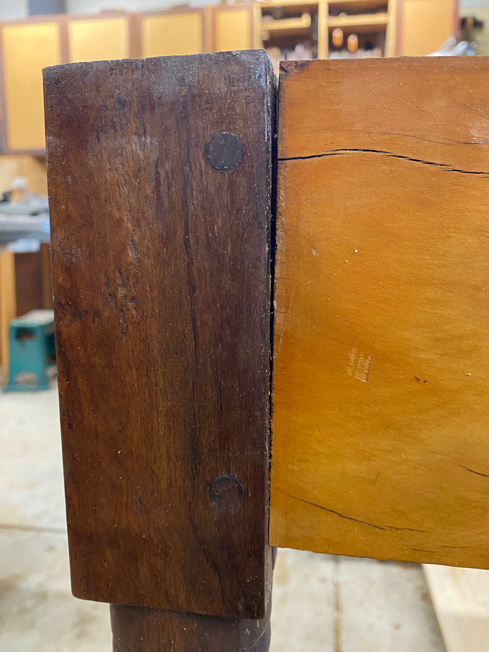
Slip at one leg joint ...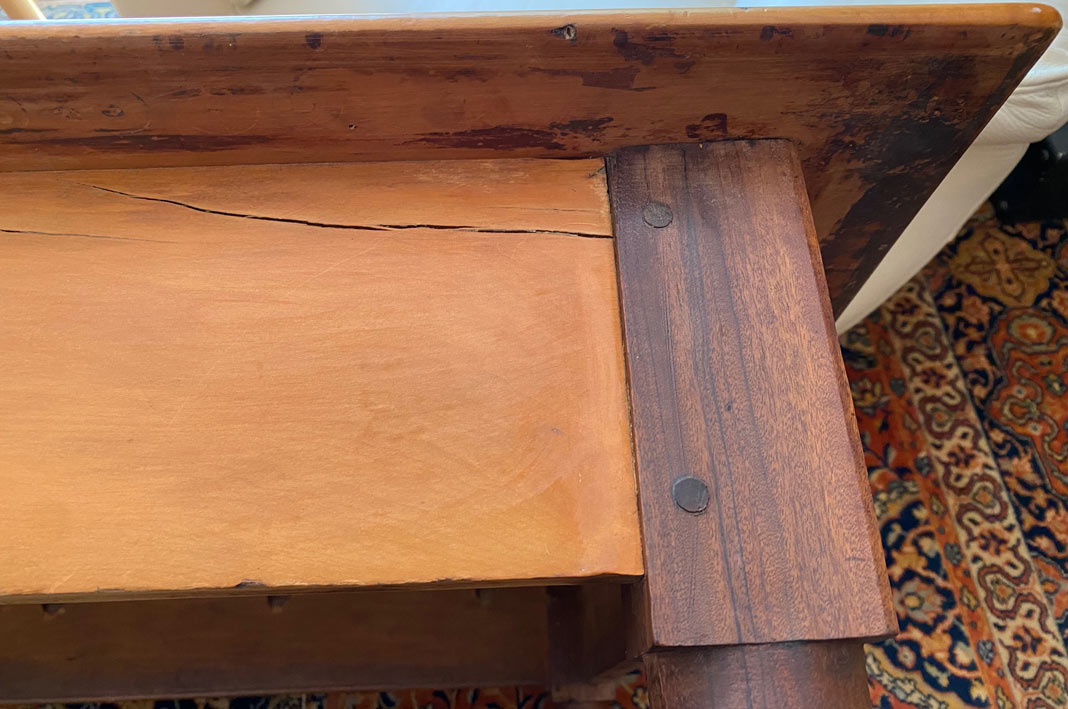
The top is attached with pocket screws (not the Kreg type!) made with a brace and bit. These do not build with wood movement in mind!
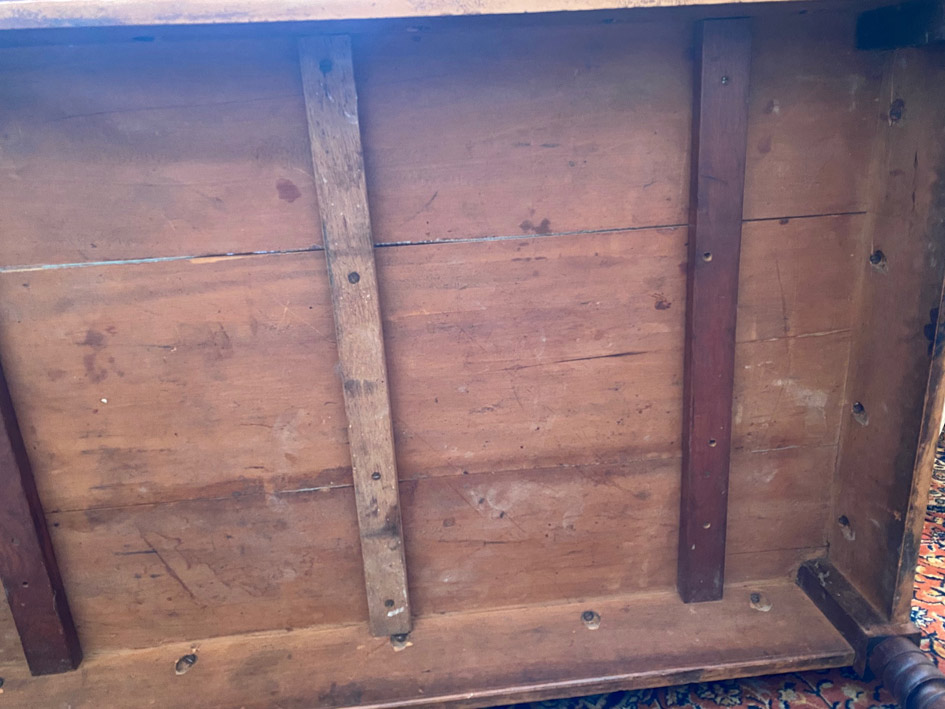
Further, the bracing of the top looks like a modern add-on and, again, prevents movement ...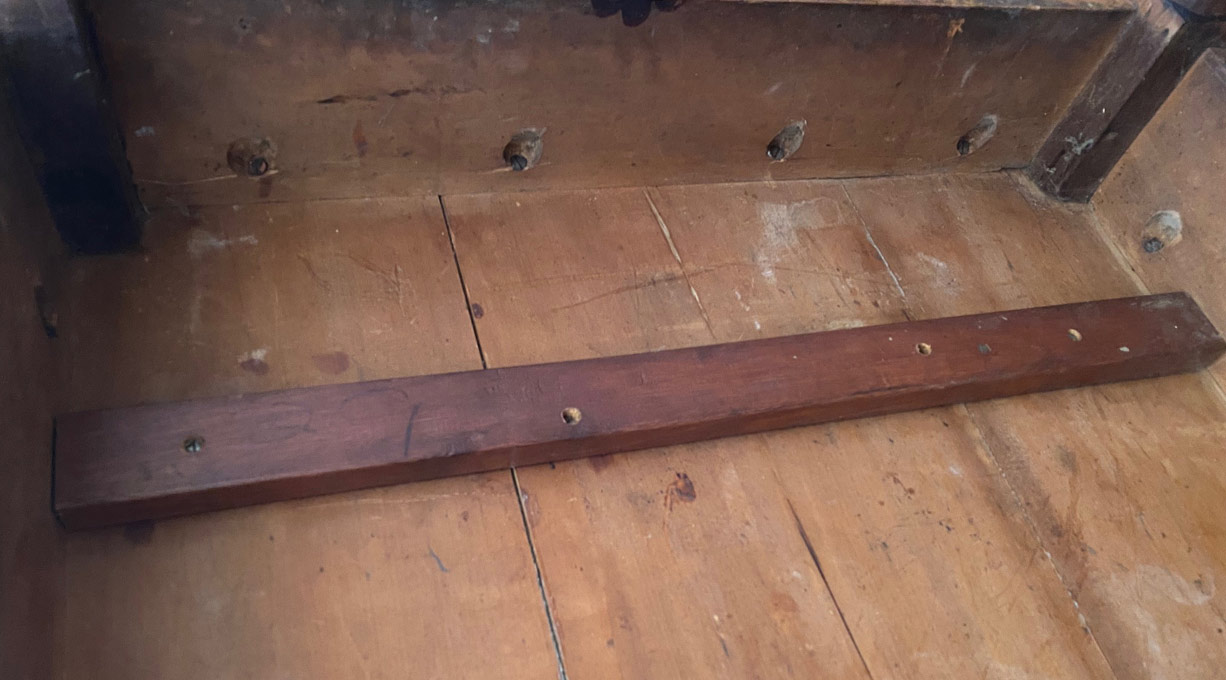
The tops of the legs are all chamfered to avoid contact with the table top ...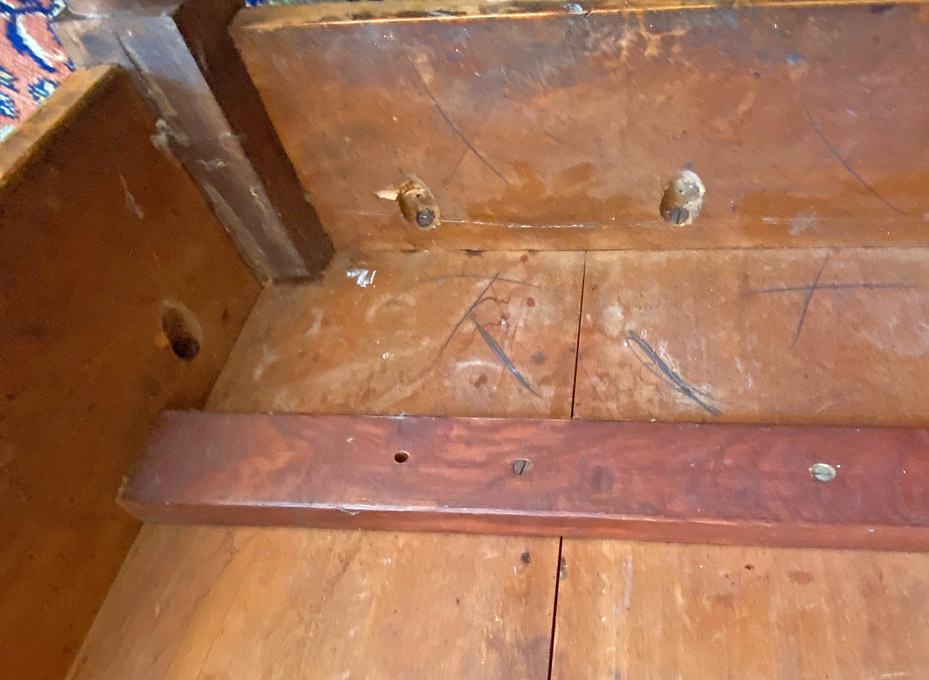
These are the screws that came out ..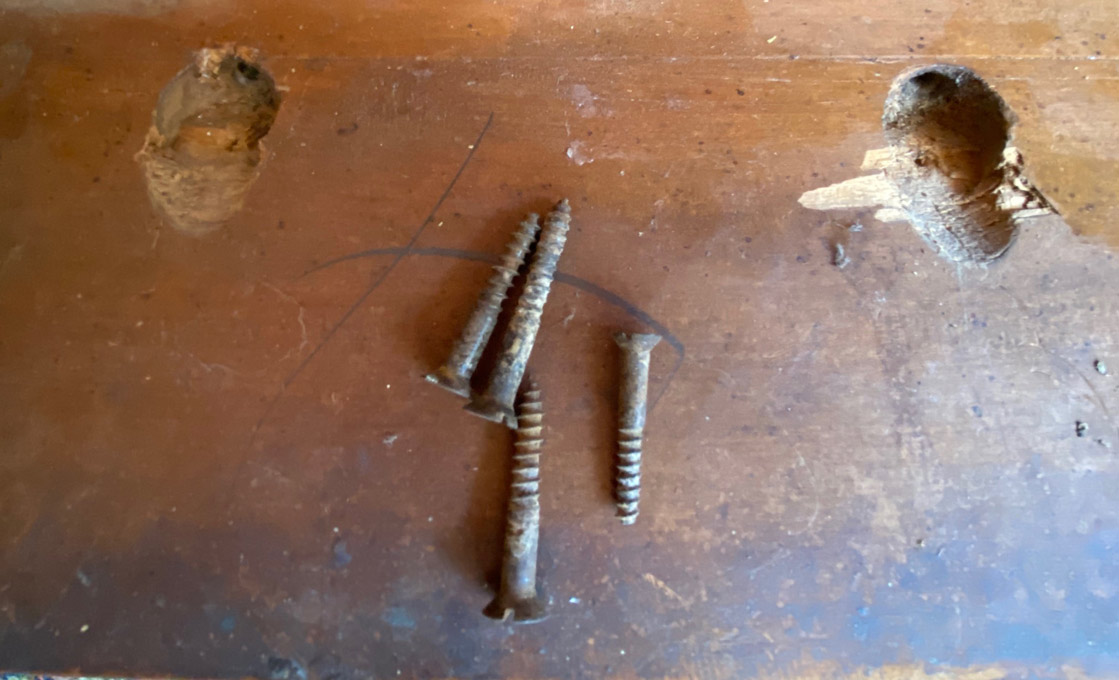
Thoughts?
Regards from Perth
Derek
Renovating a table
Posts
Re: Renovating a table
#2

Oh dear. All the classic mistakes in one package. And people still do that now.
But it is salvageable.
I bought an antique cedar office table for my wife a few years back. Superb one piece top, cast iron retaining button's, dovetailed drawers of excellent craftsmanship.
It's suffered one bad restoration by a hack of the top but not to bad.
Anyway. Nice timber. I would hide glue the top back together. Button it back down.
Don't over restore it. You will kill its patina.
Just my ten cents.
And don't use those cheap nasty pressed metal buttons. They pinch and gouge.
Re: Renovating a table
#3I guess the main challenge will be gluing the splits in the top. Were they glued before and the glue failed?
One approach would be to bandsaw the split apart and plane the edges for a good fit. But that will narrow the top and the grain pattern is unlikely to match well. But doing your best to clean the dirt out of the groove, pushing in some glue and clamping together is likely to leave gaps and a glue line.
For the battens underneath a better replacement would be battens with sliding dovetails. If you wanted to go all out you could use sliding dovetailed battens tenoned to the aprons. That would keep the top flat and also attach the top to the base. But not so easy to disassemble.
But screwed battens with slotted holes would be the simplest fix.
If the aprons to legs joinery is solid I would not take them apart to fix that one split in the apron.
I agree with Maurice about replacing the pocket screws with buttons.
Re: Renovating a table
Solution #4I spoke with my son about the table. Interesting.
My son and his wife live in Canberra, which is the capital of Oz, and the seat of government, where he works. Think Washington. He is 31 and married 2 years. His wife is the daughter I always wanted ... a woodworker-in-the-making! She will inherit my tools. My son is a wonderful person, and I love him dearly, but he has not a whit of interest in woodwork. Economics and strategy is where his interest lies. Something of a perfectionist, would be an understatement. Minimalist to the nth degree - hates the idea of having unnecessary possessions.
So I was expecting "make it look new, dad". "Sand it and paint it white". Or something like that 
He said to me he wants to keep it as it is, warts and all. "It is old and has history". Who is this person?
Now the restoration is more along the lines of choosing what should be repaired and what should be left untouched.
I decided to close up the split in the one apron.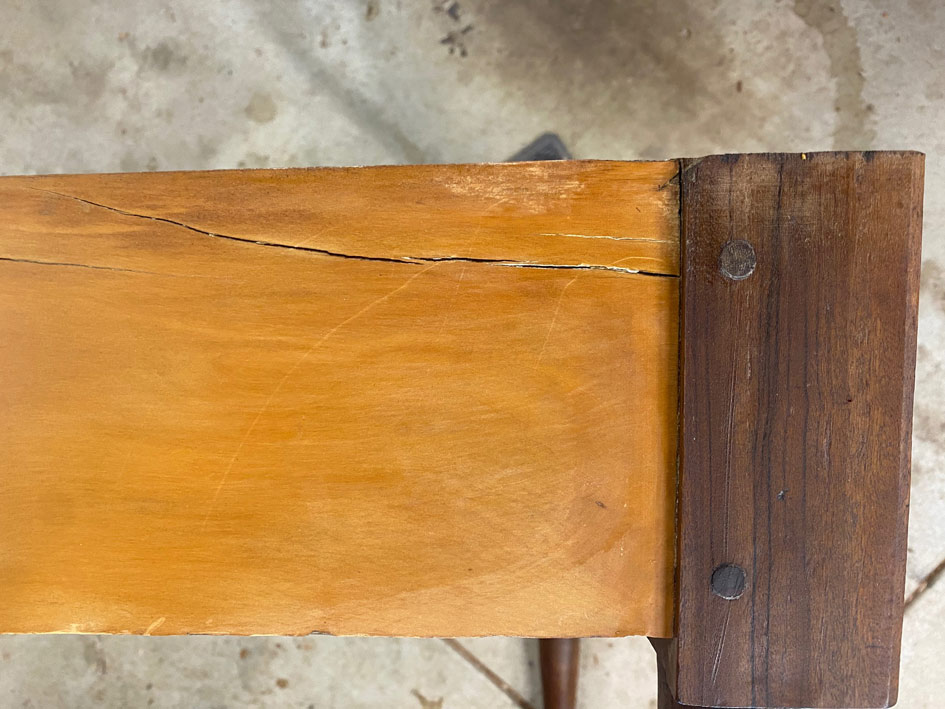
The plan was to blow and lift out any debris in the split, and then use the air gun to blow glue inside it. 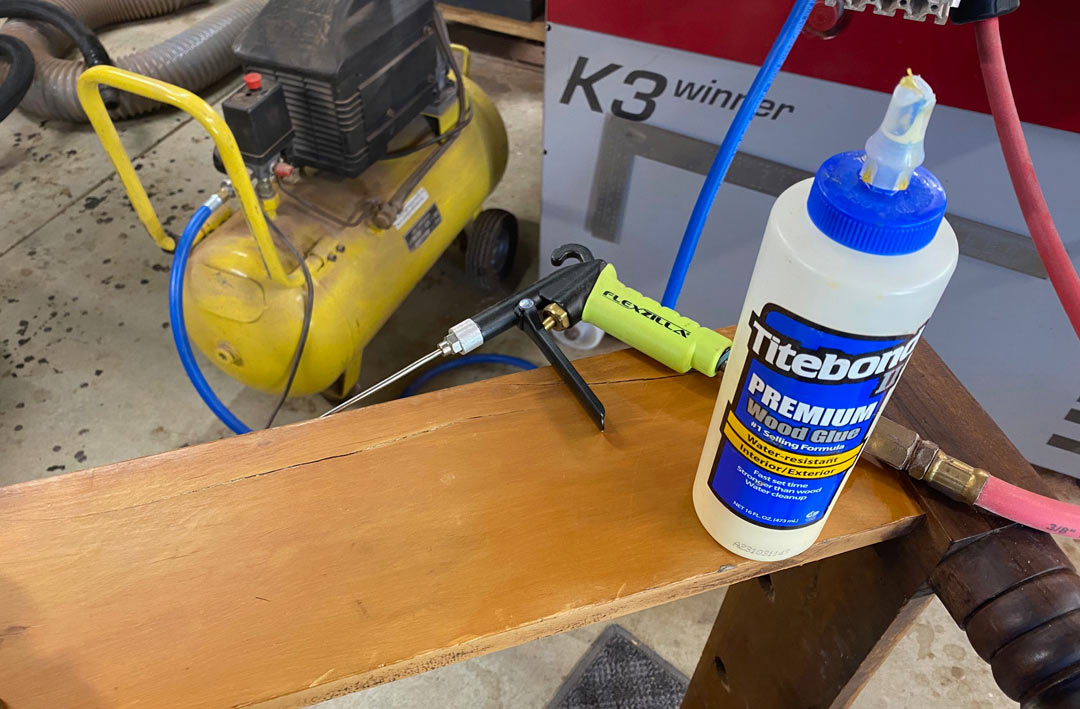
However, as the split did not run through the wood, air driven at it simply pushed the glue out, not in. In the end I thinned it a little, dribbled it in, and pushed it down. Wiped down the surface with a wet rag, and then clamped all securely ...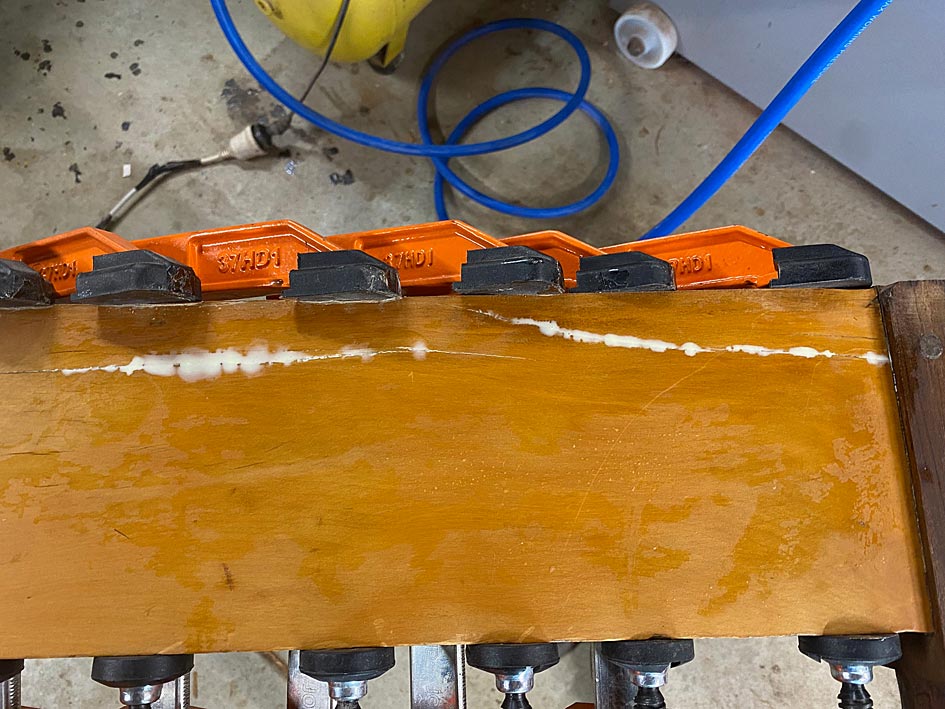
I discovered two factors about the table top.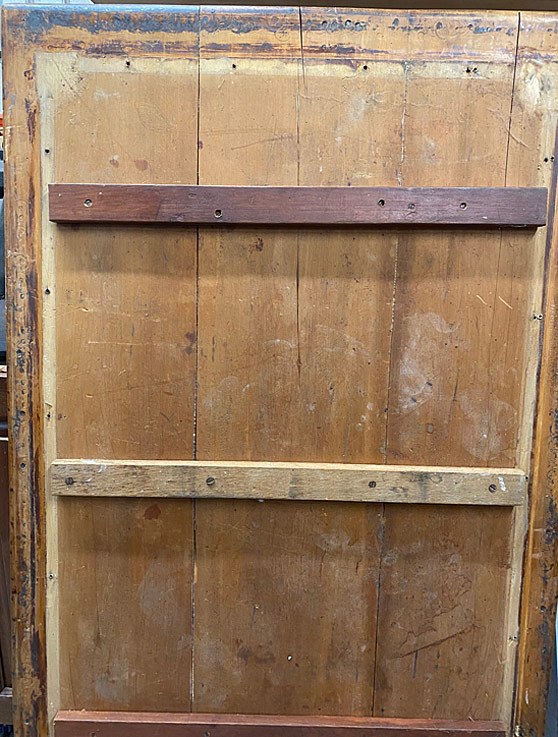
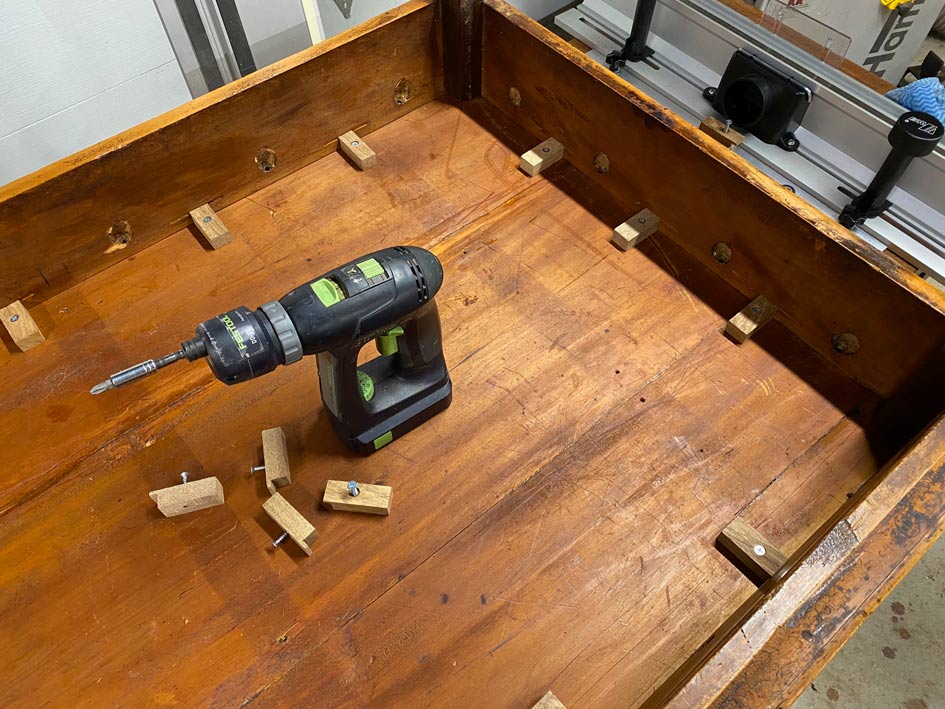
When I loosened the battens, the boards were revealed to be loose, that is, only held together by the battens ...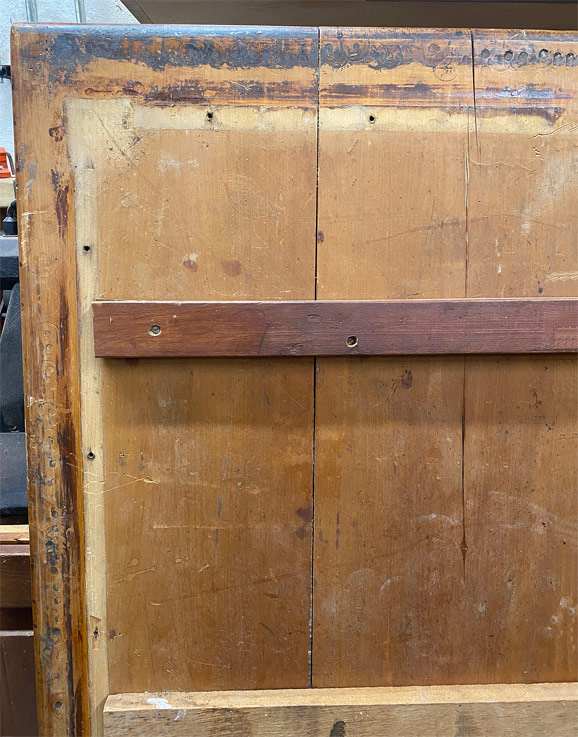
Further, the battens looked like they were added by the "farmer-restorer" 45 years ago. The ends of the battens were sawn as if with a panel saw, and no attempt made to finish the ends. The screws looked modern ...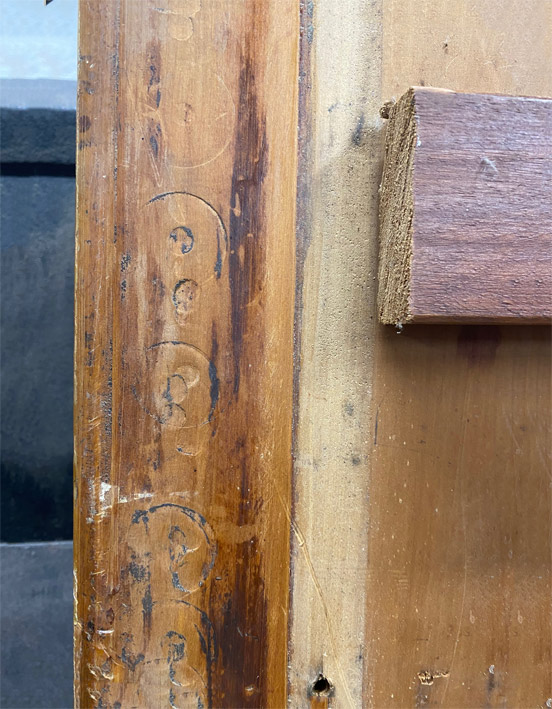
Loose boards.
The plan is now to remove all the battens, clean the edges, and reglue the boards together.
The second feature is one I am puzzled about and wonder what you believe this is about: along the underside of the table top, along the edges, are these round marks ...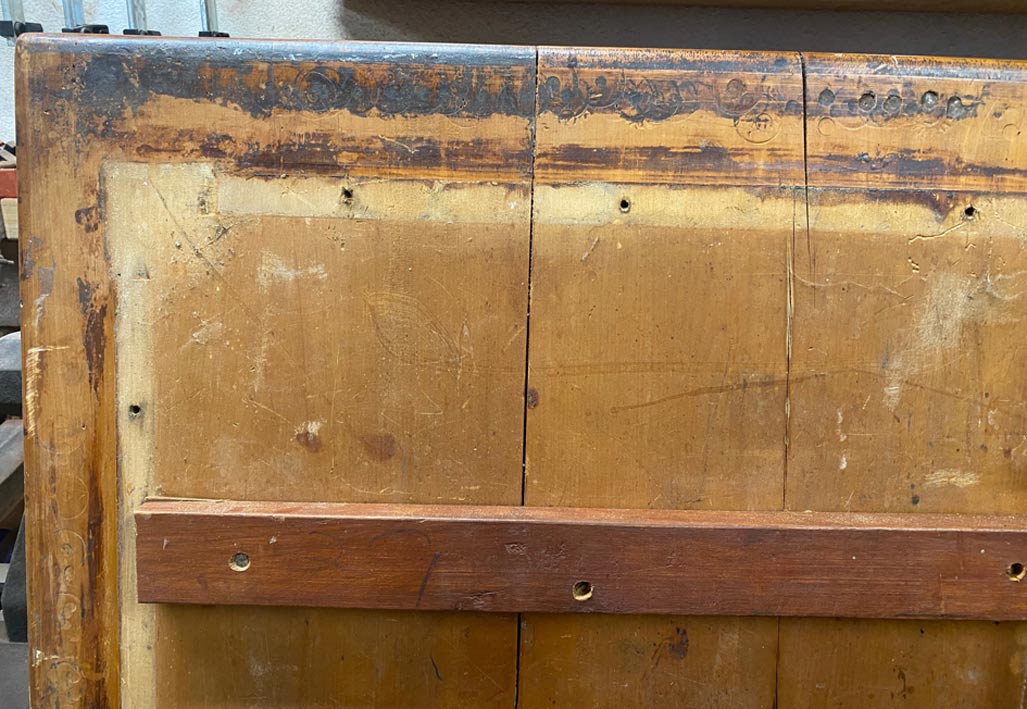
They appear as if the round pad of a F-clamp had dug into the soft Yellow Wood. But why? Why would clamps have been used all along the under edge? The upper side is a Lamb's Tongue profile. I cannot see how that would require clamping. And there are too many marks to suggest clamping to support a glue up.
Thoughts on this?
Regards from Perth
Derek
Re: Renovating a table
#5Perhaps in an earlier life someone clamped a kitchen tool. Like a meat grinder or grain mill or tomato mill?
Re: Renovating a table
#6I agree with Gary about perhaps a kitchen device such as an apple peeler.
Ron
Re: Renovating a table
Edited #7Derek, you should remember meat grinders. Mom clamped ours to the protruding lip of the tabletop, and we children proceeded to crank delicious chicken salad for sandwiches. Normally, we did put a towel under the clamp.
Nobody wants grinders anymore.
I have clung to some pretty outrageous furniture pieces over the years, but many were re-paired, re-built, and fixed when we were newly wed. They mean a lot, and always have.
Added later 07 min 49 s:
BTW, Derek, weren't you going to make 6 new dining chairs?
Re: Renovating a table
Edited #8The top is made from three boards. Removing the battens, the board on the left side was completely loose and came away.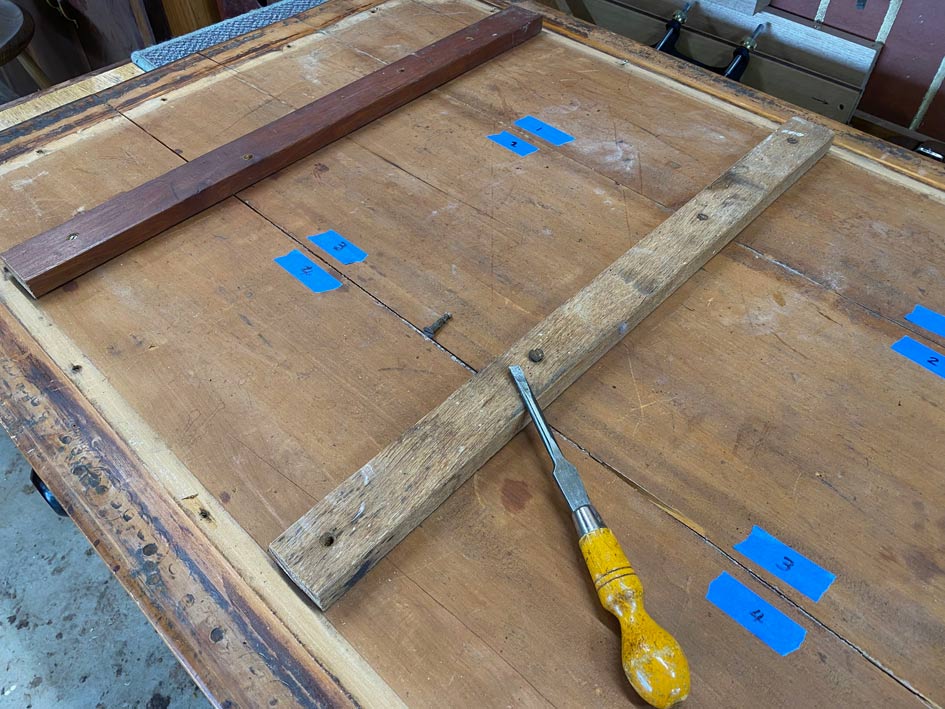
The edges of the joining boards was dry with a little hard glue, which scraped off with little effort. I suspect hide glue (as what was there was brittle) but there was too little to test ...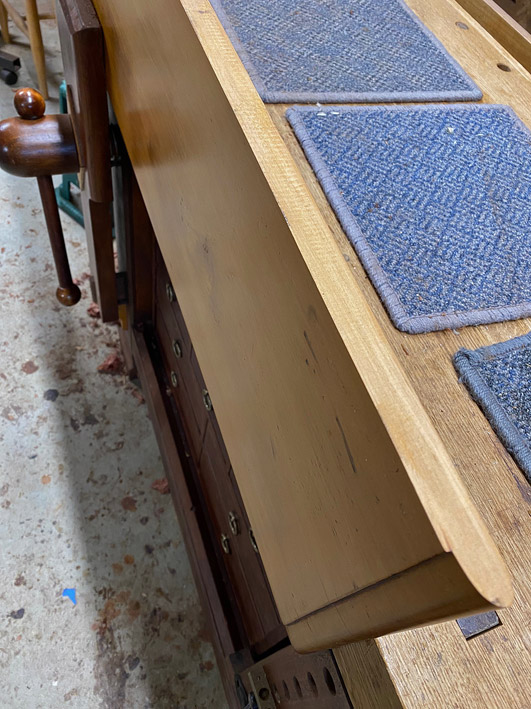
This was re-glued with Old Brown hide glue (seen here warming) ...
... clamped along with cauls, and left to dry for 24 hours ...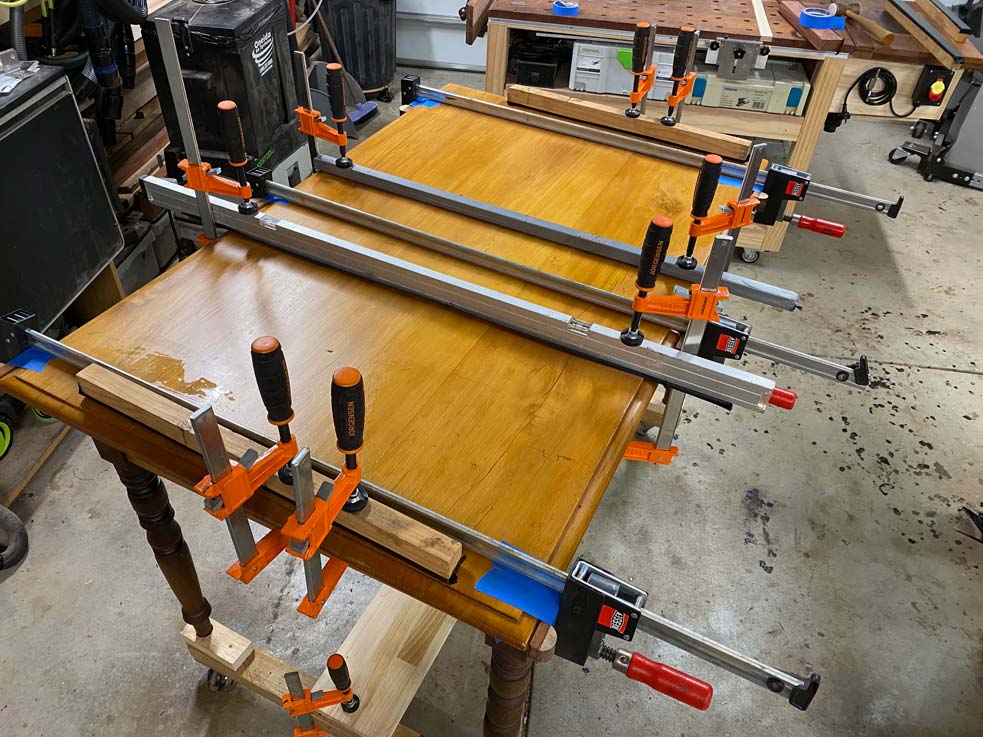
The result looks pretty decent. A glue line is evident, but in-keeping with the rest of the table top ..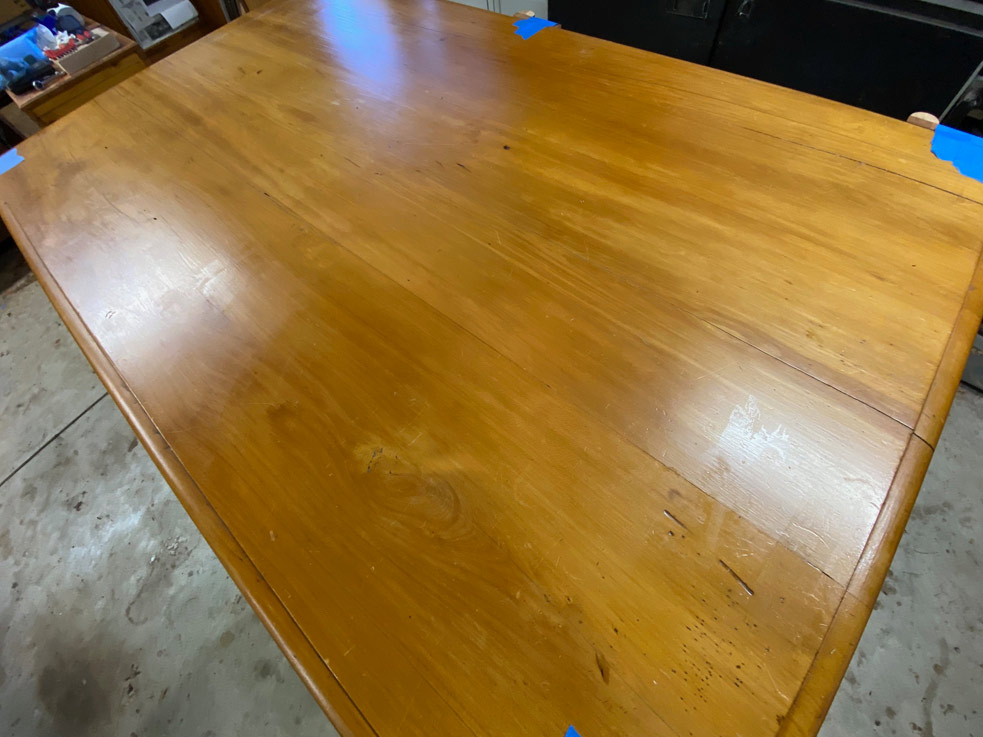
Up close, this is the worst of the join ....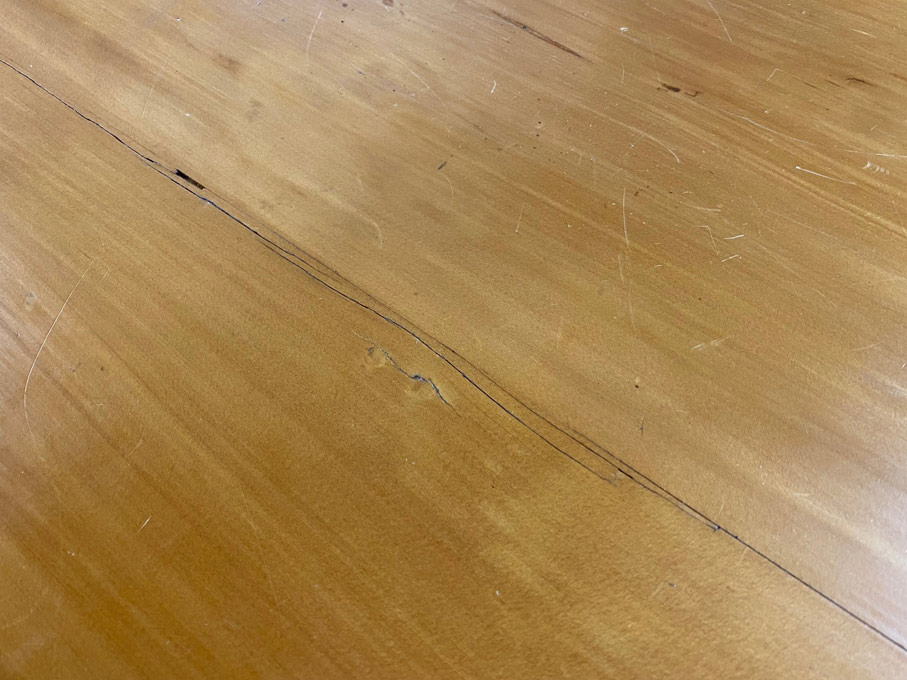
There are now two splits to deal with. The first is the large one that closes up underneath but leaves a 2mm wide slit on the top ...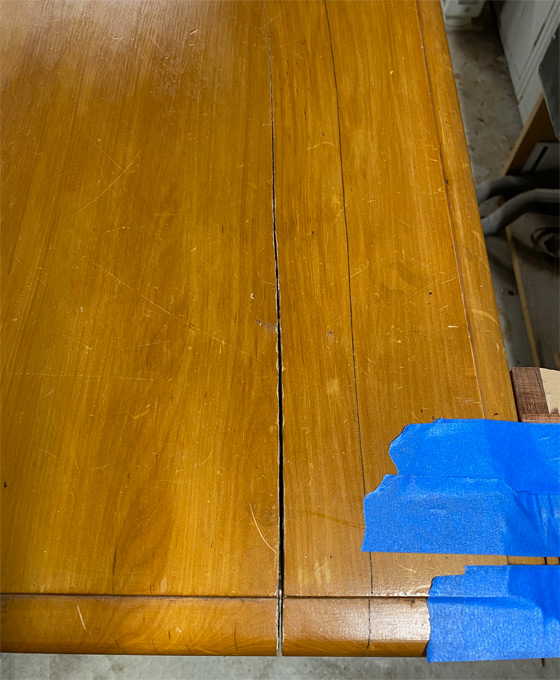
The plan is to add hide glue and pull it together. It will join along the lower side, and then the remaining slit will be filled with either epoxy and hard wax stick or just wax stick.
The smaller split ...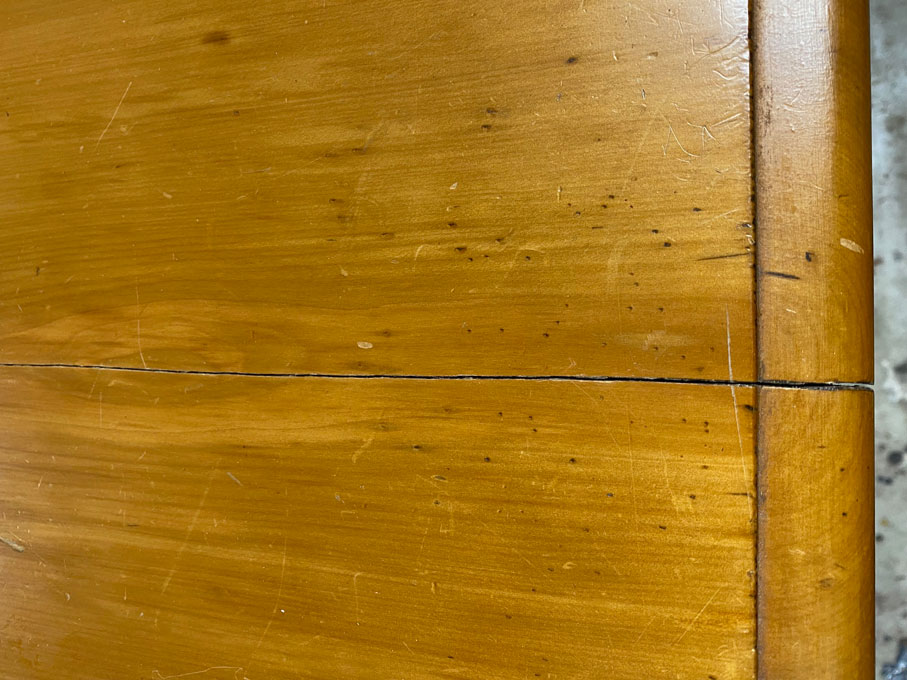
... will be glued and pulled together. It should close up almost completely. What is left will be left as is.
Hide glue was pulled through the splits with a vacuum cleaner, sealed below with tape, and clamped with a caul ...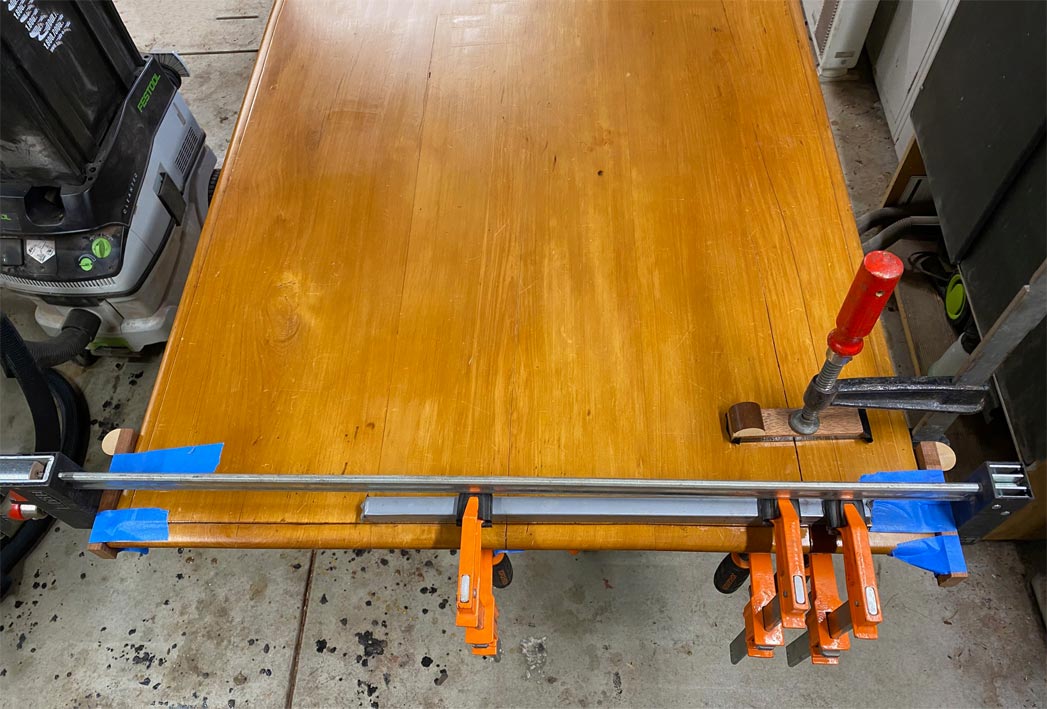
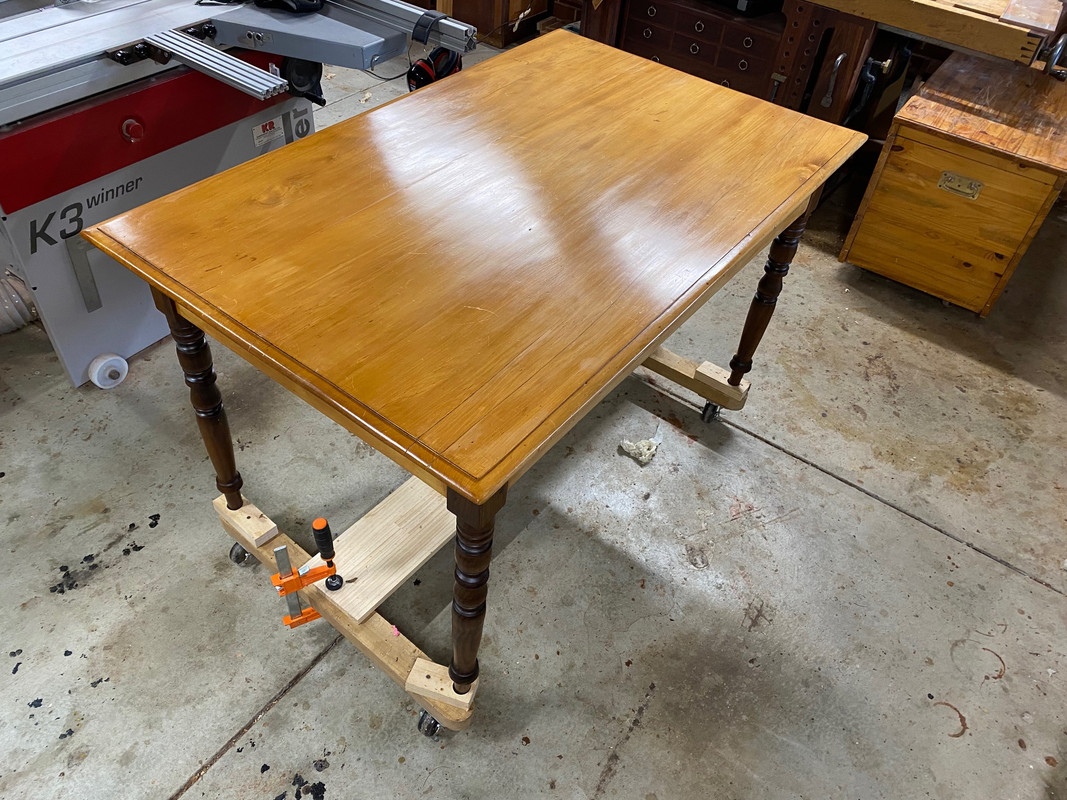
Before I go, here is a fixture that should come in handy if, like in my case, space is a priority and pieces, such as this table, need to be moved around the workshop.
Several years ago I was asked for a tip by Megan Fitzpatrick for Popular Woodworking magazine when she took over as editor. I sent her a photo of a 4x2 with wheels at each end. Two of these joined with a board create a carrier for a table ... or a cabinet ... or anything else. Unscrew the joining board, and pack away the two 4x2's.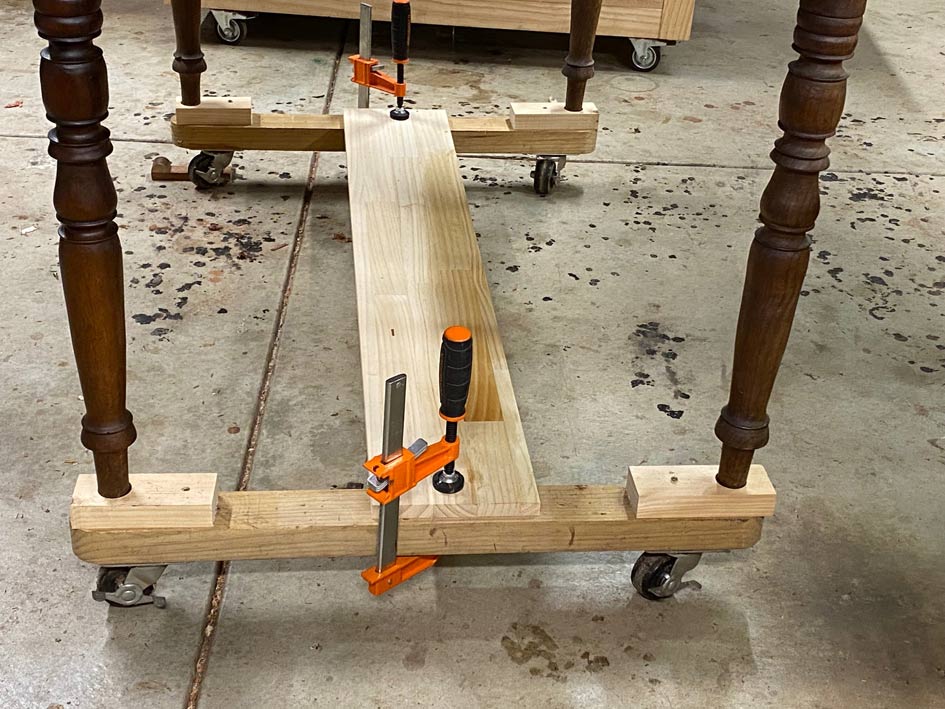
Regards from Perth
Derek
Added later 43 s:
Well, after the glue dried and the clamps were removed, I was not thrilled with the result. The width of the split was too great for my liking. At around 3mm, it would need filling, and I had decided that I did not want to fill any splits. The table is old and splits happen. Just not a split this wide ...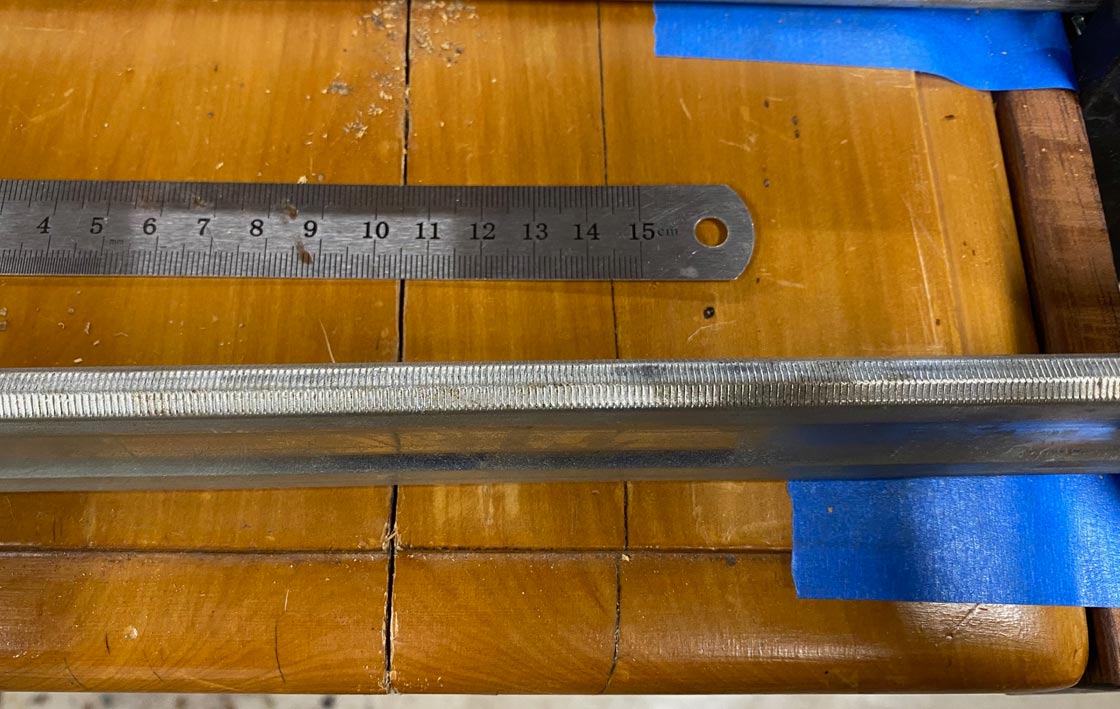
The issue was simply that the split could not close up - no matter how much force was applied by clamps - as the lower edge closed up and prevented the top side closing.
The answer was to saw the split until it was a parallel-side split ...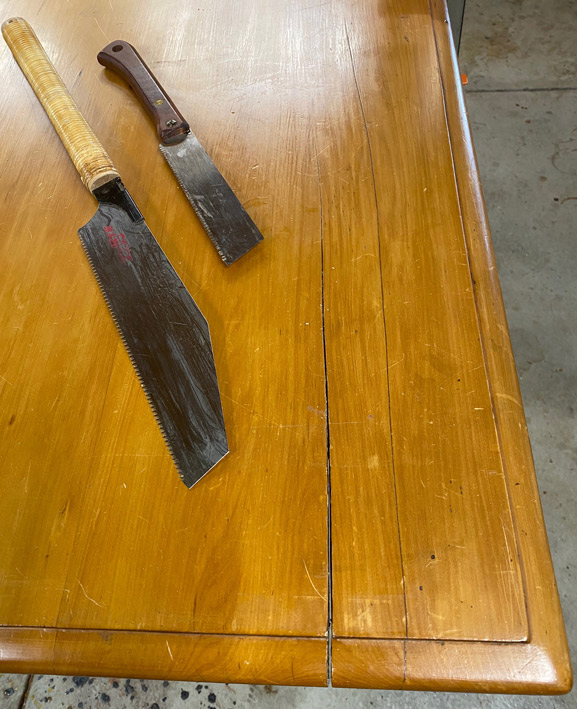
A clamp was used to pull the edges together, progressively, as the split was widened ...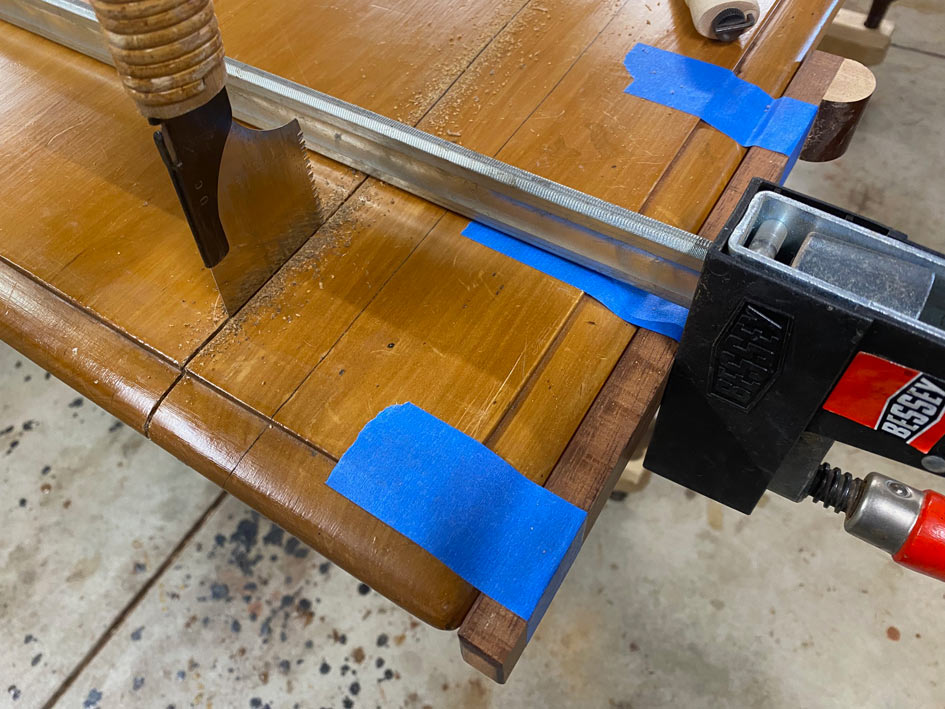
The smaller split was also sawn out ...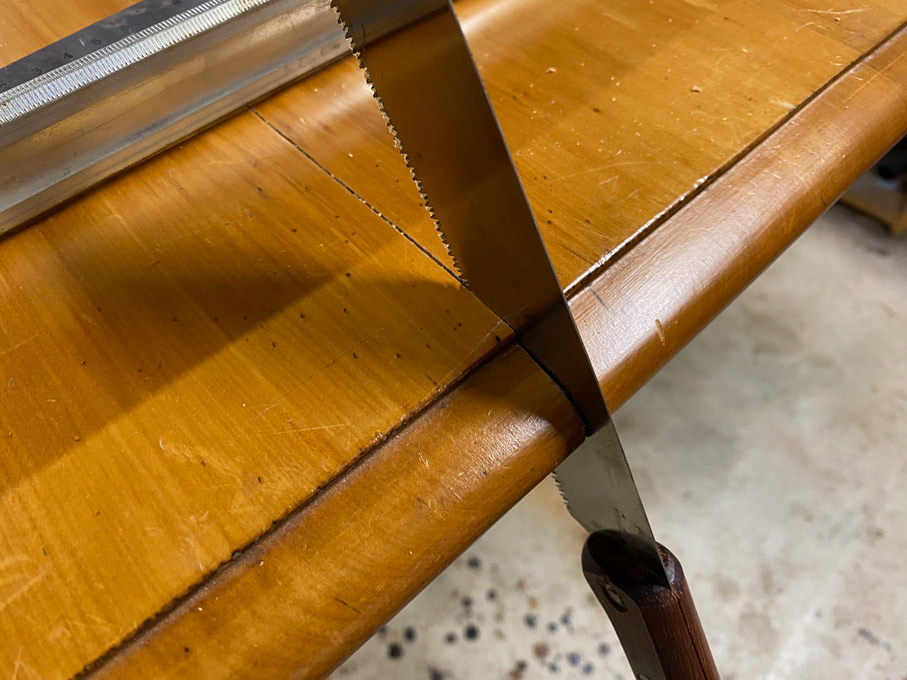
Once satisfied, the end was clamped up again .... this time with a series of clamps, to spread the load more evenly ...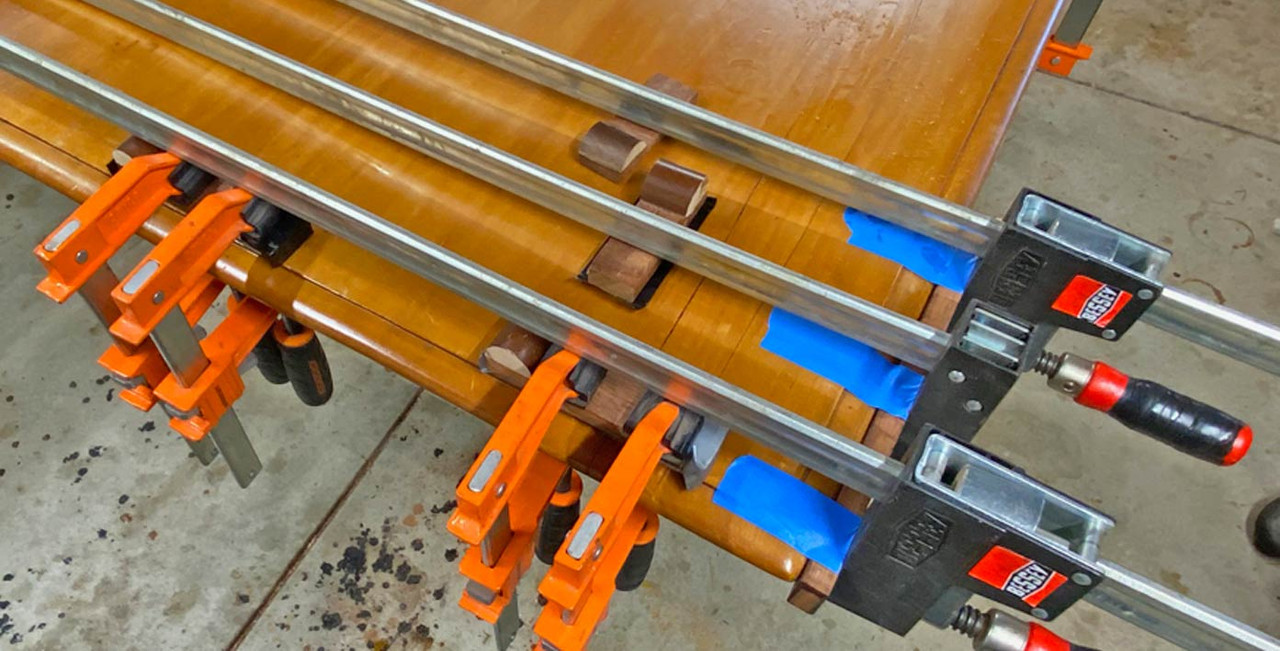
Turning the table top over, the plan was to reinforce all the splits with butterfies ...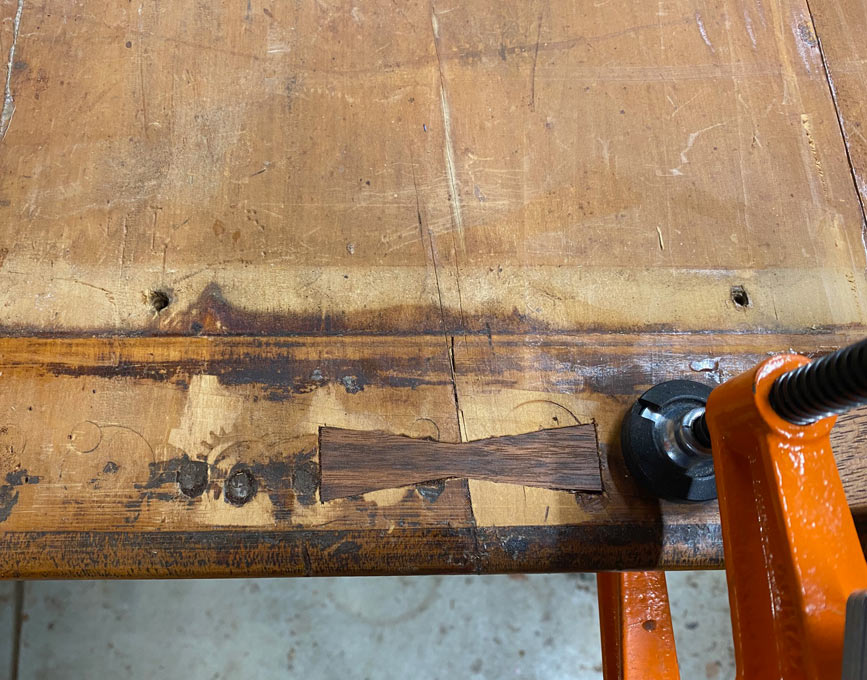
The wide splits received two ...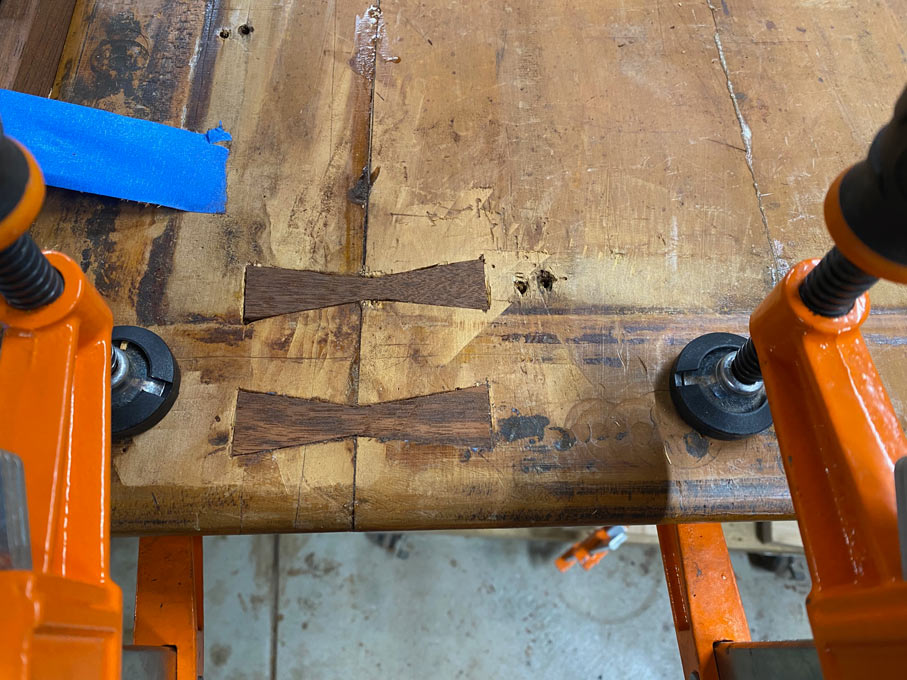
There were splits at other end of the table top, although these were still fine in nature. However, I did not want this to develop as a problem area in the future when the table went across the country, and therefore more butterfies were added ...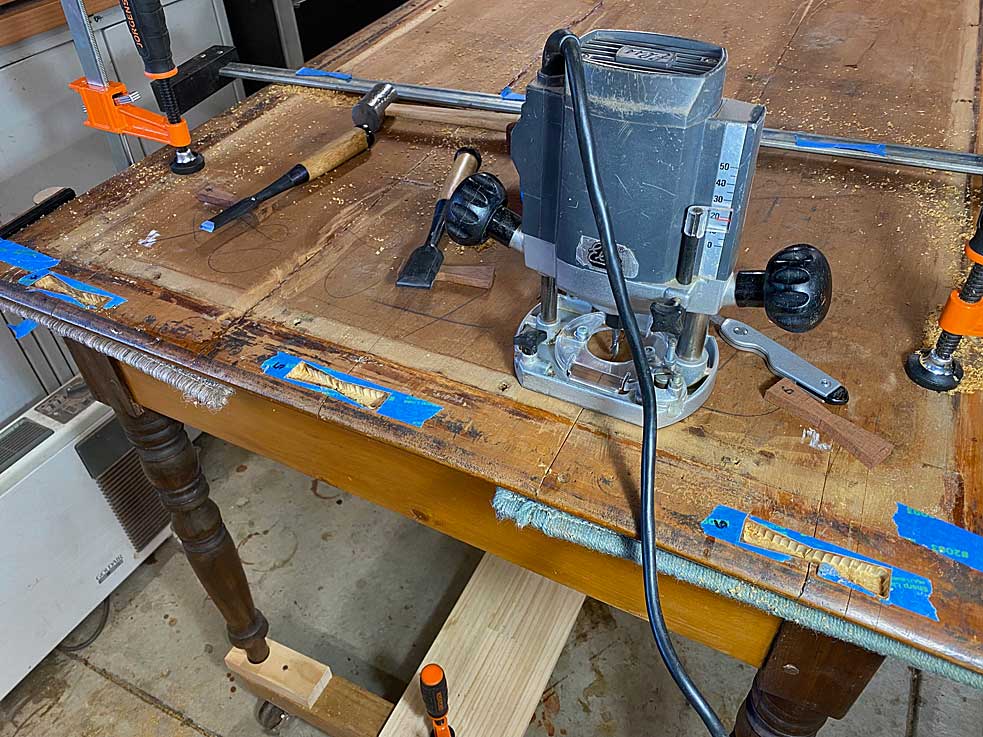
Note that the joins between boards were not touched. Only expansion splits due to expansion ...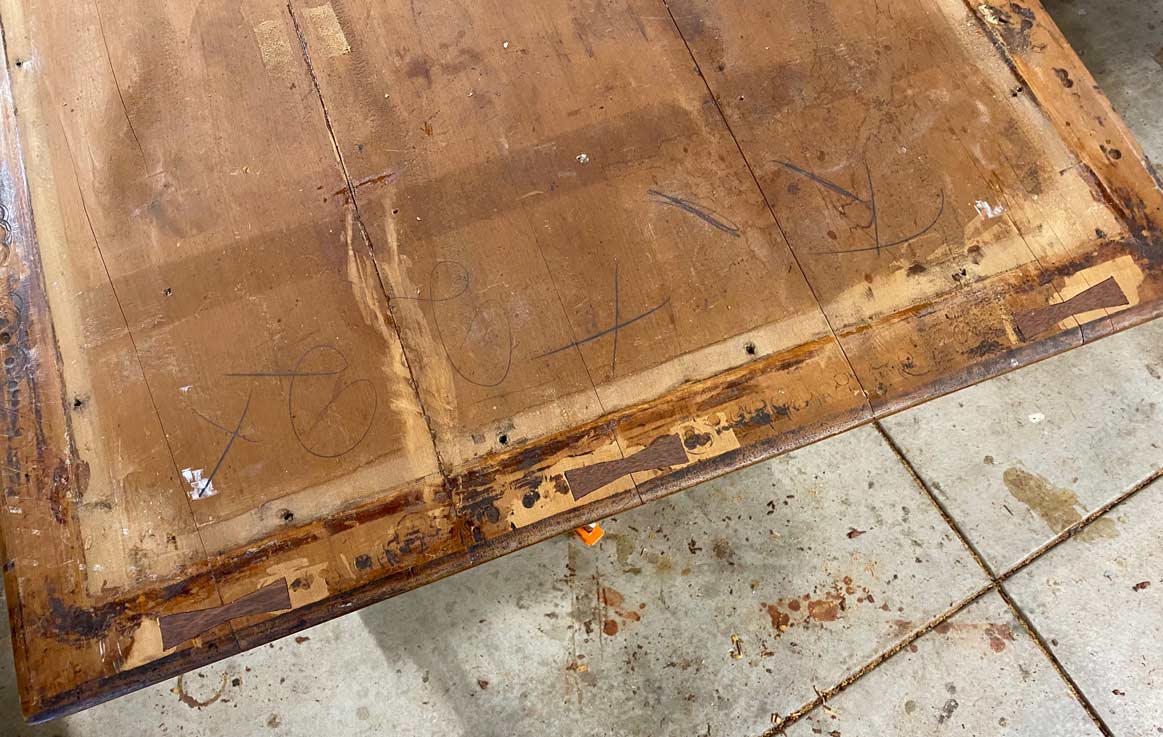
Interestingly, I noted that the builder of the table had marked the board order when gluing up the top.
Glue up again, and out of clamps, the wide split was now under 1mm ...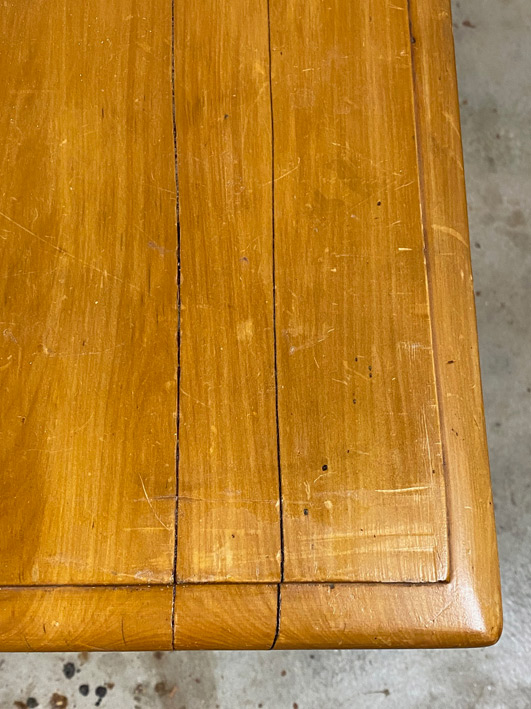
The smaller split was similar ...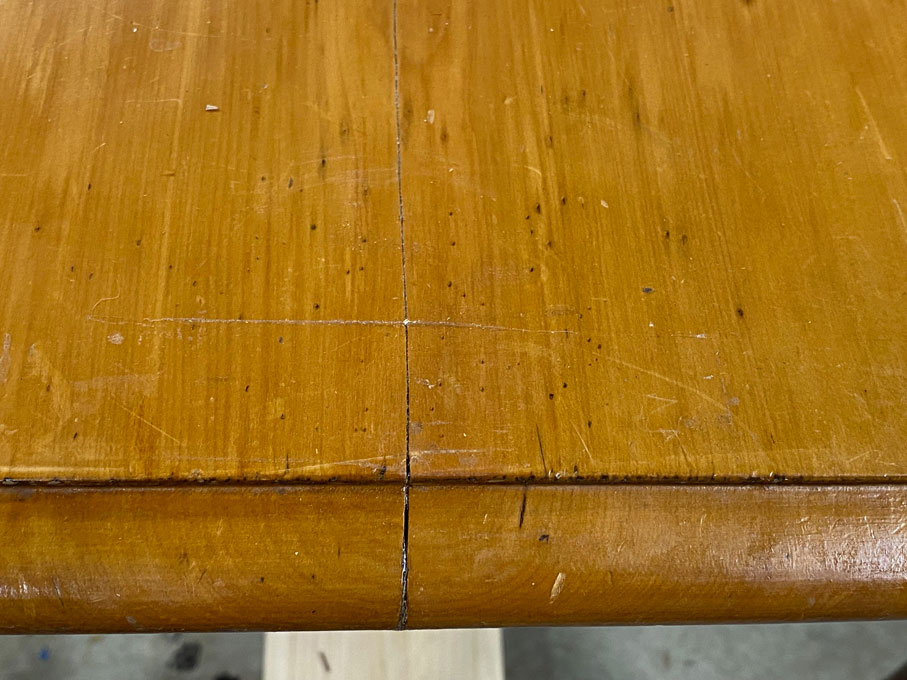
And these were in-line with the splits on the other end of the top ...
I am happy with this. To finish the top I plan to give it a light sanding (by hand), partly to remove any rough edges from gluing boards and splits, and also to key in a finish coat. About 20 years ago I decided that the top needed to be treated in a way to make it waterproof and tolerant of spills. Shellac and wax was not durable enough. So I rubbed on a few thin layers of poly. As sacrilegious as this sounds, it has been a blessing of sorts. The finish is thin enough to not look like poly, and durable to have withstood the years of family eating and dining with friends. The poly is thick enough to sand back a smidgeon, enough to level joins where the edges are raised, and then add a finish on top. I am thinking of a water-based poly as this will not change the colour of the current finish.
Now it is time to pull the legs apart!
Regards from Perth
Derek
Added later 58 s:
It wasn't in the original plan, but it became apparent that some of the legs had gaps that indicated they were only held by the pegs ...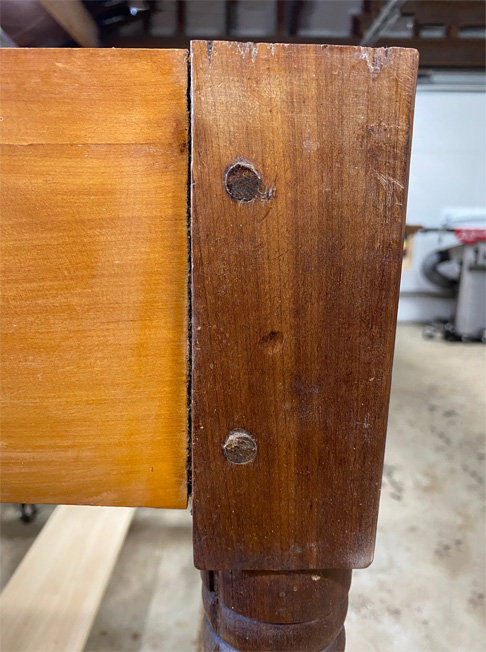
So ... to start, all the pegs were drilled out. To do this, first pull the legs in tight with a clamp to ensure that the tenon is not chewed up ...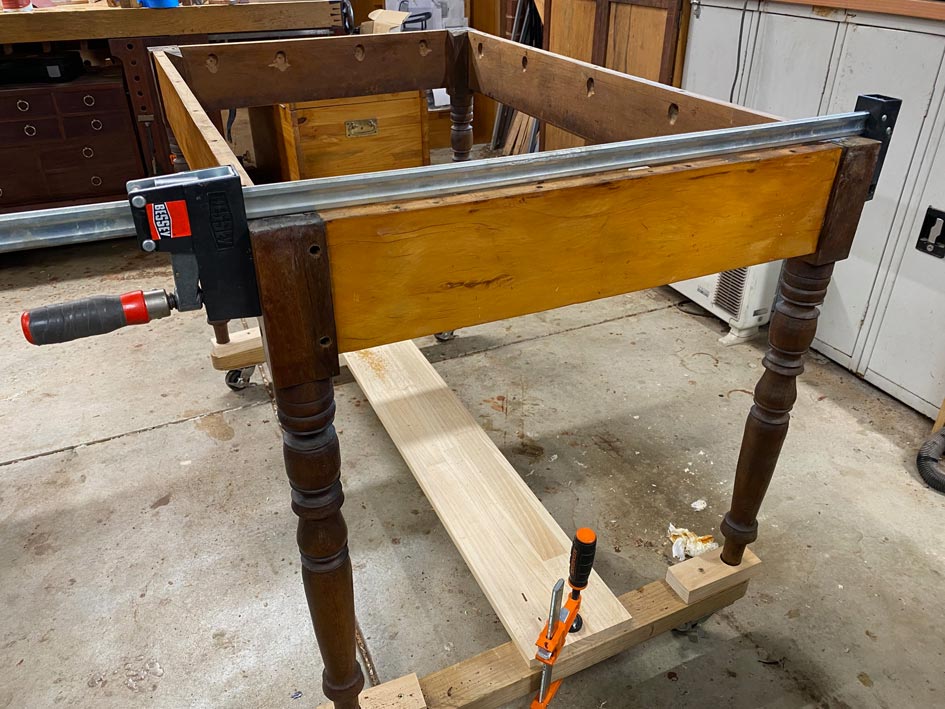
Then reverse the clamp to push the mortise-and-tenons apart ...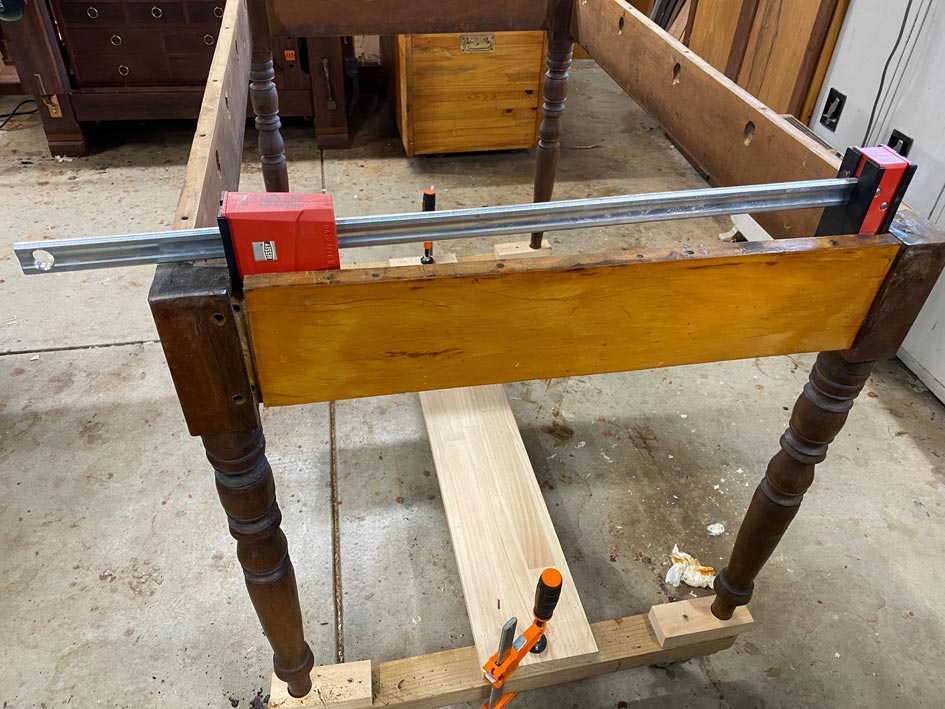
Pretty dry, would you agree ...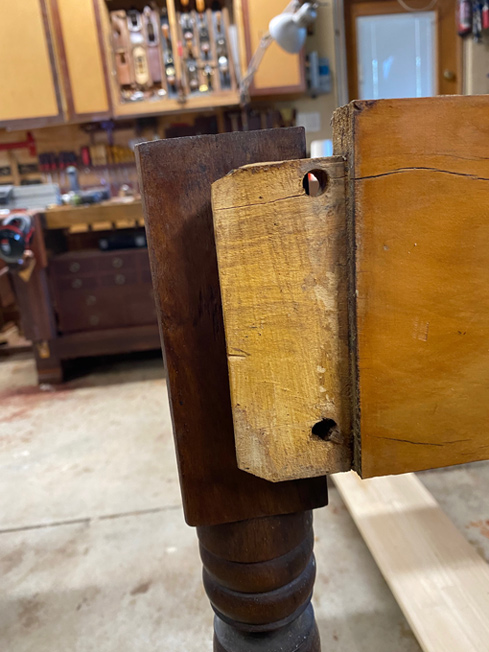
Interesting tenons ... only shouldered on the outside ...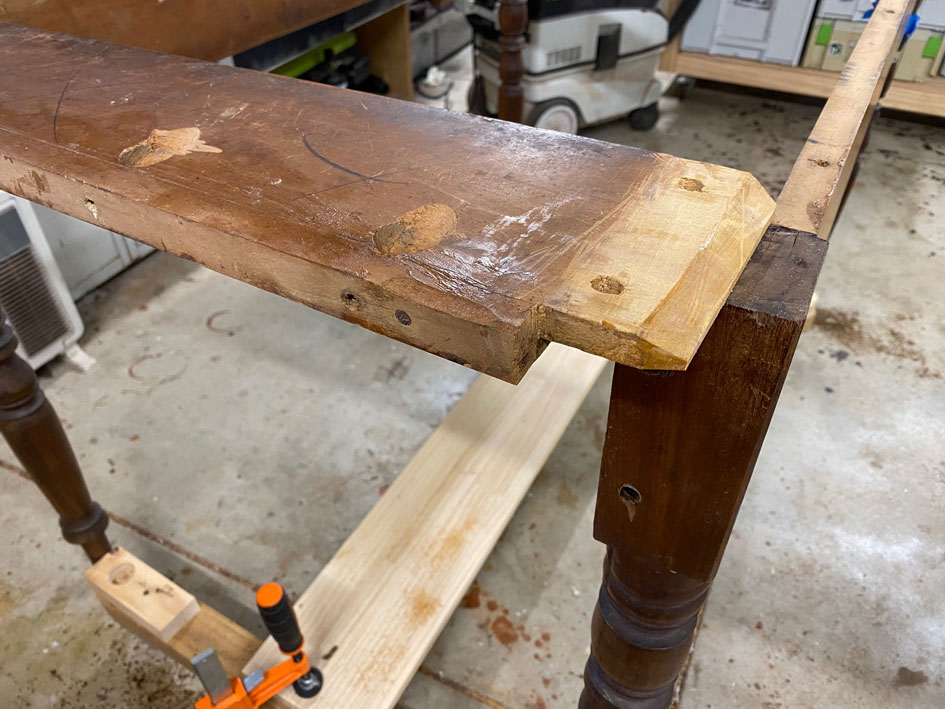
Added later 51 s:
Made new 3/8" pegs ...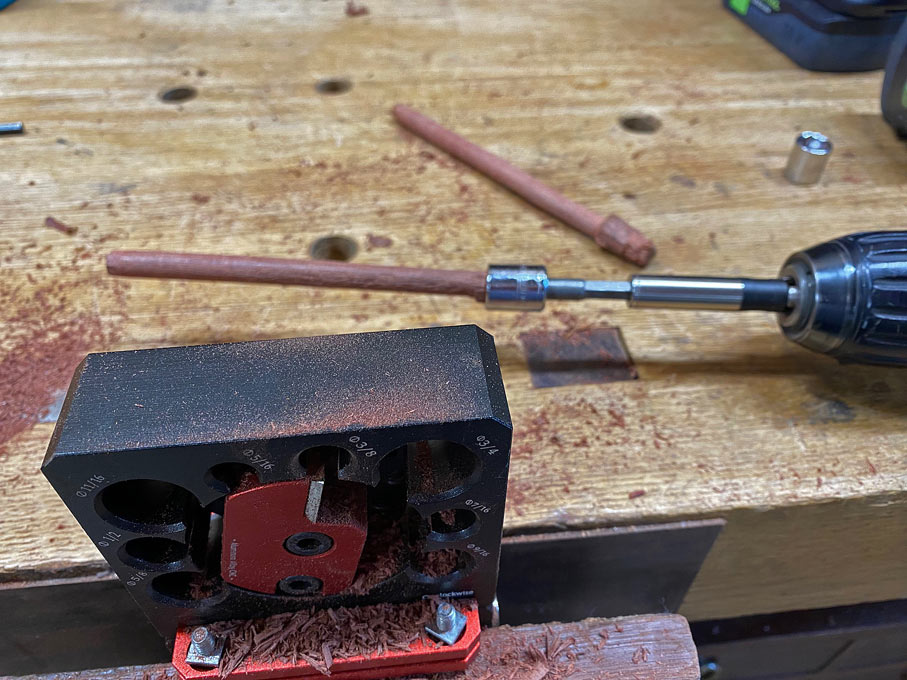
And then, after cleaning away the vestiges of the unknown glue from the joints, reglued with hide glue, fitted all together, and wacked in new pegs ...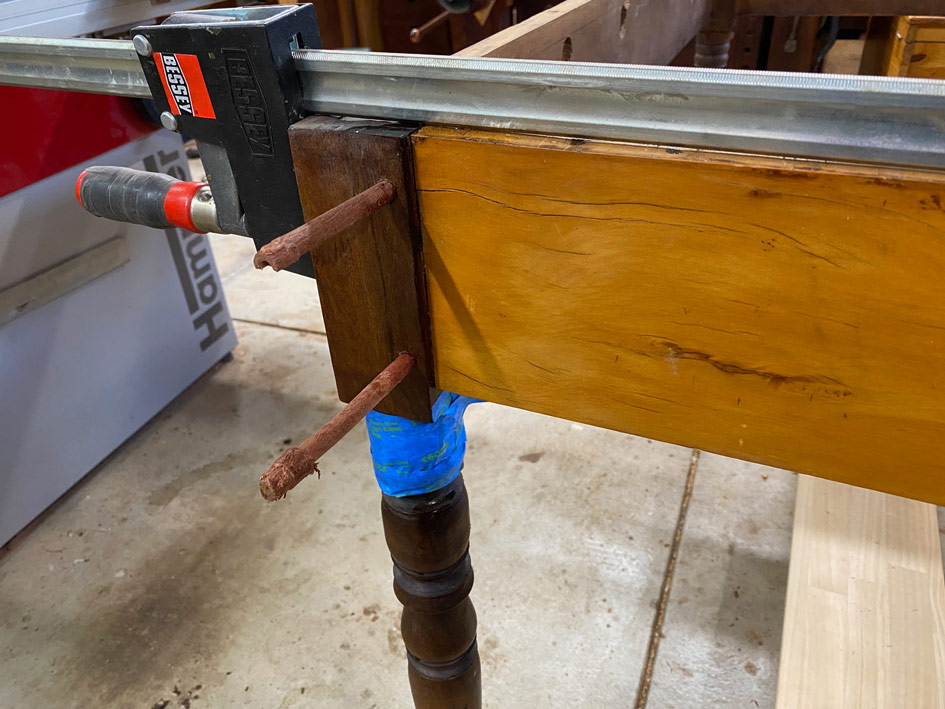
The underside of the table top was cleaned and oiled. You will recall that the top was cracked quite significantly, with one board completely loose. In part, movement was likely to have been promoted by the imbalance of a finished outer side and an unfinished underside. This would have been exacerbated by the battens across the underside and each board screwed to the aprons - all preventing movement. Frankly, I am amazed that the table lasted as long as it did, which is 40 years since it was "renovated" before my wife and I purchased it. Over the years I could see cracks appearing. The underside no longer was dry, and the battens were not being re-installed ...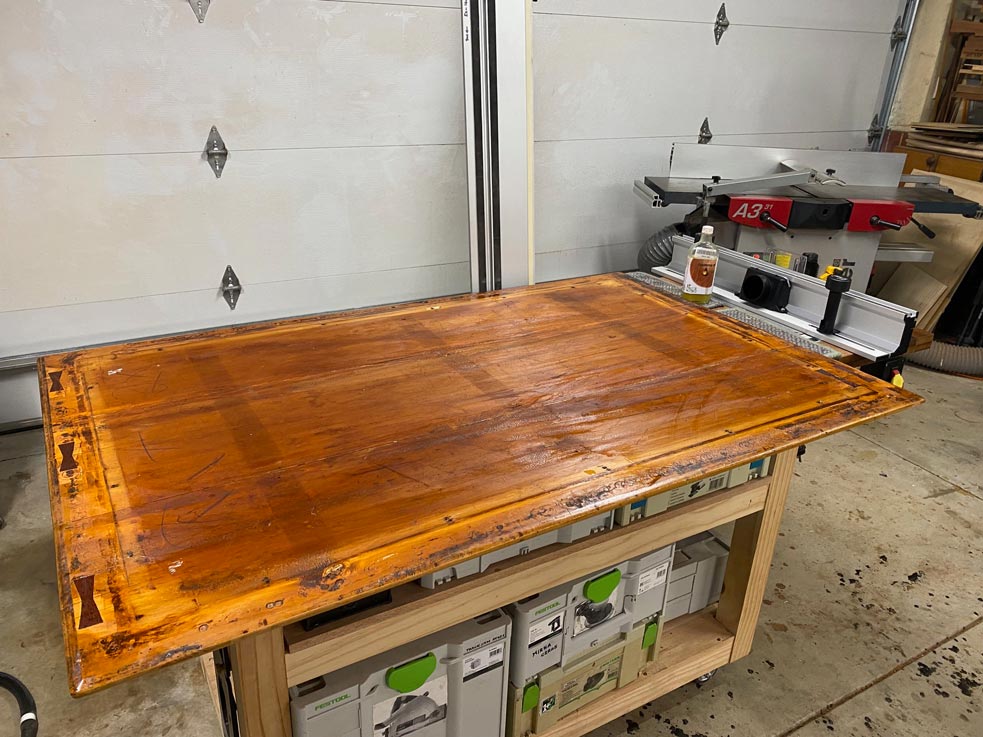
As much as possible, the markings of the table has been left to tell its history. The "circles" around the perimeter almost certainly come from the screw of a meat mincer, which was commonly attached to kitchen tables. One addition comes in the form of butterfly reinforcements where ends have split. These are only on the underside where they cannot be seen ...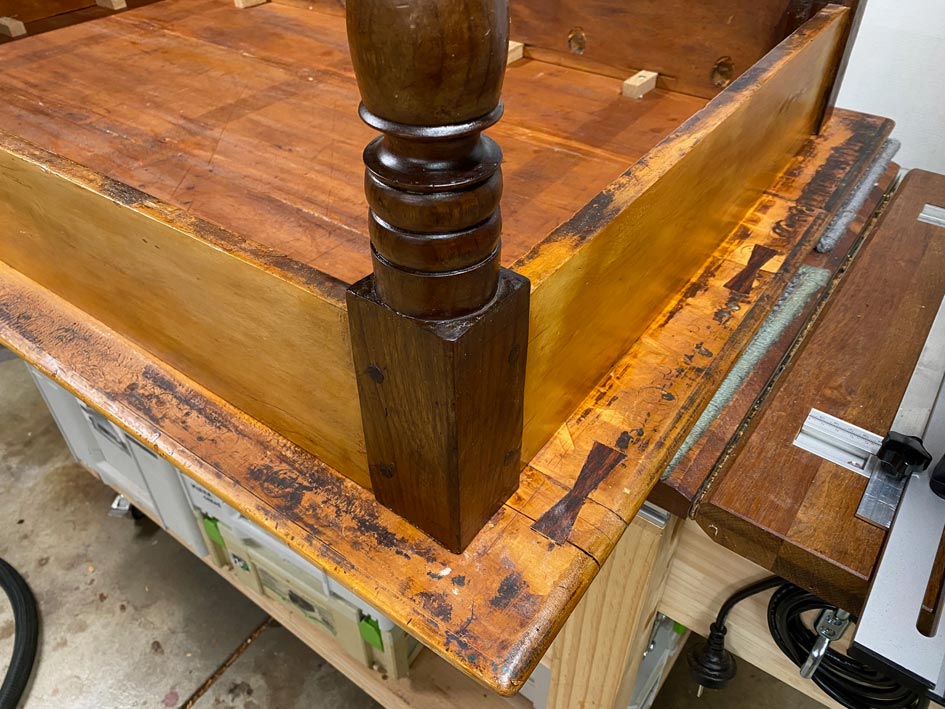
There are a few other butterflies at the other end of the table. Also seen here are wooden buttons to hold the top. The screws were thrown away. The buttons were made from the old cross bracing, and the slots created with a biscuit jointer - that will confuse someone in the decades ahead!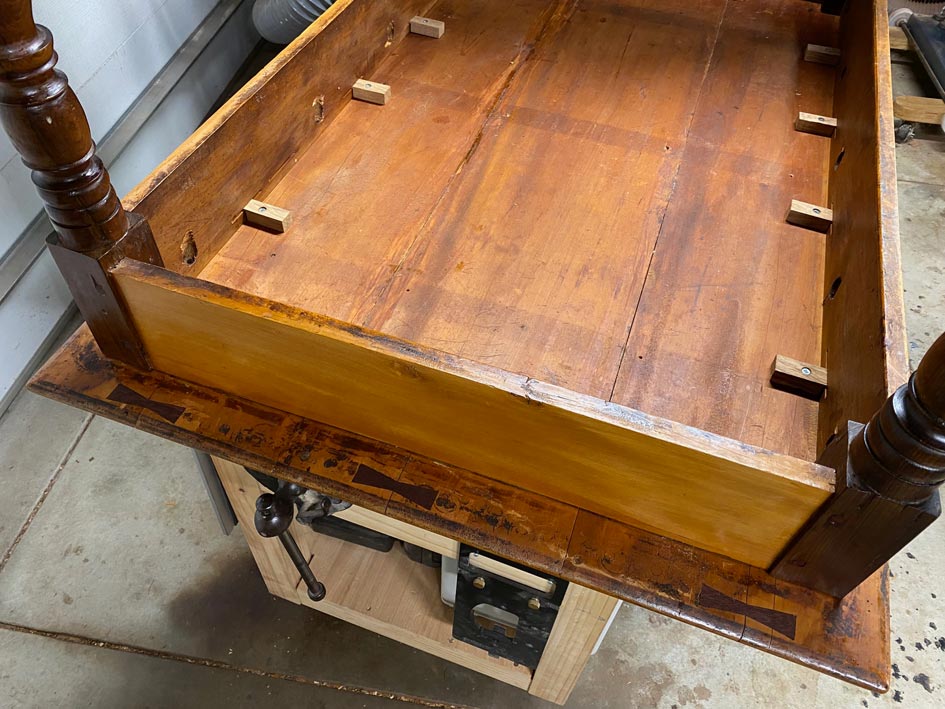
Added later 6 h 12 min 19 s:
Re: Renovating a table
Edited #9
Interesting tenons ... only shouldered on the outside ...
What you see are known as bare-faced tenons. Interesting perhaps, but not especially unusual especially where a relatively thin rail meets a relatively thick post or leg. Quite commonly seen in the structure you're working on or things like gates and structures destined for outside locations in durable woods such as oak, etc.
Slainte.
Re: Renovating a table
#10Now the table can be flipped over and the top side finished.
There were two issues. The first was the large splits opened when the top was buttoned down. I decided to add a little coloured epoxy filler as the gaps were large (see the earlier pictures), and I did not want food to get stuck inside. 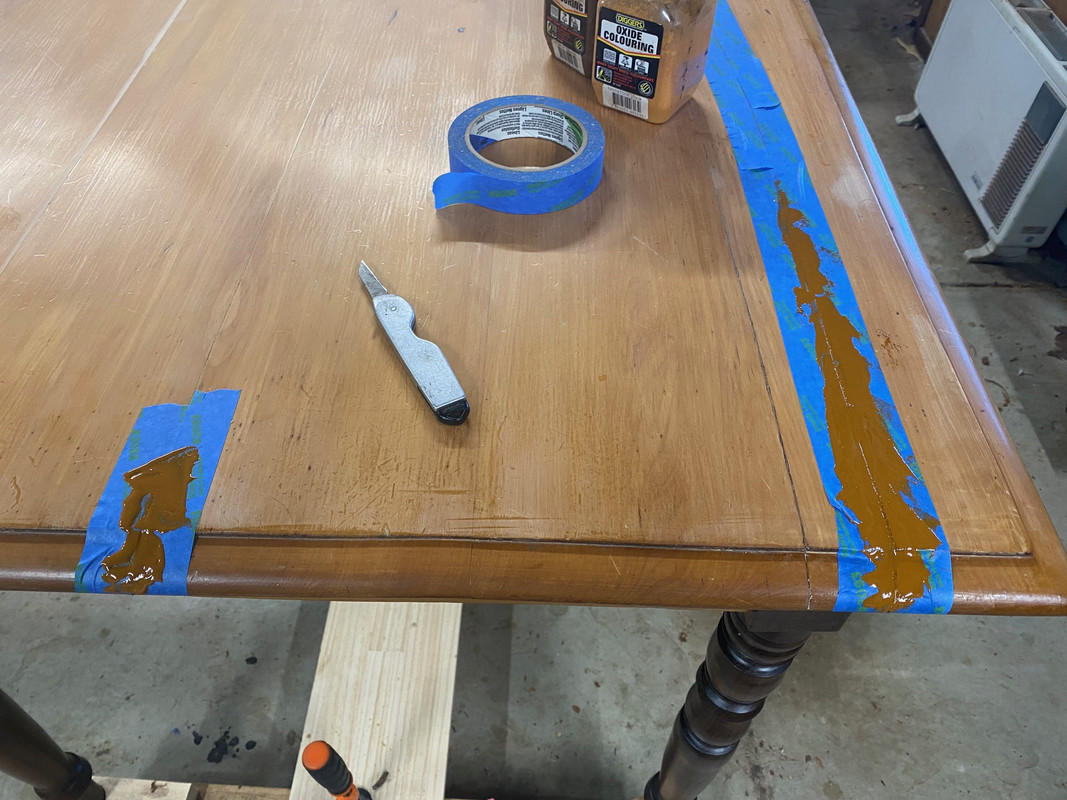
This worked well, with the epoxy being allowed to sink a little under the surface, leaving the splits visible but no longer dominant ...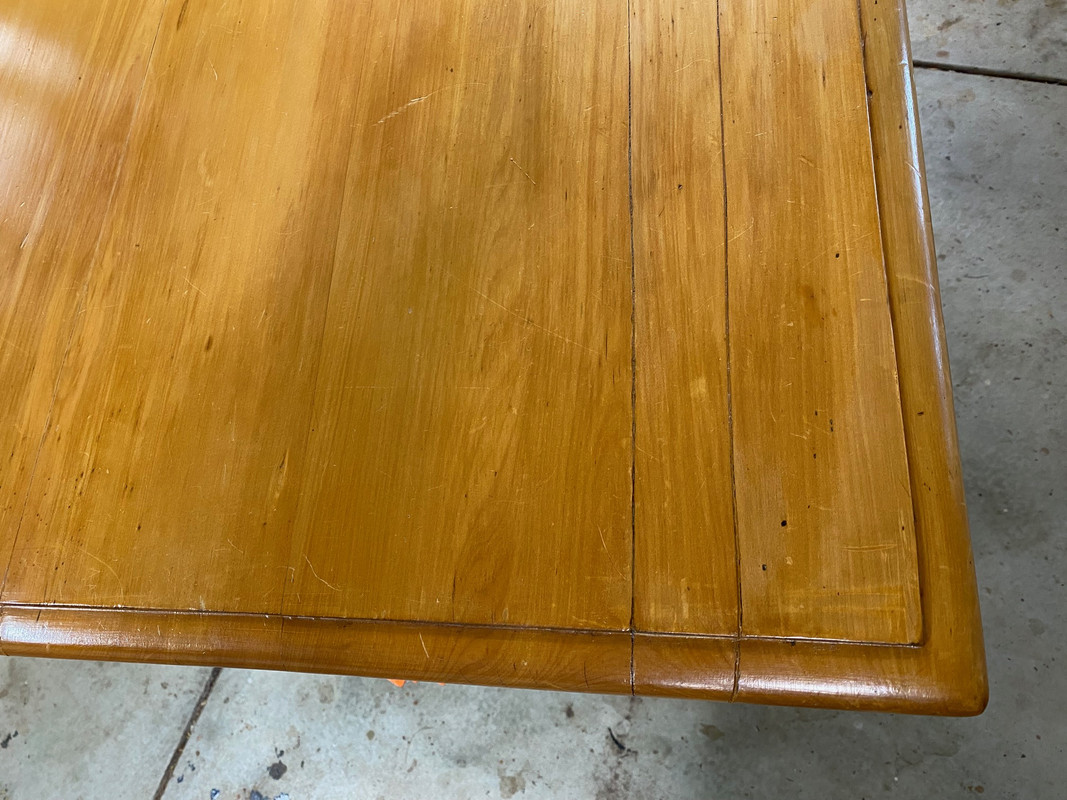
The second issue was related to gluing the loose board. Although the levelling went pretty well, there was a very fine glue line and ridge. This was cleaned up using a very sharp card scraper taking the finest of shavings, however the process left a line cut through the finish ...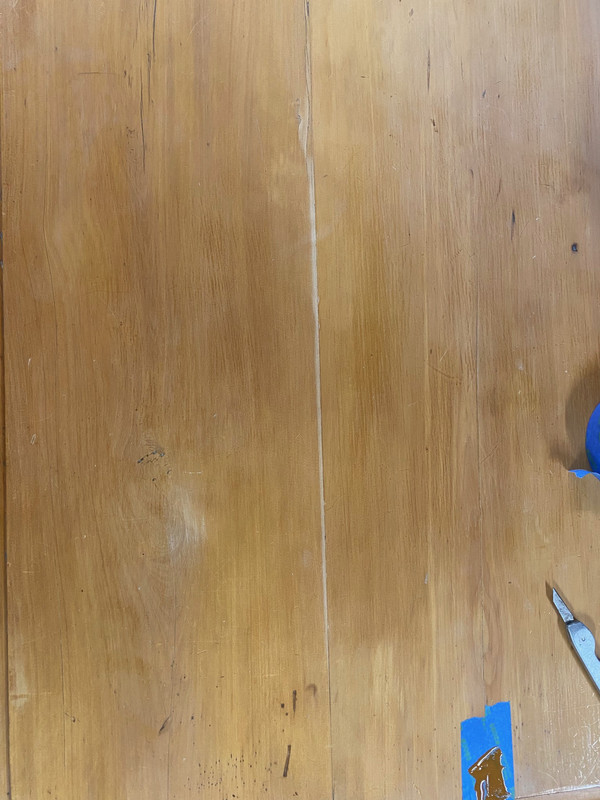
There were several areas like this, others also created by hand sanding the top with 240 grit to create some tooth for a new finish.
To re-colour these areas, I used a touch up pen on a pad wet with alcohol ...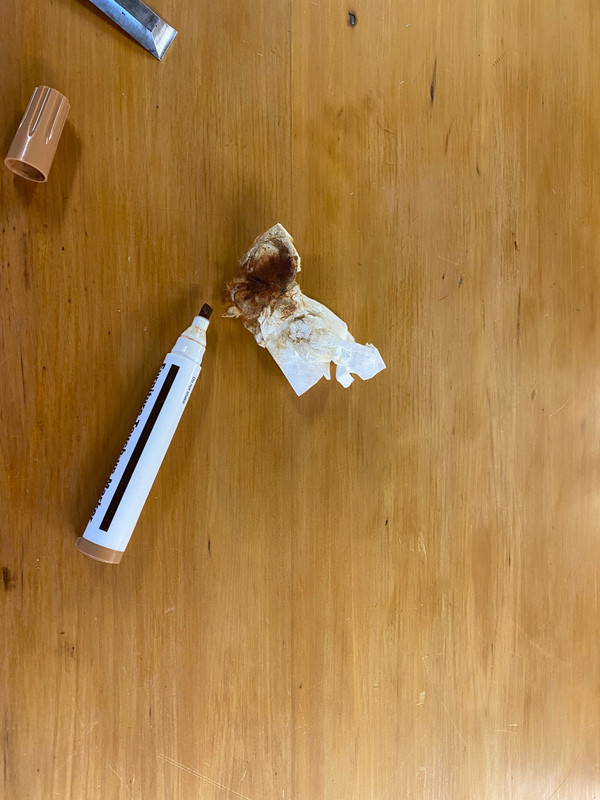
The retouched area ...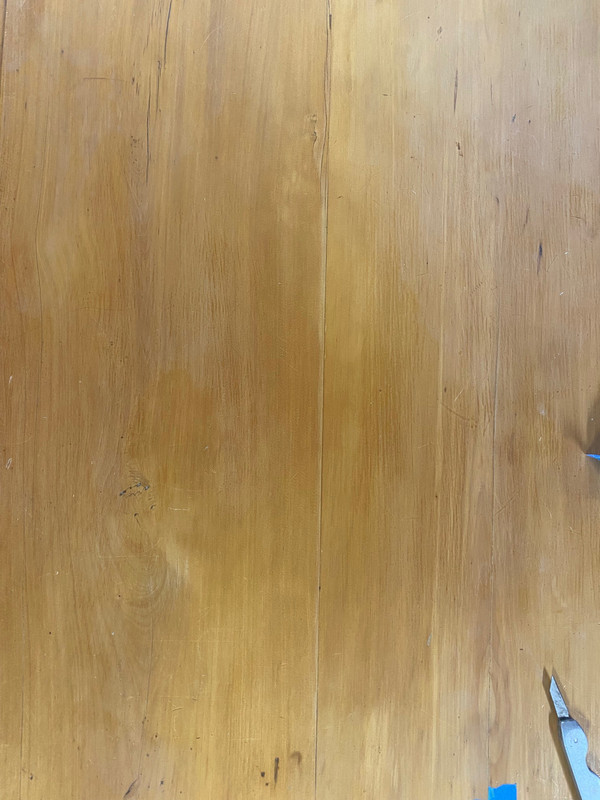
Examples of sanded-through sections ...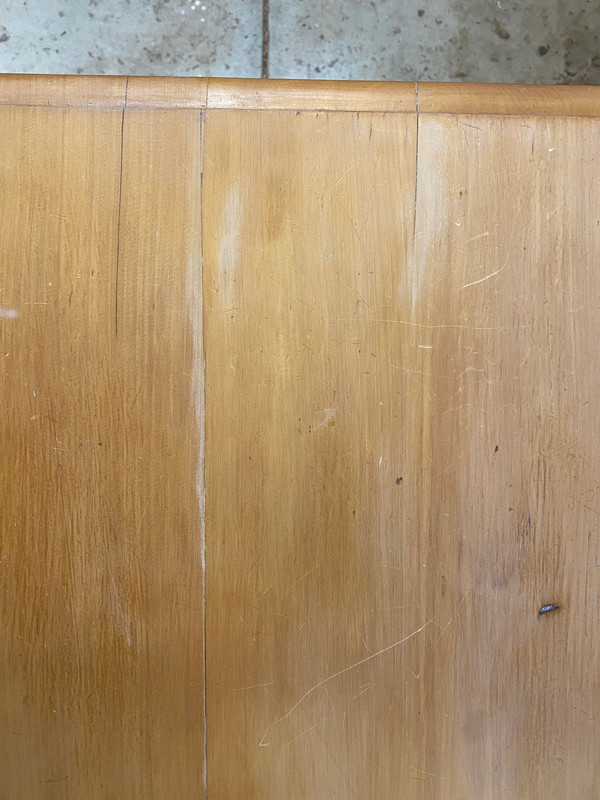
... and ...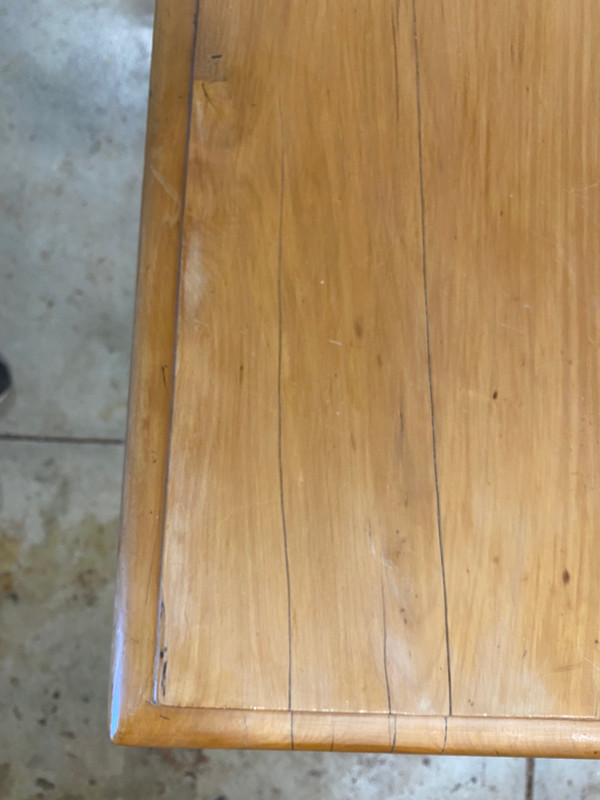

The legs were oiled and waxed (what a difference!) ...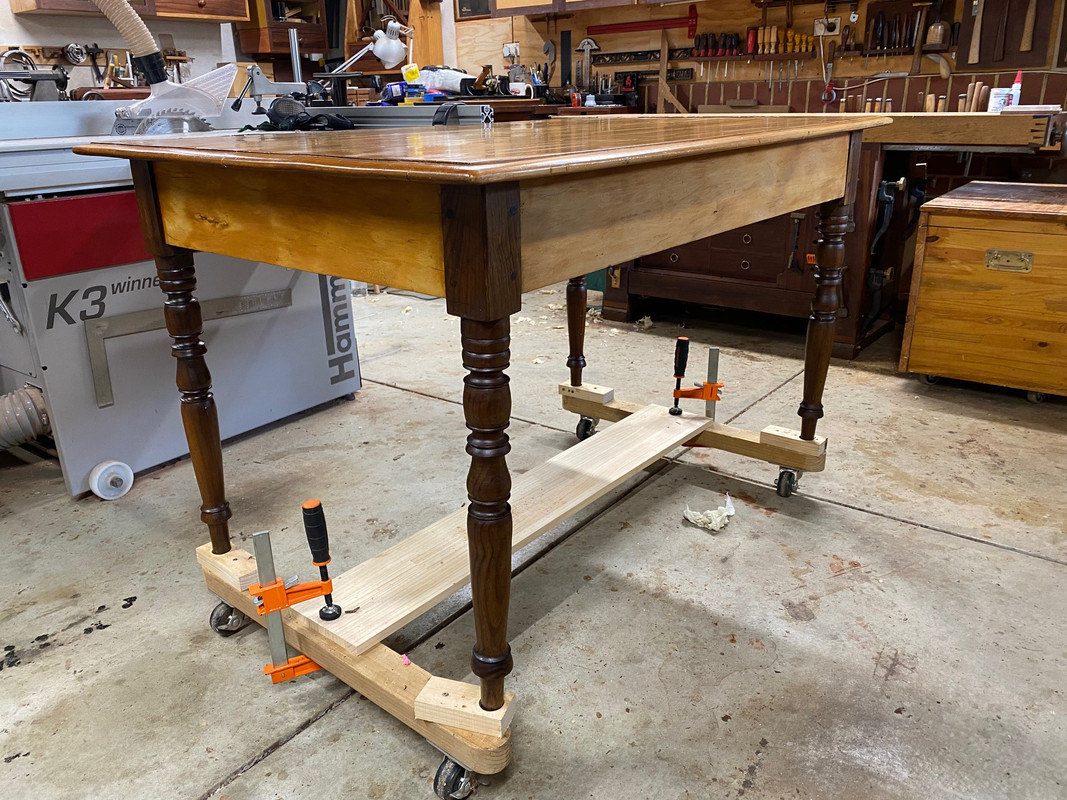
And the top received three rubbed on coats of water-based poly. Keep in mind that the table will be used for family meals. This is not going into a museum.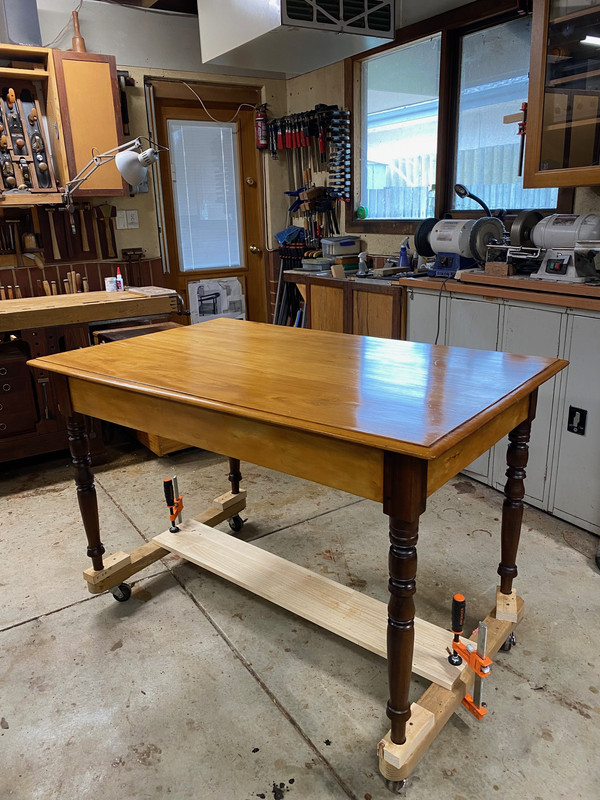
The top has since been rubbed out with steel wool and now has a natural matt finish.
Thanks for keeping me company.
Regards from Perth
Derek
Re: Renovating a table
#11Great work on the table and a very clever workshop wheeled jig.
Re: Renovating a table
#12
There you go. Worked out nice.
Glad to see you used hide glue.
Button's aren't "clever" or sexy but the truth is they work the best. Simple is not to be sniffed at.
Bare faced tenons are stronger than shoulders both sides in some applications.
Battens cause splits and they won't stop a wide top from cupping.
I love doing up old stuff.