At least 15 years ago ... possibly 20 ... I purchased a brass casting of a small block plane that someone had started but then abandoned. I think that the idea was that it would eventually resemble something like this ...
... but the casting was rough as guts and the parts all needed machining. It looked like a LOT of work, and I was not that inspired at the time, and so it went onto a shelf for a later time.
Every now-and-then I would think of the project and pick it up, and then put it back. A few days ago I decided that it was time. Also, by this stage, I had something simple in mind .... it helps to let ideas percolate for a few decades  I have enough block planes. What could be useful is a small bevel up high angle smoother ... which is really a block plane with a high angle bevel
So here we have it ...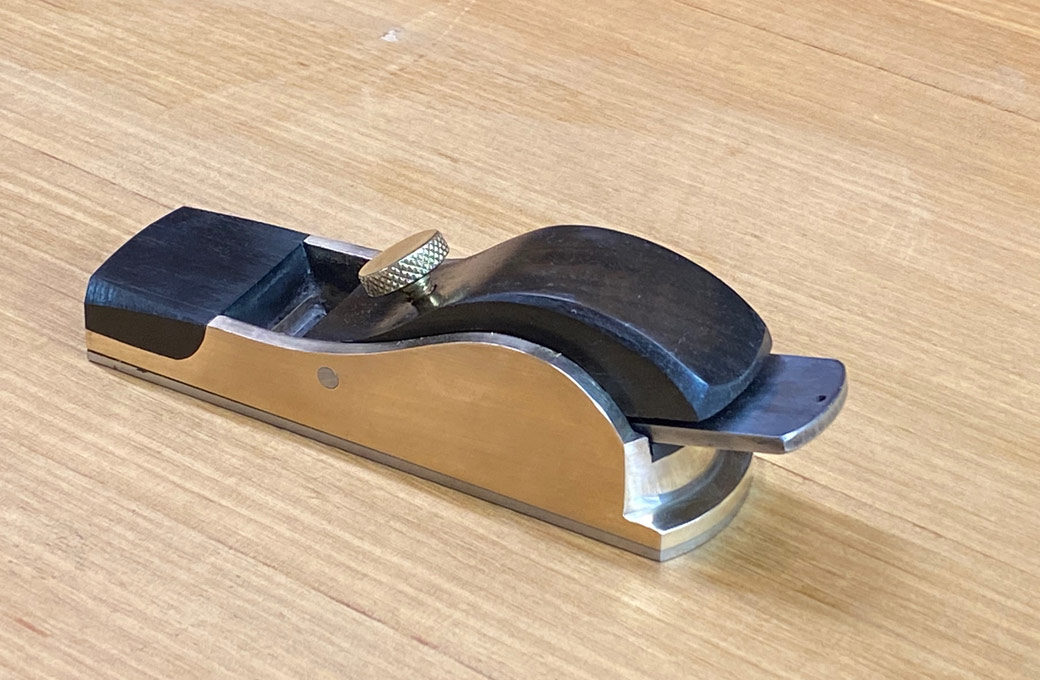
The mouth was originally designed to be adjustable. This seemed unnecessary, and it was just made reasonable tight.
Set up with a 60-degree cutting angle (Hock O1 blade), it planes Pine effortlessly. That is to be expected ...
It does the same with Jarrah, and here it is into the grain ... 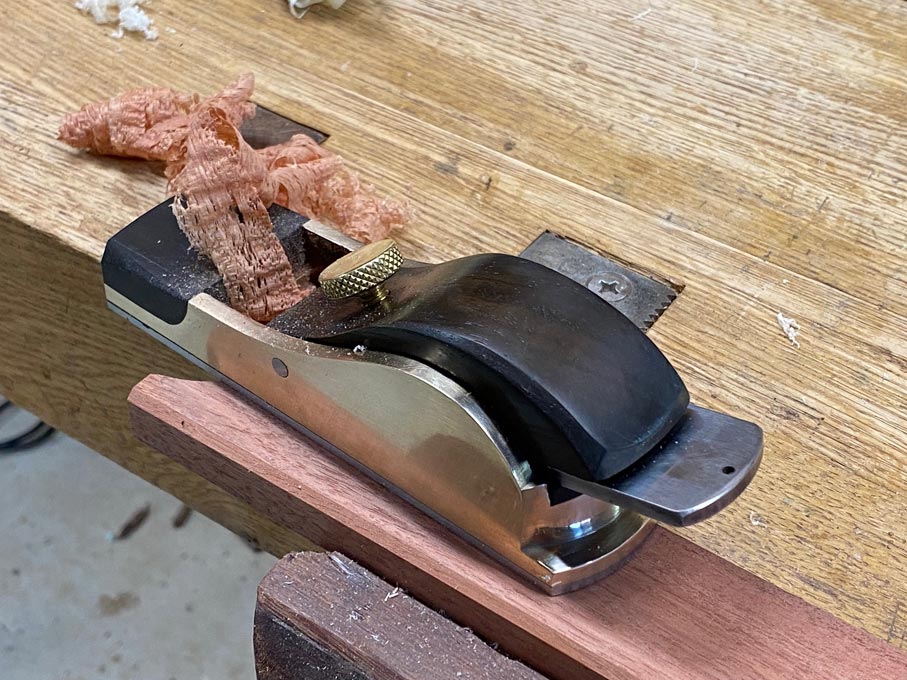
In the hand this is comfortable.
Regards from Perth
Derek
Small bevel up infill smoother
Posts
Re: Small bevel up infill smoother
#2

Hard to argue with that kind of performance, Derek. Would you explain the geometry of the cutting angle, e.g. the bed angle and the bevel angle, and review what cutting angles to use for different woods?
Ellis
Re: Small bevel up infill smoother
Edited #3Will do, Ellis.
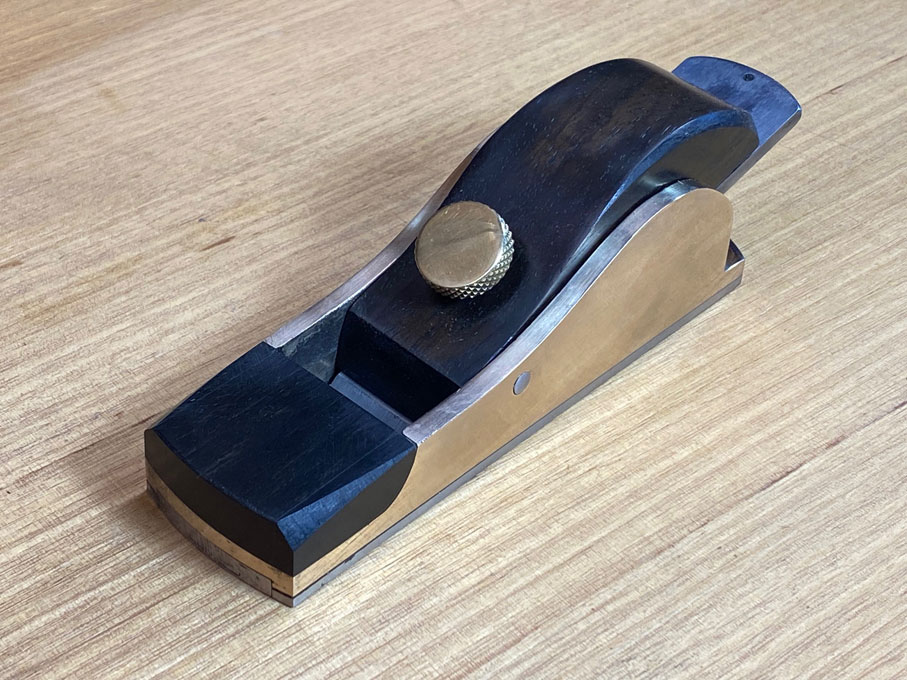
Here are more details about the plane ...
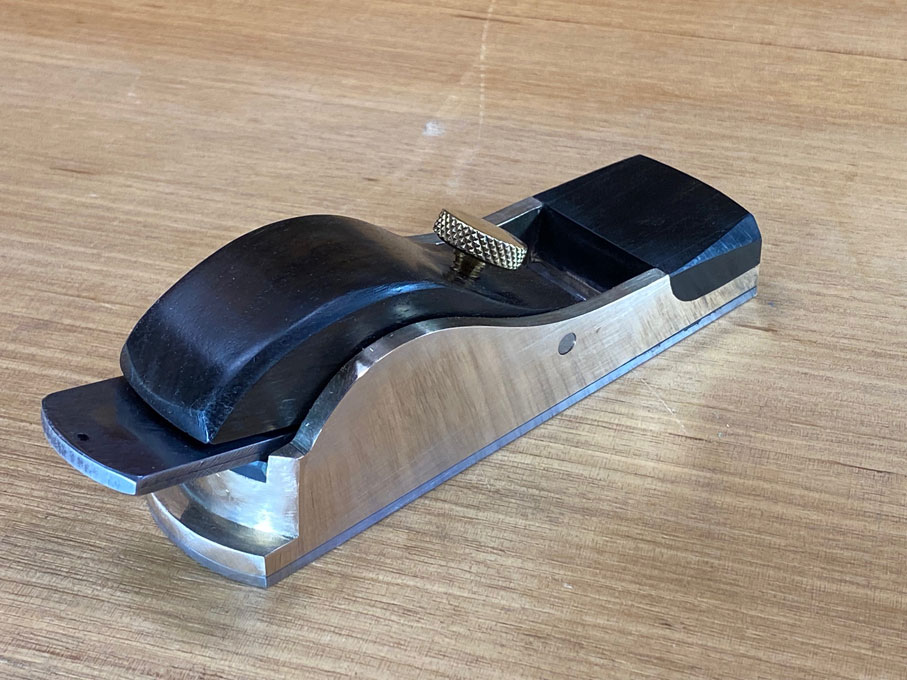
The sole is steel. This was sweated on by the previous owner (who then gave up on the build). He did not do a perfect job, and there is a smidgeon (really tiny tiny smidgeon) of a gap at the front ... you can see if if you squint.
You know, a few months ago I was thinking about sending the "kit" to you, then decided that was wimping out 
Anyway, here are more detailed photos ... if anyone wants to use the design ...
I assume all this will be self-explanatory ....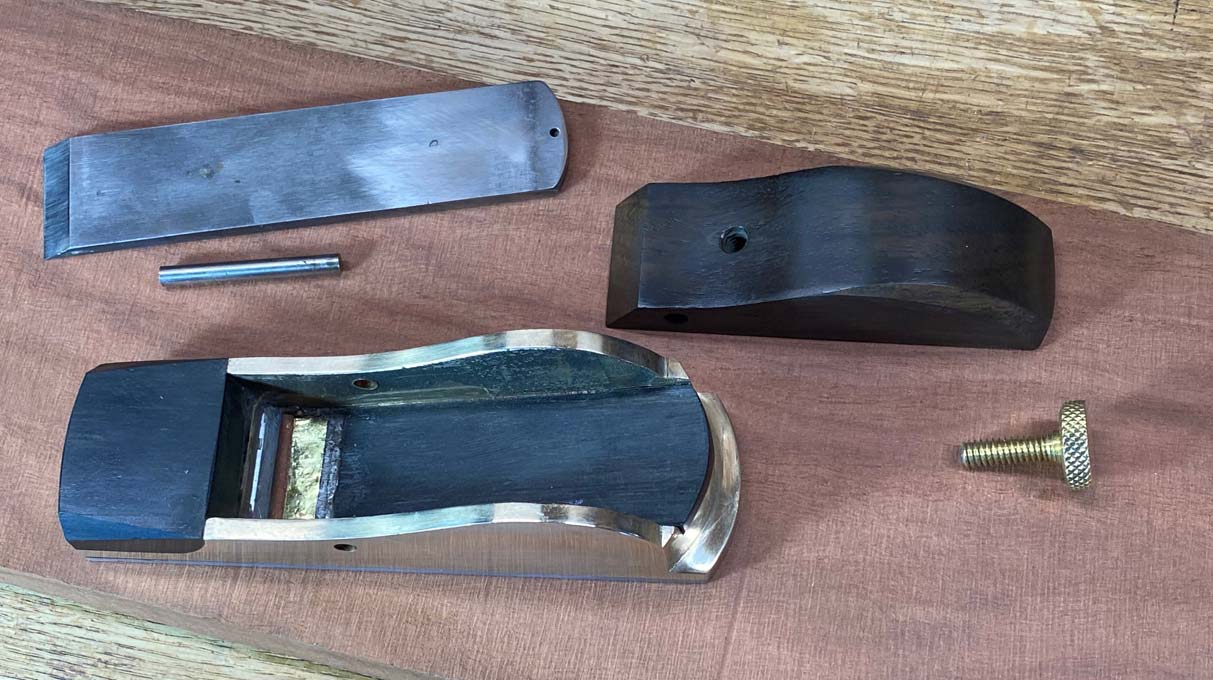
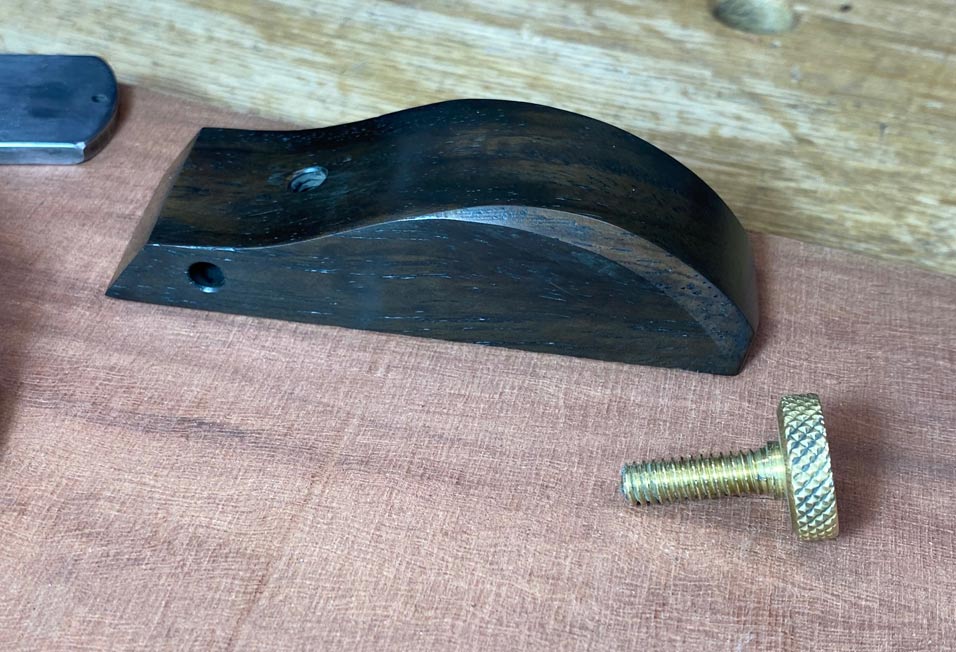
Here you can see the steel rod used to secure the lever cap. Also the angle of the lever cap screw. This was tapped into the Ebony ...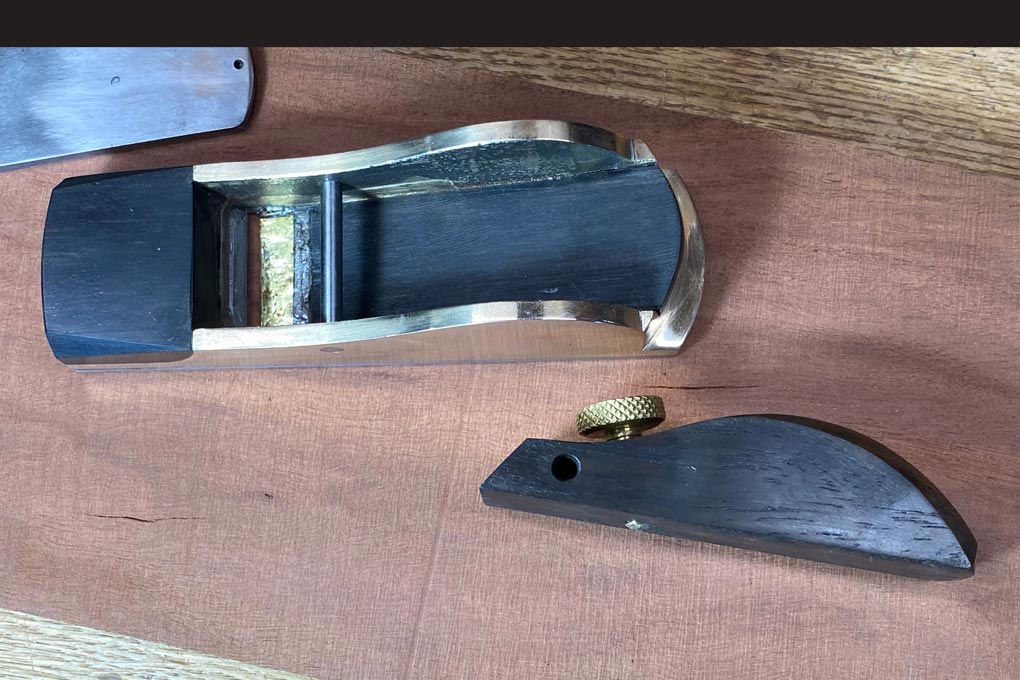
The bed is also Ebony. The bed angle is 15 degrees (the original bed angle was 12 degrees). The adjustable mouth was epoxied in after bevelling the edge against the blade ...
And a last shot of the plane smoothing some really nasty, interlocked Jarrah. Cutting angle is 60 degrees.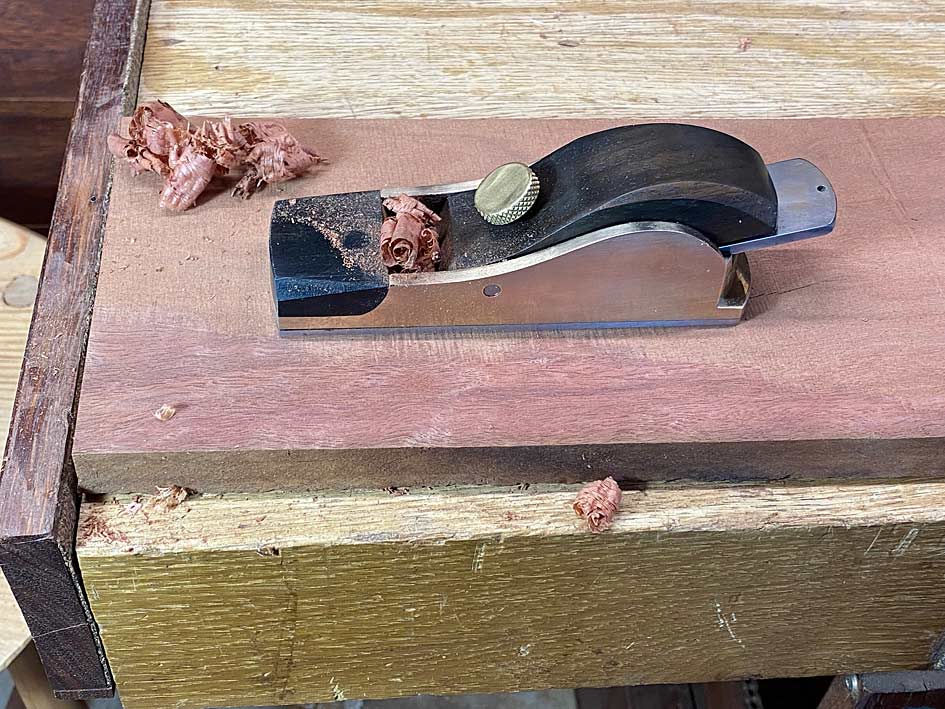
Regards from Perth
Derek
Added later 18 min 43 s:
Bevel Up vs Bevel Down is a choice.
Most BD planes, such as Stanleys, are BD with 45 degree frogs. The bevel angle plays no part on the cutting angle, which is the angle of the frog.
Most BU bench planes and block planes come with a 12 degree bed. The cutting angle is the bed angle + the bevel angle. For example, a 12 degree bed + 30 degree bevel = 42 degree cutting angle.
This is too large a topic to deal with all the permutations, so I will just provide mine. Others can provide their preferences.
When I use BD planes, these are used with a closed up chipbreaker. This combination proves to be the best at controlling against the possibility of tearout when planing reversing grain. Most West Australian hardwoods have reversing grain, and I more frequently use a BD plane with a chipbreaker.
The alternative is a high cutting angle - for example, 60 degrees - and this can be achieved in a bevel down plane with a 60 degree bed (such as HNT Gordon), or in a BU plane with a high secondary bevel (in this case, 12 degrees + 48 degree bevel = 60 degree cutting angle). I have used BU planes for a couple of decades, and my experience sees them as valid alternatives.
I would argue that a high cutting angle will achieve about 90% of a closed chipbreaker.
The advantage of a closed chipbreaker is that the cutting angle may be reduced (my Veritas Custom Smoother is 42 degrees), and this may produce a smoother, clearer wood surface (re shearing angle).
The advantage of a high cutting angle, especially on a BU plane (such as a Veritas BU Smoother) is the ease of set up, and that it is likely all that is needed for all but the most difficult woods. The disadvantage is that is may leave a less clear surface (as it is seen to be scraping), but in practice I find this is not the case. In any event, if a finish is used, it would not be noticed.
Ask questions. I am happier to deal with specifics.
Regards from Perth
Derek
Re: Small bevel up infill smoother
#4
Thanks for the excellent narrative, Derek. Your plane looks like a great user. I'm glad you didn't send it my way.
Here are a couple things that I was wondering about...
You settled on 60° for your cutting angle and it seems to do a fine job as you described. In your estimation, are there ideal cutting angles for different woods and situations? I have a bench plane with a 50° pitch that also seems to work well on unfriendly woods. If 60° was your preferred angle, could you have achieved it using the original 12° bed angle and a 48° bevel angle on the blade? Would the wood be able to tell the difference?
Can you describe "sweating," the method of joining the side walls of the plane to the sole? I wonder how the maker ended up with a gap?
Cheers,
Ellis
Re: Small bevel up infill smoother
#5"Sweating", as in "sweating on a steel sole to a brass body", is essentially done by soldering the two together. Jim Kingshott descibed it as ...
The sweating procedure, adapted for putting a steel sole on to a nonferrous metal plane, is as follows: both the plate and the underside of the plane casting are first 'tinned' - the process of running a thin film of solder over the entire surface. The two tinned surfaces are placed together and the whole assembly is heated - if the plane casting is supported upside down on two fire bricks, a gas torch can be played underneath the assembly to heat it up. When the solder is seen to be free running, the steel sole will seem to float on the molten solder. The torch is then removed and pressure applied to the sole by two metal bars held in the hands...the secret of a well-made solder joint is that the solder line be kept very thin, the optimum thickness being .003in.
The gap left by the previous owner likely reflected either a unflat sole or unflat body at a corner.
A cutting angle of 60 degrees is made up of 12-degree bed + 48-degree secondary bevel. The ideal cutting angle (for face grain) exits on a continuum between 45 degrees (for straight grain) through to about 65 degrees (for highly interlocked grain. a cutting angle of 50 degrees would work for mildly interlocked grain. The next step up would be 55 degrees, then 60, etc.
The furniture woods of the US are, by-and-by, quite a bit less interlocked that those of Oz.
Regards from Perth
Derek