Home Articles Forums Gallery Marketplace Videos

WoodCentral Forums

Knowledge You Can Build On — Est. 1998

Reach the woodworkers who ACTUALLY BUY

How do we make a better beading tool

Posts

How do we make a better beading tool

#1

How do we make a better beading tool

John Lucas

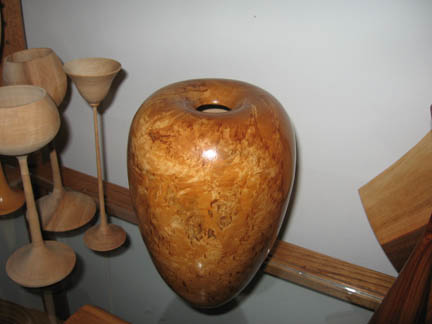
This is my mini beading tool that I made for the Genie bottles. I made it from a screwdriver but it needs improvement. I'm going to start a thread on beading tools to see if we can improve them.

On this one I simply filed a groove using a jewelers rat tail file. I think when I have time this weekend I'm going to try and file it so it has a much sharper angle from the bottom and possibly put a negative rake on the top to make it an even sharper angle. It might not hold an edge long but should cut like a skew on it's side.

I'm having trouble with tearout on the very crest of the beads. I've always had this problem with beading tools. I start with the tool below center and the push the handle down do raise the cutter through the work. That seems to cut the sides very clean but I can easily get chip out on the crest of the bead because at that point it's just scraping. I would love to come up with a way to make it a shear scrape or a cut.

One thing I thought of which I will try today is to use it as a bevel rubbing tool. If I grind the bottom so it has a bevel it might work. However I'm worried that the tips would be too weak and possible break off on harder woods. I could make them wider but then that leaves a wider space between the beads.

Anyone have any suggestions. I guess I probably should have put something in here for size comparison. This is less than 1/8" bead, maybe 3/32 or so.

Re: How do we make a better beading tool

#2

Re: How do we make a better beading tool

Brian McInturff

No since re-inventing the wheel. D-Way beading tools got this as hands down "the best". I bought the set recently and although I've not used them yet on a specific project I did play with them to learn how to use them. I'd recommend you watch one of Dave's clips on his site and it will give you an idea of how he makes his and how his are used. But instead of wasting precious time trying to figure out the right angle, if indeed a flute is needed, etc I'd just buy one and save yourself the grief.

Re: How do we make a better beading tool

#3

Chuck Jones - West TN

Suggestions?

Chuck Jones - West TN

John,

I've used my D-way beading tools on three or four pieces now and I've had very little chip out problem. Admittedly, they are a bit costly for occasional use and without the help of Santa I might not have them.

You've probably watched Dave Schweitzer's videos on the use of his tools. If not it might be worthwhile.

I tried some of the other "name brand" beading tools with no success.

I had some success with a home made version of what I saw John Jordan using. But I'm not very skilled at metal work so I never got it shaped just right.

Like everything else in woodturning, I've found that I have to make light cuts and go slowly. I'm not really a light and slow kind of person by instinct.

Re: How do we make a better beading tool

#4

Chuck Jones - West TN

Oops.  Didn't see Brian's post.


Re: How do we make a better beading tool

#5

Re: How do we make a better beading tool

Dale Bonertz

John,

Have you tried and old gouge. I have some mini gouges much like the Klein set and have ground the end with a bevel from the wing tips to the bottom of the gouge. Sharpen the wing tips a bit and present it to the wood at an angle down - handle up at maybe 15 degree angle and below centerline. Let the flute make the bead shape and the wings cut the sides of the bead. Good use of almost used up gouges or gouges that are never get used or those old cheap gouges we all tried. My current set goes from 1/16" up to 3/8" - I think.

Re: How do we make a better beading tool

#6

Brad Vietje

Re: How do we make a better beading tool *LINK*

Brad Vietje

I have a few from Robert Chapman, author of one of my favorite turning books (Woodturning: A Fresh Approach). In that book you'll see many of the bowl, vase, hollow form, and box designs that we admire so much here at WC. I suspect Bob Chapman deserves more credit for this than he is usually given. He makes and sells tools under his own brand, BCWT (must mean Bob Chapman Woodturning Tools). I haven't used the beading & parting tools in a while, but they do work very well. I don't think they are available anymore, but the designs might be good for others to emulate. I'll check out the D-Way tools as a comparison.

To reduce tear-out, I've had the best results using a beading tool to define the basic shape and stop just short of shaping the crown of the bead or "bottoming out". The last little bit can re refined with a skew or long-bevel detail gouge, or with a bit of light sanding.

Safe spinning,

Brad Vietje

Newbury, VT


Robert Chapman, Designer Woodturner

Re: How do we make a better beading tool

#7

Lyle Jamieson

Re: How about beads that dont need sanding

Lyle Jamieson

A beading tool relies on a scraping cut. A scraping cut will not leave a very good surface behind. Trying to sand each little bead is time consuming and no fun as well as distorts the crispness of the beads. Al Stirt showed me a beading technique that is much better. Ill try to describe it in text.

Use a spindle gouge with about a 45 degree tip angle grind, with the wings ground back. (there is a photo of my spindle gouge on my web site, store menu) Start with the handle down and bevel support on the top of the first bead, flute is straight up. Roll the cut to the left with a pushing cut and the tip slicing the wood fibers cleanly at a 45 degree angle. (my pencil trick from my Bowl Basics DVD) This is a standard roll-a-bead motion so far. We are working on the left half of the first bead. As the cut rolls to the left the handle must be raised at the same time to get a deep groove between the first and second bead, at the same time twisting the tool counter-clockwise. Now the flute is pointing to the left and the handle parallel to the floor.

Without stopping, start to lower the handle and sheer scrape up the right side of the second bead. As you proceed up the right side of the bead the gouge is twisted clockwise and the handle moves down to end up at the top of the second bead with the flute straight up again ready to continue down the left side of the second bead, just like the first bead was started. This is a transition from a sheer scrape cut to a bevel supported cut. There is a significant pumping motion with the handle moving up and down with each bead and twisting at the same time. A rather complex motion but the results are amazing. Ride the bevel with a push cut down the bead and sheer scrape up the other side. I have done beads that need no sanding even on a bowl, with the alternating grain, that will tear out on a heartbeat. The tool must be super sharp. I get 2 to 4 beads before I need to sharpen.

The good news and bad news is the beads will not be a perfectly uniform width, as they will be hand done. A little practice, and pencil lines as a guide, and they will be close to equil size. I dont mind the irregularities because it gives a home made look not machine done look.

Re: How do we make a better beading tool

#8

Brad Vietje

Re: How do we make a better beading tool

Brad Vietje

Near as I can tell from the information on the D Way web site, his beading tools are almost exactly the same as the Robert Chapman BCWT design. May be a different alloy, or slightly different bevel angle, but for all intents and purposes, precisely the same tool, used in precisely the same way, with the same fine results.

Once again, I suspect Bob Chapman deserves more credit for his designs than he usually receives. It probably a good thing for Dave S. that Bob Chapman is A) no longer selling these, and B) not in the US...

Safe spinning,

Brad Vietje

Newbury, VT

Re: How do we make a better beading tool

#9

Re: How do we make a better beading tool

Brian McInturff

Looking at the pics on Chapmans page and comparing it to the D-Way beading tools there are 2 significant differences. The flute and the angle. Similarities are - they are both beading tools.

Re: How do we make a better beading tool

#10

Steve Kubien

Very similar...

Steve Kubien

This is very similar to the approach R. Raffan uses. I saw him do this somewhere on YouTube for one of his pots. Brilliant. I have played with it a few times and it is not difficult to get really nice results. Mind you, I have been making really small beads with it so far (>1/8").

Re: How do we make a better beading tool

#11

Brad Vietje

FAR more Similarity Than That

Brad Vietje

Hey Brian,

Unfortunately, most of the photos have been taken off Robert Chapman's site, and those that remain don't show the tools close-up. I'll attempt to post a photo of one of these tools in use, but there are shavings blocking the flute shape.


Since I own 2 of them, I can assure you, the D-way tools are an almost exact copy. I will have to dig these out of storage (haven't used them since my last move) and shoot a photo. Not sure how long D-way has been making these, but Rob Chapman was using and demonstrating these tools in Great Britain some 15 years ago, and I bought mine in 2002. His tools, BTW, are branded BCWA, not BCWT -- I got that wrong in my earlier post.

Safe spinning,

Brad Vietje

Newbury, VT

Re: How do we make a better beading tool

#12

Re: Molding Cutter?

Stuart Johnson

Has anybody tried grinding or modifying a molder cutter bit? I don't think it would take much to make a handle.

Re: How do we make a better beading tool

#13

Re: How do we make a better beading tool

clay foster

John,

This is the beading tool I've been using for a long time. it's made from a 1/4" square tool bit. The bit costs less than $2. I drilled a hole in 5/8 round steel rod and hold the bit in place with a set screw.


The profile is ground with a 1/4" wide chainsaw sharpening wheel on a arbor in the lathe. The wheel is shaped with a diamond wheel dressing tool. You can get the wheels from places that sell chainsaw sharpeners. They cost about $15.


After grinding the profile, I polish the top of the bit with a fine diamond hone. That's also how I sharpen it when it gets dull. Being able to take the bit out of the tool makes it easy to lap on a hone or stone.

It's used in a scraper mode, held at slightly less than 90 degrees to the wood and gently moved into the wood until the bead profile is complete. It's not as a clean as a skewed or gouge turned bead, but they are all consistent in width, and can be used on interrupted surfaces, one advantage it has over a skew or gouge.


It works best on side grain and end grain. Cross grain will tear out. A little sanding with the lathe turning in reverse cleans the beads up pretty quick.

I'll have these beading tools available for sale soon.

Re: How do we make a better beading tool

#14

Re: How about beads that dont need sanding

John Lucas

Lyle That the way I cut bead but it isn't practical when cutting 1/8" or smaller beads with 30 or more in a row.

Re: How do we make a better beading tool

#15

Re: How do we make a better beading tool

John Lucas

Clay that is essentially what I made and it could be that just trying to cut beads that small is really taxing the wood, Out of 38 beads I had tearout on the top surface of about 1/4 or less. On larger beads I usually push the tool in and then wiggle it left and right a little as I get close to the touching the top. I can usually cut large beads pretty clean with my homemade tool. I think it's the small scale that is working against me. Kind of like thread chasing, you just gotta have hard dense wood for this.

Re: How do we make a better beading tool

#16

Re: How do we make a better beading tool

Doug Turner

John,

When I was in japan last year I visited a masters woodturner's studio and he forged a hook tool that cut beads inside or outside end grain or cross grain without needing sanding. The cutting end of the tool was about 1/4-3/8" thick and the bead groove was backcut about 15 degrees. I believe you could use a diamond tool bit in a dremel tool to form the bead groove. The outside of the cutting end was almost round and tapered to a sharp edge at the top. The taper gave support to stengthen the cutting edge. The shaft was about 5/8" diameter and 16-18" long. The beads he was cutting were about 1/8" diameter and extremely crisp right off the tool.

Re: How do we make a better beading tool

#17

Re: How do we make a better beading tool

John Lucas

Sound interesting but I can't visualize what it looks like. Can you send a photo from your brain. :) Maybe we could do a mind meld.

Re: How do we make a better beading tool

#18

Re: How do we make a better beading tool *LINK*

Colin

John, Have a look at the Robert Sorby tools. They do an Easy Beader and also a cutter like you have made that fits to their shear scraper tool. There are various videos to their tools on the link.


Robert Sorby Tools

Re: How do we make a better beading tool

#19

Re: How do we make a better beading tool

John Lucas

I have looked at their tools. They look interesting but still look like a scraper. Ideally I'm looking for something that cuts. Maybe it can't be designed since non of the top companies have one.

Re: How do we make a better beading tool

#20

Re: How do we make a better beading tool

Charlie Drake

John, I've been making some of the native baskets as per the Jim Adkins technique. He recommends the D-way beading tool which I have purchased (1/8 inch). It works pretty well but as has already been said, there is some tearout when cutting cross grain and even after talking to D-way, I still have problems. I've built a couple of cutters like Clay Foster shows (from HSS) and used as sort of a negative rake scraper which cleans much of the tearout. Adkins recommends saturating the wood with sanding sealer before the last cut to help with tearout and that seems to help. I've cut lots of beads with all the above tools and techniques and still am not completely satisfied. Hope your quarry provides some magic bullet!

Re: How do we make a better beading tool

#21

Create a burr ...

Doc Green

Accepting that the popular beading tools (all except Wally's) are basically scrapers, why not take them for what they are and create a burr on the cutting edge?

I don't have one to try, but if I did, here's what I'd do: First, hone the top surface of the tool so that it's perfectly flat with no leftover burr or other jagged edge. Then, form a burr by burnishing the curved cutting edge.

I think a small drill bit held in a bench vise will serve quite well as a burnisher. That is, mount the drill bit vertically in the vise so that only a fraction of an inch sticks up. Then, with the beading tool held horizontally, run the cutting edge around the shaft of the drill bit, applying only a modest pressure.

Be careful not to overdo it ... it's easy to create too much of a burr (on a scraper at least) so that the tool either becomes grabby or has to be pointed down in order to get the burr to engage, which then becomes overly aggressive.

If you try this and think you've overdone it, take the shaft of a HHS turning tool, lay it flat on the top surface of the tool, and then wipe it across the burr, going off the end of the tool in the process. This will push the burr back toward the cutting edge and hopefully relieve some of the grabbiness.

With a burnished burr on a scraper, "I can lift shavings so fine they float away, and if you touch them, they disappear." (Inside joke.)

Worth a try? ~Doc