WoodCentral Forums

Est. 1998 — 27 years of woodworking knowledge

Case construction: stopped vs. continuous rabbets

Posts

Case construction: stopped vs. continuous rabbets

#1

Case construction:  stopped vs. continuous rabbets

Wiley Horne

Hi all,

There is a long thread in Messages on how to make stopped rabbets using power tools. The aim is to rabbet case sides and top to let in the back. That thread arose from a question on a specific project, and stayed pretty much within the boundaries of the original question. But the topic is worthy of broader discussion.

As we know, cabinetmakers traditionally avoided stopped rabbets (and perhaps still do), and joined their cases so as to allow continuous rabbets. Jeffrey Greene’s book ‘American Furniture of the 18th Century’, pp. 138-139, illustrates two techniques which were used.

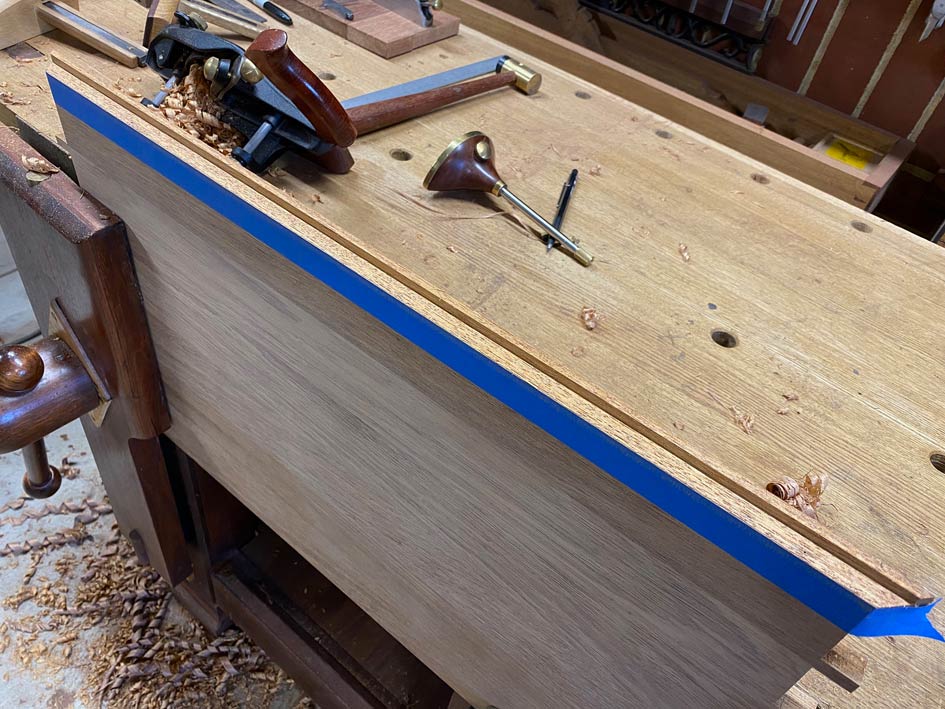
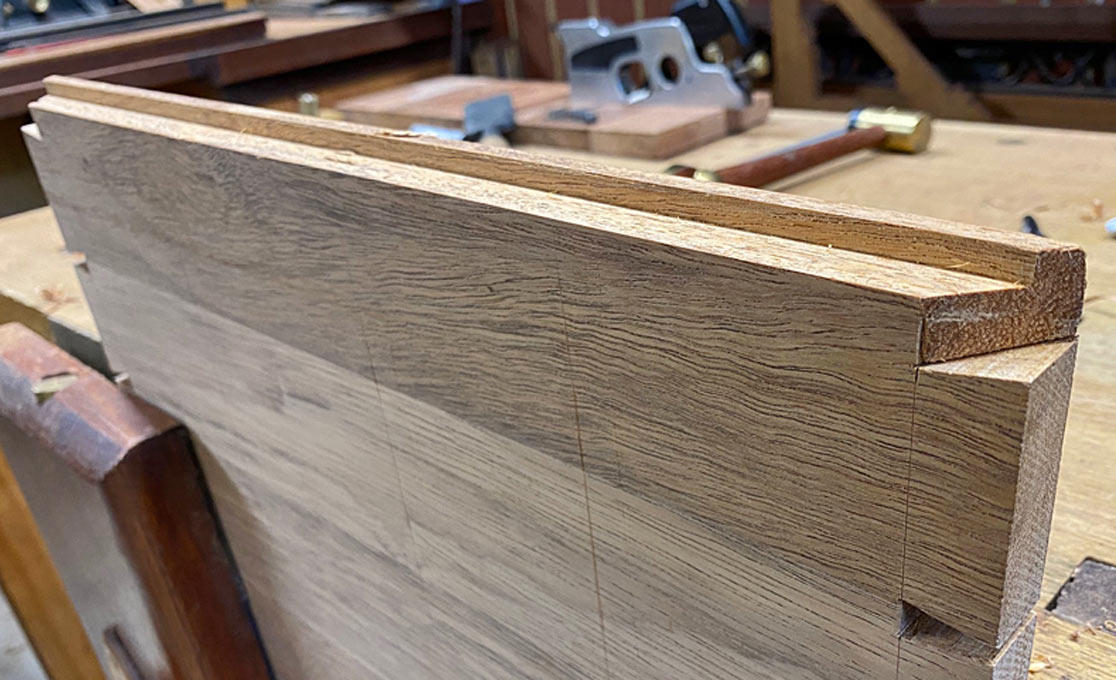
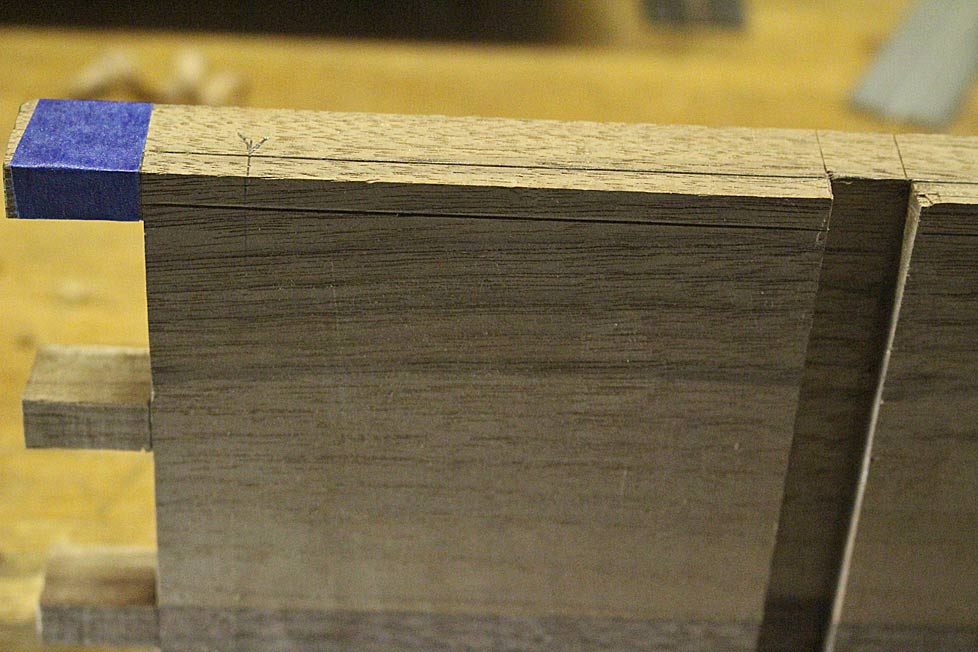
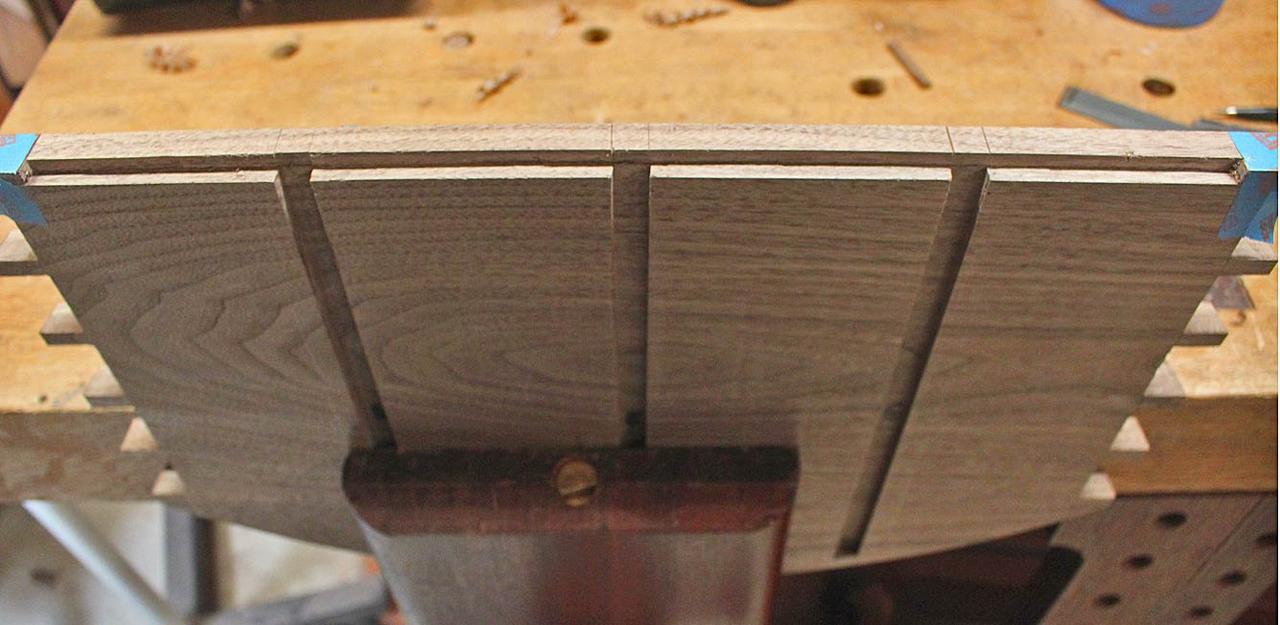
This afternoon, I roughed out from a couple pieces of scrap one of the methods shown by Greene. This method uses half-blind pins, though Greene shows an alternate using through dovetails. The key is using half-tails at the rear of both side and top. Drawn here:


And roughed out here:


Note that the method doesn’t care whether you use filletster or table saw etc to cut the rabbets.

Question: Do you use continuous rabbets in letting in the back of a case? If so, can you show the method?

Wiley

Re: Case construction: stopped vs. continuous rabbets

#2

Re: Case construction:  stopped vs. continuous rab

Derek Cohen (in Perth, Australia)

Hi Wiley

I did post on the Messages forum ("A better way") about mitre through dovetail cases ..


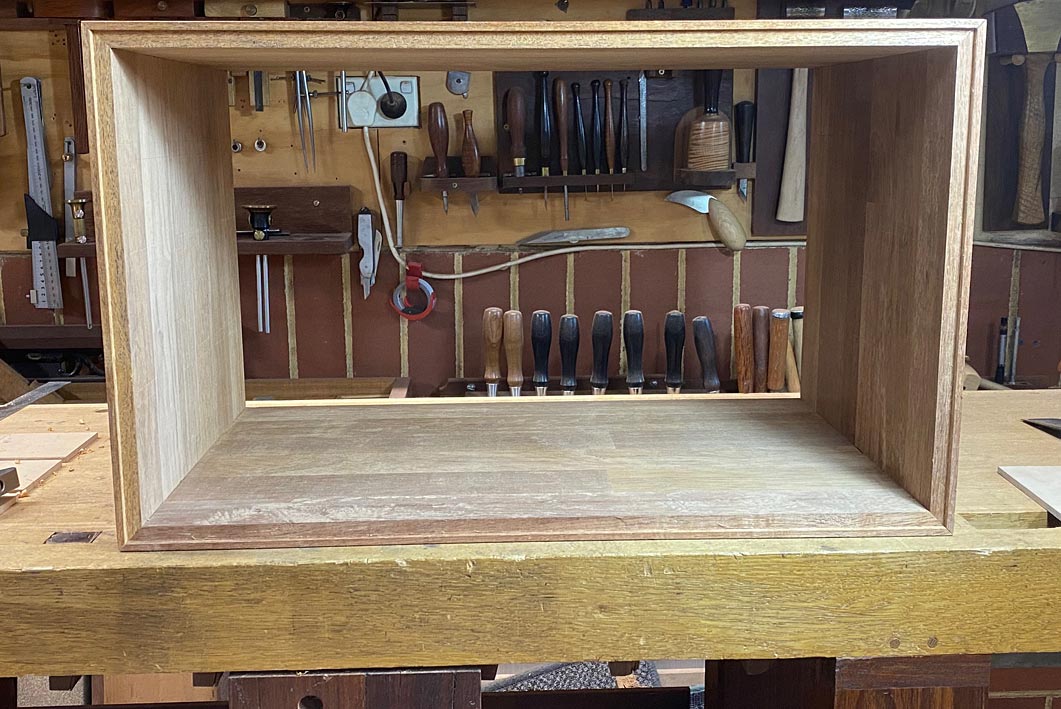
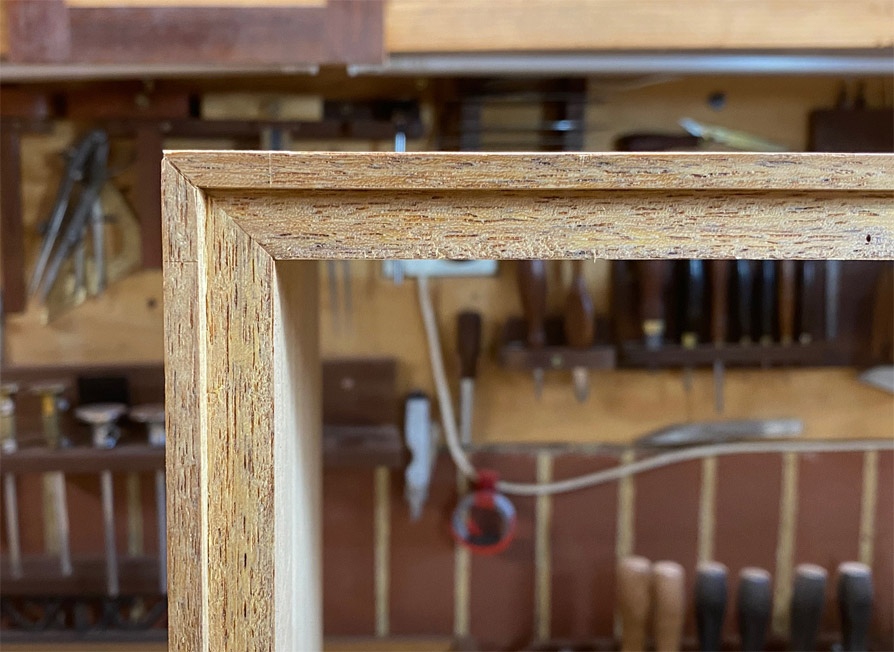
... where the mitre allows for a through rebate ...


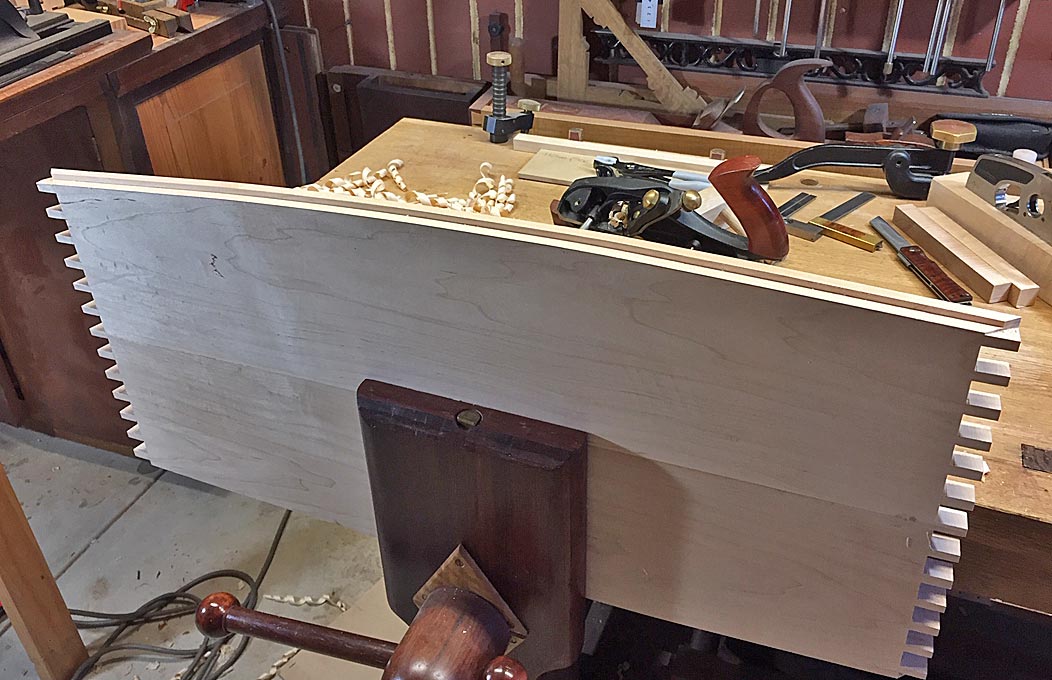
This is the rebate created ...


The alternative is a stopped rebate. However, in making this I warn to end it well short ...

... never here ...


.. as this makes the dovetails fragile.

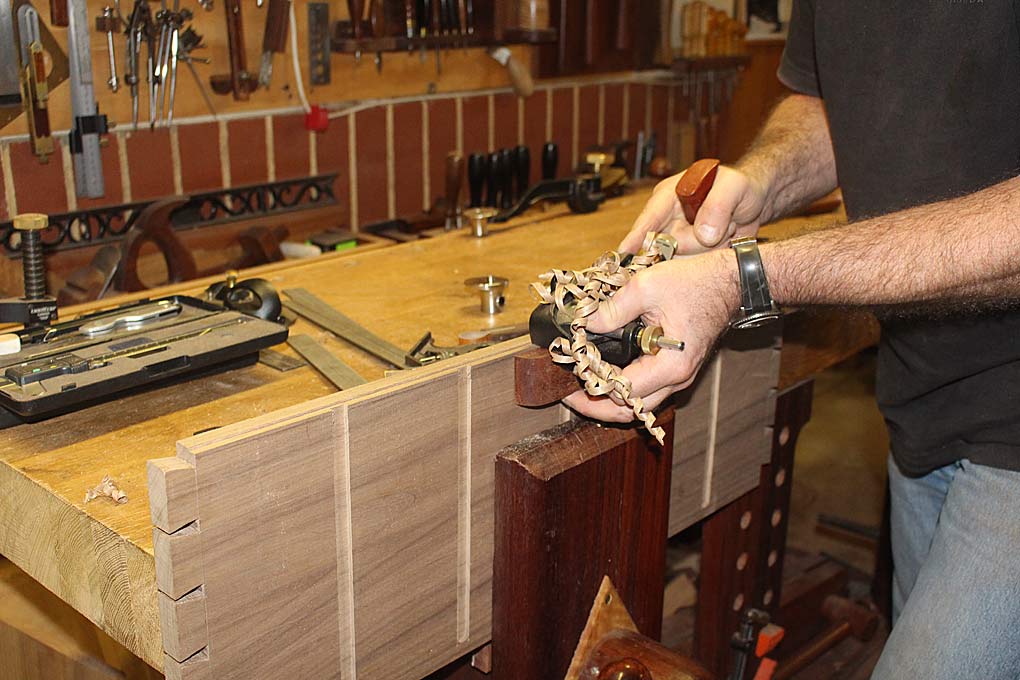
Instead, using an azebiki, the rebate was given some clearance - I was initially going to plane it with a moving filester. I have done this in the past. However, one can see where the rebate ended ...


The joining side was planed through ...


This is what it looks like when glued up ...


Only at this point is the waste removed before adding the back (in this case, ship-lapped) ...


In terms of effort, it is about the same, althoug I would say that the mitres are more difficult. In terms of looks, the mitred through dovetails win every time, and are worth the effort.

Regards from Perth

Derek

Re: Case construction: stopped vs. continuous rabbets

#3

Re: Case construction:  stopped vs. continuous rab

Wiley Horne

I’m sorry Derek. I should have cited your post. Very beautiful and exacting (to say the least) work! I thought at the time you first posted this work, that it was your most difficult of all the many builds you’ve shown. The challenge of getting all those miters to close together on the money—at the exact same time as the dovetails seat—is truly daunting.

Now for the rest of us mortals.... :) :)

Apologies, Wiley

Re: Case construction: stopped vs. continuous rabbets

#4

Re: Case construction:  stopped vs. continuous rab

Bill Tindall, E.Tn.

Doing the miter on the back of a case is a good place to practice this joint in case it is ever needed on the front where it will show.

Re: Case construction: stopped vs. continuous rabbets

#5

Re: Case construction:  stopped vs. continuous rab

Derek Cohen (in Perth, Australia)

Hi Wiley

No apology needed. I thought you were referencing my post, which was lost among the many on the Messages forum. It did not appear to resonate with anyone.

There are degrees of complexity, and I do agree with you that mitred through dovetails are exacting. I think I did 4 such cases last year, so started to "get it" by the end :)

Here's another, the Harlequin Table, where the front and rear were also curved ... which meant that the rebates were planed along curves ...


I love this piece and still find it interesting - not just the front ....


... but also the rear (which can be seen through the picture windows), where the back fits into the rebate under discussion ...


Regards from Perth

Derek

Re: Case construction: stopped vs. continuous rabbets

#6

Re: Case construction:  stopped vs. continuous rab

Joe in a Cleveland suburb

"The key is using half-tails at the rear of both side and top."

I clearly see where I screwed up on my little bookcase.

Your first picture says it all for me.

I read picture much better than I can read text...

Re: Case construction: stopped vs. continuous rabbets

#7

Nothing helpful to add...

David Weaver

That's a sensible method that you've shown.

I've rabbeted the backs of all of my cases, but all have mouldings. they all run out (open hole) on the sides of the case under the mouldings. Never had to consider anything further due to the mouldings.

Re: Case construction: stopped vs. continuous rabbets

#8

Comment

Bill Tindall, E.Tn.

The half tail that will be on the back of the case is not captured on both sides (it is a half tail). It should be designed to be small so as to not have any opportunity to curl up over time.

Re: Case construction: stopped vs. continuous rabbets

#9

Re: Comment

Wiley Horne

Good point! Let’s say you decide you want (a) 1/2” of wood holding the last pin, and (b) the rabbet will be 3/8” deep. Then those half-tails could be 7/8” wide.

Wiley

Re: Case construction: stopped vs. continuous rabbets

#10

Re: Case construction:  stopped vs. continuous rab

Wiley Horne

Hi Joe,

To my eyes, your case looked great! No mistake at all. My only motivation in posting was the terrible potential of table saw accidents, and a way to avoid the possibility by going back to an older time.

Wiley

Re: Case construction: stopped vs. continuous rabbets

#11

gaming orientation

David Weaver

one could game grain orientation as wiley has done to bias the movement back toward the tail below rather than up.

This would only be a concern where no moulding was used (the moulding would hide small amounts of movement).

Re: Case construction: stopped vs. continuous rabbets

#12

Re: Case construction:  mitred shoulder

Steve Voigt

Hi Wiley,

I may have mentioned this before, but I like continuous rabbets and use the technique Derek calls a "mitred through dovetail" (Beautiful example, Derek!). I think the usual name is "mitred shoulder dovetail." Hayward illustrates it in the linked post, see figure 4.

https://blog.lostartpress.com/2018/07/22/special-dovetails/

Re: Case construction: stopped vs. continuous rabbets

#13

Re: Case construction:  mitred shoulder

Wiley Horne

Steve,

That is a valuable link! Thank you, (and Hayward too). And Derek for showing a live example.

Somehow it looks a lot more doable to me, after seeing Hayward’s drawing. I can see my way through maintaining enough precision, provided every single mark and saw cut is on the money.

It looks like the real difficulty is that it is not very practical to saw one of the miters a little fat and sneak up on an exact fit shaving by shaving. It seems you have to go for the money cut off the saw and get them all exactly right. Is that about right—I’ve never made this joint?

Wiley

Re: Case construction: stopped vs. continuous rabbets

#14

Tutorial

Derek Cohen (in Perth, Australia)

Hi Wiley

I have a full pictorial tutorial on my website: http://www.inthewoodshop.com/Furniture/AnotherCoffeeTable2.html

To answer your question, the mitre is cut a little fat, and pared to shape. Paring using a guide for the chisel. This is not wimpy; it is sensible since this is a “three dimensional” joint, that is, there are more plains to bring together than a simple through dovetail.


Regards from Perth

Derek

Re: Case construction: stopped vs. continuous rabbets

#15

Re: Case construction:  mitred shoulder

Steve Voigt

Hi Wiley,

No, like Derek I cut mine fat and pared to the line. I did not use a guide--I just layed it out carefully and pared to the lines--but using one seems a sensible idea, especially if there are a lot of joints to cut.

I definitely recommend making a couple practice joints before doing the real thing.

Re: Case construction: stopped vs. continuous rabbets

#16

Re: Case construction:  stopped vs. continuous rab

Charlie

Will the case have crown and waist moldings?

Re: Case construction: stopped vs. continuous rabbets

#17

Re: Case construction:  stopped vs. continuous rab

Wiley Horne

Hi Charlie,

This is just a roughed-out example of how to avoid stopped rabbets. Mainly for those concerned about lowering case pieces onto a spinning table saw blade.

The molding details would be a separate consideration for those actually building a case :b :b .

Wiley

Re: Case construction: stopped vs. continuous rabbets

#18

Re: Case construction:  stopped vs. continuous rab

Charlie

Thanks... I would certainly avoid them if the joinery will be covered by molding. On a tall case, you need that extra bit for the backboards to lay on the full thickness of the subtop and the case bottom.

Re: Case construction: stopped vs. continuous rabbets

#19

Re: Case construction:  mitred shoulder

Jack Dover

I used to pare a miter, free hand or with a guide and it's quite time consuming. So one day I just made a saw guide, just two scraps glued together to form an L-shape piece with a 45˚ cut in it. Now my mitered half-tail and a pin fit from a saw.

Please also note that both pieces must be of the same thickness. If they differ even for a tiny bit then you'll have to figure a correct miter angle. This sounds too obvious, but it wasn't for me when I couldn't make my miters tight.

👍 This page answered my questions

Your vote helps other woodworkers quickly find the answers and techniques that actually work in the shop.