WoodCentral Forums

Est. 1998 — 27 years of woodworking knowledge

Some progress on my bookcase

Posts

Some progress on my bookcase

#1

Some progress on my bookcase

Joe in a Cleveland suburb

I was able to dovetail the sides to the top this weekend. Did one side on Saturday, then the other late today.

The DT's are not perfect. It's been a while since I've done any. A couple gaps are a little bigger than I would like, but they are functional and will be mostly covered anyway. They'll look fine once glued up.

The bottom and two shelves are supposed to be set into sliding DT's. Derek and Bill's recent builds and posts have given me some ideas. I may try and do it by hand. I don't know, have to think about it.

My chisels held up really well chopping out the DT waste. My primary bevels on these are 25 degrees. I added a secondary bevel of a couple degrees and stuck them into the buffer. I had white polish compound on hand so that's what I used. Shaved plenty of hair off my arms so I guess they were sharp enough. They chopped out the cherry without any problem and stayed pretty sharp.

I know the unicorn article says a primary of 20, but I don't have sandpaper on hand to change it. I have a slow speed grinder but I've never used it to grind a new bevel angle and didn't really want to ruin my chisels this weekend trying it. Maybe next time.

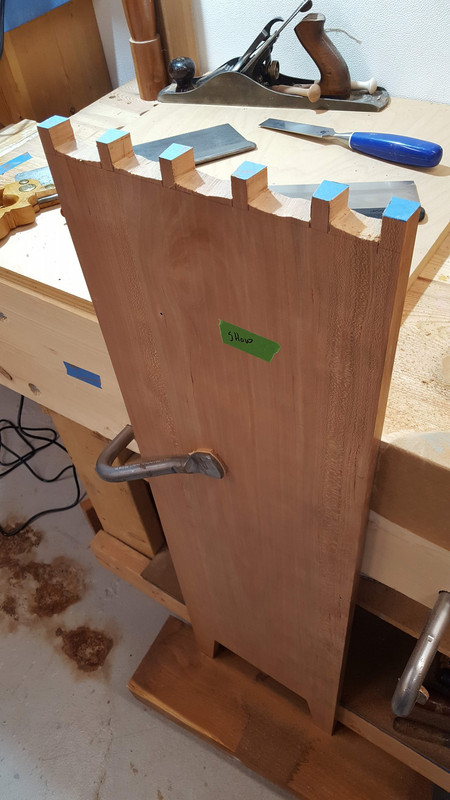
I had a hard time marking the tails on the pin board because of the height. I couldn't really secure it well. I managed though. I also used the tape trick which I always do. Helps a lot I think. Probably unnecessary for those of you who do a lot of DT's.

Anyway, here are a couple cell phone pics. Thanks for looking.

#1. Most of the waste was removed with a coping saw.

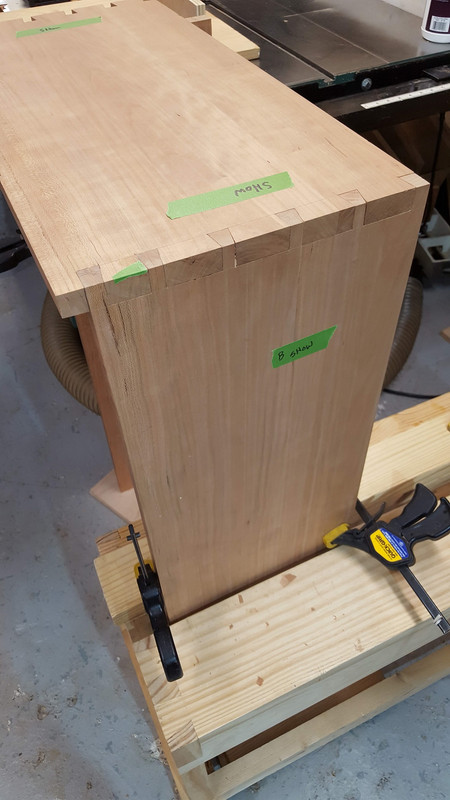
#2. Banged together. Looks ok.

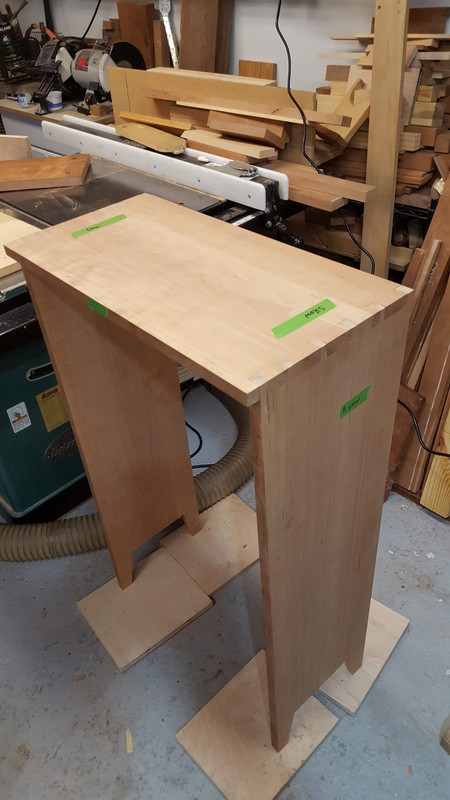
#3. This isn't right off the saw. I used pencil to see where things were too tight and shaved tiny amounts away until it went together without too much force.

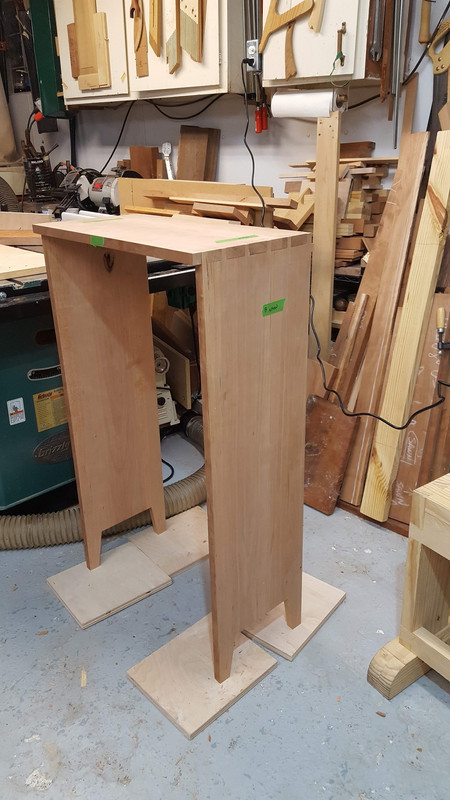
#4

Re: Some progress on my bookcase

#2

Re: Some progress on my bookcase

Derek Cohen (in Perth, Australia)

Joe, this is looking grand.

The dovetails are especially looking good. I experience a great deal of pleasure in hand-cut joinery coming out well. For some this means a little finessing. Taking careful strokes is normal in my world.

There are posts on the Messages forum that involve making sliding dovetails (here, for drawer dividers). Links:

http://www.woodcentral.com/woodworking/forum/messages.pl/page/1/md/read/id/539913/sbj/underbench-cabinet-9-drawer-dividers-part-2/

http://www.woodcentral.com/woodworking/forum/messages.pl/page/1/md/read/id/539931/sbj/underbench-cabinet-10-a-blind-sliding-dovetail/

Regards from Perth

Derek

Re: Some progress on my bookcase

#3

Re: Some progress on my bookcase

Joe in a Cleveland suburb

Thanks. Yes, I've been following your posts.

Re: Some progress on my bookcase

#4

Unicorn clarification

Bill Tindall, E.Tn.

I wish David had never spoke of the sharp 20 degree bevel in the same breath as establishing a convex bevel on a chisel tip. The reason is in your post. It confuses the issue. It has nothing to do with establishing the convex tip profile that results in strengthening the edge. Rather it is something David finds useful for his work that I doubt may others will be attracted to.

When I am asked about buffing I tell people to sharpen the chisel exactly how you have always sharpened a chisel. Then buff it, or roll it on your last sharpening stone for a few strokes.

Re: Some progress on my bookcase

#5

A dovetailing question to be addressed

Bill Tindall, E.Tn.

How do people transfer tails to pins when the pins will be on a tall piece?


I have done it with a angle iron. Lay the pieces on edge on the bench (I have a big bench) and clamp the pieces into registration with clamps. Mark.

Re: Some progress on my bookcase

#6

Re: A dovetailing question to be addressed

Joe in a Cleveland suburb

Great tip. Wish I had thought of that.

Re: Some progress on my bookcase

#7

just buffing at first...

David Weaver

is fine. Except if someone is buffing on top of a 35 degree angle -that's a bit too blunt. But stuff like 25-30 and then buff, no problem.

The reason I modify geometry behind the edge is just because it's there to do.

what I don't like is a dull feeling chisel that shoots wood off of a cut or bounces in a cut, or wedges back into a baseline a significant amount. The adjusted geometry solves those things and makes the chisel work like (but better than) a flat bevel in terms of resistance and wedging.

That combination was provided in the large article by request, I had not measured angles but everyone wants to know angles. I think it's better developed by feel - after initial experimentation with buffing, keep lowering the secondary or secondary and primary bevel behind the edge until you experience failure.

I did that with a footprint chisel around 15 degrees or some level below 20 and the failure was very spectacular. Which goes back to something cliff stamp said in one of his early videos - you manipulate the bevels to choose where failure occurs. The objective of going lower and lower was to see where failure would occur further than the buffed edge since that was the variable manipulated. I was satisfied after that that there's no great reason to go below 20 degrees.

This is a product of laziness, same as it is for plane irons - find failure (rather than reading about someone else's accounts of it) and then see where it occurs and back off a step until it doesn't occur. That's the lazy man's optimal point.

(I don't leave a tiny leaf of wood between tails, either, so minimizing wedging is a nice thing to have -it minimizes diving, too - as in, I generally need to make two cuts between the tails instead of one as one may be able to do using one of those trick high tension saws. That time is more than made up for in how fast I can saw waste out, though. Maybe only one cut would be needed in softwoods, but I don't work a lot of softwoods.)

The add-on to laziness (laziness drove me to that setup) and mentioning the details in an article, though, is to head off the false assertion that the edge would just be blunt and harder to drive through wood. Even a steep edge will pare wood nicely, but if it's followed up by a chisels with a fat edge that shoots shards at the person cutting half blinds with it, and that feels like it's indifferent about penetrating, that's not so nice).

Re: Some progress on my bookcase

#8

The other bit of this....bevels...

David Weaver

I would guess on average that I recut or set about 200 bevels a year, either sending tools out that I've bought used or now making chisels or irons. Resetting a bevel to shallower for me is about 1-perhaps 4 minutes, depending on what's getting done.

I get that for other folks this isn't the case and it's not so willy nilly. Once I've reset a bevel, I don't adjust it again later, it's just an initial thing, but going through a lot of tools and making a bunch, it's going on constantly.

When I brought this method up, there's an oppositional woodworker on the UK forum who mentioned something about having a set of chisels in the past set at 20 degrees and then later setting them to something around 25 or 30 and regretting it ever since. He says he does a lot of woodworking and shows some of it from time to time (he's doing at least some of what he says he's doing).

Things like that are a good reminder to me that some of the things that I do regularly aren't regular practice, just as some of the things other people do routinely like they're walking down the street are really arduous for me.

I remember talking about laying out a design and drawing it with george. almost nobody does this. George has drawn so many curves (and started as a child tracing pictures of sailboats in some old book that he used to get from the library that was filled with line drawings of boats), that he can visualize proportions and then just draw a curve in a stroke. No templates or anything, just draw it as it should be seen. I still haven't done this successfully without taking a first stab, looking for objects floating around the shop to set a curve, and then later correcting whatever I've made to something that looks a little better (which is also one of the reasons I prefer making a whole bunch of something now rather than one - my first of anything is almost always ugly - I can see strange aesthetic things now in the first chisels that i made in terms of the tang meeting the blade of the chisel, the taper of the tang and the curves - they look like they were made by a third grader.

My drawing is bevel adjustment for other people, but at the same time - am not smart enough to settle with not being good at it, rather making a whole bunch of things to incrementally get a good result. It would be smarter to just print out a pattern and use a program to reduce it to whatever size I need it and then just use it.

Re: Some progress on my bookcase

#9

For case tops

Bill Tindall, E.Tn.

you didn't ask :)

For the dovetails on a case top I dry fit the case with the dovetailed dividers, which holds the case together and in position. Then I put the top with it tails cut on top of the case where it goes, clamp and mark.

Re: Some progress on my bookcase

#10

Re: Unicorn clarification...more

Bill Tindall, E.Tn.

Everyone I know but Warren suffers dulling when chopping dovetails. I was chopping some at the time David informed me that he had improved edge durability by adding a convex beveled edge to a chisel. I tried it by rolling the chisel during my last sharpening step. ( I soon bought a buffer as I saw the universal edge improvement this tip modification provided- deer skinning to roast cutting knives for example).

I had a compelling need.

It was easy to try.

No risk of a modification that would be inconvenient to recover from.

Success was immediate and easy to demonstrate.

Adaptation was immediate.

I don't know what angle my chisels are at and they may not ever be at the same angle. Whatever, it is good enough. Motivation is lacking to change the angles, and I don't know how I would measure if there was an improvement. It is this situation that I find myself in that lead me to wish David had decoupled modifying bevel angles from modifying the tip.

I can explain how and why to modify the tip in two sentences. Explanation of why it is beneficial, to what for most of us would be a radical modification of bevels, takes more explanation and may not be as universally beneficial as tip modification. Hence, a barrier to adaption.

Re: Some progress on my bookcase

#11

Re: A dovetailing question to be addressed

Jack Dover

I just do pins first and stand a pin board on a tails board. Works every time.

Re: Some progress on my bookcase

#12

Re: A dovetailing question to be addressed

Bill Tindall, E.Tn.

bookshelf 5' tall. I don't have 5' from my bench to ceiling. But for cases where altitude is not a limitation how do you keep the boards in registration while marking?

Re: Some progress on my bookcase

#13

It's an idea from an R. Wearing book

Jack Dover

Yeah, when there is not enough height from a bench to a ceiling I do it on a floor using an old Ikea table top as a reference plate. In fact, marking it out on a floor is so convenient that it's my preference now. I work on a case 5'7" long these days, what's described below worked just fine.

For keeping big pieces on registration marks I made a few... idk how to call them, right angle braces? An image is googleable by "dovetail alignment board", mine is just a few scraps, 12" and 16" long, 3" - 4" wide, screwed together at 90˚ and reinforced to make it rigid. Then I clamp as many as I need to keep a vertical piece on a line, most times 2 braces is all what's needed. Spring clamps are most convenient and allow repositions easily. Usually a vertical piece's weight is sufficient to keep in on a line steady, but occasionally I put a spring clamp on a horizontal arm of that brace. Everything is tight, but not dead tight, so light tapping is sufficient for minute alignments.

On less critical pieces (shop furniture) I've clamped a straight board on a line and asked my wife or one of children (there's usually one messing around) to hold a vertical board plumb. This has a disadvantage of having access from outside only and it's hard to see whether a piece is on a line, so take your time clamping a guide and make sure the piece is tight against a guide.

Let me know if this explanation is confusing. I'm rarely good at explaining simple things, but I can take a few pictures later today.

Re: Some progress on my bookcase

#14

yes fine

Bill Tindall, E.Tn.

It reminded me that I saw this approach in some else's shop some years ago. He claimed it was easier than tails first and I can't deny the claim.

Re: Some progress on my bookcase

#15

Re: yes fine

Jack Dover

It seems that long pieces don't leave a lot of options, unless a shop is on a second floor, there's a stairwell or a similar opening and parts could be clamped lower. Otherwise all operations are on parts laying flat and I just find it easier to saw pins first using a Japanese method.

I can cut tails first or pins first with about the same degree of success (or sometimes lack of it), English saws or Japanese saws. Pins first is my preference at the moment mostly because pins produce a crisper line, so my tail lines are transferred better. I might go back to tails first once I splurge for a premium Western saw.

Re: Some progress on my bookcase

#16

Re: yes fine

Warren in Lancaster, PA


Just kidding. A lot of large 18th century pieces are made in upper and lower sections, which makes construction and transport easier.

👍 This page answered my questions

Your vote helps other woodworkers quickly find the answers and techniques that actually work in the shop.