WoodCentral Forums

Est. 1998 — 27 years of woodworking knowledge

Bookcase progress with a few pics.

Posts

Bookcase progress with a few pics.

#1

Bookcase progress with a few pics.

Joe in a Cleveland suburb

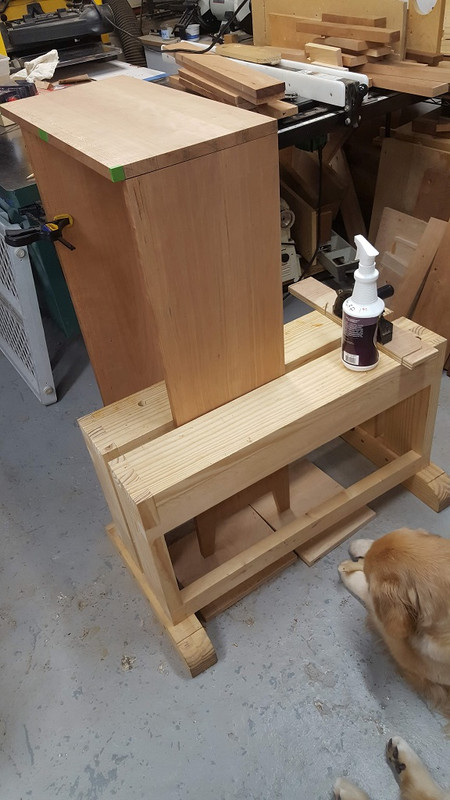
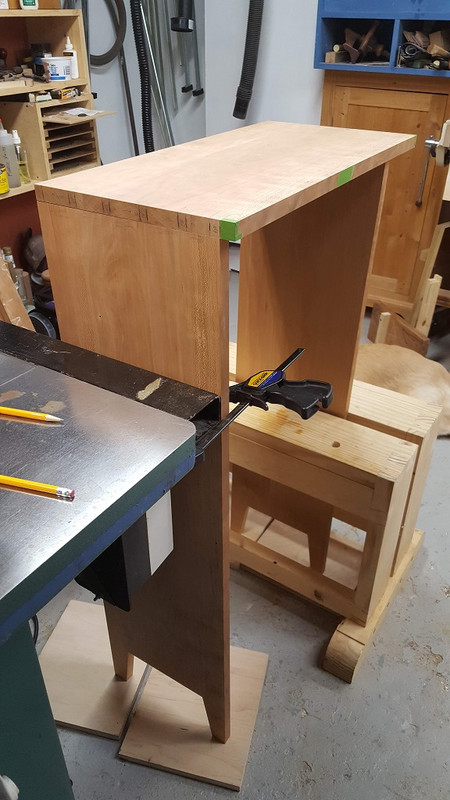
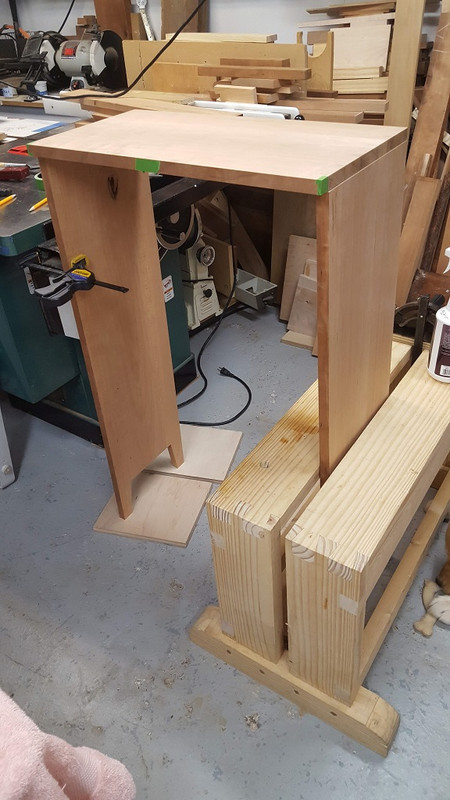
Thought I'd share a few pictures of the progress I've made on this little bookcase.

I'm using the Christian Beckvoort article from the Feb 1998 issue of FWW. Something I've always wanted to make and

my daughter asked me to make it for her baby room. I have to complete this by March.

I wasn't sure if I should post here or the regular message forum, but since my next step is doing the DT's thought I'd post these here.

Last weekend I spent most of a day practicing on scrap cherry. It's been a while and thought I should. That's when I realized how dull my chisels are which made me do some sharpening

which lead to me looking at my old stones which lead me down the path of maybe upgrading my stones... too many choices and options. :b

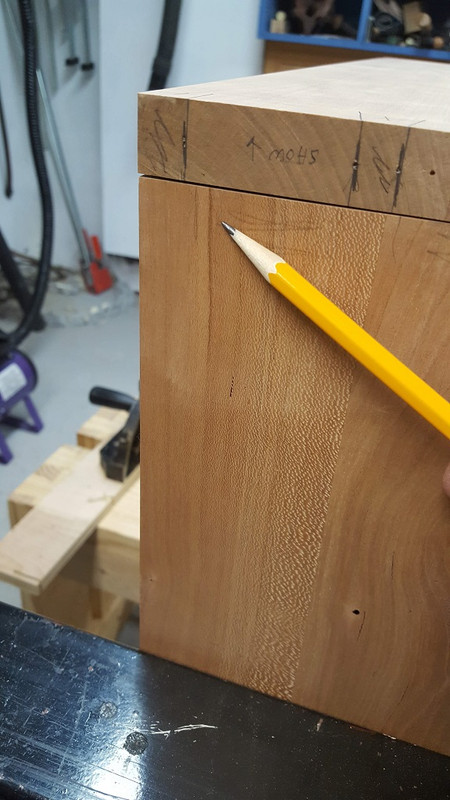
A couple weeks ago I asked about a crack/split in one of the boards and if I should worry about it. I ended up using a syringe and diluted TiteBond. I squirted it down into the split the best I could then clamped it over night. Glue squeezed out pretty much the entire length of the crack. I think it will be fine. Plus most of it will be cut away after doing the DT's.

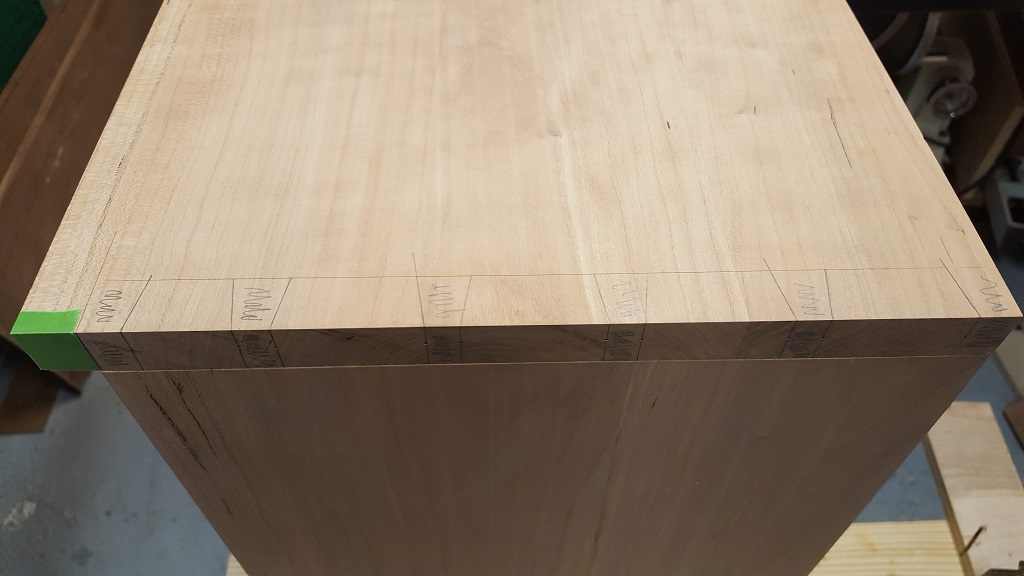
Hopefully this weekend I can get back to it and do the DT's (both the tails and pins).

The next step will be doing sliding DT's for the bottom and the two shelves. Not sure how I will do that. I have to study up on that...

Thanks for looking.

#1

#2
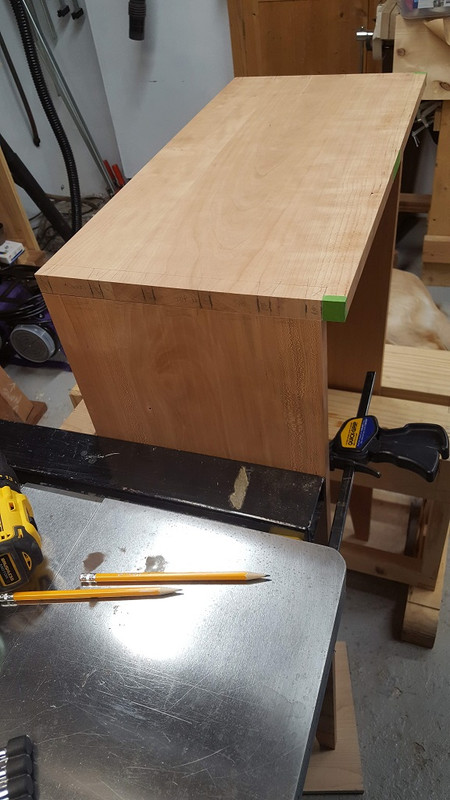

#3 The pencil is pointing to the crack. It'll be mostly cut away.

#4

#5

#6

Re: Bookcase progress with a few pics.

#2

The next step will be doing sliding DT's 

Bill Tindall, E.Tn.

We did a dovetail in the Headley Shop for the bottom of this case piece not much different in size from your shelf.


The approach will be controversial to some. But this shop has been cranking out Period Furniture for 3 generations and I have come to accept that what they do is quick and reliable. No need to taper the dovetail.


The approach is to cut the tail then fit a socket to it. This part is important. This joint does not have to be, and in fact must not be, tight. If it doesn't slide together effortlessly, loosen it. It purpose is to keep the parts from pulling apart. Even the lousy gap filling of yellow glue will fill a loose joint and keep it from pulling apart. The required strength is all compression and no tension.


I do not remember how I cut the initial dado. Router or saw?. But then I chiseled the angle for the dovetail socket with a guide block, adjusting until I got a loose fit. (picture is doing one of the drawer blade dovetails, not the full length one that I don't have a picture of ) If Steve Hamilton could not easily slide it together he said, "loosen it more".

Re: Bookcase progress with a few pics.

#3

A bit of Unicorn will help your chisels

Bill Tindall, E.Tn.

Chopping out dovetails, even in mild cherry, is hard on edges. Give the tip a convex microbevel and your edge life will improve for this task.

Re: Bookcase progress with a few pics.

#4

Re: A bit of Unicorn will help your chisels

Joe in a Cleveland suburb

I've read the unicorn article here and have been watching David W's videos. I think I will give it a try.

Thanks.

Re: Bookcase progress with a few pics.

#5

Re: A bit of Unicorn will help your chisels

David Weaver

It sounds like a gimmick at first, but it's easy to master and you'll be surprised how well it works. It's just simple manipulation of the failure point of an edge that happens to be favorable for us.

i've seen a few comments about the safety element of a buffer and a sharp tool, but have trouble figuring out how it's remotely as dangerous as table saws, grinding wheels and drill presses. I thought maybe the buffing wheel might be able to launch something (it could if it was harder material like layered leather), but have had a lot of tips grabbed by the wheel sharpening knives (that can be avoided pretty easily) and nothing ever happens - the tip of the tool just gets directed off of the wheel.

Re: Bookcase progress with a few pics.

#6

Ditto the knife tips

Bill Tindall, E.Tn.

I used to fear a knife tip catch but in fact it does just as you say.

Re: Bookcase progress with a few pics.

#7

grinding sweep...

David Weaver

a motion of lifting the handle through the curve on a drop point with the knife nearing vertical (probably more like 45-60 degrees, but feels like vertical) at the end of the stroke allows for pressure to be kept into the buff without any catch (sort of a motion as if imitating grinding the point off).

Not that important for a knife, but that little bit of a catch can tear apart a straight razor at the tip (feels a little risky as they pivot on the handle, too, but the real risk is catching the tip of the razor and breaking it due to the grind being so thin).

Re: Bookcase progress with a few pics.

#8

Re: grinding sweep...

Bill Tindall, E.Tn.

Razor blades only cost twenty cents in bulk so I don't bother sharpening them and risking their thin tips breaking :)

Re: Bookcase progress with a few pics.

#9

Re: Bookcase progress with a few pics.

Joe shelton

Good-looking project underway, and I look forward to seeing more about it as you go.

And I really like your saw bench, too.

Re: Bookcase progress with a few pics.

#10

Sliding dovetails: parallel vs tapered

Derek Cohen (in Perth, Australia)

Joe, my rule of thumb is that a sliding dovetail under 6" can be made with a parallel socket/tail. Longer than this, then you need to make tapered sliding dovetails.

Bill's reply, below, recommends making the joint loose. I do not do this - I want a tight fit. Expansion is taken care off by only gluing the front quarter, leaving the rear 3/4 to move. If the joint needs to be loose to come together, then it is likely too long as a parallel socket/tail can bind.

Here is a relatively recent (blended) build with tapered sliding dovetails:

http://www.inthewoodshop.com/Furniture/EntryHallTableForANiece7.html

http://www.inthewoodshop.com/Furniture/EntryHallTableForANiece8.html

http://www.inthewoodshop.com/Furniture/EntryHallTableForANiece9.html


Regards from Perth

Derek

Re: Bookcase progress with a few pics.

#11

Re: Sliding dovetails: parallel vs tapered

Joe in a Cleveland suburb

Good info, thanks.

Re: Bookcase progress with a few pics.

#12

Re: Sliding dovetails: parallel vs tapered

Derek Cohen (in Perth, Australia)

Joe, keep an eye out on the Messages (general) forum. I have been posting a build, "underbench cabinet". This will include a LOT of (parallel) sliding dovetails (for the drawer dividers). Hopefully, there will be something of interest.

Regards from Perth

Derek

Re: Bookcase progress with a few pics.

#13

There is no expansion issue to avoid

Bill Tindall, E.Tn.

Sticking a shelf between two verticals, or a bottom in a case, is joining pieces with parallel grain, and likely the same wood. We don't glue 1/4 of the dovetails when this joining is done with dovetails, nor when using the easier to make but less robust joint where the shelf or case bottom is joined in a dado.

BTW, I have made about 2 dozen book case units where the top, bottom and shelves are joined only with the horizontal member stuck into stopped dadoes cut into the sides. Ditto numerous case pieces before I moved to dovetails.

Re: Bookcase progress with a few pics.

#14

Re: There is no expansion issue to avoid

Derek Cohen (in Perth, Australia)

Bill, my example refers to the situation where the grain of a side wall and the grain of a frame/stretcher, which runs in the sliding dovetail, do not expand and contract in the same direction.

Regards from Perth

Derek

Re: Bookcase progress with a few pics.

#15

Re: There is no expansion issue to avoid

John Jardin

Derek is right - sliding dovetails over 6" should be tapered.

A great article in FWW #194 by Martin Milkovits details exactly how to construct these simple but strong joints.

Re: Bookcase progress with a few pics.

#16

Re: There is no expansion issue to avoid

Bruce, a MN Galoot

I’ve done sliding dovetail joints in casework up to 24” long, not tapered, using liquid hide glue. They slid together like they were greased. I fit the joint so they weren’t piston fit, but they weren’t loose, either. That was using a suggestion from Bill T.

Re: Bookcase progress with a few pics.

#17

Re: There is no expansion issue to avoid

Joe in a Cleveland suburb

I have that issue. Thanks for pointing it out. I'll review it.

Re: Bookcase progress with a few pics.

#18

Re: There is no expansion issue to avoid

Derek Cohen (in Perth, Australia)

Thanks John. I have just completed a search in FWW, looking for #194. I came across #217, in which Garrett Hack answered a reader's question ...

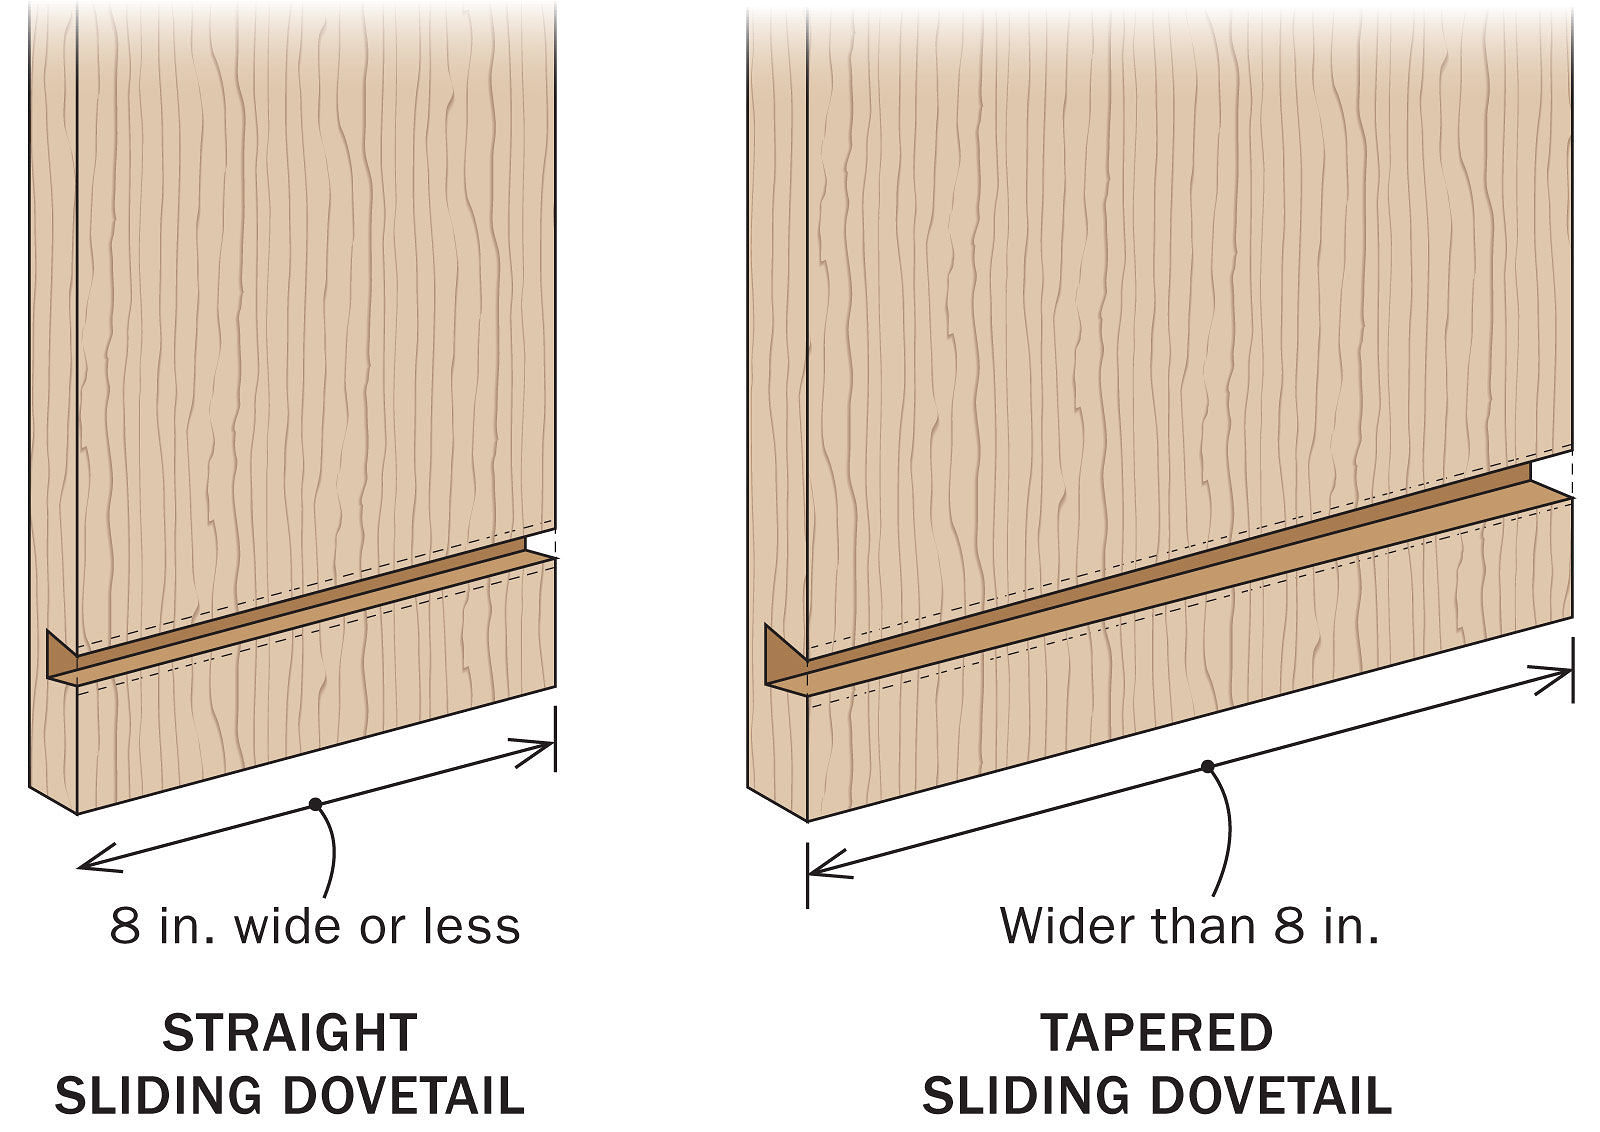
Standard sliding dovetails are useful and easy to rout accurately and quickly. The challenge is that a snug-fitting sliding dovetail can be a bear to get together, especially when the joint is long. I use a standard sliding dovetail when the parts are narrow—less than 10 in. wide in softwood and less than 8 in. wide in hardwood (see “A Better Way to Build Wall Cabinets,” FWW #210). For wider joints, tapering the joint makes it easier and far less stressful to assemble (see “Quick, Sturdy Bookcase,” FWW #194.)

Tip: Don’t glue the entire joint. Whether sliding or standard, partially assemble the joint first, then add glue to the last 2 in. of the tails.


How to choose

To maximize its strength, a sliding dovetail needs to fit snugly, which makes it harder to assemble when glue is added. For wide cases, use a tapered sliding dovetail, which tightens only when driven fully home.

That is pretty much my earlier recommendation.

Regards from Perth

Derek

Re: Bookcase progress with a few pics.

#19

I made mine in a case last year for the top ...

David Weaver

...case full length and glued them full length. They wouldn't have needed it but I cut them somewhat loose both for speed and so I could test fit them more easily. The back of my case is closed, so nobody can see the loose part. I guess if one is cutting them a little looser toward the back, it's the same effect as tapering.

My bottom case is 18" deep and I did not cut full length dovetails for it (in the top case, due to moulding at the bottom and wanting to manipulate fit of the top cabinet to the bottom without dovetails, I left the sides long and the bottom member is a sliding detail....less than a year ago now and I almost forgot why I used them on the top in the first place.

I was also using #1 common cherry, which from my local guy doesn't just have more defects, but is less straight and stable vs. his FAS cherry (which helped make the above decisions. Tight joints would've been too much trouble with the stock)

The wood on the sides and shelves is the same, same orientation, same load, etc. I'd be surprised if any damage due to wood movement ever occurred (i.e., there's not even a difference in sawn orientation - which could obviously present a problem).

Re: Bookcase progress with a few pics.

#20

The bottom line- choice not requirement

Bill Tindall, E.Tn.

Tapering a dovetail for a shelf or case bottom for example, is a choice. Clearly it does not have to be done. One need to only look to the output reported here to prove this point.

I can see the enjoyment some would get from executing the tapered version and the satisfaction of feeling the joint slide together and snug up perfectly. I can appreciate the satisfaction of assembling the tools, jigs and skills to make the joint efficiently. Advocates need to "sell" these aspects of this joint to a receptive audience.

That said, if your focus is on a pressing need for a place to store the dictionary, a bookcase can be built without having to learn to make a sliding dovetail. Ditto the case bottom for sock storage.

The single most important thing I learned working in the Headley shop was how tight to make a dry fit joint. I can pass along what I learned in one sentence. If a sliding joint won't go together with hand pressure it needs to be made looser. It corollary, if the joint meets this requirement it can be assembled with glue along its entire mating surfaces, without issue.

What some fail to understand is that locking joints like dovetails don't rely on glue for strength. The function of the glue is merely to keep the joint from sliding back apart. A "stronger than wood" bond is not essential as it is in edge gluing.

Re: Bookcase progress with a few pics.

#21

Re: Devil is in the details....

Bruce McCrory

If one does do sliding DT's as Derek has with the batten and legs, is the glue better located at the end of the joint with movement on 3/4 the length; or, glued centrally so a shorter length of movement is accommodated?

I am thinking of a table with battens (for 4 legs) that Caleb James presents on his Instagram site. The following is for the four legged version....

https://www.instagram.com/p/CIPFVFmp1tE/

The three legged version is similar.

Re: Bookcase progress with a few pics.

#22

Re: Devil is in the details....

Derek Cohen (in Perth, Australia)

If one does do sliding DT's as Derek has with the batten and legs, is the glue better located at the end of the joint with movement on 3/4 the length; or, glued centrally so a shorter length of movement is accommodated?

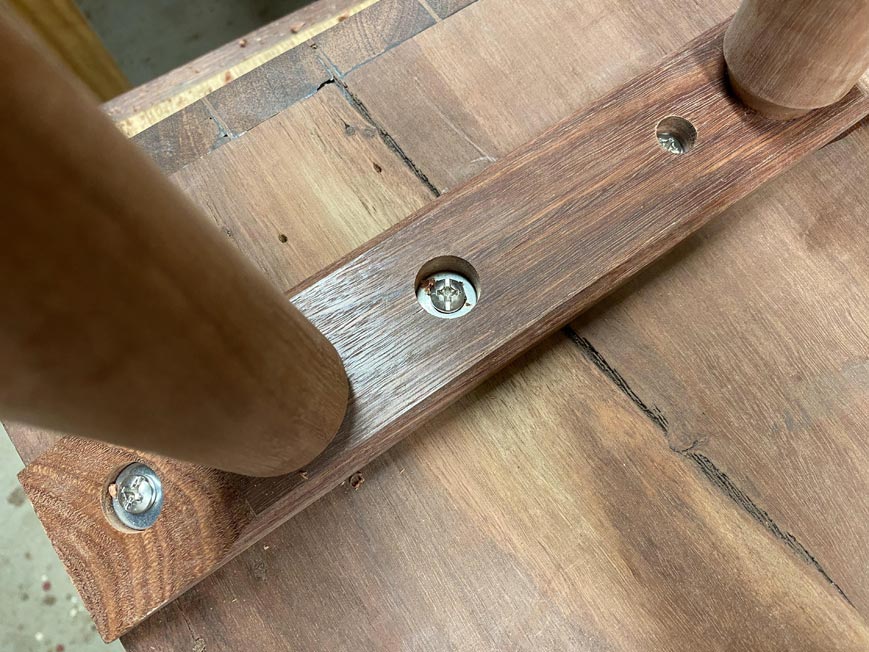
Bruce, if one makes these legs, not only is there glue in the first third, allowing the other 2/3 of the batten to move (as the combination is across/with grain), but screws were added to prevent sideways movement (noting that the legs are raked, and this adds stress to one side of the sliding dovetail). These screws also permitted movement towards the rear, with the front screw fixed and the others able to slide ...


I am thinking of a table with battens (for 4 legs) that Caleb James presents on his Instagram site. The following is for the four legged version....

https://www.instagram.com/p/CIPFVFmp1tE/

The three legged version is similar.

On the other hand, if you build Caleb's table, the battens here are to add thickness, and are likely glued and screwed (no sliding dovetail). Consider this construction the same as the stools I recently built ...


Regards from Perth

Derek

👍 This page answered my questions

Your vote helps other woodworkers quickly find the answers and techniques that actually work in the shop.