I seem to remember back when ,someone posting a tutorial of building a scratch awl or marking knife using a brass plumbing fitting for the ferrule. I looked in Woodcentral articles in the hand tool section and got nothing. Anyone know where I can find such a thing?
Hi Jack, I routinely use plumbing fitting of various sizes as ferrules. Mounted on a wood lathe and using good sharp tools, I turn them down to make the outside smooth. The insides are where the first step takes place; choose the one that fits the ferrule you need. Hope this idea helps. P.
I routinely use copper pipe as a ferrule, works really well.
I once used a brass compression cap, but I doubt it works as well as snug fitting pipe. You could do the same with a brass nipple, cut off the threaded ends and you have ferrule stock for several handles.
... are three different awls, and they do not plumbing fittings (the only thing I recall using brass plumbing fittings on was a brace). Two of these use brass inserts for shelf pins ...
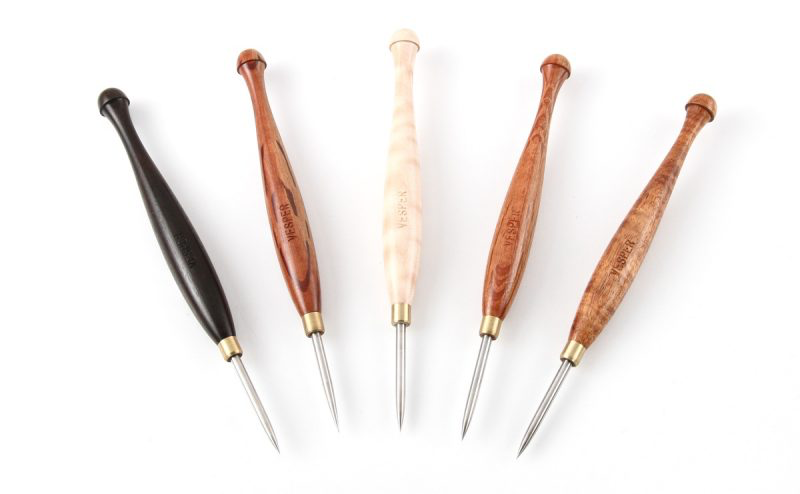
Once upon a time I made dovetail marking knives and matching scratch awls. These scratch awls were designed to be used like a pencil, hence the shape. They are the best way to mark a position - there is no confusion with a dot, while a knife leaves a line which may not be aligned. The ergonomics are important here. Now they are made by Chris Vesper (I have no financial connection. Chris is a good friend and when he asked if he could make the, I said “sure”) ..
The second awl is a birdcage awl, for starting or making holes for screws. The handle here aims at downforce together with twisting ...
Recently, it occurred to me that I could convert a screwdriver into a scratch awl, and that the wider handle would be handy for marking deepish holes ...
Jack, perhaps you will not need garden fittings ...
I got the bug from the latest pw magazine. I made one using an old cheapo awl for the shaft . Turned the handle from some apple and used a brass cap out of my junk drawer. It came out crappy. It works but I think it's ugly.I was hoping to get a few pointers on putting the parts together from someone who had done it. I picked up a long 3/16" drill bit today to make the shaft out of and a few miscellaneous brass possibilities for ferrules and will give it another try tomorrow.
I think William Duffield popularized this using brass compression fittings (the cap part) here on Wood Central. I have seen a few of his tools where he uses them. You turn the spigot on the handle to a size where you can thread the fitting on. A little epoxy secures it permanently. Back on the lathe, you can ease the corners with a file or sandpaper and leave it hex shaped or go full round. You can turn it but be careful and take small its.
I have used brass for all of my ferrules. I typically use brass plumbing nipples. I usually buy a few, cut them to approximate length, then stuff them in a box to use as needed.
They work great because they are fairly thick and can be tapered while on the lathe. I do the heavy work with files, then the final tune using regular old lathe tools. This way the blend into the wood is perfect.
It also ages very well. The rasps and some of the drivers in the picture I did almost 20 years ago. The draw knife and 6-in-1 screwdriver I did last week.
The handle is walnut,oiled.Ferrule was a compression cap. I rounded it on the lathe with a file. The shaft is a piece of a 3/16" long drill bit I cut off with a dremel cutoff wheel and shaped by chucking it in a drill and running it against a 1" sanding belt. The point seems to be hard enough for my uses without hardening. Can I harden a drill bit using a torch and then oil quench? Does it need hardening? I ordered some drill rod and will be doing some more experiments when it gets here. I have some interesting wood scraps to use for handles. This project could get to be quite enjoyable. This particular awl is for lathe use to mark centers on turning blanks.
In the top right of the photo there are 5 that I just bought, and one that is cut in half.
They are basically just 6" brass pipes with threaded ends. The threaded ends get thrown out. It is a bit of a loss, but the fact that I can get these at the big box store any time I need makes it worth it.
Cutting off ferrule blanks and squaring the ends can be tricky. One of these days I am going to get a nice little jeweler's lathe for that. I usually cut them rough with a hack saw, then make a little stub of a jam chuck to slide them on to so I can square the end with a file on the lathe. Sometimes I do some rough shaping at this point as well.
It works best if you square both ends and get it to the right length before adding it to your project. I have thrown out a lot of nicely turned handles because the ferrule was in too rough of shape when I tried to incorporate it.
The best lesson I have learned using this method is that brass pipe is not very concentric when they extrude it. This make the wall thickness quite variable. Sometimes as much as .020 thicker on one side. That is why I true the ferrules up first before I slide them on a handle. (if the transition is meant to be seamless. A giant step on one side can really ruin your day)
Jack, assuming that the drill bits you are using are HSS, then just insert the cutting end in a cordless drill and spin it against a moving disk sander until you get the desired shape. The heat is irrelevant. HSS laughs at it. Now reverse the drill bit in the drill and drill it into the handle.
I wrote an illustrated article on this topic several years ago, maybe 18 years or so, according to some of the notes I have. I can't find the article on WoodCentral, but that's not a great loss, as I later developed a set of much better, more accurate and more efficient techniques. I never finished an article on those techniques, for several reasons some of them associated with the frustrating methods of posting pictures and posting articles permanently on WoodCentral, and some of them with the tooling I used and made for the process. Also, most of the most important points of my original method were also independently discovered and documented by Doc Green in his excellent book "Fixtures and Chucks for Woodturning".
Jack (or anyone else), If you are interested, I can email you an illustrated pdf of my documentation of my original method. However, the figures and photos are all over 100k, so I cannot post them here without further processing.
Explanations and photos of my new, improved method will be quite a bit more work, as it requires a "cart-horse inversion" or two or three, so to speak, in tools and methods.
However, as I am still unhappy with my methods for mounting flat tools and tanged tools in my handles, I have come up with a further improved technique, which I have not yet proven. All the parts for a proof of concept test are actually laying out on my bench, waiting for me to pick up the handle blank, the ferrule, the mandrel and a camera and carry them over to the lathe.
William, I'm pretty sure that your article was the one I remember . I am working out my own method for doing this task but I would love to have yours as a reference.

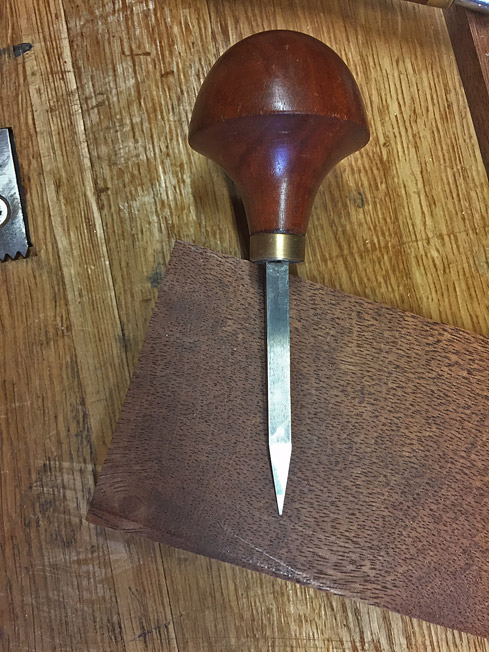
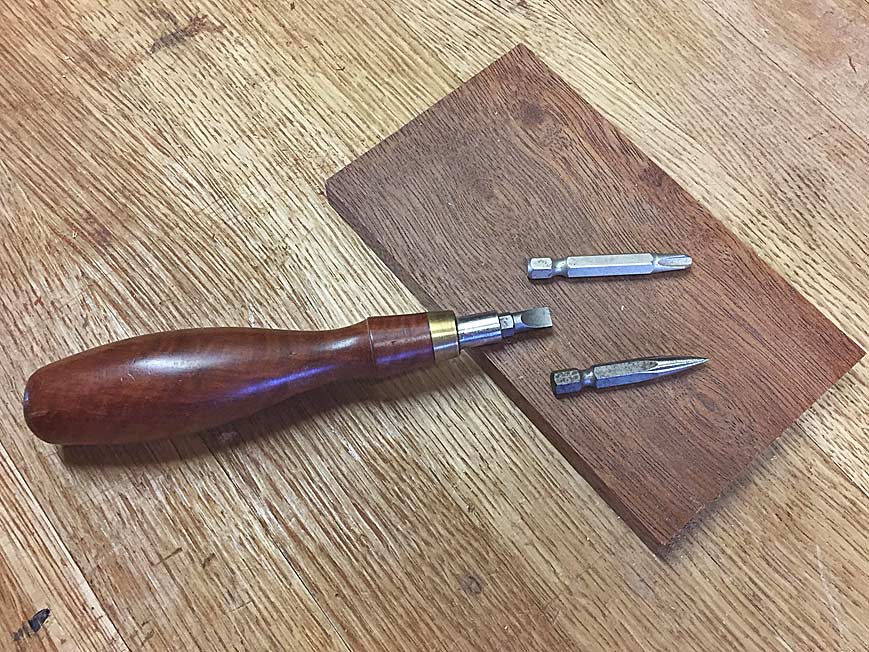
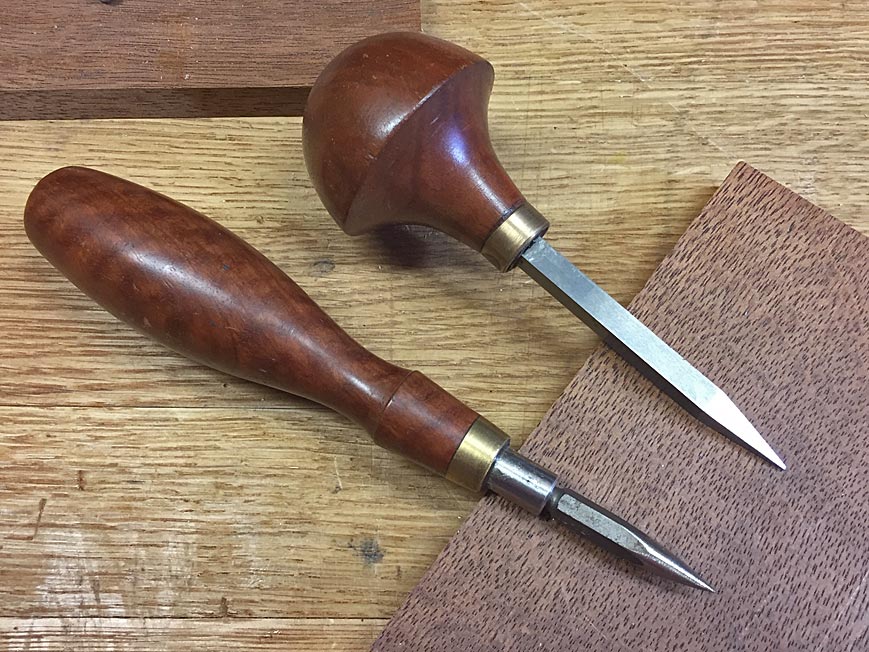

 I do the heavy work with files, then the final tune using regular old lathe tools. This way the blend into the wood is perfect.


