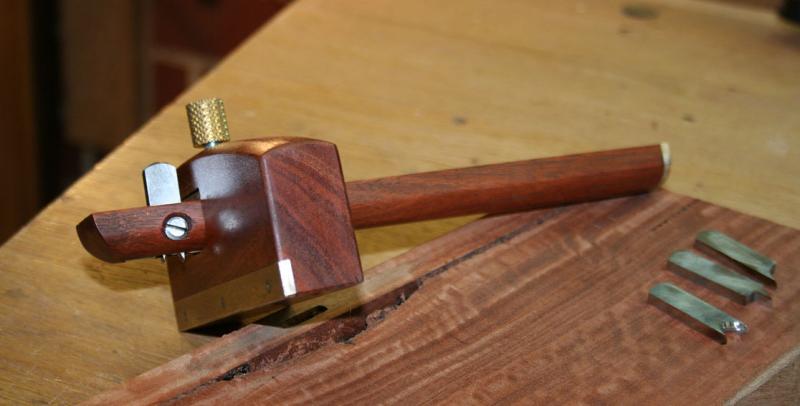
Bear in mind here that the goal was a set of bench chisels without floating a home loan to buy them. That said, I retired all my others because I became fond of the nimble ergonomics and durability of these.
my tool organization is lacking and i want to move my chisels out of the drawer under my bench. i was thinking of doing something like a tote. i like how that looks.
and failed. i wound up messing up a few things and need to start again.
I was making a simple gauge to measure the thickness of the tail board and transfer to the pin board. i like tails first and i also like to make shoulder cuts. it just my preferred method.
i'l try again as soon as i read up on how to get threaded inserts to seat properly.
If I remember correctly, that's the set you and Phil made from CPM-3V, right?
Some people seem to think the only hand tool worth making yourself is a hand plane.
Even if you can purchase every tool you need new or used, building your own tools can be a useful exercise, often impractical but not always. First, all tools are kits. Building one from scratch at least teaches you that you can modify and improve just about any tool you have bought, either to make it work better or to adapt it for a different function. It also gives you an idea of what you might need to do to restore an old tool you can buy cheaply, so it works as well as or even better than what you can buy new.
Some of the tools I've built for my shop include: carving and joiners mallets, awls, striking knives, bow saws, coping saws, a cutting gauge, an inlay stringing tool, scraper burnishers, work lights, shop lights, turning tools, hand screws, dovetail gauges, bench dogs, custom vise jaws, a router plane, myriad tool handles, and my meta-bench with dovetailing vise. Is a router table, with fences, drawers, lights, locking casters and dust collection, a tool or furniture? I won't enumerate the tools I built because I was trying to be cheap, but then found out didn't work nearly as well as available commercially manufactured tools.
There are several things you need to do to get them to seat properly.
First, you have to choose the right size drill bit to make the pilot hole. The bit you choose will depend on the kind of wood you are installing it in, and whether you are going into face grain or end grain. Experiment on scrap.
Second, you must make and properly use an insertion tool. The slot in the insert is NOT for installing it; it is for removing it when you've messed it up. Find a bolt and a couple of nuts that match the insert's inside thread size. Cut the head off the bolt. jam the two nuts together on the bolt so the length of thread on one end is the same as the height of the threaded insert, and the other end is long enough for the chuck on your brace to get a good grip on it. (The length of exposed threads on the insertion tool in the illustration is excessive.)
Chuck the tool in your brace, thread the insert on the other end, set the objective on the floor with the hole for the insert facing up, insert the end of the insert into the hole, apply your full weight through your shoulder into the brace, and thread the insert into the objective. To remove the insertion tool, just smack the handle in a counterclockwise direction. If you get any torn threads, carefully back out the insert with a matching size screw driver (I hope you installed it right side up with the slot against the jammed nuts), fill the interior threads with wax, thread it back onto your insertion tool, brush on some epoxy, and reinstall it. The 5 minute stuff is sufficient, or yellow glue would probably work too.
There are issues with the side dogs, specifically planes of weakness. I can't think of any way to make them from solid wood or plywood where there is not some place where splitting forces will break them. (Of course, you could make a pair from wood and take them to a metal fabricator to be reproduced in stainless steel.
I have an alternate approach or two: You can drill dog holes in the side of the vise jaw and the edge of the bench top and stick regular dogs in them. Or, you can drill some holes in the faces of the front legs and hammer a holdfast into an appropriately positioned hole near one end and clamp the other end in your leg vise.
Edge dogs were (are?) made commercially in metal (see Landis p.108). Coleman originally made a pair in wood while attending College of the Redwoods and used them his whole career until he made another pair in wood for an article in Fine Woodworking (see FWW #253 and YouTube video: Tim Coleman's Bench Puppies).
Anything can break....but, you got to be one super strong son of a b..ch to do that and you'd be risking breaking/damaging the drawer that those wood dogs were holding....and I don't understand why anyone would do that.
As far as drilling a lot of extraneous holes in my bench.....that's not my style.
But they're not extraneous if you use them. I do use most of the dog holes in my bench. The ones I don't use, either I used to use them, but then found a better way to do the operation with a new tool, or they are on the back side of the bench to be used in the future when it goes on to someone else who is right handed instead of left handed. To me, it makes more sense to spend a few extra seconds at the drill press to drill another hole that I will probably find use for in the future, than to waste time over and over again looking for a conveniently placed dog hole that isn't there, or rotating the vise handle extra times to fit the work piece between two dogs that are too far apart.
Instead of a brace I use my drill press, unplugged, to hold and turn the threaded rod with the locked nuts. It makes sure the insert goes in at 90 degrees. Just think of the chuck as a screwdriver handle and you'll get the idea. This week I installed 42 threaded inserts that way.
I have 3 to 5 benches, depending on how you count them, not counting my two shaving horses (though those were in the Bench Book). Things that go in the bench, maybe only a forged bench dog. Now if random tools like chisels count, then I have a ton of things.
Looks rusty, which it is, that is steel for you, welded, or forged it rusts almost immediately. Dogs will hold or not depending on hole size, head angle, and penetration. Really easy to get right if you make them yourself, as they can be tweaked and tested till they are right.
"I won't enumerate the tools I built because I was trying to be cheap, but then found out didn't work nearly as well as available commercially manufactured tools."
Sometimes one has a lucky opposite experience. I made one of those reamers that uses a saw blade. I had to carve the rest of it in rather primitive conditions. It worked better than commercial chair reamers for me. And that is entirely due to someone else's design. The saw teeth make the reamer work really well.
Here are 3 simple chisels I made that are copies of the LMI chisel, which sell rapidly for 60 bucks, a real favourite with some luthiers. So I figured, why not a set of 4. As you say you sometimes want something a little different, so I made 1 of them in a tightly curved shape to scallop braces.
I've done it, successfully, both ways, but each has some disadvantages, too.
It is easier to apply sufficient downward pressure with the drill press for difficult woods like white oak (and others that are even more difficult), but I find it easier to apply sufficient rotating force with the brace. Inserting the chuck key in the drill press can help. I also find getting the insertion tool to release when I'm done to be easier with the brace. The larger the object I'm trying to install the insert into, the less convenient the drill press becomes (for example, an assembled bench top is almost impossible to get up onto a drill press table ). Alignment using the brace can be improved by setting up a pair of machinist squares to sight on.
Won't be for everyone, but it is probably worth noting.
Weld an insert to a 2" long driver bit and put it in an impact driver. Press into some paste wax to lube the thread and drive it into the hole. Cordless impact drivers can actually be used quite delicately if you get the knack for it (I also use them to hang drywall as its really easy to sneak up on the desired screw depth).
The only time this gave me trouble was when trying to do it in stabilized maple burl - I'd even pre-threaded the holes before sending the wood off for stabilizing, and still got chipping problems as I used the tool again to clean out the threaded hole when the wood came back.
As an aside, in trying to source metric inserts that were steel rather than brass, I came across a German company making them since the early 1960's - they say the slot goes in first as it's role is to help cut the threads. But I've never seen anyone do that, even the contract companies that made the 1960's German gunstocks I was duplicating put the slots up.