We value your privacy.
We use cookies to enhance your browsing experience, analyse site traffic, and personalise content.
By clicking “Accept all”, you consent to our use of cookies. You can also choose
“Essential only” or learn more.
Last night I had a few minutes to look at this saw a little. I wanted to remove the handle so I can clean the plate up a bit and clean the handle and get it ready for the horn repairs (a first for me).
The split nuts have been worn down to the point where the slots were pretty much gone. On one of the nuts, the slots were totally gone. I wonder what would have worn them down?
Anyway, I don't have a split nut screw driver so I took a piece of scrap 3/4" bandsaw blade and made a quicky little screw driver. Worked ok. I also used a piece of the blade to scrape out new slots. The brass is super soft and was easy enough to do.
My goal is to just make this a usable saw again. I use these things, I don't collect them so it doesn't really need to be perfect. The plate is dirty but otherwise is straight and should sharpen up nicely. The other thing is that my ww'ing time is so limited, I'd rather be making saw dust than rehabbing tools...
Question:
I think my next step will be to strip/sand off the finish on the handle while waiting for some replacement wood. I think I'll go ahead and order two new split nuts even though they won't match. This is because the medallion one won't hold very well (because of the missing bad threads) I don't think. At least then there would be a couple new ones holding the handle in place. Make sense?
Thanks for any input, comments, and/or suggestions!
Here's the cheapo screwdriver - it's obvious I didn't want to spend too much time making...
Another shot of handle
Somebody has already worked on this saw. It must have been a really long time ago since the split nuts were worn down.
Here you can see the split nuts where I had to scratch out new slots. Worked well.
There are hardly any threads left on the medallion screw - Not sure what I am going to do about that if anything.
Only a couple threads left on the screw.
Here you can see in the top picture the top split nut is worn down to where the slots are gone. Wonder what it would have been rubbing on to wear it away?
Definitely beech, those picture are clear enough to say that with 100% certainty.
I'll get the box of beech in the mail today. I'll give you some heart and some sap to use. It won't really make much difference in final coloration, but I'll put a range of ring sizes, too, so you can find a nice match.
It appears he was sawing up against the face of something already assembled. The most obvious use that comes to mind is trimming the ends of pegs in timber frame construction. Of course there are other, similar operations he could have been doing, but pegs in frames wouldn't have to be trimmed flush, and the beams would have been rough sawn, providing enough abrasion, mostly on one side of the saw handle.
I've looked closely at your photographs, and I cannot see any medullary rays typical of beech in any of the end grain, so without seeing more detailed photos, either apple or birch seems more likely than beech.
There are lots of orchards in this area, so the one horn replacement on an apple handle that I have done used a piece of firewood that one of those orchards sold on the side. It would have been nearly impossible to extract a whole handle from any of the wood from those trees, due to their pruning practice for maximum fruit yield, but enough for a horn is easy. I think there are still apple orchards in northern Ohio; at least there were when I was a young'un.
If the handle turns out to be birch, and you can't find any locally, cherry sapwood is a reasonable facsimile.
First, a flat smooth surface must be planed in the handle, preferably aligned with the grain, but that's usually the general direction of the original split anyway. Cut an oversize blank for the patch from the center of the log, well away from the end checks. To decide where to cut the blank, look at the blank and the handle from the end grain and rotate the blank until the growth rings are aligned. That will show you the correct surface to cut and plane. Leave the patch square until you have glued it in place. You will probably want to make a caul to fit the bottom edge of the handle, so you can find a parallel surface to clamp to.
Really nice saw that you've got there. As I said before, I do like Richardson Bros. products, especially the earlier ones. Maybe because both these saws and I am from New Jersey. A couple of observations...
First, from the photos, the handle does look like beech. With some properly oriented scraps, you should be able to do a nice job with the patch.
Second, in my experience with many saws, one often sees the saw nut slots partially or completely "worn" away. In my opinion, and again, I've looked at a lot of saws, the wear is not from actual use, but from the initial manufacturing method. Once the saw plate was affixed by tightening the saw nuts, the handle sides were filed and sanded flush. One can often see file/sanding scratches that extend over both the surrounding wood margin and the saw nut. Yes, there can also be actual wear, but in general, the thin depth of saw nut slots, I think was from when the saw was made.
Third, I hope you can strive to keep the medallion with the saw, even though there are insufficient threads. Consider that Richardson was absorbed into the far larger firm of Disston. They didn't make anywhere near the number of saws as the firm that gobbled them up. There are probably 10 times, maybe 100 times as many saws by Disston than by Richardson. Richardson saws are not super common like Disston. Yes, repair the handle, replace the parts that are missing, but try to retain the saw medallion if you can.
How you ask?
If you are using a new, modern split saw nut as a replacement for the ones that are missing, you can use a die to thread the existing shaft of the medallion with the correct modern thread size. You can even lengthen the existing shaft with a bit of cold forging of the shaft middle with a hammer against a small anvil. If the shaft is really too short, you could silver solder an extension to the original and thread that new short section. If you are trying to reuse an old saw nut from a different saw maker, you would have to try to match the threads, no easy task. I collect 19th century threading die plates used for gun and clock making trades so I might have a close enough match if you wanted to go that route. I'd even offer my services gratis to make it work if it will help to retain all the saw's original parts.
As I step off of my soap box, we should all realize that tools were made to be used. We collect these antiques and admire, restore and use them. Some are quite rare. If you can, please try to reuse and/or adapt any old parts, like the medallion, in your restoration project. We are only the stewards of these antiques and should try to maintain as much integrity of the original as possible.
Your wise words of encouragement and advice are appreciated, as is your generous offer of help. I'm curious as to whether you might tell us more about silver soldering. I've done it in a lot of experimental ways over the years with mixed success. Which alloy is best? Sheet or wire? Best flux? I'm sure I can Google hundreds of pages on this but I'm wondering about your specific insights. Care to hold forth?
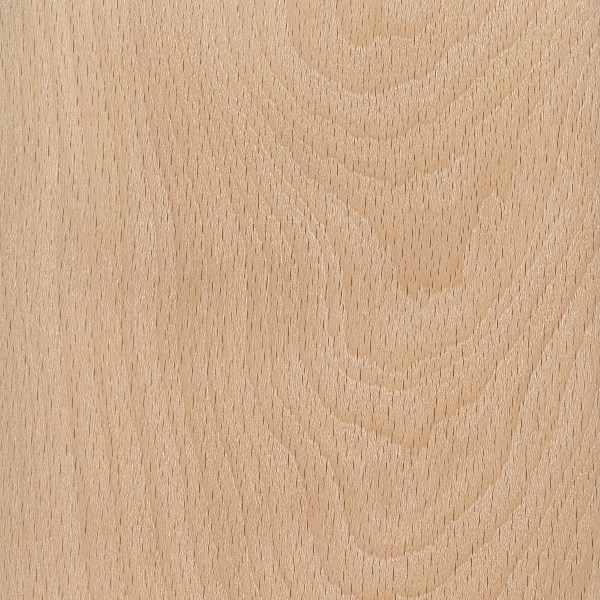
This pattern in the grain is what I look for to identify American beechwood, Fagus grandiflora.
European beech, Fagus sylvatica has a similar pattern, but enough different that you should usually be able to tell them apart with careful study.
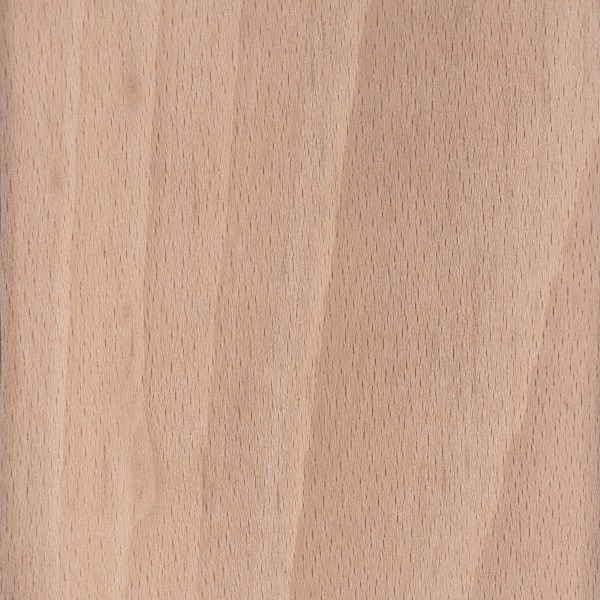
Here is the pattern seen in riftsawn European beech.
The medullary ray pattern shows up most distinctly on tangential surfaces (flatsawn) but also can be seen on quartersawn surfaces. On surfaces that are very close to radially sawn, the ray fleck patterns are a lot more difficult to tell apart from the similar patterns seen on cherry, maple, birch and even sycamore.
In my earlier post, I am sorry I misled you. The pattern is distinctive but quite different in the endgrain. Here is a photo of American beech end grain.
Later, I'll try to get some photos of apple, and some old and new beech molding planes, if I can convince my camera to do its job.
Those are some pretty impressive pix, William. Your camera did the job.
I have an old brace that will be up for grabs next week. I think it's European beech, but I haven't delved deep enough. It almost looks like boxwood, but, nah.
A box arrived in the mail yesterday. Thanks so much David!
You can see in the below picture that I should be able to get a close enough match. It will be an obvious repair, but that's ok. I just want to be able to use... but I will try to make it look good.
What does anybody think, should I cut on the red lines, or the green lines. Both have their pluses and minuses; one will have better surface area, the other a little easier to clamp.
If I use hide glue, maybe I don't need to clamp? Would just a rub joint be good enough?
I've been reading various articles on how to go about all of this. Mostly those at Wiktor's wkfinetools.com site.
Thanks William for taking the time to show these pictures.
The very small black specs (I don't know what they are called) in your pictures I can see in my handle when I look at it very very close. They aren't nearly as pronounced/visible as in your pictures.
One of the scraps David sent me looks very close. The other two are pretty close also.
Identifying wood is a real science... When I see cherry I'm pretty sure it's cherry. Same with walnut. Like bird watching. When I see a cardinal, I am pretty sure it is a cardinal.
Sorry Ellis, but those are not my pictures. They're from the Wood Database website, http://www.wood-database.com. I mentioned taking some more pictures because the appearance of beech and other woods changes a lot over the centuries, and I'd like to show what antique beech planes (and saw handles) look like and how they compare to new tools. I'm not there, yet.
The medullary rays are an important element of the distinctive grain patterns. These are bundles of fibers that grow in a radial direction from the center of the tree out to the bark, and are what form the patterns that are celebrated in quartersawn white oak, radially sawn American sycamore, Ceylon satinwood and silky oak, to mention a few.
Definitely NOT the red line. That would be attempting to glue end grain to end grain, a sure path to failure. Cutting as close to perpendicular to the red lines would yield optimum strength and close grain matching, except you would be sacrificing a lot of sound wood to make a perfect glue joint. You could probably make that cut to repair the damage to the lower horn, but not the upper.
Of the pieces of wood in your photo, the center one, directly under the upper horn, is definitely beech, but I am not yet convinced that the other two and the handle itself are. That may be because they are slightly out of focus. I think you can trust David to know what he sent you.
They're all beech. I sent various pieces of heart and sap with varying widths of growth rings so that Joe could find something (particularly in regard to the growth ring size) that matches what's on his saw handle. They are all american beech, too (fagus grandifolia). The reddish heart in the middle comes from Horizon (an offcut from a plane blank) and the sap (which may have some lighter heart) comes from Mike Digity, who cuts his trees in southern ohio. In fact, mike has cut a lot of the beech that Horizon has eventually dried (Horizon supplies the planemakers who use american beech - I don't think anyone else provides quality stock that they provide, though a few small locals have taken shots at drying 16/4 blanks - their selection isn't as consistent as horizon). What I've noticed in buying beech blanks from several other sellers and then a bunch from horizon is that the blanks vary quite a bit in color. In the old days, planemakers used sap only and threw the rest of the wood aside for firewood, but the blanks I get from horizon are usually heart and sap mixed. If I cut a blank in half at the heart and sap line, I could convince the average user that they were different types of wood.
When saw handles age, especially the ones that are finished as smoothly as the interior of the atkins saw (and presumably something applied), sometimes they get a bit smooth looking for beech, but I've never seen aged apple that had the defined rings that you can see on the smooth part of the richardson handle.
that said, if someone repaired a small section of apple with beech or beech with apple, I don't know that it would matter too much, as long as the color matching was good and oil wasn't allowed to seep into the joining line (it would instantly become dark and pronounced).
(Unfortunately, I know more than I'd like to about Beech, and quartersawn cherry, and quartersawn maple and quartersawn cocobolo, etc ,because it has taken so much effort to find decent wood each time I've looked. I was able to find maple, birch, cherry and sycamore in quartersawn blanks before I could find beech. I do have some euro beech, but not much. I got it in trade, and didn't include any of it in the box to joe.
side comment - if I were to cut that handle, it'd be on the red line, or I'd take the whole horn off and cut it just above one of the growth rings (parallel to the tooth line).
The latter would be the easiest to hide if it's done well, but nothing will be permanently invisible.
The knowledge you guys have on this stuff is mind boggling to me. Thanks for sharing it.
Regarding beech, why don't we see it used in furniture very much?
I've never paid any attention to it, but the pieces you sent to me I thought look nice and wondered what a cabinet or something would look like made from it.
I could only guess (other than suppositions), but stability and drying probably has something to do with it (and it's a bit harder than most of the stuff that's common in furniture).
It takes carving detail nicely, but it's very variable regarding how the quartered side planes (it can be easy or it can be difficult). It also cracks easily if it's not sealed, a lot more easily than anything else I have (both long grain and end grain cracks). If you have a well dried piece of wood and the temperature outside changes by 30 degrees (which usually involves a moisture drop), there's a good chance it will develop an end check.
When I asked Rick Hearne if they had beech, he basically said "yes, if you want to buy a whole tree", but otherwise not. He said that it's common in upholstered furniture, but there's not much market for it and he called it "utility wood".
And...it twists horribly if it's not sawn with the pith centered (but it does just fine if it's sawn correctly).
I think it's just too much trouble, but if it's oiled a little bit, it has a really nice color and it's not nearly as boring looking as maple.
The really difficult stuff to get (16/4 kiln dried, sawn with the pith properly centered on the mill) is difficult because the drying schedule is very slow. Probably slower than anything else. 8/4 probably is closer to some other woods' drying schedules, but it's still not easy to find much of it except on european markets (it's cheap by the cubic meter on alibaba for anyone who wants to buy a whole whole bunch and pay to have it shipped).
Since this is a woodworking website, not one devoted to metal working, I’ll try to be brief.
Silver soldering is a form of brazing. Brazing is when a lower melting point metal is wicked in between two mating surfaces using some form of heat. When cool, the two parts are joined mechanically. Painting with very broad strokes here, the term “soldering” refers to a lower temperature form of brazing. Silver soldering simply has some amount of silver metal in the solder. The proportion ranges from ~85% silver down to around 5% depending on the other alloying metals and the temperature range in which the solder it to be worked. This temperature range depends on the melting points of the metals being joined. You cannot joint together metals that have a lower melting point than the solder you are using. Not at least using conventional means that I know of. BTW, gold is routinely soldered using gold-bearing compositions. Same deal - use a lower temperature gold solder to join higher melting temperature pieces. Don’t follow this rule and you get a metal puddle!
Silver solders come in different melting point grades, extra hard (highest), hard, medium, “easy” and “extra easy” (lowest). I usually use hard or medium for general work. For repairs, I use the lowest melting silver solder.
Some comments about welding and please, folks with more knowledge chime in here. My sole experience was some basic welding while in high school and that was a while ago… Welding is the joining of metal by melting the pieces to be joined, with or without additional material. Forge welding steel (think laminated irons in plane blades) joins two pieces without additional metal. Only heat, flux and hammering are used to make this type of weld. Conventional electric arc and gas welding usually join metal pieces with the addition of welding rod or filler of similar composition as the metals being joined. Often in basic welding, a space or bevel is made between the joint to allow the filler material some space to go.
In general, it is easier to weld metals that have poor thermal conductivity. Steel and aluminum are typical examples of this. From what I understand, jewelers can weld gold with lasers, but silver is difficult, because gold alloys have a lower thermal conductivity than most silver alloys. Silver also has a higher reflectivity than gold.
In the case of a job like repairing Joe’s saw medallion… If the medallion shank is really too short to be rethreaded, one way to lengthen it would be to silver solder a new brass shank to the medallion back surface, or simply solder a short brass extension to the current shaft. I would file either with a flat file, clean up any corrosion and make a small brass rod that mates to the existing piece. Again, the surfaces should be nicely fitting and clean – a file is usually fine for this. Silver solder does not easily fill gaps. I would then use some iron binding wire to hold the pieces together so they maintain contact and position while being heated. Then one applies a borax-based soldering flux to the joint. I like using Batterns “self pickling” flux and a small brush. Just a personal preference. Then heat with a propane torch. The medallion is small enough that a regular propane torch will heat it sufficiently. I have medium silver solder in wire form and when the medallion/extension is hot enough – around a dull red/yellow glow – the solder is touched to the joint region and it will flow into the joint if all is clean and mating well. You have to heat the workpiece, not the solder. It often helps to silver solder in a darkened room – if it is too bright, you can’t tell the temperature as well. I usually solder on a small heat resistant tile made of compressed glass wool. When cool, remove the binding wire and clean up any excess solder with a file. Then the extension can be threaded to match the new saw nut.
When I tried to get some photos of the grain pattern examples from my molding planes, my camera mostly failed miserably. Although I could see the medullary rays clearly, the photos came out just as indistinctly as the ones you posted. In any case, I have no more doubts that yours are all beech. Since my photos look just like yours, I'm not going to bother to post them.
I did succeed in getting a couple of good examples of faces that were not illustrated in the Wood Database photos, but not exactly what I wanted to show.
The first pic shows end grain of a new American snipe bill plane on top and an old (1830s to 1860s) London #12 round plane in European beech on the bottom. Since both planes are lying on their sides, and were made from quartersawn billets, the growth rings are mostly vertical and the medullary rays are approximately horizontal. In a century and a half, the late wood has darkened considerably, and both the growth rings and the medullary rays show up much more distinctly. When it was new, the London plane wood looked very similar to the New England plane wood. (David has already made note of subtle color variations, which can vary as much in the same species as between the species.)
The second pic shows four faces of the two planes, the London plane on top and the New England plane on the bottom. The top band of color shows a radially sawn face of the London plane, illustrating the medullary rays cut through end to end, giving figure often called ray fleck. In the beech it is similar to the patterns in cherry or maple but at a larger scale. Ray fleck is also seen in quarter sawn white oak, but the oak rays are much longer, wider and irregular. The second band is a rift sawn face of the same plane, in which some of the ends of the rays are just visible. The third band of color is a flat sawn face of the New England plane. Like in David's photos, the rays are not really visible.The bottom band of color is a radially sawn face of the New England plane. It distinctly shows the dark ends of the rays and the light horizontal lines of the early wood growth rings.
Hope this helps you in your future searches for and identification of beechwood.