New WoodChat!
Home Articles Forums Gallery Marketplace Videos

WoodCentral Forums

Knowledge You Can Build On — Est. 1998

Fast and affordable laser cutting – so you can make the parts you can’t find anywhere else

One step back (with the Lingerie Chest)

Posts

One step back (with the Lingerie Chest)

#1

One step back (with the Lingerie Chest)

Derek Cohen (in Perth, Australia)

It's always a bit disheartening to hit a problem that threatens to derail the project before it has managed to truly get underway.

When we left off last time, the panels were done and I began planning the drawer dividers.


Then I noticed that the join in the book-matched panel on the left had split in near the centre. It was possible to flex it back-and-forth. The lower- and upper sections were still holding. I wiggled a little hide glue into the split and pulled it tight with clamps. I returned after a day, and it looked strong. It had been my plan all along to add 1/4" thick strips at the inside of the panel, which would both stiffen and reinforce. Now it looked like this would be necessary, rather than insurance.

The areas for the 3" wide strips were marked off, and the finish scraped off the centre of each panel. One panel remained intact as this work took place. The other split .. again. Damn and bugger.

My wife said "take it off". I thought I may be getting lucky, but - no - she meant the panel :)

Thank goodness for hide glue! I had used Titebond Liquid Hide Glue all along. However, I have never had to undo anything before. This was a first.

The first step was to drill out the pins. One side of the hole was covered with waterproof tape and boiling water was poured in. A heat gun added more heat. A clamp was used in reverse direct to push the sections apart. Slowly it moved, and then .... then my camera decided to blow up the memory card, and every photo of this process was lost! Double damn!

I started over today ...
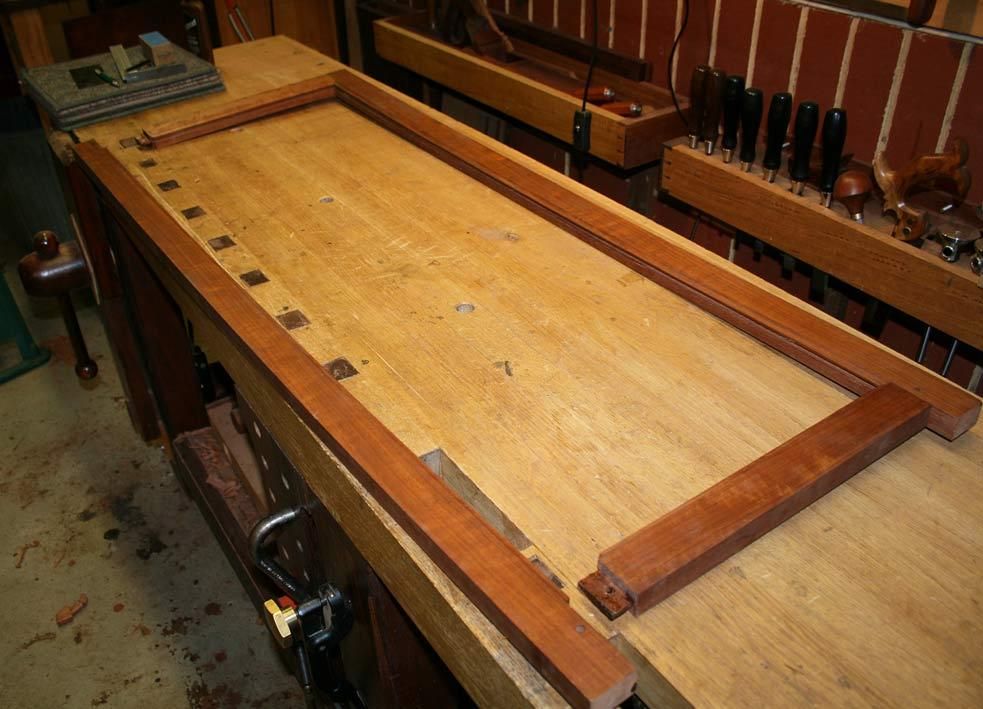

Post-mortum of the panel indicated that the spring joint gap was too large ...
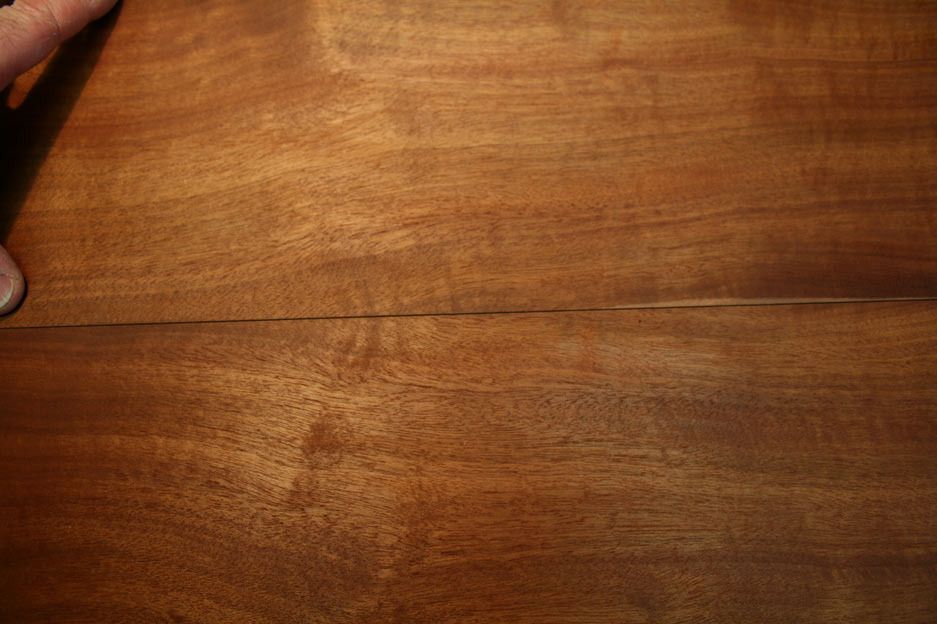

Clamping the pieces together would have squeezed out the glue.

Checking the sides against a straight edge, it was clear which piece was the offender ..
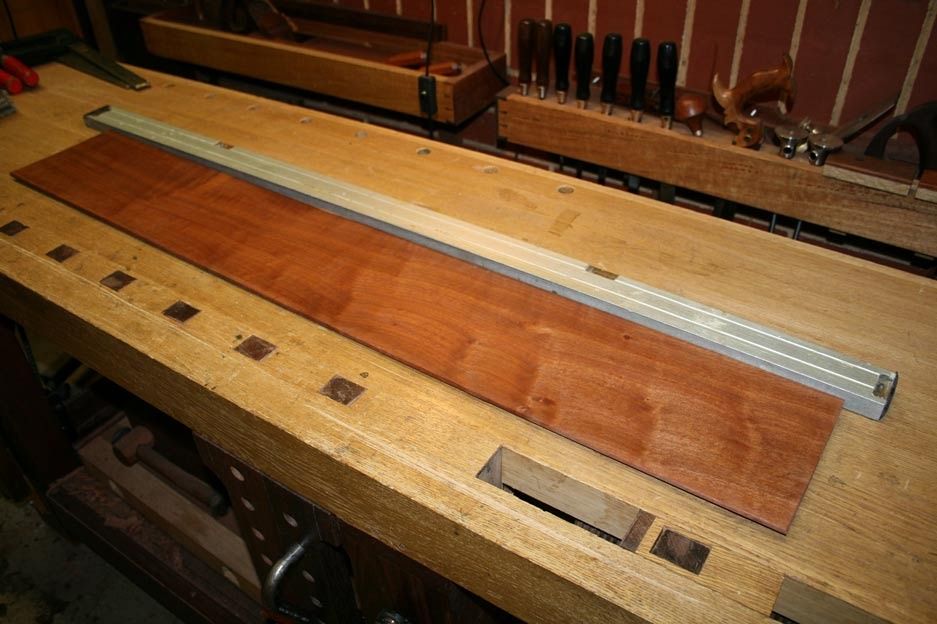

I am not sure if I demonstrated the method I used to joint these thin 1/4" thick panel sections. Well this is how it was done ..

First step was to lift the board up on a 1/2" thick section of MDF (nice and flat). The second piece was added for balance ...
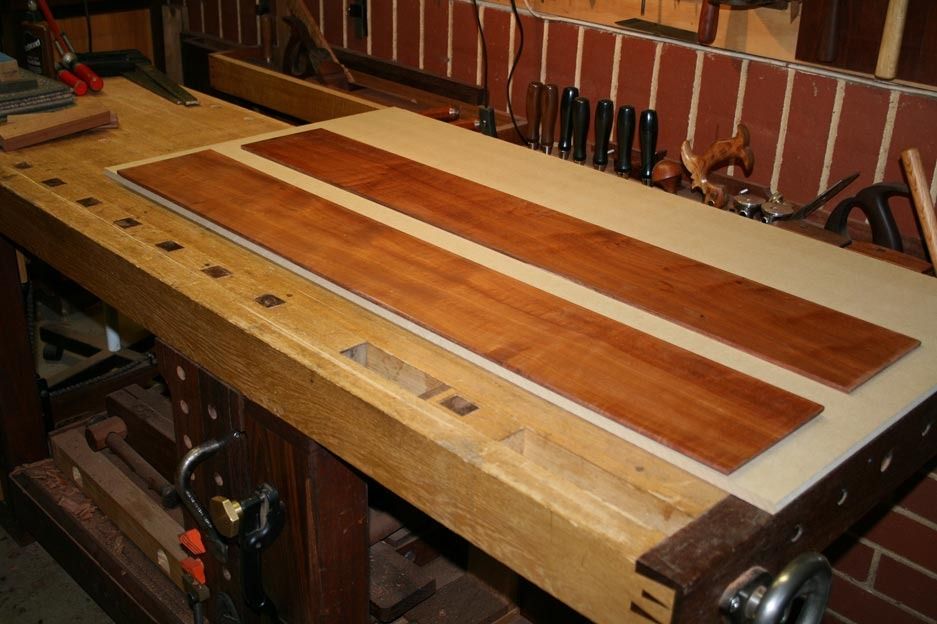

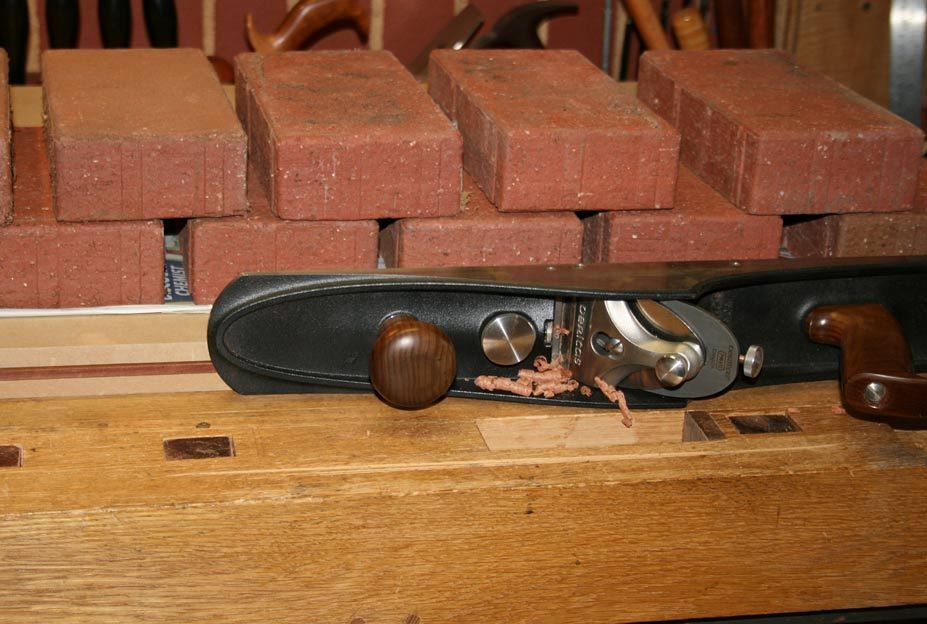
A second piece of MDF was layed on top, and then weighted down with bricks (to ensure the edge was flat and parallel to the bench top ..
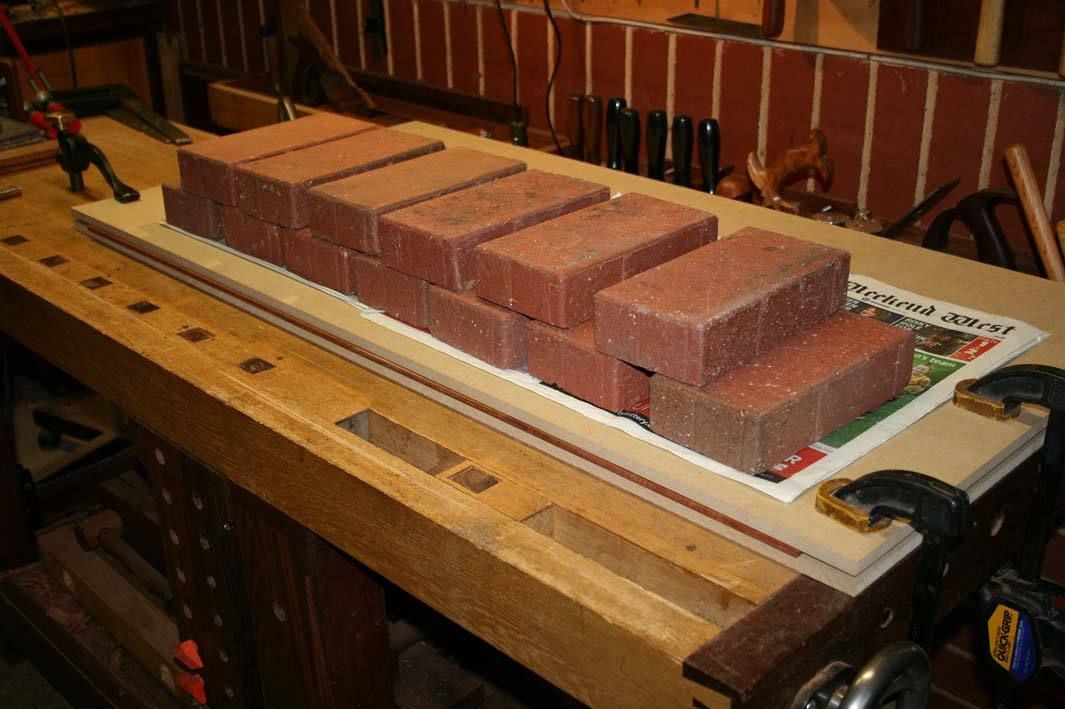

A jointer plane was now about to shoot the edge square ..
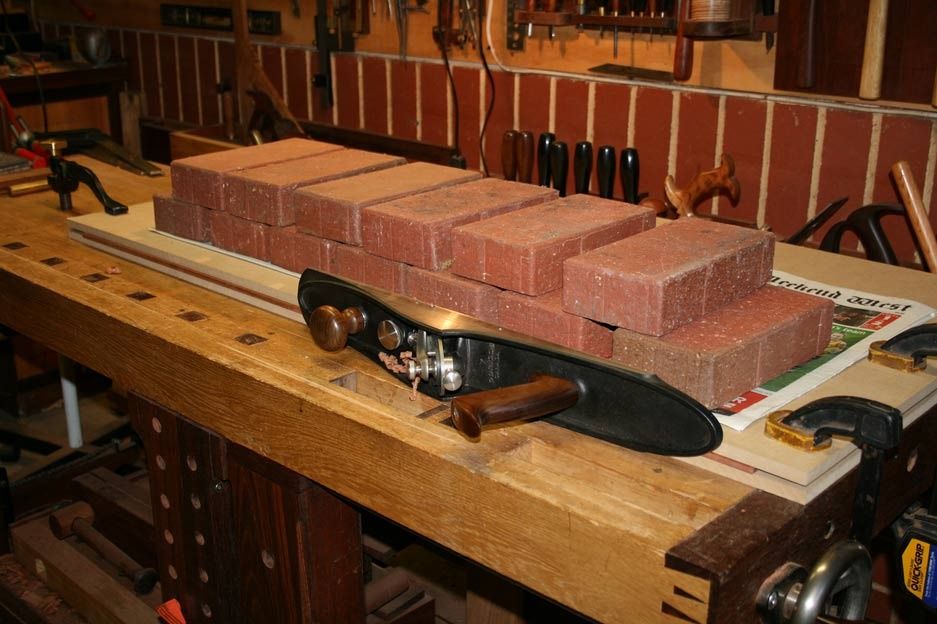


Generally I plane the centre to create a spring joint, but here I was reducing the existing gap by planing it flatter. In the end it was a very slight, almost imperceptible hollow ..
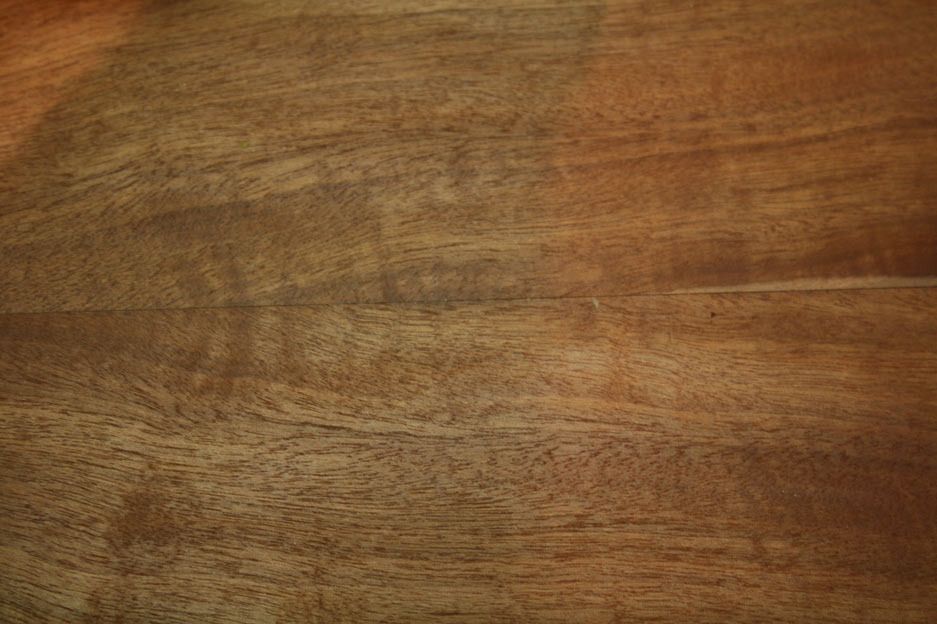

To glue up, the panel pieces were first work from the back side. Tape was stretched across and used to pull the sections together ..
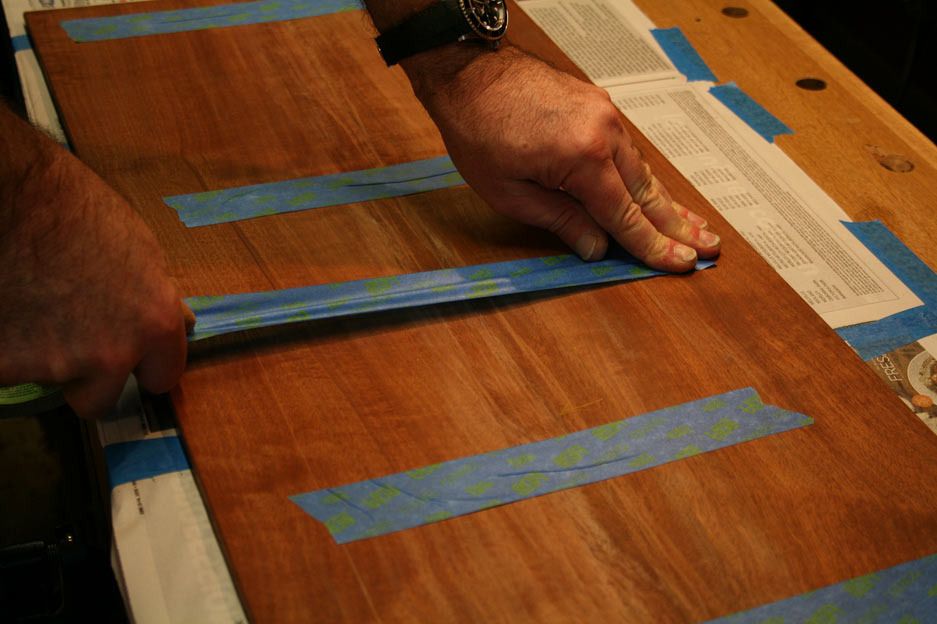

The full side was done, with the joint line reinforced to minimise glue running out ...


Reversing the panel, glue was spread down the join ..
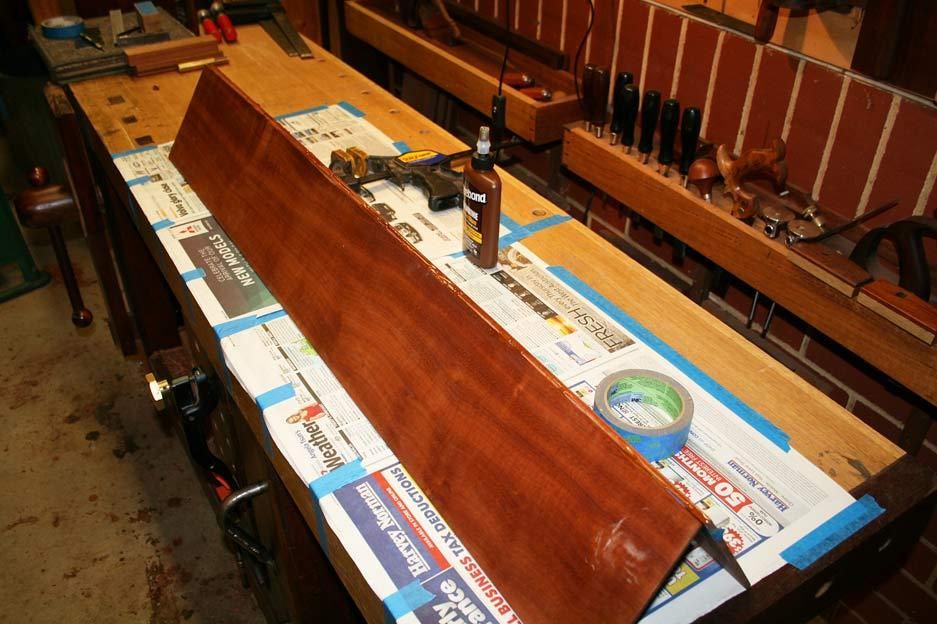

This could then be opened out, taped together (again with stretched tape), joins levelled with a plastic mallet, and lightly clamped together. Bricks were added to hold everything flat while the glue dried ...
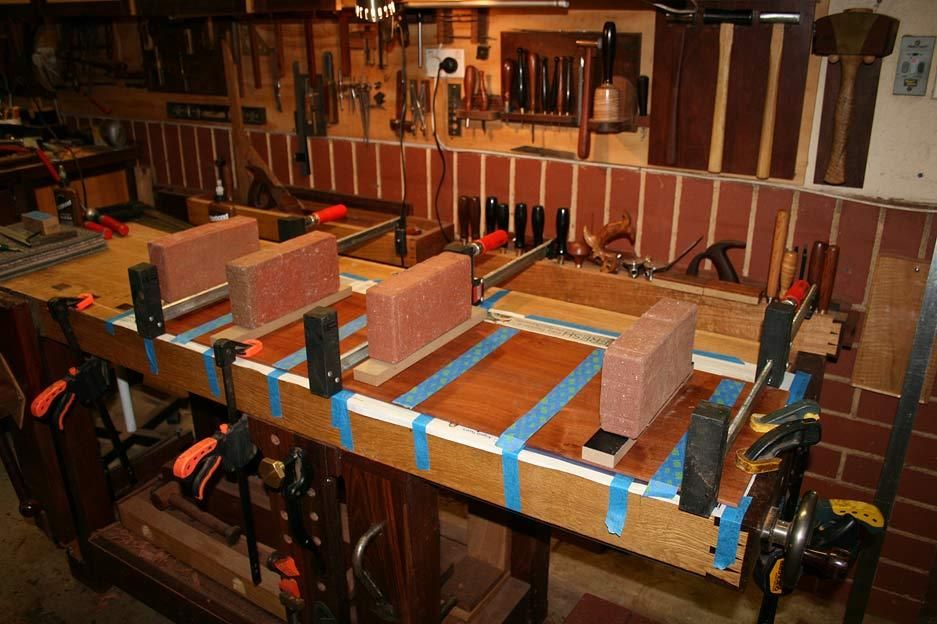

While this is drying, the solid panel received its reinforcing strip ...
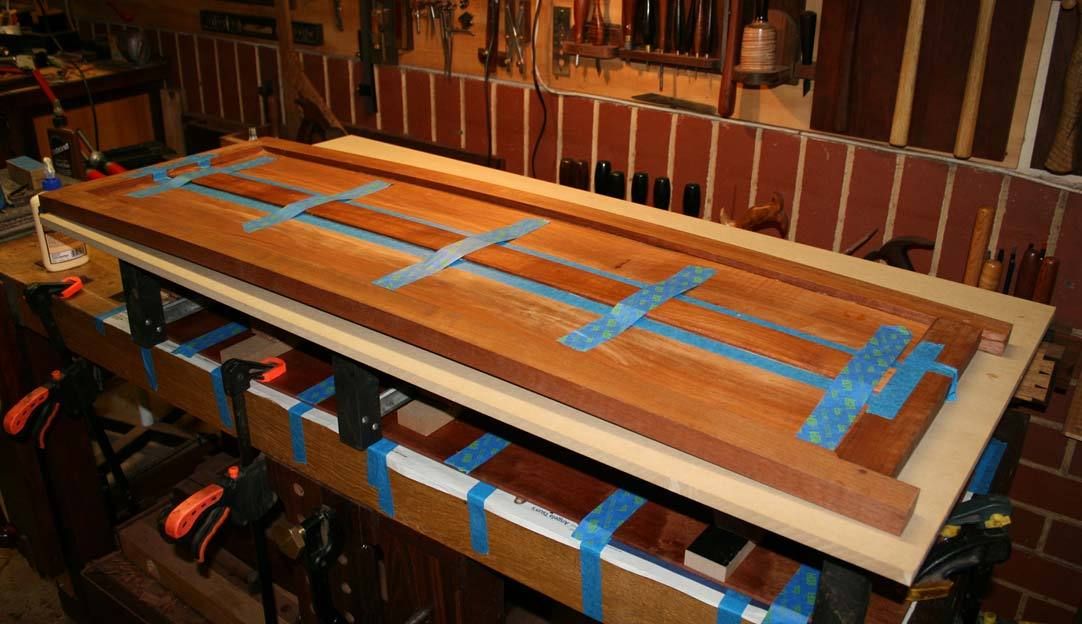

The program will be resumed shortly ...

Regards from Perth

Derek

Re: One step back (with the Lingerie Chest)

#2

Spring joints.....

roger lance

Derek.....I know that this technique is a hallowed, time-honored method.....but I've never bought into it.....the logic of it just doesn't completely compute for me. It's not a subject that I'm passionate about and prepared to argue against.....guys advocate it....fine.....have at it.....but....

You are making a great argument for using hide glue though.....I might have to give up my almost total reliance on the yellow stuff.

Cudos for showing that you sometimes have to back-up.....

Re: One step back (with the Lingerie Chest)

#3

Re: Spring joints.....

Derek Cohen (in Perth, Australia)

Thanks Roger.

When the panel split my first thought was that the glue was bad. However the M&T joints were really tight and strong. I was a little concerned that they would not come apart. More boiling water and heat ...

The point is that the failure in the panel could not be the glue. Plus the other panel was strong. A close look at the edges of the two sections revealed that they were almost dry - glue starved.

I think that there is always a danger of over-clamping edges regardless of whether they are spring-jointed or flat. However, here I think I ended up over tightening the clamps because they needed a touch more to close up.

The other issue is that there is not much room for error with a 1/4" thick panel - less glue area.

The Titebond Liquid Glue is convenient - it is used cold. It also has a long open time. There is a place for yellow glue, especially when you need something to dry faster and is not needed to come apart. I used Titebond Type II on the reinforcing strips.

Regards from Perth

Derek

Re: One step back (with the Lingerie Chest)

#4

Re: Spring joints..... ratio of stiffness

TomD

Kudos to you, once I am derailed I can take my good time getting back to it.

I didn't read how you made that joint because frankly I don`t want to have a clue. But the pictures looked like everything I would avoid doing. I do a fair bit of this work due to musical instruments, and panels as in your case.

Sprung joints are not appropriate to this work. I have no problem with the concept, though I think it mainly applies to situations where the shop wants to minimize clamp use, but it works in that case. I would say that sprung joints at the higher level of making furniture that doesn't split... at the ends, may be for real if one makes furniture for folks that move around to different climatic zones, though I wonder how common a concern that was in earlier days when techniques were being developed. My folks worried more about woodworm in the UK.

ANYWAY the point one has to get is that the low aspect ratio panels do not have the flexibility to overcome spring. I provided some number on this a few month's back, that nobody commented on, but basically it had to do with a comparison of gluing up different steps in a table top, and what the ratio of stiffness was if the sticks were 6 feet by 6 inches, or 2 feet by 6 inches. Or in the case of a guitar soundboard 20 inches by 8 inches, (softwood, and 1/8" inch thick). Speaking just of aspect ratio, forgetting species or actual dimensions, the smaller pieces, 2 feet by 6 inches, for a glue up of 2 feet by 12 inches is one third the aspect ratio of the table top pieces, or 2 vs 6. Based on it's planform alone the stiffness is 27 times higher. The planform stiffness of the guitar piece would be 64 times higher. So that provides some kind of bookends on what are reasonable aspect ratios, by the time you are down to 2 for a panel, you are getting crazy stiff, the actual dimensions are not really necessary to consider.

What all this means is that there comes a point where the aspect ratio is so low that the forces required to deform the sprung joint are unreasonable. Maybe a simpler way to look at it is to consider that some pieces that we glue together we can easily close by hand or light clamping pressure. But what you have there with the panels is pieces that are the width of joists under a grand piano. Of course such joists would be thicker, but that is not the point as those increases in thickness are directly proportional to the increases in stiffness, not third power functions.

What I did to deal with this was make a plane that was about 18 inches long and designed like the finest cutting finish plane. The idea was to minimize spring geometry for these guitar sized pieces. I got the idea from Krenov, but in the end making pieces that are straight is a lot simpler. I don't use any clamps to glue them together. I use the Overholtzer system where on piece is clamped or weighted to the bench and the other piece is rubbed against it. It is nothing more than a rubbed joint except for guitar type pieces you need an alignment surface.

Here is a picture of an ancient method of soundboard assembly, courtesy of Frets, and the defunct CF Fox factory. This is the more standard method and one notes that very minimal pressure is required, just whatever comes from the wedges under the ropes, but that the plates are held co-planer. You will note that the sticks under the plates are also inside the rope windings. On fancier versions of this rig the underside sticks are dadoed into a plywood box which makes the whole thing easier to work with, but the traditional method is more versatile, and only slightly more fiddly. It also does not require one to own some bar clamps, though these days you can get some decent ones at the dollar store.


Actually this jig has another layer of complexity which is the longitudinal strips to align the edges of the central joint between the wedges. I hadn't noticed that before. Normally all you actually need are a stick, a wede, and some string per station, but this is a picture from a small scale factory.

Re: One step back (with the Lingerie Chest)

#5

Clint Searl

Re: One step back (with the Lingerie Chest)

Clint Searl

Contemporary glues and properly dry stable wood invalidate the rationale for sprung joints.

Re: One step back (with the Lingerie Chest)

#6

Re: One step back (with the Lingerie Chest)

Sgian Dubh

Clint, I think people sometimes get the wrong end of stick regarding sprung joints, which I'm not saying is necessarily what you are doing. It's just convenient to reply your post.

I think Derek reasonably deduced he had 'oversprung' the failed joint. It's hard for me to tell from the photographs provided, but I take his word for it. Creating too great a hollow between the edges is a real cause of likely failure. The ideal spring is one that requires no more than light pressure to bring the two edges together at the centre. Light pressure I define as only that needed to hold something like a large old fashioned telephone directory spine upwards and pages down between a finger and thumb.

Whilst it's true that wide thick boards have more strength (beam theory) than narrow thin boards, the spring gap generally can be adjusted to account for this when executing this type of joint, whatever the width and/or thickness of the boards. In any case, whatever type of boards are being joined (wide and thicker, or narrow and thinner) I generally prefer a sprung joint at assembly time because I know if extra pressure is needed to pull the ends of a panel together to close a gap, these are likely places for failure later when the item is in service. I prefer pulling up the centre a tiny bit tighter, if required, than sucking up the ends tight to close gaps. Slainte.

Re: One step back (with the Lingerie Chest)

#7

Re: One step back (with the Lingerie Chest)

Warren in Lancaster, PA

Contemporary glues and properly dry stable wood invalidate the rationale for sprung joints.

It might be just the opposite. Traditional joints with hide glue were rubbed a bit and left, often without any clamping. I would be interested in seeing references to a hollow joint from a hand plane before 1880.

I think once you have the joint nice and flat it is just extra work to hollow it out.

Re: One step back (with the Lingerie Chest)

#8

Clint Searl

Re: One step back (with the Lingerie Chest)

Clint Searl

Richard, maybe I've just been lucky, but I attempt to joint so that there's no spring in the dry fit, and have never experienced a failure...middle or ends. So, maybe the sprung joint is just an artifact of past technique that's superfluous, potentially leading to what Derek's dealing with.

Re: One step back (with the Lingerie Chest)

#9

To spring or not to spring, that is the ..

Derek Cohen (in Perth, Australia)

Hi Tom, Clint and Richard

Tom, now you tell me not to spring the joint!

It strikes me that one is damned whether one does or does not.

Springing a joint aids in tight joins at the ends. Not springing a joint (leaving them flat) may leave the centre vulnerable to rocking if the ends dry further. The advantage of flat sides is that one may create a rub joint.

On the other hand, a well made joint either way works well.

It did not occur to me that the thin panels should affect the choice of joint. I am not sure how the spring joint ended up as large as it did, since I spotted this immediately when later laying the boards together. As Richard noted, there should be a minimal amount to close. Over-enthusiasm with clamps is probably more of an issue with such thin boards owing to their small surface area. I was not aware how much pressure they were exerting at the time. I've not had to create such thin panels before. Not a timely learning experience!

Fortunately, I got the gap right on the other panel. It is strong. It now also has the added strength from the reinforcement on the inside, which removes the hollow ring from a thin panel. This will be reduced further when additional bracing for the drawer dividers go in.

Regards from Perth

Derek

Re: One step back (with the Lingerie Chest)

#10

Re: One step back (with the Lingerie Chest)

TomD

"I think once you have the joint nice and flat it is just extra work to hollow it out."

You are probably right about that, but the spring is the step before the flatening so the reverse is how I prefer to think about it. Planes as sold do not make things straight, they make them hollow. I can hollow an edge blindfolded within thou, but making it straight requires a bit more skill, and a plane is not the best tool.

I do wonder whether the whole idea of the sprung joint arose from a misinterpretation of the fact that hollowing is what planes do, and that hollowing is a shortcut. Then someone invented a rationale for it that never really makes much sense. But like a lot of these things it is now impossible to dispense with. I have never seen a study that would indicate that sprung joints work/don't work relative to weather, though they clearly can reduce clamps required for some glue-ups.

Re: One step back (with the Lingerie Chest)

#11

Re: One step back (with the Lingerie Chest)

TomD

"Contemporary glues and properly dry stable wood invalidate the rationale for sprung joints."

Hide glue, as the glue from the past is much stronger than most modern glues as far as mechanical failure or creep is concerned. It can fail due to bacteria, wet, alcohol, heat, etc... But those are not the failure modes that a sprung joint is meant to deal with. So I don't think modern glues are anything to crow about in that respect.

Dry stable wood brings two things to mind. If you live in a well climate controlled home, and don't move out of the zone, you don't have much to worry about. If however, one simply means that well dried wood will solve the problem in the modern world, that is less likely. There are challenges of climate (euro is somewhat temperate compared to some places people live). Central heating makes matters worse, and mobility means you might have built your furniture in the far north but retired to Arizona. I think the issue is not easier today, but the idea may have been bogus all along.

Re: One step back (with the Lingerie Chest)

#12

Re: One step back (with the Lingerie Chest)

TomD

"Whilst it's true that wide thick boards have more strength (beam theory) than narrow thin boards"

I tend to think thick and thin, or narrow and wide. Aspect ratio describes the ratio of length to width, which is very important when comparing the effort required to deflect a board. Thick/thin is not really an issue, as it is mostly self adjusting.

Stiffness not strength is the issue, and the difference is that strength is a second order, while stiffness is a 3rd order issue, this is why the problem gets so much worse, so fast with changes in aspect ratio.

"the spring gap generally can be adjusted to account for this when executing this type of joint"

That is probably true with every day examples in furniture, one exception being bookmatched type panels where the aspect ratio can really mess up your life, and soundboards are another one. When you get reasonable examples where one thing is 64 times stiffer than another, it can start to be the case the for all intents and purposes it is smarter to think of the piece as not bendable, and to look at getting the straightness right, rather than the spring, as far as ease of execution and results are concerned.

Sprung joints are not evenly compressed, and that is a problem when the loads required to close a joint spike. Very high loads will occur where the ends of the boards meet, if the arch between them was carefully formed.

Re: One step back (with the Lingerie Chest)

#13

Re: One step back (with the Lingerie Chest)

Sgian Dubh

You are quite right Tom to point out my use of the wrong word, i.e., strength rather than stiffness. I'm not quite sure why I substituted strength for stiffness - brain burp I suspect. Anyway, I take your points regarding the rest of what you say, although I do argue the extra pressure required to close sprung joints at the middle compared to the ends should be slight. How 'slight' I can't quantify, but if I refer back to my pinched together finger and thumb force required to hold a book analogy, I imagine 'slight' to be difficult to measure without some sort of sophisticated stress/strain measuring equipment. Slainte.

Re: One step back (with the Lingerie Chest)

#14

Making a joint

Warren in Lancaster, PA


"I think once you have the joint nice and flat it is just extra work to hollow it out."

You are probably right about that, but the spring is the step before the flatening so the reverse is how I prefer to think about it. Planes as sold do not make things straight, they make them hollow. I can hollow an edge blindfolded within thou, but making it straight requires a bit more skill, and a plane is not the best tool.

Hollowing the joint before flattening is another time waster. If it is helpful for a beginner, fine, but it is not necessary. I would be interested in seeing documentation of hollowing technique before 1850.

As to whether planes naturally hollow, I am not sure what you are talking about. A few years ago a fellow on this forum suggested just the opposite: that a flat edge would become rounded as more strokes were taken. So I flattened an edge and then took 30 shavings off the edge and it was still flat.

Re: One step back (with the Lingerie Chest)

#15

Re: One step back (with the Lingerie Chest)

Sgian Dubh

Clint, if your technique consistently yields success, it can't be argued with. Still, I prefer the sprung joint to ensure the two ends are automatically already in intimate contact at glue-up time. I have consistently found over the years edges that are slightly convex at glue-up time, or ends requiring sucking up tight for whatever reason to close gaps, tend to fail, opening at the ends first, and sometimes leading to total joint failure, particularly in the case of the basic unreinforced edge joint. My analogy, for recommending the sprung joint has always been to compare the end result to the tab on a zipper. If the zipper tab is locked down, the zipper stays shut, but if it's unlocked the zipper gradually opens from the 'unlocked' end. Perhaps not a perfect analogy, but it's always sufficed to get the concept across. Slainte.

Re: One step back (with the Lingerie Chest)

#16

Clint Searl

Re: One step back (with the Lingerie Chest)

Clint Searl

And I have found consistently over the years that a fully mated dry fit joint will not fail. Plus it can withstand some modest glue starvation that would challenge a sprung joint, as evidenced in this discussion. Woodworking fashions and affectations come and go; I just think it's time for this one to go, but to each his own.

Re: One step back (with the Lingerie Chest)

#17

Stiffness is Stiffness

Chris

Hi Tom,

I think I don't disagree with what you said.

It's just that Hook's law was discovered in the 17th century, one would consider the stiffness a constant. What you are describing is the change of area moment of inertia (for this specific geometry that would be resistance to bending, if you will) that changes with the geometry of your piece of wood.

So just change "stiffness" with "area moment of inertia" or ("second moment of area", or "moment of inertia of plane area" or "second area moment") we are all good...semantics.

TomD wrote:

[...]

Based on it's planform alone the stiffness is 27 times higher. The planform stiffness of the guitar piece would be 64 times higher.

[...]

Re: One step back (with the Lingerie Chest)

#18

Re: One step back (with the Lingerie Chest)

Sgian Dubh

Clint, I understand your points, and I'm not going to try and persuade you to change a technique you've found to be successful. But a sprung joint shouldn't present assembly difficulties or lead to failure either. What Derek described was seemingly the result of an 'over-sprung' joint if you follow my drift. I have seen such failures before. The key has always, for me, been to get the spring just right which, no doubt, I'll continue to aim for in my work. Slainte.

Re: One step back (with the Lingerie Chest)

#19

Re: Fully Mated

Hank Knight

Clint said, "I have found consistently over the years that a fully mated dry fit joint will not fail."

If the joint is fully mated along its length, it will almost certainly be successful, whether it is sprung or not and regardless of the kind of glue used (assuming an acceptable wood glue). I dry check joints by stacking one mating edge on top of the other and checking to see that the top board sits solidly on the bottom one, with no rocking or spinning and there is no light visible through the mated seam. This is not as easy to achieve as one might think, especially for an impatient person. It usually takes me a number of passes with my jointer plane to get a satisfactory dry fit, and I find that it is really difficult to test a sprung joint to see if it is fully mated in the center. Consequently, I shoot for a flat, straight joint that is fully mated along its length with no pressure, slight or otherwise, required to force it together. I have never had a joint fail when it was prepared in this manner. I understand the rationale behind sprung joints; but, like Clint, I do not believe springing the joint adds anything if the wood is dry and properly prepared as I described above. In fact, for me, springing the joint adds to the difficulty of preparing the mating surfaces.

My $.02.

Hank

Re: One step back (with the Lingerie Chest)

#20

Clint Searl

Re: One step back (with the Lingerie Chest)

Clint Searl

While I continue to strive for the total absence of spring.

Peace

Re: One step back (with the Lingerie Chest)

#21

Clint Searl

$.02 more

Clint Searl

For long joints, for which I don't trust the saw, jointer, or my shooting skill to make "perfect", I rig a jig that separates the boards at slightly less than the width of a straight 1/4 or 3/8 router bit, then run the router fenced on one board so that it nips a bit from both boards simultaneously. Tiny wiggles are usually cancelled out with quite good results.

Re: One step back (with the Lingerie Chest)

#22

Re: Stiffness is Stiffness

TomD

Thanks for the correct terminology, and some new concepts to learn. I am just trying to allow people to see the kind of shapes that are for all intents unbendable. For people who want to have real numbers there are online calculators they can just enter their dimensions in. But for most of us by the time a certain easily identified geometry has been reached you might find closing gaps a poor bargain.

Re: One step back (with the Lingerie Chest)

#23

Re: Making a joint

TomD

It's like a santa cookie cutter. The one thing it makes is a cookie shaped like a santa, one hopes. That is the workmanship of certainty. If could be used to cut out a pizza sized piece of dough with an interestingly worked edge. That is the workmanship of risk. Relative to planes that we use to make things straight and flat, the certainty is that the plane will cut whatever transverse profile is there, and that it will cut a longi hollow. You can put whatever English you want on it, though why one would bother when it does exactly what it is supposed to is another issue.

I have no idea who you are quoting but it is a well understood possibility that edges can get rounded accidentally. I think that is so called beginner workmanship, though before a thousand blogs and a few thousand online videos it was certainly not limited to beginners. It relates to a tendency for the off surface hand to tip the plane in it's direction, though I would call that an end, rather than an edge.

The key point about your example is that you started with an already flat edge which you might be inclined to regard as an extra step yourself as in "flattening the joint before flattening is another time waster". One question that arises is how do you know an edge is flat/planer? When hollowing one knows because the plane stops cutting. So the planing is the same process as the measuring, and the springing. Getting three steps in one may be slow for some, but I'll take it. I think David Charlesworth refers to this kind of deal as a stop cut. I use the terms hollowing, and backing out (for the step from a given hollow to flat)

Re: One step back (with the Lingerie Chest)

#24

Re: always spring

David Charlesworth

I have always used spring in my edge joints, as I was taught, and have never had failure.

Workshops here tend to be damper than many houses, so the logic seems plausible.

End grain loses moisture quickly, which would stress the ends of a joint.

David

Re: One step back (with the Lingerie Chest)

#25

Some data on the topic

Bill Tindall, E.Tn.

A typically made spring joint exerts a piddly amount of additional force to the ends of a panel joint relative to the strength of the glue at this point, if the surfaces are perfectly prepared for gluing(no gaps).

End grain sealed with finish (varnish) (like a table top) looses moisture little different from the rest of the structure according to measurements I have made. The rate limiting step for moisture loss is transport across the poorly conducting finish layer.

That said, a gapy joint at a panel end may be weak enough to fail where as the aid of the spring planing would have lessened or eliminated the gap and avoided failure.

It is a fact that reliable joints can be prepared from well machined edges that are flat and unsprung. Most all joints are in fact prepared this way. Modest springing doesn't hurt and apparently excessive springing is just another word for an improperly prepared edge.

The bottom line is that we all learn some technique for preparing edge joints that work. For the new learners, pick one that suits you and learn to do it flawlessly.