New WoodChat!
Home Articles Forums Gallery Marketplace Videos

WoodCentral Forums

Knowledge You Can Build On — Est. 1998

Nearly 100 Exotic Wood Species, Direct-Imported Since 1972. Shop Slabs & Turning Stock.

The Chair - how would you ...

Posts

The Chair - how would you ...

#1

The Chair - how would you ...

Derek Cohen (in Perth, Australia)

The Chair is nearly at a point where I can begin to think of a glue up. Well, that's really getting a little ahead of myself. What I mean to say is that the stretchers are nearly done. Basically, there is one significant (through mortice) and one minor task (rounding the sides) to complete, and then it is ready.

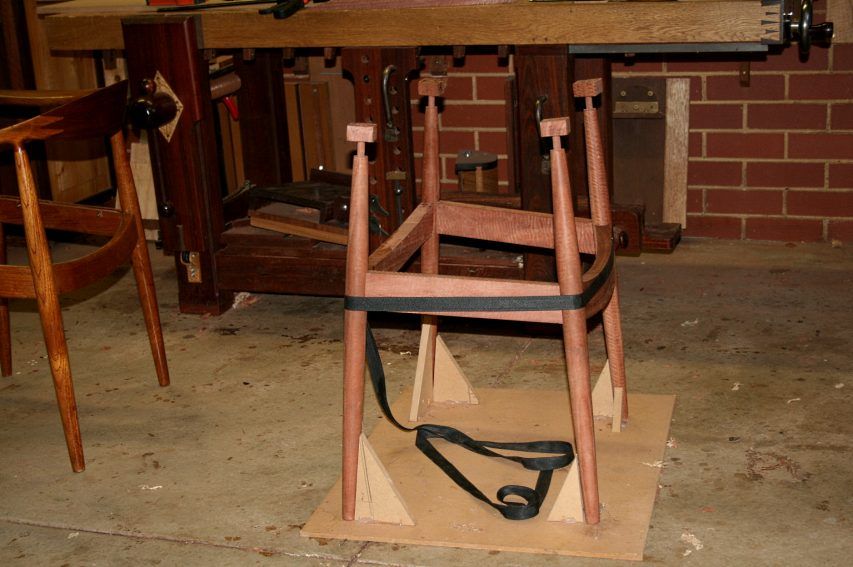
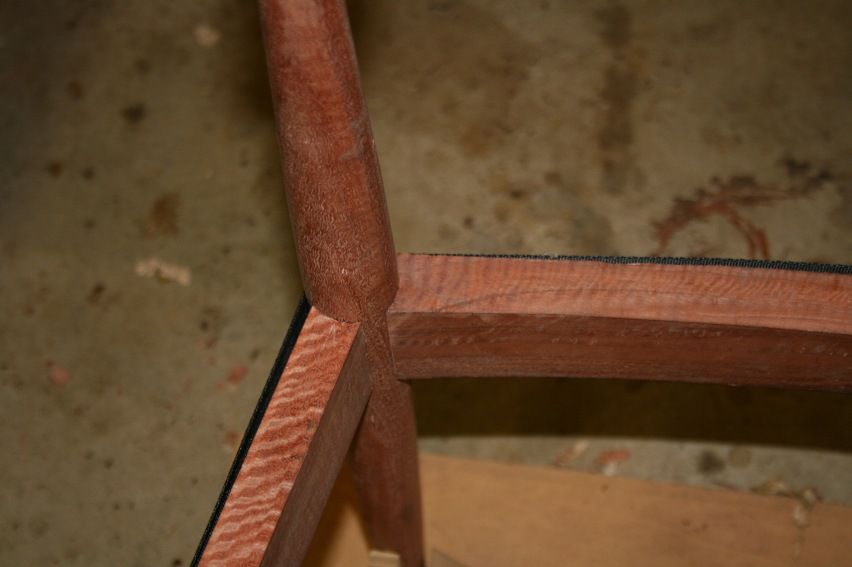
This is where we are ...
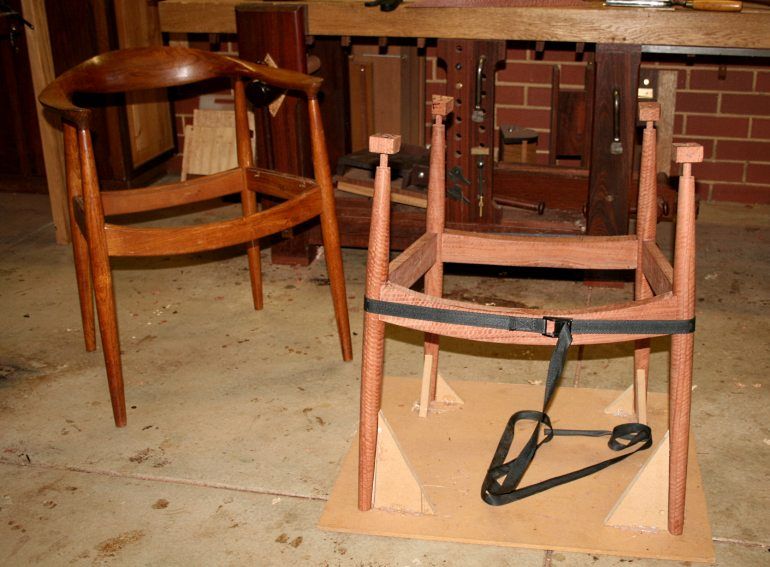


All the coped joints have been fine tuned ..
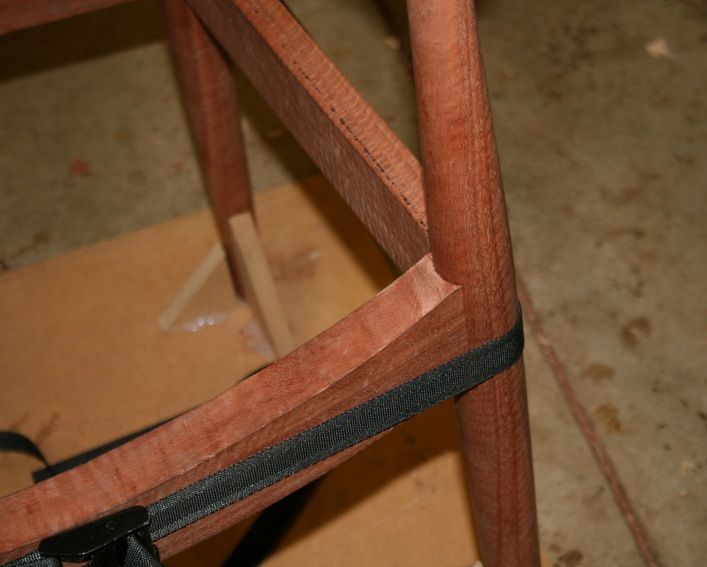


Before the side edges are rounded, a through mortice (I'm not sure what else to call it) needs to be created in each of the stretchers for the Danish Cord seat. The through mortice runs nearly the full length of the stretcher, beginning and ending 30mm ( 1 1/4") from the ends. It will be 3mm (1/8") wide and through the middle of each stretcher.

This is what it will look like ...
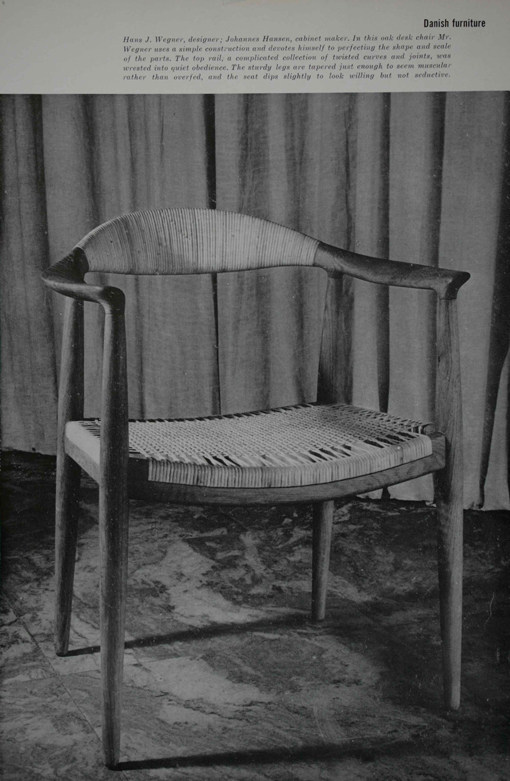

Now here is where I could do with your thoughts: how would you create this through mortice with hand tools? Power tool of choice would be a router. That would be an easy process.

My first thought was to saw it out with a coping saw and then clean up the edges with a rasp and file. I practiced on a scrap and decided that this would require too much cleaning up. The saw blade tended to wander with the grain, and the through mortice was too narrow to saw two parallel kerfs.

The other method is to use a mortice chisel. Chisel half-way from each side of the stretcher.

Keep in mind that the front and rear stretchers are compound curves. The side stretchers are straight.

It should be straight forward: score the sides, and chop out the waste. Well, scoring the sides is not straight forward for the compound curves. To begin, a cutting gauge needs to have the appropriate fence to follow a curve. OK, so I can do that.

I practiced on scrap ...
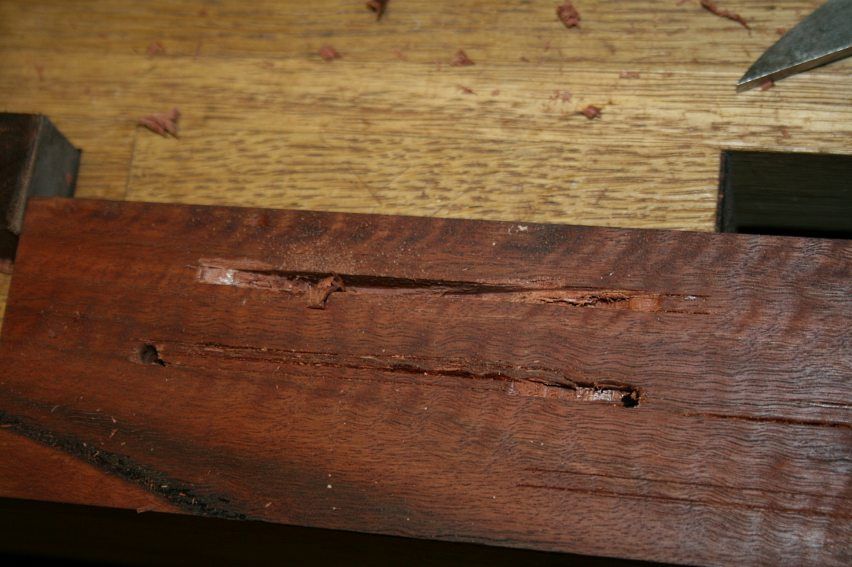

In this wood a single blade cutting gauge was not reliable. Even with initial light passes, the blade wandered with the grain enough that the mortice was in danger of wandering off course or widening. A mortice gauge would be better, but I did not feel like making one with the correct fence specifically for this project.

It occurred to me I could use the Veritas inlay cutter for the Veritas router plane. This has a fence that will follow a curve.
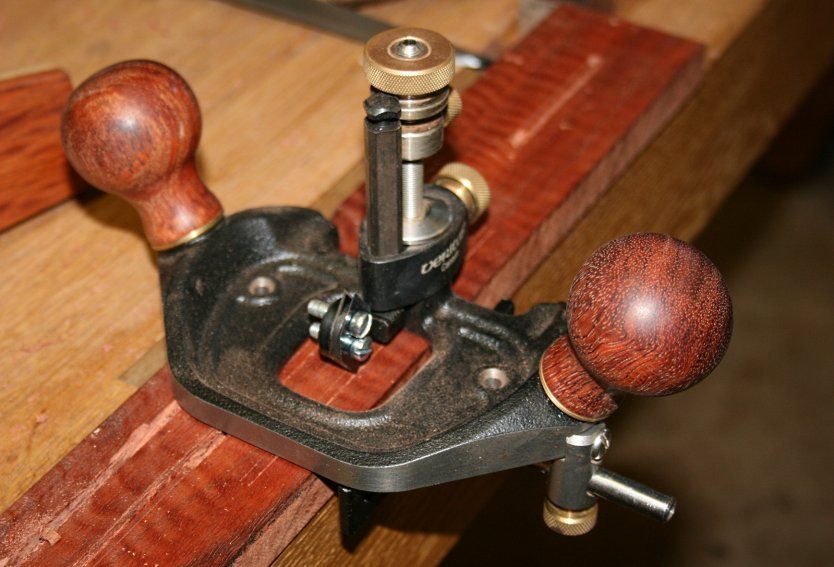

This has twin blades to score a parallel line for inlay ...
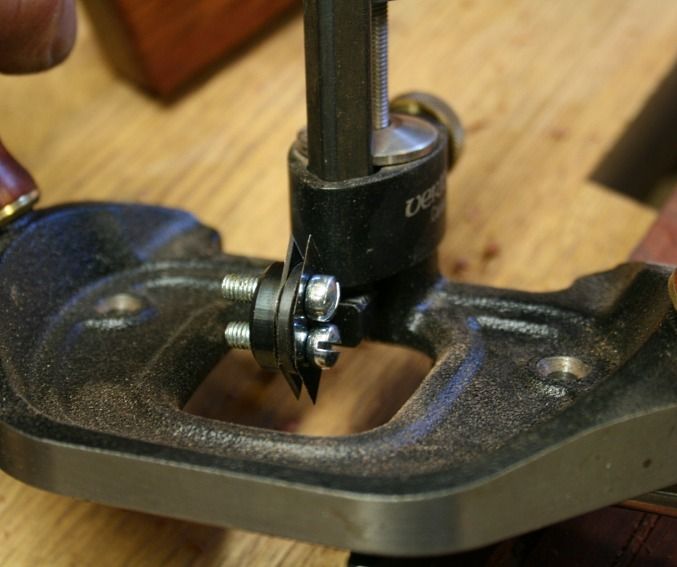

This is the line created (lower example) ..
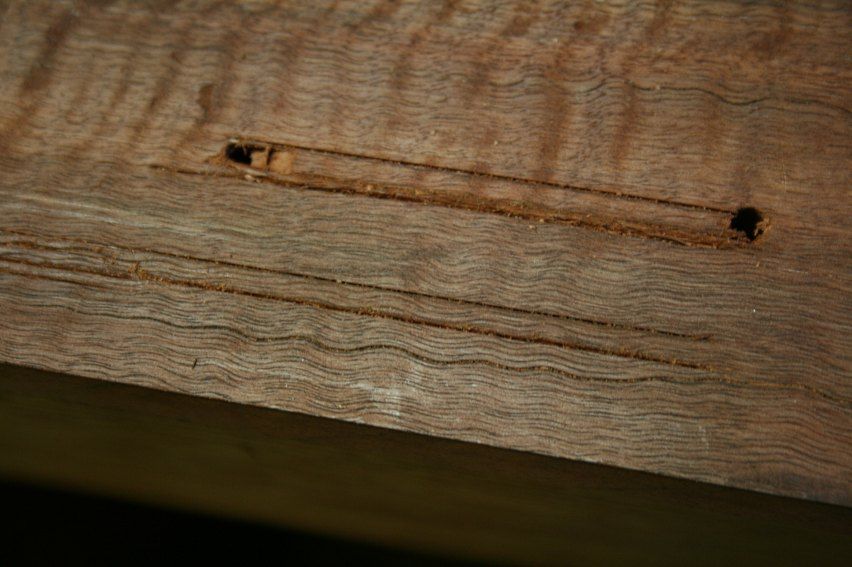

Chopping out the waste with a 1/8" mortice chisel was OK ....
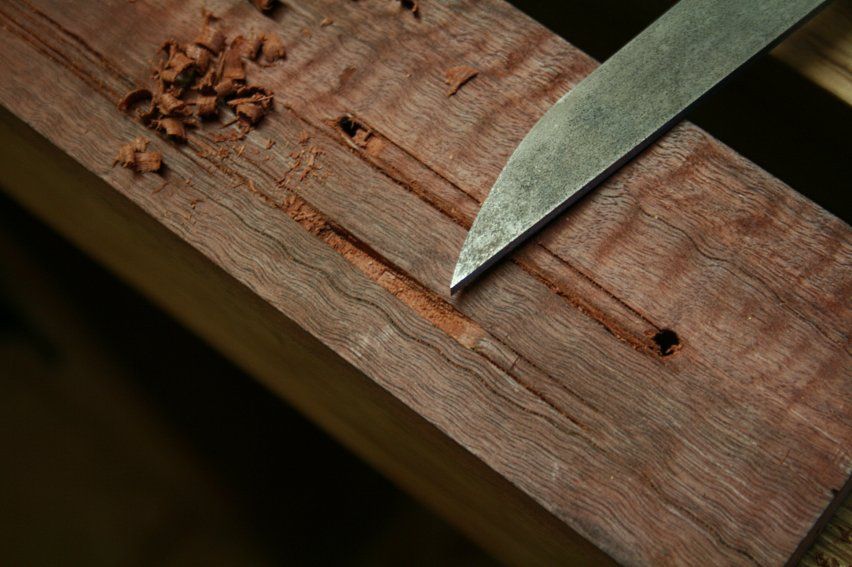

.... however, I can see that this will take time to do.

Anyone have another idea?

Regards from Perth

Derek

Re: The Chair - how would you ...

#2

Re: The Chair - how would you ...

Bill Houghton, Sebastopol, CA

This might be a case where the drill-and-chisel method of mortising makes sense. Were I in your shoes, I'd think about a dowel guide to make for quick, accurate drilling.

Re: The Chair - how would you ...

#3

I suppose...

Rob Lee

... a CO2 laser is out of the question??? :D

Seriously - How about sawing it? You could make something that looks like a bagel knife (blade with a fixed width fence) - or even go the stairsaw route; small mortises at each end - and saw out the middle.....register against a batten or fence...

Cheers -

Rob

Re: The Chair - how would you ...

#4

Re: The Chair - how would you ...

Hank Knight

Re define "hand tool" to include tailed implements that are held in and operated by hand, rather than fixed in a floor-standing base. I learned this technique from Bill Clinton.

Re: The Chair - how would you ...

#5

dowel guide

Derek Cohen (in Perth, Australia)

Hi Bill

I like the idea of a dowel guide, followed by a chisel. I have a Stanley (#59 ??) that is perfect for clamping across a stretcher. I would likely have to make a guide for 1/8" as I doubt anyone dowels this small ... perhaps.

Good idea.

Regards from Perth

Derek

Re: The Chair - how would you ...

#6

Re: dowel guide

Bill Houghton, Sebastopol, CA

I don't know how comprehensive your hardware stores (is the British term ironmonger?) are, but for a brief use like this, you could probably find an unhardened bushing. If not a steel bushing, look for the aluminum bushings used to cap the ends of steel cable. One of these would probably be worn out by the end of the job, but they're not expensive.

Re: The Chair - how would you ...

#7

A bagel knife!

Derek Cohen (in Perth, Australia)

Hi Rob

You must be writing this over breakfast! :)

A fence guide would work for the side (straight) stretchers, but not for the compound curves. In fact, these would defeat a power router, so no free bagel there as well.

One of the reasons I gave up on the coping saw idea was that the kerf created was too narrow to widen with rasps or files and there was too little width (1/8") to add a parallel kerf.

Having said all this, sawing is probably the correct technique. I can imagine a more competent woodworker slowly and carefully sawing out this mortice in the same manner as a piercing.

Regards from Perth

Derek

Re: The Chair - how would you ...

#8

Re: A bagel knife!

Rob Lee

Hi Derek -

Yeah - the compound curves are an issue. You may want to look at quirk routers and coachmakers tools for that one...

Accurate parallel sawing is straighforward if you fix a blade to a block such that it is parallel to a work surface - move either the workpiece while the saw is fixed(or vice versa) - and the work surface is the common reference. For the compound piece, i'd glue some sacrificial blocking onto it to make a temporary reference face.... since you're going to be reshaping anyway....

It's all so easy from 11,312 miles away..... :) (especially when I've never done that myself....)

Cheers -

Rob

Re: The Chair - how would you ...

#9

Jack Guzman from Maine

Float

Jack Guzman from Maine

Derek,

How about making a float as wide as your mortise and curved(concave) in profile?Then,using a guide clamped to the stretcher,saw it out.---Jack

Re: The Chair - how would you ...

#10

Re: The Chair - how would you ...

Paul in NJ

Hi Derek,

This is a modern chair that was always built and designed for power tools with the final refinement with handtools and sandpaper. I think it would be appropriate to use a jig guided router.

My thoughts doing this with hand tools follows:

Make a cutter for a scratch stock or beader that scratches a 1/8" wide slot with rounded shoulders. Drill a through hole at each end of the proposed slot and then use the beader or scratch stock on both sides of the rail to define the slot.

Use a mortise chisel to lengthen the slot far enough to use a key hole or compass saw to finish the slot. You can buy one new in the building supply stores where they sell dry wall (plaster board). They are thick coarse toothed saws with a lot of set. You might have to give the saw a quick pass with a file to sharpen the teeth. This will give you a fairly thick kerf. I would finish up with an edge float I made from 1/8" stock. You could probably also use a file instead of the float.

Regards,

Paul Dzioba

Re: The Chair - how would you ...

#11

Re: The Chair - how would you ...

William Duffield

You might use one of these Preston quirk routers, but one with two curved fences might work even better. Tony Murland sells the blades separately if you wanted to build your own holder and fences to match the curve of the seat rail.


http://www.antiquetools.co.uk/toolbox.php?category=Latest%20tools#2412

He happens to have one of the quirk routers for sale right now, order # 393.

You can ignore the brass router. It just happened to be in the pic.

Here's a picture of the business ends of three of the blades, in different widths. When this picture was taken, the widest blade had not been sharpened, and the nickers weren't properly shaped.

Re: The Chair - how would you ...

#12

Re: The Chair - how would you ...

Wiley Horne--So. Calif.

Hi Derek and all,

Great progress!

I agree to work from both sides. After scoring the channel, I would drill the ends. Then would alternate a Japanese panel saw (against a batten) with the mortise chisel. Saw down a quarter inch, then chop out waste; then saw another 1/4 inch. etc. Repeat other side.

Looks beautiful!!

Wiley

Re: The Chair - how would you ...

#13

Re: The Chair - how would you ...

Tom

If I was doing this with hand tools, I would want to at least try a bowsaw with a 1/4"/6mm rip blade. If I couldn't control it, I would stay well within the lines and either float, rout, or chisel the remainder. I don't consider the fact that you have compound curves a problem for aligning a fence. There are compound curves on guitars when we rip the perfling groove with a fenced cutter. It might not be too difficult to jig something up.

Whatever the excuse for not doing the joints in the square, to quote Mrs Doyle "maybe I like the misery", you certainly could have had the shape you needed for a fence at some earlier stage and done it then. First run through it probably made sense to leave this till later since why put all that work into it if the joints ended up on the floor. But as it is now clear you had total mastery, you could select your routine differently if it suited you. That would be a fair reason to actually rout it with power at this point, though I know you won't.

With easy cutting wood, I am always surprised how well Roy makes slots with a freehand chisel. His chops have fallen off over the years, though maybe he is back with all the teaching, he did drop off in some areas, but his slotting was always great, however, this wood is probably nasty.

Mrs Doyle on taking the high road, 6:40:

http://www.youtube.com/watch?v=ZmkeAlut7KI

Re: The Chair - how would you ...

#14

Re: The Chair - how would you ...

Derek Cohen (in Perth, Australia)

Hi Paul

With this Jarrah, which is brittle and vulnerable to break at edges, scraping would get me into trouble.

However I am liking the idea of sawing more and more - just from within the safety of a mortice, with a defined sidewall to act act a guide for a chisel.

Regards from Perth

Derek

Re: The Chair - how would you ...

#15

Re: The Chair - how would you ...

Derek Cohen (in Perth, Australia)

You might use one of these Preston quirk routers, but one with two curved fences might work even better. ....

You can ignore the brass router. It just happened to be in the pic.

Hi William

I was about to write "no tool purchases - use what I have", but that would be a lie. This morning I "visited" my local bordello (Carba-tec) for a fresh supply of West Systems epoxy, when I could not resist the miniature Veritas router plane. This has a 1/8" blade. I rationalised that it can be used on the inside curve, where a larger router plane cannot ... :D


OK, it was so cute ... and a real tool.

Regards from Perth

Derek

Re: The Chair - how would you ...

#16

Re: The Chair - how would you ...

Derek Cohen (in Perth, Australia)

Hi Wiley

Thanks for the kind words.

Now, may I please borrow your Japanese panel saw? :b Teasing aside, I am interested in how you would use it. Any photos that you could upload?
Regards from Perth

Derek

Re: The Chair - how would you ...

#17

Slots!

Derek Cohen (in Perth, Australia)

Hi Tom

Thanks for the link. I am not sure if I enjoy Father Ted - it all seems so hard in his world - which is what this is all about. I do not identify with the misery, but I do like a challenge. What we have here is my inexperience to plan and execute tasks ahead of time, which could have made this slot making (much better term that through mortice) a great deal easier. At any rate, the occasional dilemma offers an opportunity to get the forum to put on their thinking caps.

After all the input I now do have a plan. I just need to be more patient.

Regards from Perth

Derek

Re: The Chair - how would you ...

#18

Re: The Chair - how would you ...

William Duffield

I have one of those, and thanks to your tip on modifying the cutter shaft of the small router plane, I now have one of those as well. But wait, there's more: I now also have a replacement small router plane blade to which I will make the same modification, to fit the ANDY router in the picture. And that brings my total router population up to eight.

Re: The Chair - how would you ...

#19

Re: Slots!

Tom

Ted is an inside joke around he, which doesn, t help on WC, my kids have a Ted quote for everything. Just the other day they got to use the near and far joke in math class, and nobody got it. Not far from the tree...

You are making inspirational progress on the chsir. I do think there is a big difference between how I set up a one off task, and repeats, as far as locking in a result as well as all the other stuff related to production.

Re: The Chair - how would you ...

#20

Japanese panel saw (azebiki)

Wiley Horne--So. Calif.

Hi Derek,

I'll try to get photos taken, but really it's so simple I think I can describe. Here is the type of saw I'm talking about, an azebiki:

http://www.hidatool.com/woodworking/saws-for-woodworking/panel-saws-and-keyhole-saws/fukagawa-azebiki-panel-saw-80mm-3-12

I bought mine from a particular maker....just because. Didn't know if I would ever use them, or for what. Recently, I have grown into great respect for this type of saw. It will do things that nothing else will (very well). My project involves quite a bit of sawing 1/8" to 3/16" veneer into strips. The big advantage of the handsaw over a bandsaw is that the handsaw (azebiki) won't rag the edges. At all. The wood I'm using is hard and has a tendency to splinter.

Anyway, you can use a strip of plywood as a fence. Clamp it along your mark, and get a very accurate saw cut, requiring only a couple or three passes with a fine-set plane to have a joinable edge. You can just hold the saw against the straight edge with your off-hand, and pull it along the fence. It's quite amazing--the rip side will pull up long planed shavings. The saw is curved in a way that you can keep feeding fresh teeth into the cut, and you can get down a quarter inch pretty fast. Or sometimes it's best to tilt the saw up and use only the first coupla three teeth as a plane.

As it applies to your work....Actually, you don't necessarily need a batten, which would be a pain for you to make on the front and back stretchers, unless you have a physical pattern already in hand. Instead, go the way you started out, but use the saw to speed things up. That is, score the cut with the LV hand router attachment. Dig out a starting channel with the mortise chisel, or a 1/8" bit in a second router (you'd want to keep the setup of the scoring attachment). Once you've got the shoulders of the cut down about 1/8" you could use the saw freehand to speed things up, coming in behind the scoring attachment to deepen the score lines. The shoulders you've made would fence the saw. Chop along the channel with the chisel to make rubble in the channel. Then come in behind with the router + 1/8" bit to dig out the waste. Repeat.

Using so many words makes this sound slow. But it's actually not. The work can go fast. What you have to watch for is to be deliberate with the unfenced saw, so it doesn't climb out of the channel. That can be disastrous (workmanship of risk, doncha know).

On the other hand, you're doing fine with just the scoring attachment and chisel :) . Maybe add a router +1/8" cutter to dig out waste.

Wiley

Re: The Chair - how would you ...

#21

Re: The Chair - how would you ...

Kees

No idea how to do that. Drilling a lot of holes, then sawing with a fret saw to remove the webs between the holes and finally shaping with a rasp, would be my instinctive reaction.

I wonder though, doesn't a slot like that seriously weaken the stretchers? The Danish one survives despite of it, but it does look weak.

Re: The Chair - how would you ...

#22

Re: The Chair - how would you ...

Sgian Dubh

Derek, it's too late now, but if I'd been making this chair solely with hand tools I would have done something like as follows.

Prior to executing any joinery at either end of the rail I would have taken a blank that was squared up slightly wide, fat and overlong. Then I would have split the width into three longitudinally with the appropriate curve incorporated. The middle strip would have been sized to suit the required slot. Next I'd have prepared the inner faces of the two thicker outer pieces of the rail, and similarly prepared the outer two faces of the middle strip. Following that I would have cut the inner piece into three lengths, two short ones at either end, and a long piece in the middle which is discarded. Finally I would have joined the four pieces remaining back together carefully matching up the grain pattern so that it would take a hard look to discern any disruption in the grain match up. After that you'd get on with any final sizing required, do the joinery at either end and shape the rail.

This is essentially the same technique as is frequently used to make up a table rail in which a drawer front is needed, and where the maker or designer wants the grain to flow across the width and height with as little disruption as possible.

Given that it's too late for this technique it looks like your only recourse now is to peck away at the job along the lines others have suggested. For myself I'd prefer to use a router and some sort of jig, but that assumes the slot required can be worked with an appropriate router cutter, e.g., a 6 mm diameter bit which I'm guessing is about the right size. And, of course, that method is counter to your stated aim of replicating a chair using hand techniques that was almost certainly designed to be made using machines where appropriate. Slainte.

Re: The Chair - how would you ...

#23

Re: The Chair - how would you ...

Derek Cohen (in Perth, Australia)

No idea how to do that. Drilling a lot of holes, then sawing with a fret saw to remove the webs between the holes and finally shaping with a rasp, would be my instinctive reaction.

Exactly, Kees!

I wonder though, doesn't a slot like that seriously weaken the stretchers? The Danish one survives despite of it, but it does look weak.

My thoughts as well. The slot is 1/8", which is the thickness of the cord. I am not sure what the compression of the cord is like. The Chair seems to have survived this design. Jarrah is a lot stronger than anything the Danes used. Nevertheless. I am considering adding filler pieces from the inside of the slot.

Regards from Perth

Derek

Re: The Chair - how would you ...

#24

Re: The Chair - how would you ...

Derek Cohen (in Perth, Australia)

Thanks Richard.

I know. I know. My next chair will be different. This is the first one I have attempted and I have struggled to get my head around the angles involved.

Now, while I do have your attention, perhaps I could get some input with the arms and backrest. They threaten to make the build so far look easy by comparison!

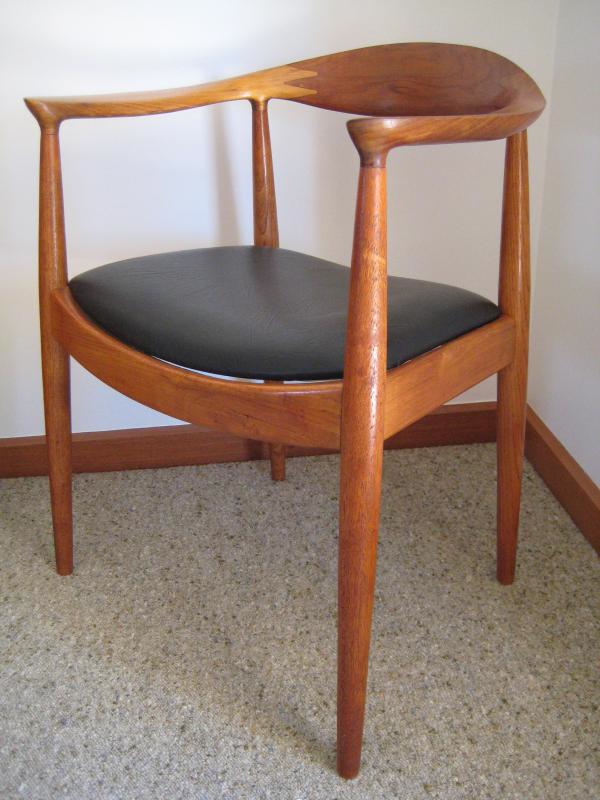
The chair looks like this ..


The section to which I refer is this join ...


Regards from Perth

Derek

Re: The Chair - how would you ...

#25

Re: The Chair - how would you ...

Kees

Ha! Did I win a price? :D

Jarah may be stronger, but maybe also more brittle, so more prone to failure under shock? Of course I don't really know, but a reinformcement on the inside might not be a bad idea.