New WoodChat!
Home Articles Forums Gallery Marketplace Videos

WoodCentral Forums

Knowledge You Can Build On — Est. 1998

Want Better Milling & Firewood Knowledge?

The Kist is complete.

Posts

The Kist is complete.

#1

The Kist is complete.

Derek Cohen (in Perth, Australia)

Here is the final chapter..

Returning from Cape Town, with my wife staying on for an extra week with her folks, I had the whole weekend to myself in the shop. :) This was doubly helpful as the kist was to be a birthday present, and she is due home tomorrow, Tuesday (today being Monday).

I needed to ..

1. Fit the drawer

2. Fit the mouldings (already made with rounds and scrapers)

3. Round all edges

4. Oil and de-nib

5. Install the hinges in the carcase and lid

6. Complete the lid (fine tune the breadboard ends, trim to size, glue and peg the breadboard sections - I chose not to drawbore these as I did not want the pegs to extend through the lid and show at the outside)

7. Oil and de-nib again

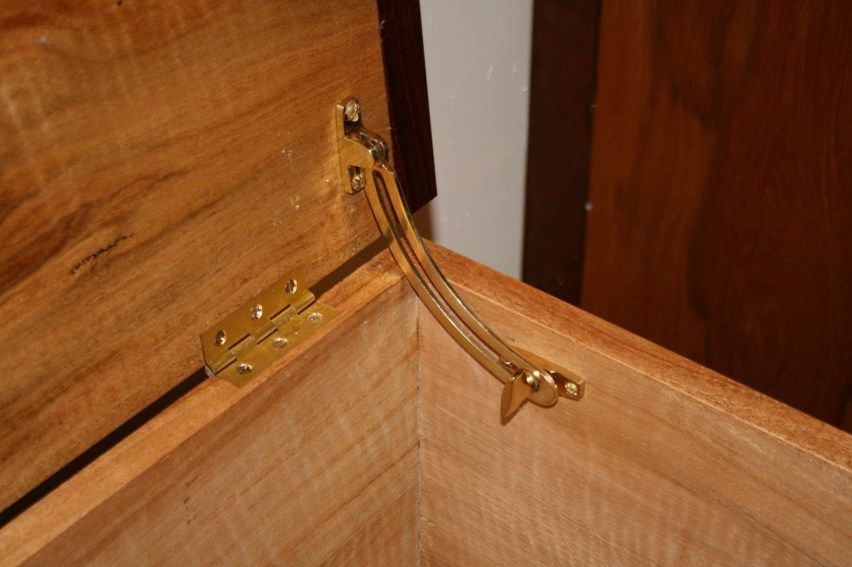
8. Install the lid stays (I'd never used these before, and I already had a headache trying to work out how to with a template or manual)

9. Oil and de-nib

10. Wax

11. Lug the thing into the family room, stand back and - hopefully - admire my hand work. Hopefully.

Before I left on holiday I needed to work out a method of hanging the drawer. I had considered running it along a groove with the idea that it would aid in preventing it tipping as it was extended. In expectation I had planed a rebate for the tongue. Here is the drawer resting on the tongue ...

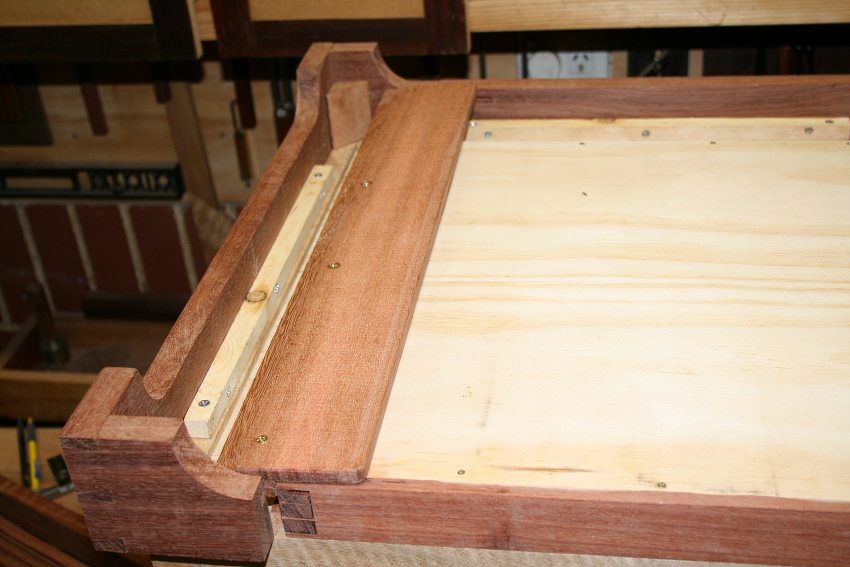
Bill made me see sense and, consequently, I removed the tongue, planed a rebate, and glued and screwed a filet to the runner. The drawer would run in the filet. The reason for planing the rebate was to raise the height of the filet (and drawer) ...
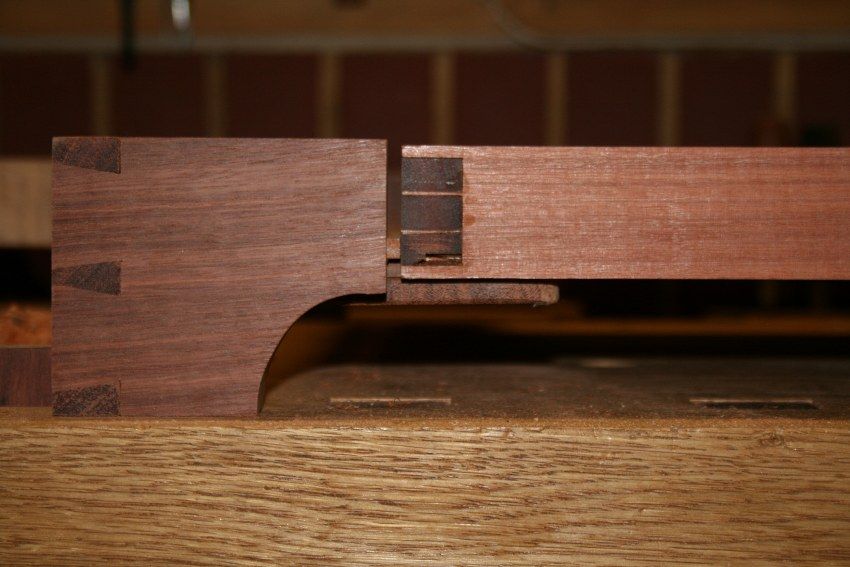

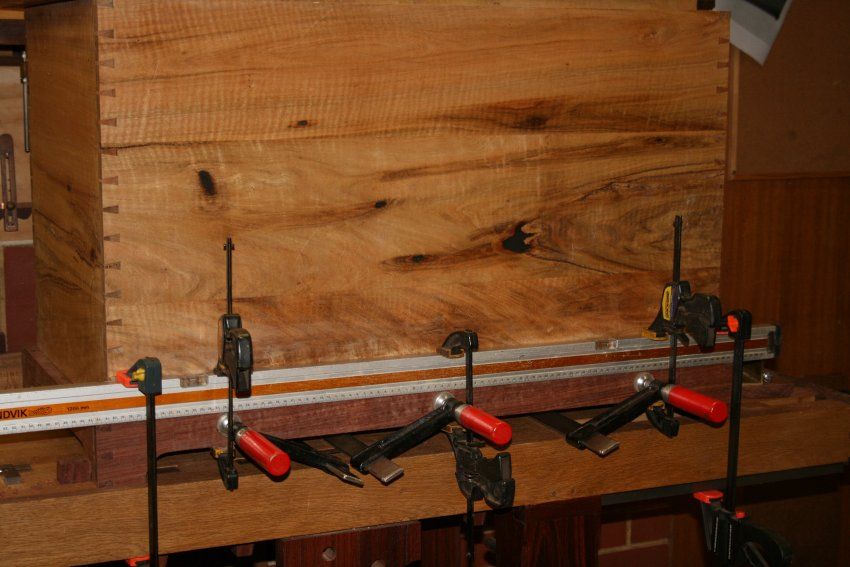
To ensure that the drawer would move square to the carcase, the drawer was aligned with the front of the carcase, then one runner was glued in place ...

The drawer was then removed, the other runner slid into its mortices, the drawer returned, and the second runner butted against its side. Easy-peasy alignment ...

The applied drawer front could now be attached ...

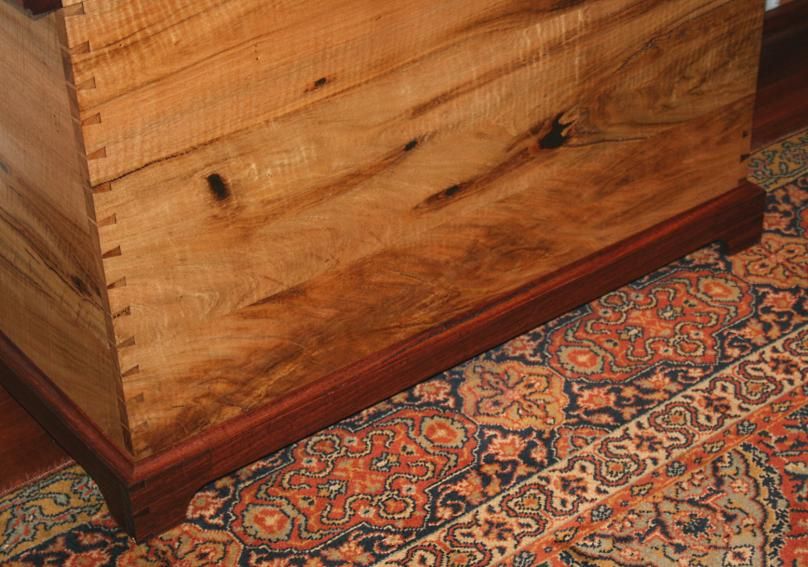
The moulding were installed with the use of a MF Langdon mitre box and saw and shooting board. I decided that the mitre box is totally overkill for small mouldings - the 28" saw is cumbersome and the 11 ppi teeth too coarse, although freshly sharp. My next project will be to build my own mitre box for use with a smaller saw. Later ... Of coarse I totally forgot to take pictures of the mouldings at this stage.

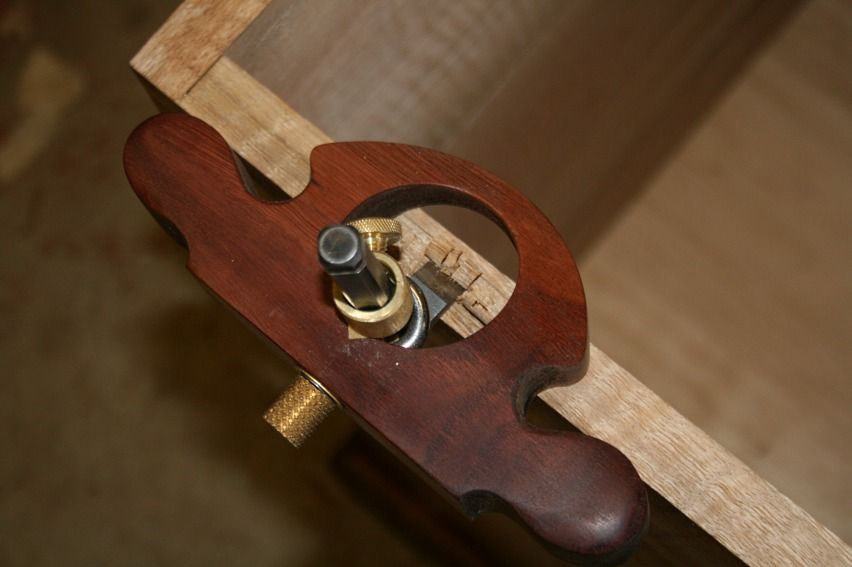
I imagine that a butt mortice plane is used in a similar manner for hinges ...

Anyway, it was all done, and I'll spare you pictures of the mundane. Instead we can skip to the end result. I will apologise in advance for these photos. It was late in the day, the sun was down, and the light came instead from two side lamps in the family room as well as a somewhat pathetic flash.

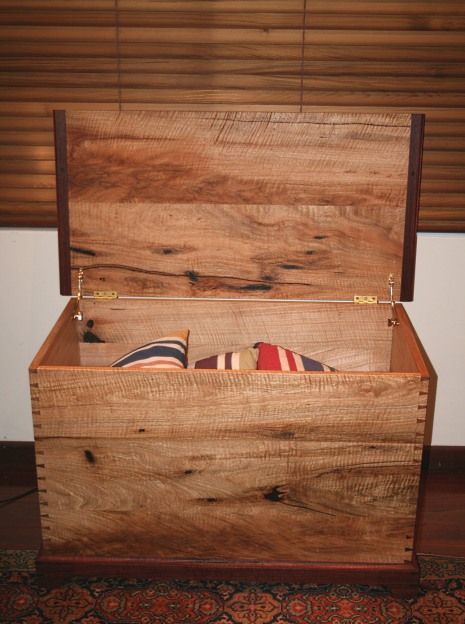
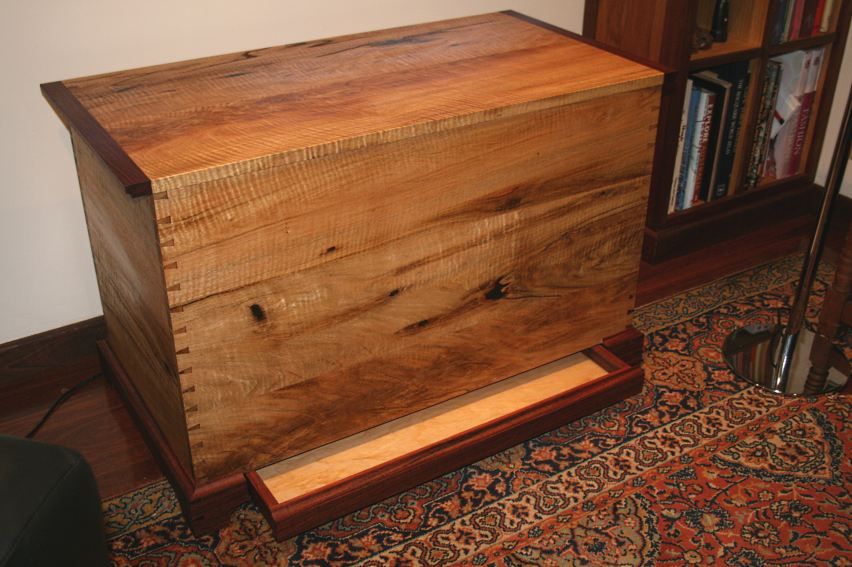
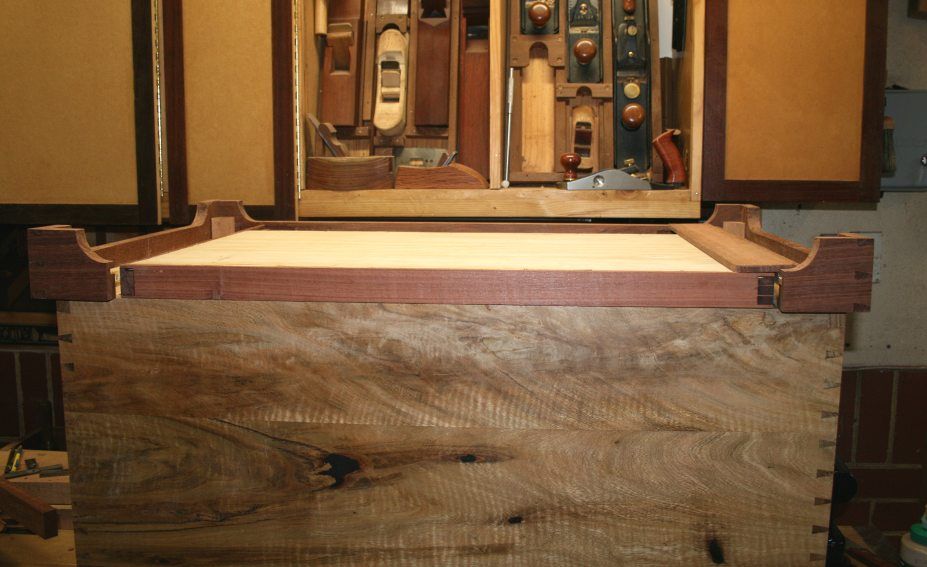
Dimensions: 3'0" (900mm) long x 1'8" (500mm) wide x 2'0" (600mm) high)
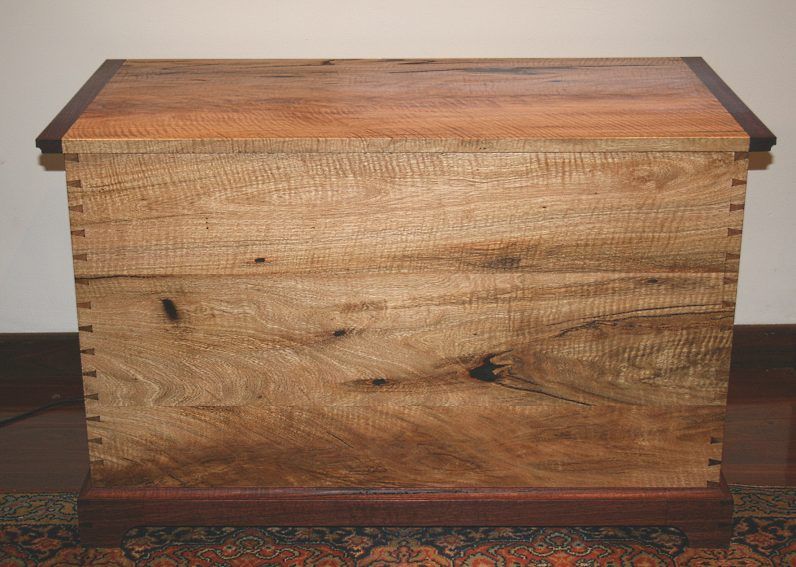


This project continues my interest in hidden drawers ...


The drawer has 1 1/4" (30mm) of internal depth. This should be plenty for a thick book or several magazines.
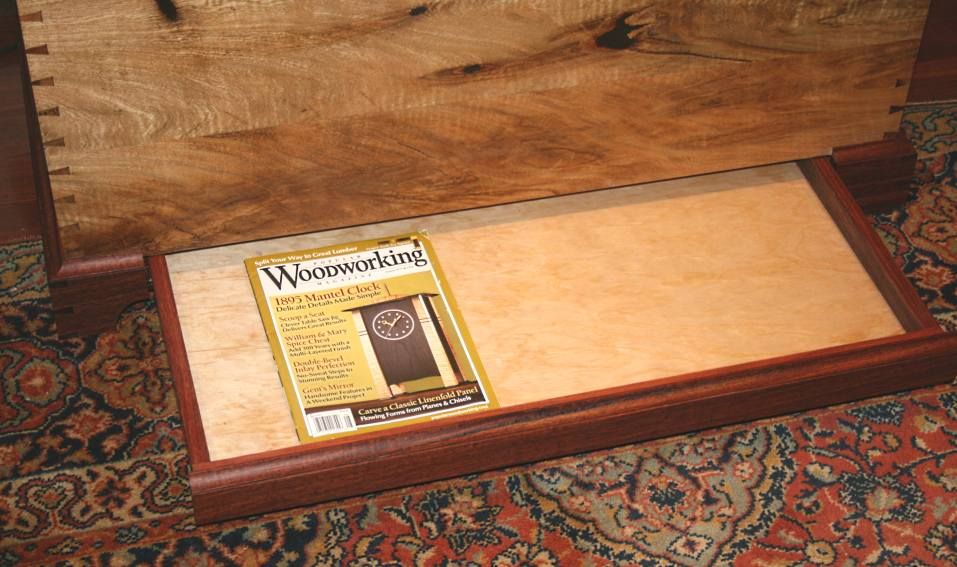

The moulding is attached to the drawer and acts as a stop.

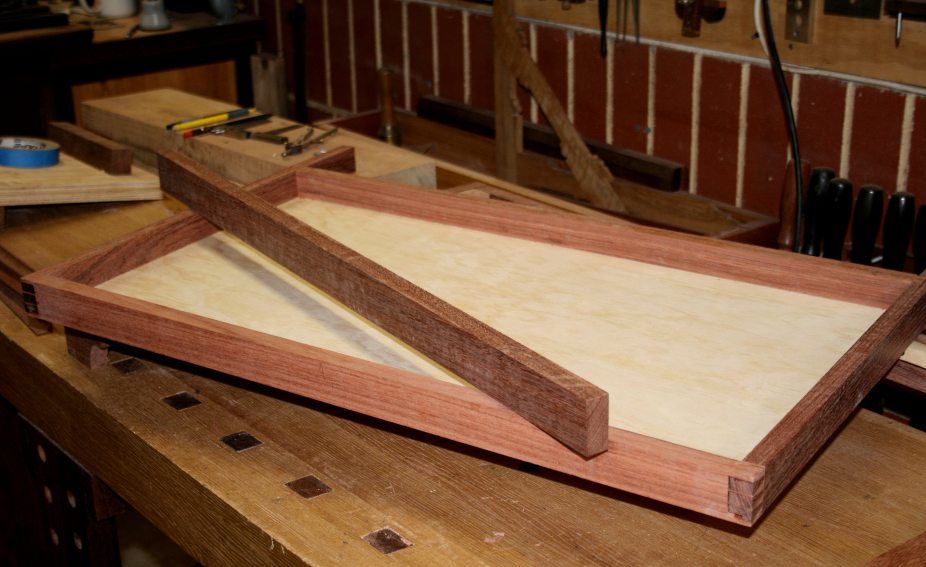
Here is an earlier picture of the drawer with applied front to attach ..

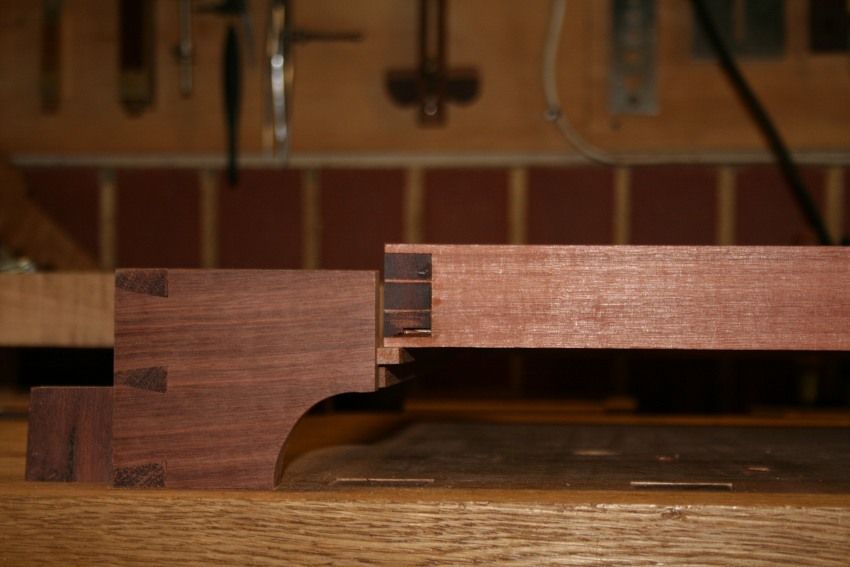
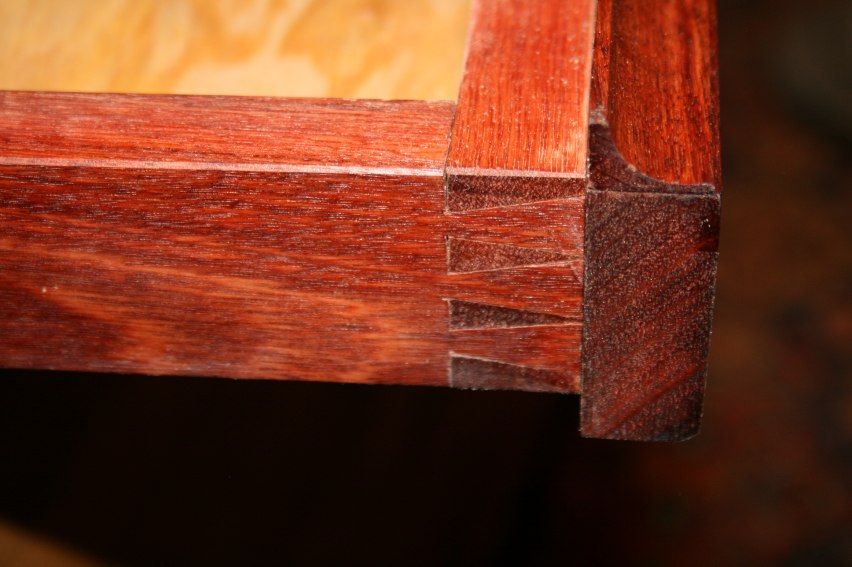
The front was standard through dovetails (here you can also see the applied front and moulding in cross section) ...

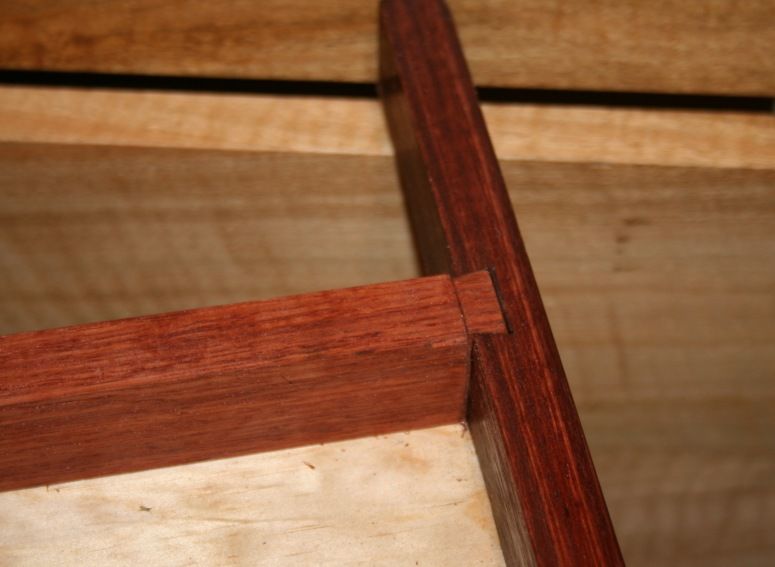
The rear was a sliding dovetail (to allow longer sides to stabilise the drawer as it reached full extension ...

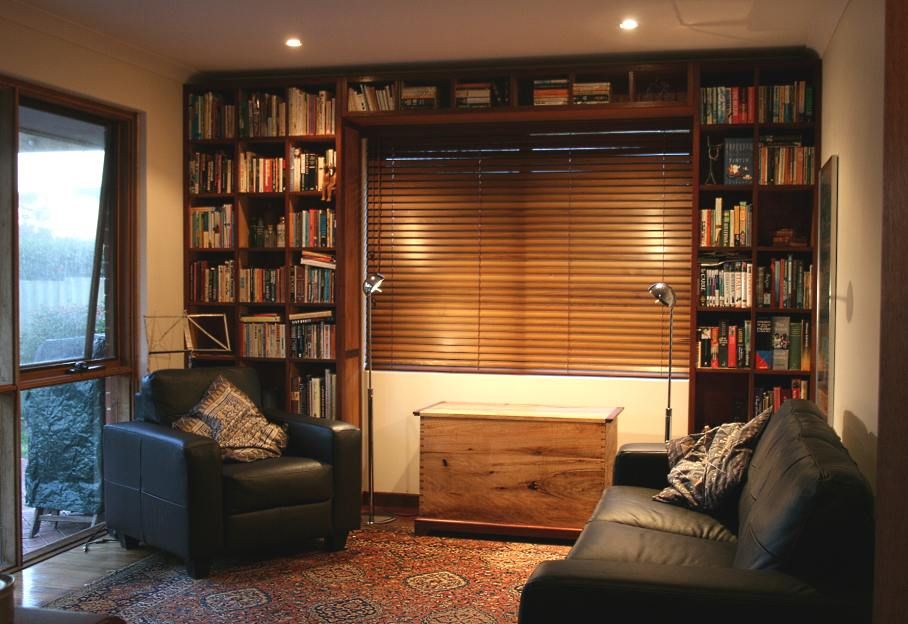
Context - for use as storage and a place to rest a mug or glass ...

This was not a particularly complicated or difficult build. It was, however, one of the most frustrating I have experienced owing to the extreme difficulty in working with Curly Marri. Near the start I came close to just burning the wood. Several times I asked myself why did I choose to continue. I purchased the wood because I thought it was striking. I think I was right. The real beauty of this timber can only be appreciated in reality, not in photos. It has chatoyance and amazing figure. It is Devil Wood nevertheless and should not be worked with hand tools, or by anyone sane.

Thanks for persevering.

Regards from Perth

Derek

Re: The Kist is complete.

#2

Re: The Kist is complete.

roger lance

Derek....well done.....another pleasing design that was executed with exceptional skill.

Re: The Kist is complete.

#3

Neat stuff ! Purty too !


Re: The Kist is complete.

#4

another neat design

Bill Houghton, Sebastopol, CA

That is lovely wood, even just in photos; and the hidden drawer is a nice touch.

The narrower breadboard ends are an improvement over earlier iterations; and the cove both lightens them further and signals that they're handles for lifting the top. I am still not sure introducing a third wood into the design was best; it would have been interesting to see the design with the ends being in the same wood as the base - or the same color value, anyway.

But this critique does not alter that it's a beautiful piece.

Re: The Kist is complete.

#6

Re: another neat design

Derek Cohen (in Perth, Australia)

Thanks Bill

I think the lighting - or excess of it from the side lights - is the cause of the Jarrah breadboards appearing lighter than the Jarrah base. The pieces come from the same board.I was quite particular about matching the colour and figure so as to link them.

Any ideas about internal features? I suspect my wife will actually store blankets and pillows inside, so there may not be space for additional compartments.

Regards from Perth

Derek

Re: The Kist is complete.

#7

Re: The Kist is complete.

Wiley Horne--So. Calif.

Hi Derek,

Good for you--she will be thrilled, I'm sure!

I've changed my mind on this piece during your build. I like the black splotches now, and the general irascibility of the wood. It's still in the wild. It takes many dovetails (like bolts!) to get it to hold still. It needed those dark breadboard ends to get a bound on it. Finished and in place, it looks like it is still full of orneriness.

It looks most striking in its place of honor!

Wiley

Re: The Kist is complete.

#8

Ah; I withdraw my concern, then

Bill Houghton, Sebastopol, CA

As to interior compartments: I like the idea of those little tills made with two pieces of wood in an "L," fastened at the top end of the space, with a lid. Takes away little space from blanket storage, and gives a neato space for small stuff. And if you have, or ever have, grandchildren/nephews/nieces/little people around, the till makes a neat toy place.

Re: The Kist is complete.

#9

Adam of Oakland

Re: The Kist is complete.

Adam of Oakland

It's a very successful project here, thank you for photographing your work and posting it. I have been following the progress on this and other forums and was also curious how the lower drawer movement would be resolved. I like the solution you finally used. it seems pretty straight forward, reliable, too.

I also recall your worrying about the grain pattern of the edge joined box sides but to me it looks really really well. I'm colorblind so am more apt to look at grain patterns than colors when looking this stuff over. I think you did the best one could do with the wood on hand and it really does look gorgeous.

thanks derek for posting your work on line here, it is always well photographed and explained.

Also, if you are serious about the miter box project, please pls plz do post up ideas and progress!!!! I had recently done a bit of trim moulding and found it entirely frustrating because i had no way to shoot a 45deg miter with my planes and only a dull ryoba with no guides to make the initial cuts.

best!

Re: The Kist is complete.

#10

Jesper, Denmark

Re: As always.....

Jesper, Denmark

....a well thought out, well designed and well presented beautiful piece.

Re: The Kist is complete.

#11

Jim in Burlington Ont.

Re: The Kist is complete.

Jim in River Oaks, Ont.

Excellent work and the attention to design and detail. Thank you for sharing,

Jim