New WoodChat!
Home Articles Forums Gallery Marketplace Videos

WoodCentral Forums

Knowledge You Can Build On — Est. 1998

This $39 jig will make you a WOODWORKING GOD!

A tool tray ... with a difference.

Posts

A tool tray ... with a difference.

#1

A tool tray ... with a difference.

Derek Cohen (in Perth, Australia)

I wanted a tool tray for my bench. Yes, really. However I did not want one that would fill with shavings, or become an obstruction when planing or clamping. It could not be in the middle or at the side of the bench.

I had this idea when designing the bench that I would build a tray and, instead, attach it to the wall. During the course of my research, I also came across a photo of Chris Schwarz' tool-rack-across-the-window. This gave me an additional idea.

When I declared the bench completed, this is the box I built for part of the tool tray ...


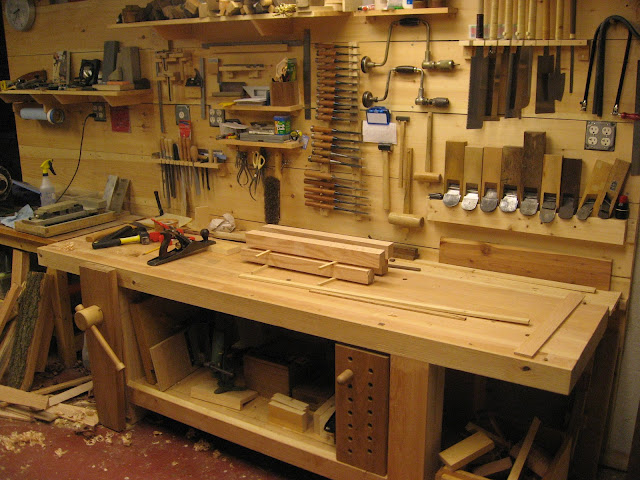
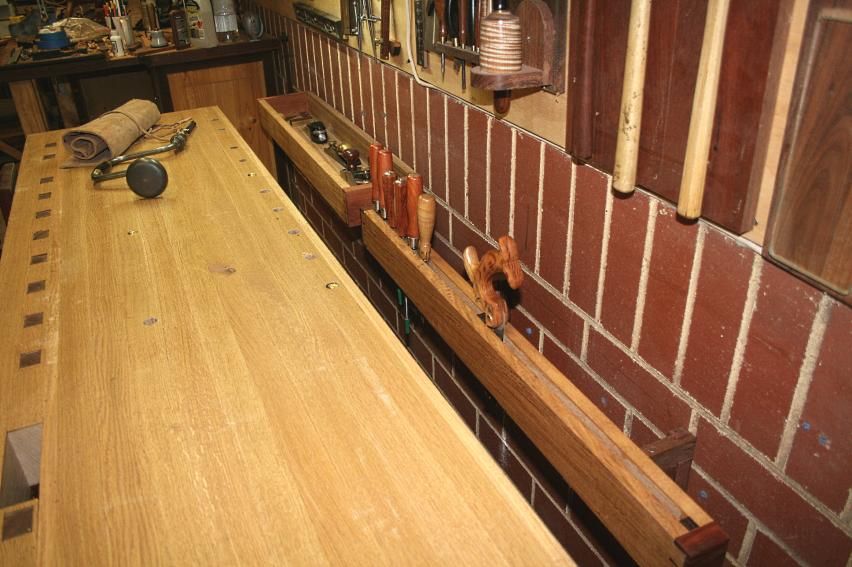
Here is the bench now with the completed tool trays - yes, plural ... there are two trays.


The first tray was attached to the wall so ...
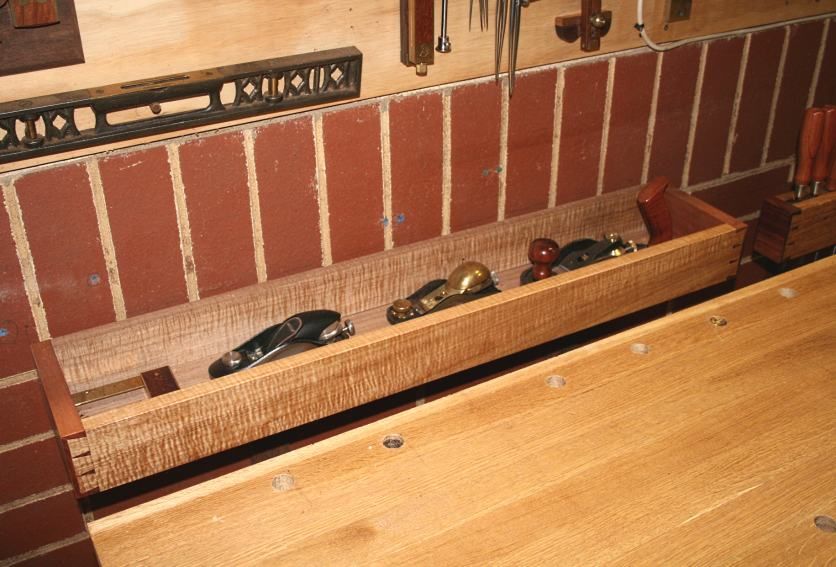

The second was placed in line with this one, to its right ...
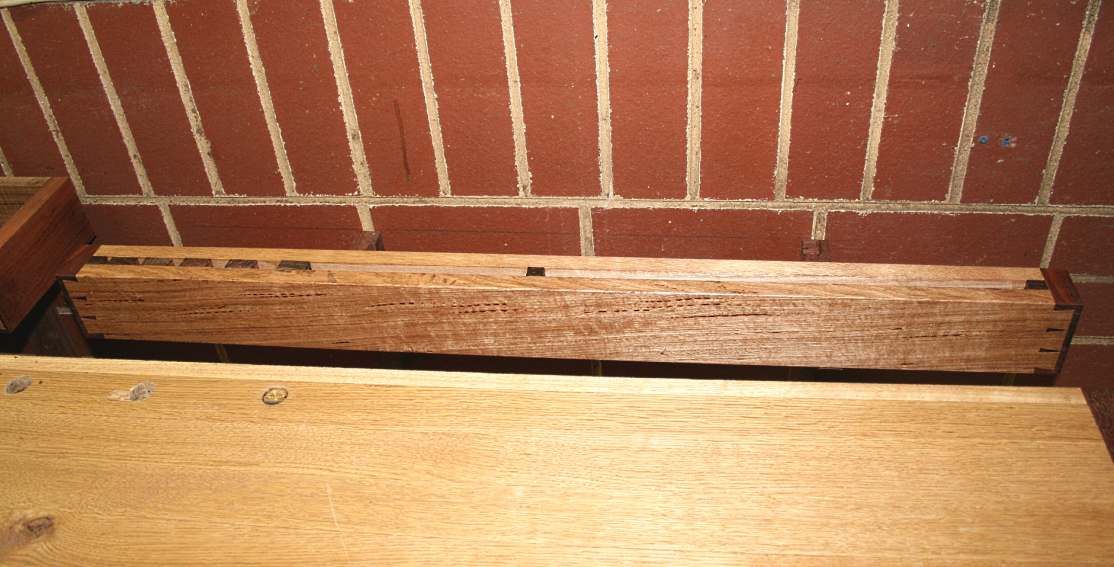

This tray is essentially a long slot, with the left side having dividers for chisels (these are adjustable for size) ...
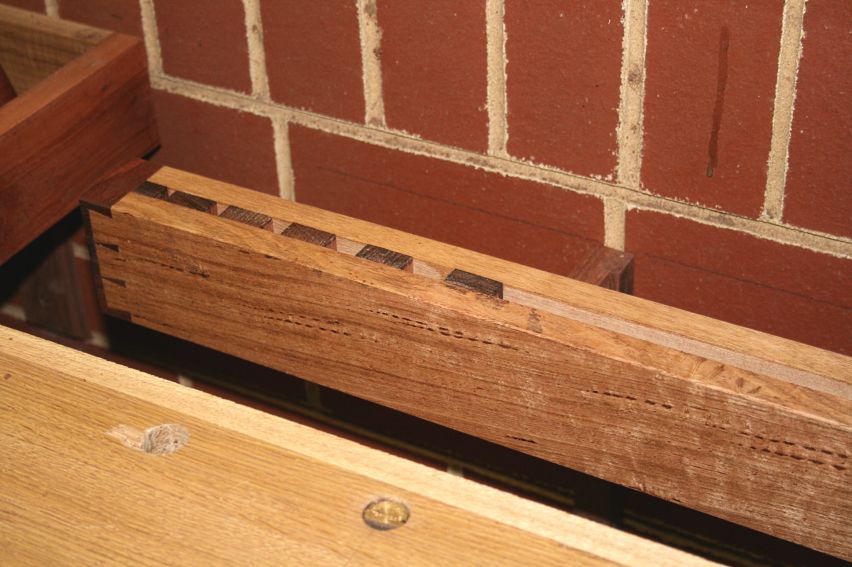

The other half has space for backsaws. While i have a saw till, the slotted tray is simply to hold tools that would otherwise take up space on the bench.
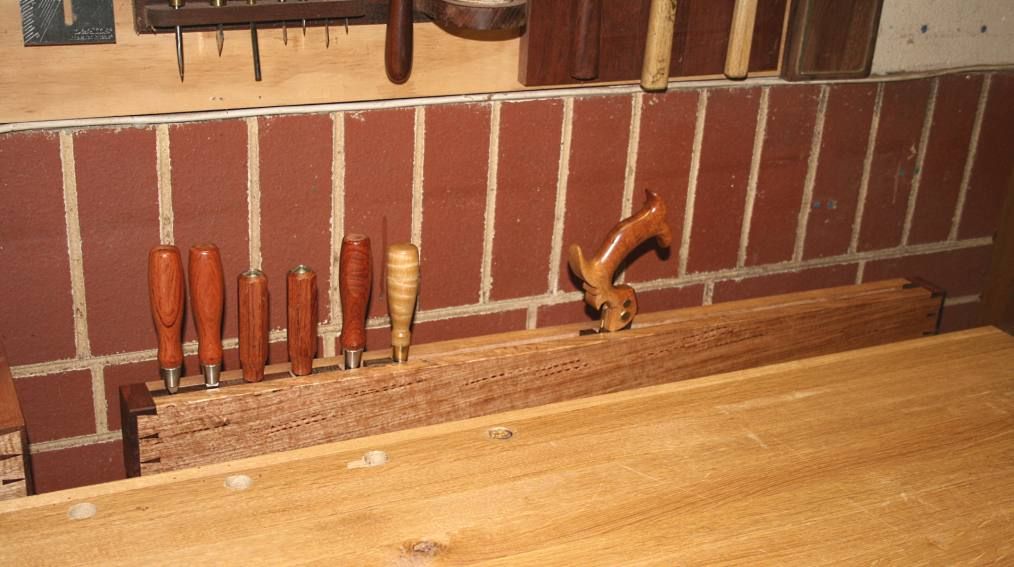

The top of the tool trays are set a fraction below the top of the bench. When I need to plane across the bench, either the trays will be kept clear, or the bench can be pulled further back from the wall. At this stage there is enough clear room to work across the bench, and also to access the tools in the tray and on the wall.

Regards from Perth

Derek

Re: A tool tray ... with a difference.

#2

Re: A tool tray ... with a difference.

roger lance

A fertile mind is the mother of invention....or was it "need"....or "necessity"....no matter....well done!

Re: A tool tray ... with a difference.

#3

Re: A tool tray ... with a difference.

TomD

I like that. I particularly like how the dovetails were carried over the the narrow rack, that doesn't realy need them. Only thing I don't like, and this comes form my bench also, is the gap with the wall.

Re: A tool tray ... with a difference.

#4

Ellis Walentine

I'm convinced...

Ellis Walentine

... that you enrich your whole experience by having such lovely and fitting shop surroundings. You've solved your problem very nicely, Derek.

Ellis

Re: A tool tray ... with a difference.

#5

Re: A tool tray ... Tool rack detail ??

Bob Entwisle in NJ

Derek,

Your work is inspiring.

The spacers in the slotted tool rack, you mention that the spacing is adjustable. I'm guessing that the dividers have a tongue that rides grooves in the front and back rails?

Bob in NJ

Re: A tool tray ... with a difference.

#6

Re: A tool tray ... Tool rack detail ??

Derek Cohen (in Perth, Australia)

Hi Bob

Building tongues and grooves and whatnot is too much detail for such a basic thing. I wanted this functional. The dividers are as simple as can be.

Here is a bit extra information that goes to answer that question ..

The brackets were built from scraps of Jarrah. The basic frame is held together at one corner with a half-lap joint. This is dowelled to prevent any slippage. The angle is strengthened by triangulation ..


This is the back of the tray. You can see the simple angle iron that was used to screw the tray to the top of the brackets. You can also see how the chisel spacers are fixed. The spacings are 1/4", 3/8", 1/2", 3/4" and 1". If these need to be changed, simply unscrew the existing spacers and move them to the desired position. The slot is 1/2" wide.


Regards from Perth

Derek

Re: A tool tray ... with a difference.

#7

Re: A tool tray ... with a difference.

Derek Cohen (in Perth, Australia)

Hi Tom

You have me thinking about what I can do with the "gap" between the wall and the tray. There should be room there for a shelf - unseen from the front but good for placing more tools, if needed. Thanks.

Regards from Perth

Derek

Re: A tool tray ... with a difference.

#8

Re: A tool tray ... with a difference.

wilbur

Hi Derek,

This might involve rearranging the tools you have hanging at the lower part of your wall storage, but how about simply screwing a board to the lower part of your tools storage wall big enough to cover the bricks between the bottom part of your tool storage area and the top of the workbench? Then you can push the workbench up against the newly attached board, and you'll have storage options all the way down to your workbench top, and you won't have to look at the bricks anymore. You could then attach your new trays to the newly attached board.

Re: A tool tray ... with a difference.

#9

A little while later ...

Derek Cohen (in Perth, Australia)

Hi again Tom

I have found a purpose for the "space". This helps more than you can imagine.

One of the planes that "floats" around the shop is my 36" jointer. I just have no place to park it permanently. It takes up this empty surface, then that empty surface ... getting moved around all the time.

Now it has a home ...


Just for reference, that blade (by Berg) is 3" wide.

Thanks.

Regards from Perth

Derek

Re: A tool tray ... with a difference.

#10

Re: A tool tray ... with a difference.

Derek Cohen (in Perth, Australia)

This might involve rearranging the tools you have hanging at the lower part of your wall storage, but how about simply screwing a board to the lower part of your tools storage wall big enough to cover the bricks between the bottom part of your tool storage area and the top of the workbench? Then you can push the workbench up against the newly attached board, and you'll have storage options all the way down to your workbench top, and you won't have to look at the bricks anymore. You could then attach your new trays to the newly attached board.

Hi Wilbur

That is a sound suggestion, but ..

The reason for having the bench close to but away from the wall is to facilitate working across the bench. One of the limitations of having the bench against a wall is the panel width one can plane in this direction.


And what have you against the bricks! :)

Thanks for the idea nonetheless.

Regards from Perth

Derek

Re: A tool tray ... with a difference.

#11

Re: A little while later ...

roger lance

And it fits perfectly too....in length, width, and height.... :D .

Re: A tool tray ... with a difference.

#12

Re: A tool tray ... with a difference.

wilbur

Hi Derek,

As a matter of fact, I ran into the "what do you do when you are planing across a wide panel and your bench is up against the wall" issue as well. This is what I did.

I attached a cleat to the pine board I mounted for tool storage so that it could hold a 1x8 (it might be a 1x10) pine board at a level that was a little below the top of my workbench, and attached a second cleat to the back side of the top of my workbench. Now my workbench is off the wall by enough so that I can plane a panel cross grain without running into the wall.


I decided to have a shallow drop from the benchtop to the board. If you wanted to set the board deeper, one could put the board at any depth relative to the workbench top that you want, of course, and you could also use a bracket to support the board so that you aren't relying on the workbench, either.

As far as why you might want to cover the bricks, I'd hate to see the side of your jointer plane get scraped up by the bricks. Things do happen, no matter how careful you are. And in addition to getting a bit more wall storage space, I think that the look of extending the wood down to the workbench top looks a bit nicer in a woodworking shop. It's sort of like not covering up a fireplace with cherry panels all the way up to the opening of the firebox. :D


Re: A tool tray ... with a difference.

#13

Re: A tool tray ... with a difference.

John Pappas

Derek,

Everything you do is first class. You've given me some ideas I might use at some point in the future. And, I just have to share with you something my daughter recently sent to me. (I don't know why.) It's a little plaque that reads, "Organized people are just too lazy to look for things."

:)

John

Re: A tool tray ... with a difference.

#14

Re: A tool tray ... with a difference.

Charles

It's an interesting interpretation. Your basic craftsmanship is to a point where it is above reproach. Now you'll have to start answering to your design decisions. I don't particularly care for the overall scheme, but it's your workshop and, again, the workmanship is excellent. I would hate to sink all of those fittings into the nice brick wall.

Take this for what it's worth (ain't much) - I'm working out a shop with tools and supplies stored in liquor store boxes at the moment (long story). One of these days I might get settled.