We value your privacy.
We use cookies to enhance your browsing experience, analyse site traffic, and personalise content.
By clicking “Accept all”, you consent to our use of cookies. You can also choose
“Essential only” or learn more.
>Wilbur, I haven't heard anything which suggests that there is a problem with leaving it as it is. Is it going to wobble? Is it going to come loose? If so, maybe then it will be easier to get apart.
Thirty years ago Daniel O'Hagan told me "Just don't be ashamed of your mistakes." Why not just plane up some thin stock and wedge it or glue it between the shoulder and the leg?
>This being a bench and something that will be used to work on future projects I`d look at this as an opportunity to have a"mistake",as in something less than absolute perfection,there to remind me to slow down and take the time to double check all the details.
More than one of the craftsmen who`s advice I sought told me it was good to have something humbling around the shop to "keep yourself honest".One even went so far as to say"Perfection is what you shoot at for others who pay for your work,you keep the mistakes for yourself".
The workbench is a tool.Maybe it would be a good thing to have at least some reminder like the sign over Cecil Pearce`s shop door that said "The finest tool ever made is the human hand,but it is weak and it is fallible".
I do like the keyed scarf joint though and would consider something like that as an elegant way to both fix the problem and remind me that there was a problem at one time.If anyone asked about it I would tell them that was my answer to the problem when the board stretcher was out being repaired.
>You must have syringes coming out of your ears, fill one up with steaming water and inject the joint. Be very careful with heat guns, they can literally set the wood on fire.
>I had an art prof in college who suggested that an artist should hang their mistakes in their studio as an inspiration to improve as they worked. I think Bob said it better though.
>maybe these have already been suggested, I haven't read the whole thread through yet.
Getting steam to the joint is easy. Kettle and a vinyl hose - tape a rag around part of the hose for gripping. Getting it in the joint is another question - maybe through one of the drawbore holes.
Long clamps - just buy a pipe union and thread two of your pipes together. I've made 10' clamps this way out of two 5' pipes. Pipes longer than 5' are a pain to have around most of the time, but a few unions sitting on the shelf take up hardly any space.
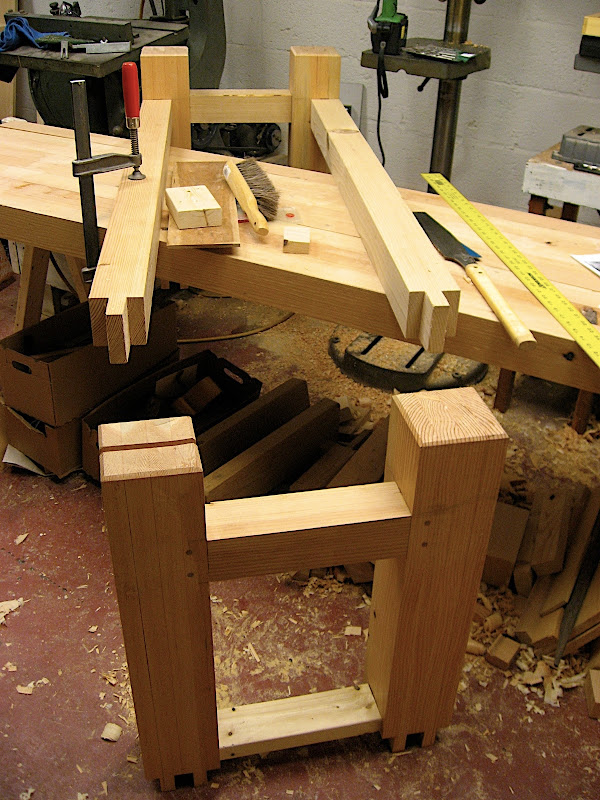
>I wound up just sawing off the stretchers and redoing the two M/T joints. I sawed through the problem joint and got some play in the stretcher, but not nearly enough to be able to do anything with it.
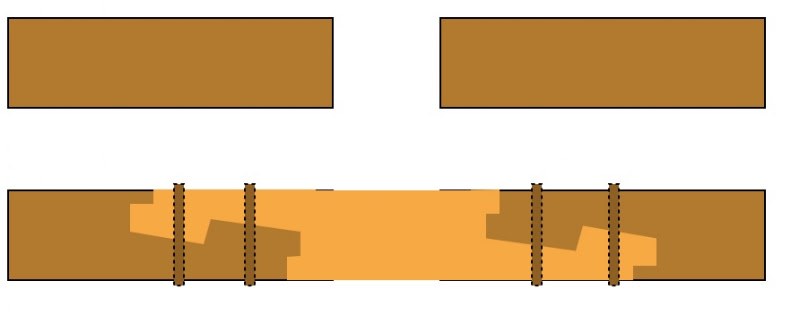
I had thought about sawing off a bigger chunk of the front stretcher to give me some clearance, putting in a short length of stretcher into the leg with a M/T joint, and joining the two sections of stretcher with a joint like this:
But this would have required me to do a really good job aligning the two stretcher sections, and I would not have had a way to pull the joints as tight as I would with a drawbored M/T joint.
Clearing out my mortises was really pretty easy. The biggest problem I had was wrestling the base in place to recut the tenons on the stretchers.
I'm almost ready for the glue up, but this time I'm going to make sure I have long clamps around.
>Wilbur, I'm glad you decided to fix this. I think there's a point to be made about accepting some mistakes, but to work for as long as you have on this, only to lower your sights now, would really be hard for me to do. I get the sentiment, but half of woodworking is learning to fix your mistakes.
I'm also glad you decided against the scarf joint. Fixing a simple problem with a complicated (if elegant) solution is inviting trouble. Realistically, you'd have had to do the scarf joint FIRST, and then marked out your shoulders accordingly. Otherwise, you'd have run the risk of making the stretcher just a bit longer (or worse, shorter) than the other, and you'd be stuck with the same problem, only made worse.
Once the dry fit is done, and you know that everything will go together, I'd not only have the long clamps on hand, but I'd have some sacrificial boards clamped to the outer face of that end panel. Sometimes, when I'm trying to settle two tenons like that, if one slides home, the other one racks, and seizes up. And while I like elegant solutions, and careful work practices, there are times in life when the best solution is a liberal application of sheer ignorance and utter brutality. Preload the joint with the clamps, and then use the Bigger Hammer, and a sacrificial board to take the big hits. Pony clamps can apply a serious amount of force, but sometimes a shock to the system is just what the doctor ordered to get things sliding. I'm not saying it's pretty. But it works.
Maybe it was an air-locked joint. Maybe there's too much glue trapped in the bottom of the mortise. Maybe something stupid and unexpected is happening... Either way, there are moments in life when you just want it to work. And panic fuels a hammer head like nothing else I know.
Re: applying heat... this is best done when the joint is still fresh, and the glue hasn't fully cured. Heat gun is good. Head lamp bulb in a lamp will also work, and should be left in place for a duration, with clamping pressure still applied. And denatured alcohol seems to help, too. I'm told it weakens the glue bond a little bit, but as near as I can tell, it doesn't really affect things too much. It looks like you're drawboring everything anyway, so that would probably mean that it will only take 5800 pounds of force to overcome the drawbore pins and the tenons in the top to take it apart, instead of the full 3 tons.