Home Articles Forums Gallery Marketplace Videos

WoodCentral Forums

Knowledge You Can Build On — Est. 1998

Price drop on over 1300 Rockler items

Dovetails made easier

Posts

Dovetails made easier

#1

Dovetails made easier

Derek Cohen (in Perth, Australia)

>Here are a few strategies for producing tight dovetails. Add your own.

Marking out with a scale. This makes it easier to adjust the spacing.


Sawing square is the key to tight fitting dovetails. Ganging up boards makes this easier to do.


I saw the tails first. The accuracy in sawing these angles is not critical - it is matching these saw cuts to the pins that is critical. Using a dovetail angle marker helps in this regard - not vital, but it does make it easier to replicate angles.

Dovetail markers also allow one to experiment with different angle ratios. I think that the angle does not make a lot of difference to drawer strength. On the other hand, a wider or narrower dovetail can enhance the aesthetic look. I tend to go for a higher ration (1.5) on thin boards and a lower ratio (1.7 or 1.8) on wide boards.


Starting a saw cut with the saw raised effectively lowers the rake of the teeth and makes for easier starting. Aim to follow two lines similtaneously (e.g. the angled and the horizontal lines).


Aim to make your saw cuts as close to the knife line as possible. The tighter your sawing, the less need for paring, and the less chance of errors creeping in. To achieve such close tolerances, use a chisel to chamfer a fence for your saw.


Before removing any waste, take the time to mark out which areas are to be removed. If you look carefully at the through dovetail end of the drawer above, you will see a cut into the tail! I caught myself just in time. Dang spatial difficulties!

I prefer to remove waste with a fretsaw/jeweller's saw than chop it out. A recommendation made to me was to add a twist to the blade so that you do not experience the limitation I show here of how deep into a board a standard fretsaw can cut.


When paring the waste, place the board side-on. This will more easily allow you to see whether you are not holding the chisel over the vertical line . Aim for a slight undercut for a tight fit at the baseline.


If you find it difficult to judge vertical, then place a square alongside the chisel.


If you need to chop out waste in hardwood, a guide fence can aid in maintaining even baselines. Note that this is not a vital tool � practice makes one unnecessary. However these are excellent jigs.


When transferring tails to pins, many use a handplane to rest the tail board. I find that this can easily cause the board to move, which will affect the accuracy of the marking. Accurate marking is all-important for accurate sawing.

I made a �Rest Block� out of pine scrap onto which I glued 240 grit sandpaper (on two opposite sides � one as a non-slip for the board, and the other as a non-slip for the bench).


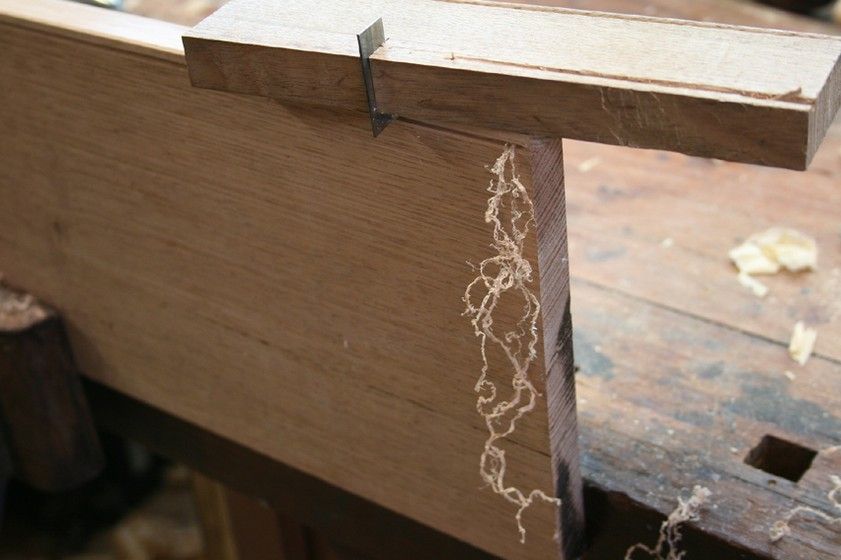
Always transfer marks with a knife. For tight tails you will need a thin bladed knife.


Prior to joining the boards pare a chamfer on the backs of the tails before wacking them into the pins. This takes two seconds to do and makes the join a smoother process.


When joining boards, especially when they are hardwood, add a clamp to the pin board to prevent the ends splitting. I close up gaps with a wedge-shaped block.


Plan the grain direction so that you are able to plane away from the edge of the face board.


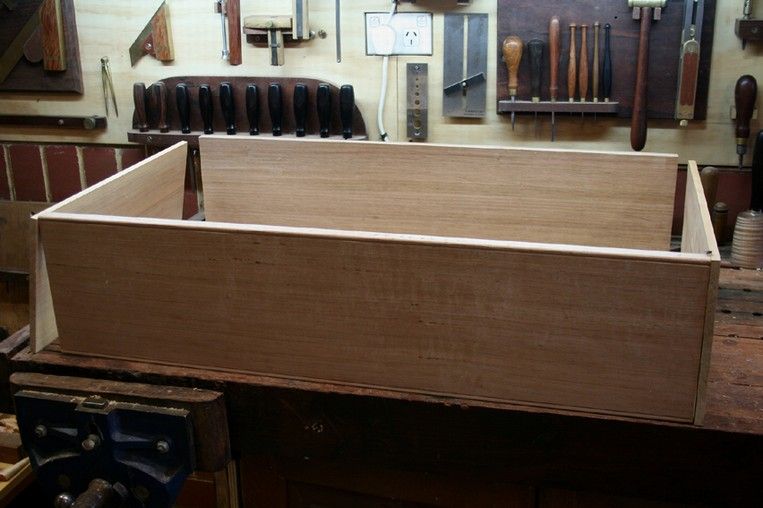
Here is a recent drawer I built. These dovetails all went saw cut to saw cut �


A close-up of the through dovetails �


And a close-up of the half blind dovetails �


Happy dovetailing!

Regards from Perth

Derek

Re: Dovetails made easier

#2

Great Tutorial - and TIPS!

charlie belden

>Chamfering the ends of tenons and the top edges of mortises makes assembly much easier - as does chamfering the ends of dowels. Why it didn't occur to me to do the same with the inside edges of pins and tails forthe same reason is a mystery - you thankfully pointed out. And cutting a bevel on the waste side of a pin or tail to help with saw alignment is another obvious idea - once you've been shown it.

It's the little details and refinements that can make something doable that wasn't - or was difficult to do.

Thank you sir. The text WITH good photos are much appreciated.

Re: Dovetails made easier

#3

Thanks Derek. Good info but...

Scott Burr in Ben Lomond CA

>I remember a few Christmas's back you were against coping out waste (I posted a nice poem about it). What made you change your mind?

I like the rest block idea, I'm going to have to give that a try.

Re: Dovetails made easier

#4

Re: Dovetails made easier

Wiley Horne--So. Calif.

>Hi Derek,

Great show and tell, as always. All that quartered wood, holy cow! The drawer is beautiful, and I especially like the graduation on the pins (not to speak of the fact that they're perfect zero-entry pins!).

!. Ganging drawer sides. I agree with you that this is both efficient, and enhances accuracy. I like to fret saw the waste also, and find it efficient to leave the drawer sides ganged in the vise (after the saw cuts are made), and fret saw them while they're still ganged. When using small pins especially, this is particularly easy to do.

Incidentally, for those using Japanese saws with an 0.012" thick blade, a No. 2 fret saw blade can be snaked down the kerf (Olson numbering). I do the blade twisting that you mention, but am about to change over to a deep-throated fret saw--LV sells them.

2. Transferring marks. I want to ask you something: It appears that you made no marks on the pins board endgrain until you made the transfer from the tails board. Is that right? If so, I totally agree (maybe this is a no-brainer). So that when you knife-in the pattern of the tails board, it is not just the sidewalls of the tail that get transferred, but also the ends of the tails.

In regard to holding the tails board onto the pins board for transfer, I have a suggestion for those with twin-screw end vises....An advantage of this type vise is that you can clamp the pins board vertically in the vise--right at the corner of the bench, _outside_ the vise screws--and clamp the tails board down over the pins board. This takes about no time, and ensures that nothing moves while you're marking.

Again, Derek, thanks for a fine tutorial and thought-provoking post!!

Wiley

Re: Dovetails made easier

#5

Hey Wiley a question...

Scott Burr in Ben Lomond CA

>I gang cut tails but have run into trouble when coping the waist while their clamped together. The blade bends enough with the cutting force I've found it more accurate to cope the waist on DT's board one on one.

Re: Dovetails made easier

#6

Re: Dovetails made easier

Pam Niedermayer - Austin, TX

>Great post, Derek. The only tip I'd add is to freehand the first board, whether pins or tails, rather than mark; although if one has to mark, I much prefer your ruler method.

Couple of questions: 1) what is the advantage of using a wedge shape interface between your hammer and the board for setting? and 2) is it true that you made a bead on the drawer face top?

Pam

Re: Dovetails made easier

#7

Re: Hey Wiley a question... *LINK*

Wiley Horne--So. Calif.

>Hi Scott,

Typical for me would be two sides together, each side 3/8" to 1/2" (for a larger chest), for a combined thickness of 3/4" to 1". In soft maple, beech, birch, for example.

These are dozuki kerfs (12-13 thousandths), using a No. 2 Olson skip tooth fret saw blade.

I have found that the adjustable-frame fret saws aren't rigid enough--if I stress 'em enough, the saw will deflect and start twisting into 3 dimensions. So the saw frame I use, and this is per David Barnett's recommendation on this forum a few years back, is non-adjustable--see link. I got mine at Contenti, but here's the one that Otto Frei sells.

Also, I'm talking pretty small pins (talking about drawers now), which means that you're only sawing through maybe 3/8" max width of wood at the fat part of the pin socket. In other words, the wood cross-section being sawn at one time, for two drawer sides, would be approx. 3/8" x 3/4" to 1".

Wiley


Non adjustable fret saw frame

Re: Dovetails made easier

#8

As far as #2 goes... Yes,

Scott Burr in Ben Lomond CA

>It's been described in Derek's earlier posts. Pretty cool I might add...

Re: Dovetails made easier

#9

Re: Thanks Derek. Good info but...

Derek Cohen (in Perth, Australia)

>I remember a few Christmas's back you were against coping out waste (I posted a nice poem about it). What made you change your mind?

Hi Scott

Mmm... I think that you must have imbibed one too many eggnogs at that time :) I have always coped out the waste.

Can you play the poem again? :)

Regards from Perth

Derek

Re: Dovetails made easier

#10

Re: Dovetails made easier

Derek Cohen (in Perth, Australia)

>Hi Pam

I have tried to answer several hours ago, but all my posts get caught for vetting by the moderator. The problem is that I do not know if these will eventually be posted or not. I suspect that anything that has an image goes along this path.

So all I will say is the wedge is to focus the hammer blow on a particular pin/tail section. And, yes, I did bead the drawer, on the upper and lower face edges. I did post pictures of these, both in an earlier segment, and recently for you.

Regards from Perth

Derek

Re: Dovetails made easier

#11

for those interested in labor saving;other thought

Bill Tindall

>After a few drawers there are some parts of drawer making that get tedious and waste chopping is at the top of my list. I have moved to doing it with a band saw. With a coarse blade the waste can be removed by a combination of sawing and using the teeth in a "milling" fashion. It goes quickly and I can get on to fitting which I find more satisfying. A quick paring cut at the base line and the tail or pin is done.

Having the cut orthogonal to the face of the board (for tails) is more important than the angle. Hence, I start the saw opposite from what is shown. I start with the handle high and the cut begins on the back edge of the board. In this orientation I can better judge the angle of the saw to the line across the top of the board. Starting with the handle down and the cut on the front of the board makes orientation with the vertical line more reliable and orientation to the line on top less so....in my hands.

Re: Dovetails made easier

#12

Re: Dovetails made easier

Derek Cohen (in Perth, Australia)

> ... am about to change over to a deep-throated fret saw--LV sells them.

... I want to ask you something: It appears that you made no marks on the pins board endgrain until you made the transfer from the tails board. Is that right? If so, I totally agree (maybe this is a no-brainer). So that when you knife-in the pattern of the tails board, it is not just the sidewalls of the tail that get transferred, but also the ends of the tails.

Hi Wiley

I have that LV deep throat fret saw, the one referred to as super light. It is indeed super light and very balanced. The fittings are a little flimsy (it is a cheap fret saw), but mine in still in use after a few years now.

With regards markings on the tail board, I do in fact run the baseline on them once the thickness of the tail board is established. The tails only get transferred, of course, when they are complete.

I have now posted the article to my website: http://www.inthewoodshop.com/Furniture/MakingBetter%20Dovetails.html

Hmmm .... no place to post links anymore ...?!

Regards from Perth

Derek

Re: Dovetails made easier

#13

Re: Dovetails made easier

Derek Cohen (in Perth, Australia)

>Couple of questions: 1) what is the advantage of using a wedge shape interface between your hammer and the board for setting? and 2) is it true that you made a bead on the drawer face top?

Hi Pam

The wedge is simply to focus the hammer blow on that pin/tail intersection, to drive them closer together.

Regarding the bead, yes I added a bed on both upper and lower edges of the drawer face. Ithink I posted a couple of pictures of this in an earlier thread....


Regards from Perth

Derek

Re: Dovetails made easier

#14

The best fixed frame EVER

David Barnett - SW FL Gulf Coast------WebKitFormBo

>Brand new, from designer Lee Marshall of Knew Concepts. Available in 3" and 8" as well as 5" (http://store.knewconcepts.com/je5prhasaw.html). The saw tension mechanism alone pays for itself in saw blade attrition savings. This frame does not flex.

Re: Dovetails made easier

#15

Re: Dovetails made easier

Derek Cohen (in Perth, Australia)

>..... am about to change over to a deep-throated fret saw--LV sells them.

2. Transferring marks. I want to ask you something: It appears that you made no marks on the pins board endgrain until you made the transfer from the tails board. Is that right? If so, I totally agree (maybe this is a no-brainer). So that when you knife-in the pattern of the tails board, it is not just the sidewalls of the tail that get transferred, but also the ends of the tails.

Hi Wyle

I answered your post several hours ago, but it did not made it onto the forum (to be vetted by the moderator - what is that all about?)

Anyway, I have a deep-throated fretsaw from LV. I think it is termed a "superlight". It is indeed superlight and has a wonderful balance for its length. Quite a light duty build but it held up over about 3 years before I needed to replace the screws, so now mine is a little modified :) . It tensions pretty well.

A rather blurry blow-up of a couple of coping saws, a jeweller's saw and the large fretsaw ...


With regard marking the pin board, I do add the baseline as soon as I know the thickness of the tail board. Of course, the tails can only be transfered once they are completed.

Regards from Perth

Derek

Re: Dovetails made easier

#17

Re: The best fixed frame EVER

Wiley Horne--So. Calif.

>That really looks great! Gonna get the 8" one to avoid blade twisting in future.

Thanks very much! Which fret saw blades do you like best, for wood? Right now, I'm using Olson No. 2 skip tooth (12 thousandths thickness).

Wiley

Re: Dovetails made easier

#19

Re: Dovetails made easier

Bill Houghton, Sebastopol, CA

>The location to post links is the same as it was - you do have to be registered.

Re: Dovetails made easier

#20

Re: Another image of the beaded drawer

Pam Niedermayer - Austin, TX

>Thanks, Derek, that's a great drawer front. And thanks on the wedge hammering; although I don't see the point at the moment. If you used a full width piece of stock, you'd still hammer down the tallest offender first.

Pam

Re: Dovetails made easier

#21

Re: The best fixed frame EVER

Pam Niedermayer - Austin, TX

>I just tried to order this honey, but danged if I can figure out how to pay for it. Do they only use Paypal? Really prefer not to log onto Paypal from a vendor site.

Thanks,

Pam

Re: Dovetails made easier

#22

blade twisting is not to be avoided

Bill Tindall

>Not sure why you want to avoid blade twisting but not doing so has a price to pay. An 8" saw, if you don't need it and you don't for dovetails, is going to be substantially more unwieldy than a 5" saw and the blade will be less rigid. Presuming the board is oriented with tails or pins pointing to the sky will leave the frame pointing to the sky with a twisted blade, a more desirable position than the frame dangling off to the side and generating torque on the handle.

On anything very thick I can chop it with a chisel faster than I can saw it with a fret saw. Maybe I needed a more aggressive blade.

The fret saw approach was abandoned when I had half a mile of waste to remove in 3/4" oak. I guess people were more patient in 1790, probably because they had to be. I concluded that a fret saw was for fret work in thin stock. When it becomes too tedious to chop I waste it out on a band saw for I didn't see the fret saw offered any speed advantage over chopping.

Re: Dovetails made easier

#23

removing waste

Warren in Lancaster, PA

>Bill, I timed myself this afternoon putting four tails on a board. Of the 73 seconds, only about 10 were spent with a coping saw in my hand. I don't see how using a band saw could save time and make this less tedious. I don't know whether workers in 1790 were more patient, but I do think they were disciplined and skilled.

Re: Dovetails made easier

#24

Re: removing waste

Pam Niedermayer - Austin, TX

>In my hands, using a band saw is definitely a much slower and more obnoxious process than using a chisel, unless there are hundreds of things to cut and I can stand there feeding the machine.

I wanted to order one of these coping/fret saws because I want to give sawing the waste a full try. Previously, using a coping saw has been tedious and slow. Perhaps if there were a Japanese version? :)

So, guys, do any of you think this beefed up coping saw is appreciably better for sawing out dovetail waste than saws you've previously recommended? Is it worth a possible compromise of my online financial security?

Pam

Re: Dovetails made easier

#25

Re: The best fixed frame EVER

Kevin Adams

>Wiley, would those jewelers' blades they sell be too fine for sawing out dovetails? I need something a little smaller than the 2/0 size you suggested and I see that site has a selection of some tiny blades...just wondering if they are really meant for metal, not wood.

Hope all is well. Thanks.

Kevin