Home Articles Forums Gallery Marketplace Videos

WoodCentral Forums

Knowledge You Can Build On — Est. 1998

This $39 jig will make you a WOODWORKING GOD!

Drawer design and drawer bottoms

Posts

Drawer design and drawer bottoms

#1

Drawer design and drawer bottoms

Derek Cohen (in Perth, Australia)

>The armoire project has proved to be a wonderful opportunity to create discussions and glean information in a number of areas - construction, design, technique ...

I have begun to write these up and will post them on my website as they are completed.

Well my wife's brother and family left for home (in New Zealand) yesterday and I managed some hours in the shop today. I have the weekend and then back to work on Monday.

The focus is the large drawer in the lower section of the armoire. This is approximately 30" wide by 7 1/2" high by 17" deep.
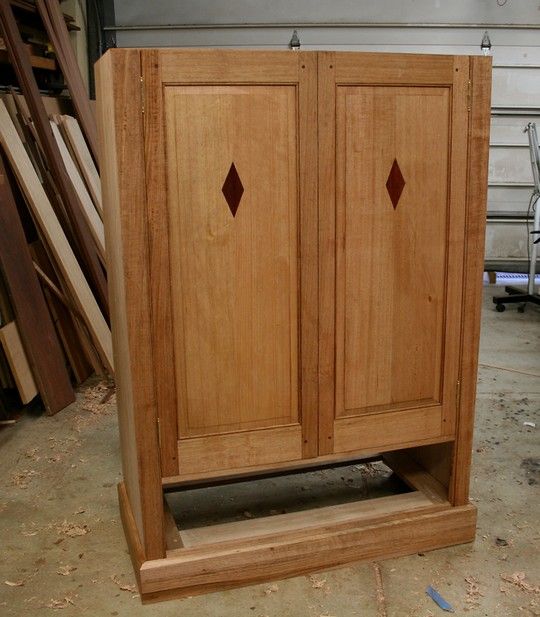

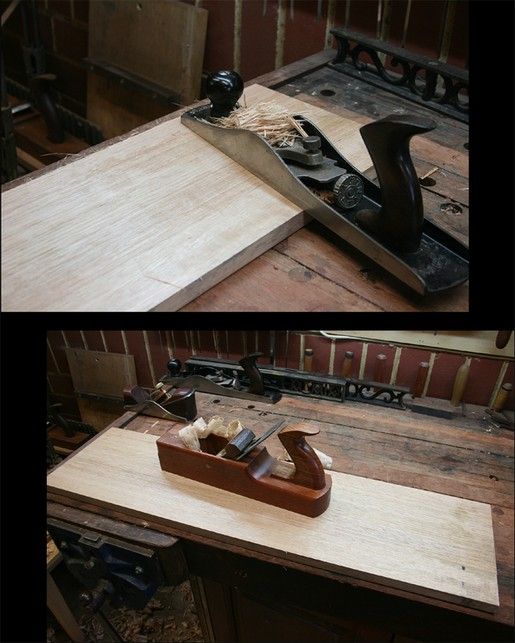
My time today was in preparing the boards - with the exception of a tablesaw for ripping and a bandsaw for resawing, everything has been done with handtools. A few pictures of the dimensioning ...
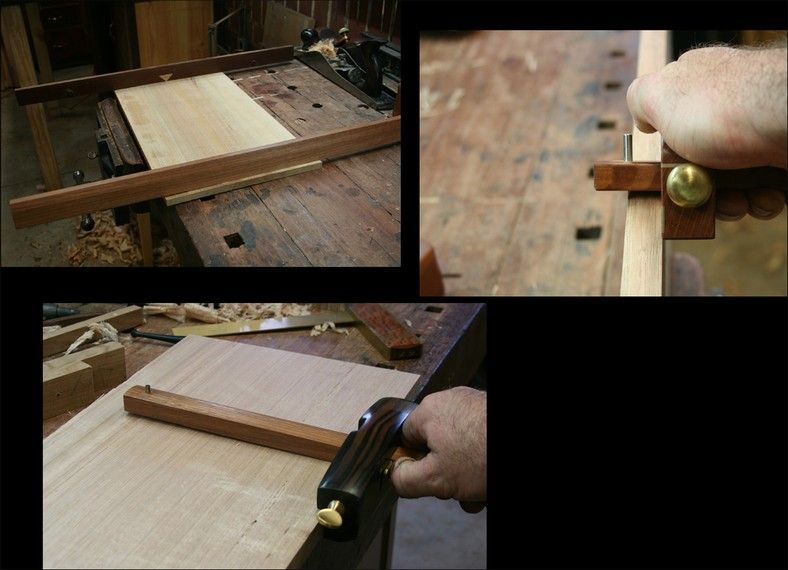

I loved this one of the beads scraped onto the drawer front ...
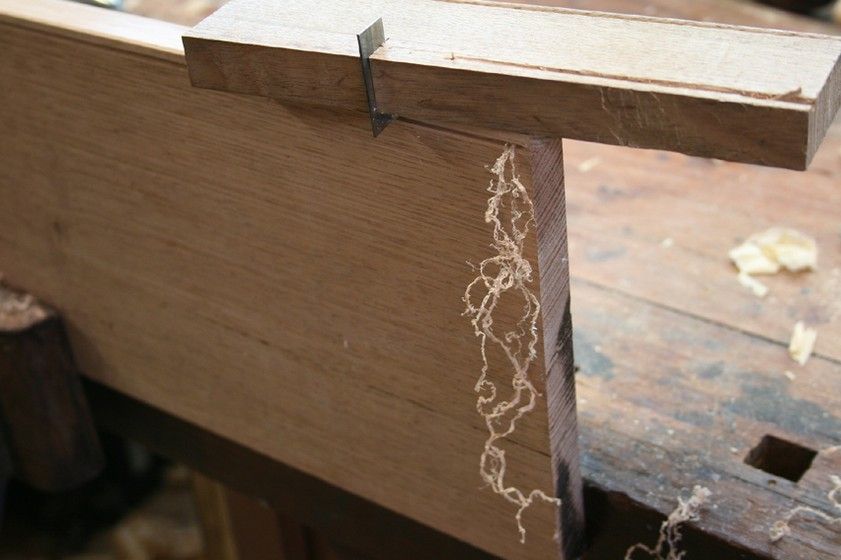

Here are the sides ..
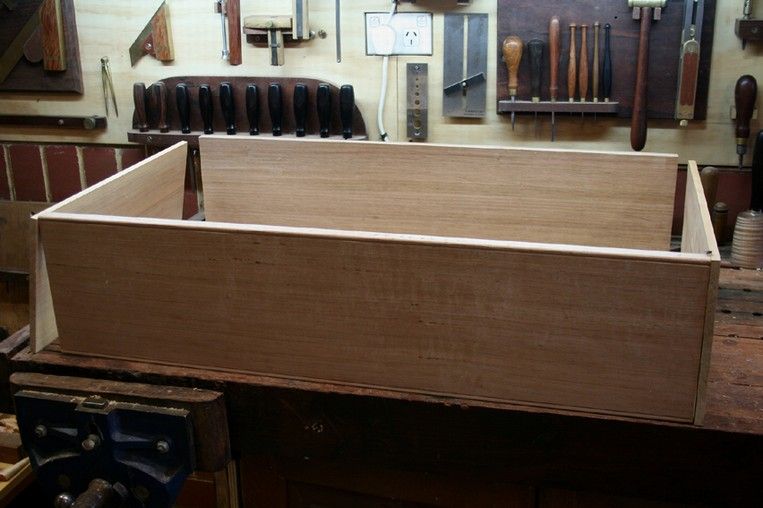

.. and the drawer bottom (clamped with cawls as do with all boards that are left overnight) ..
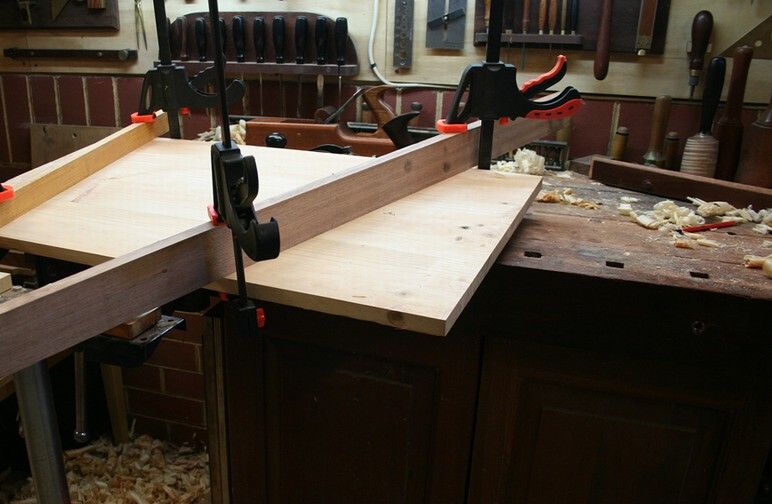

Now the focus of my enquiry is actually the drawer bottom. The dovetails are straight forward - half blind on the front and through at the rear.

I am curious to know what you do when attaching their drawer bottoms, both generally and in a situation such as mine.

Essentially there are two methods I would consider. The third - nailing and glueing to the underside of the drawer - is not up for consideration.

The two other methods are sliding a panel into a groove in the side boards, or sliding a panel into a slip.

It is interesting that in an article in FWW "Drawer Bottoms" by Alan Marks, he refers to slips as the "French Method", so named as it appears to have originated in France.
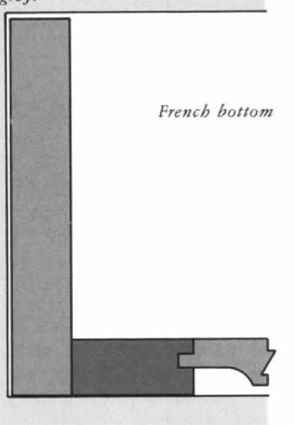

Christopher Schwarz described using slips several months ago on his blog ...
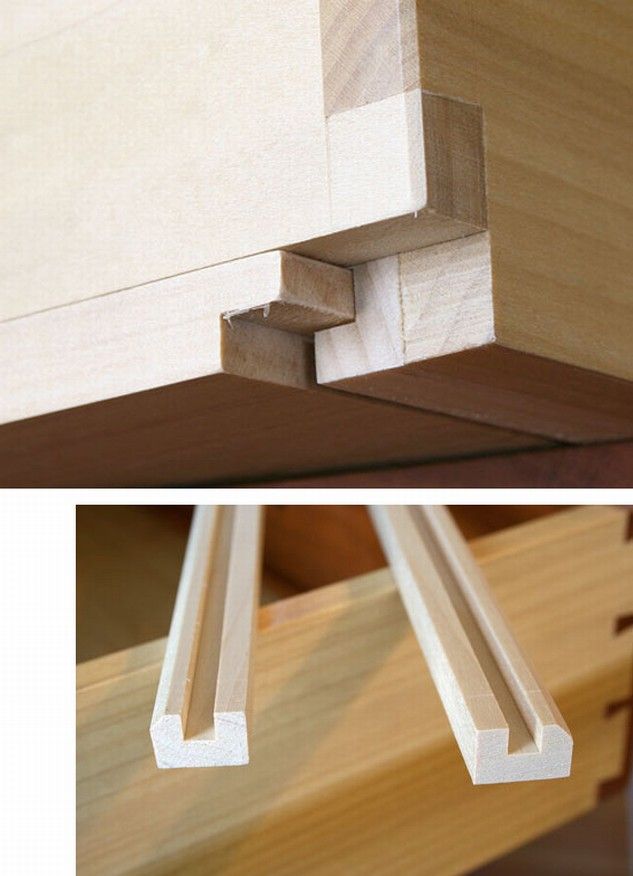

Marks refers to the panel-into-a-groove as the "Kitchen drawer", so called as it was "the cheapening of quality construction to the extreme".
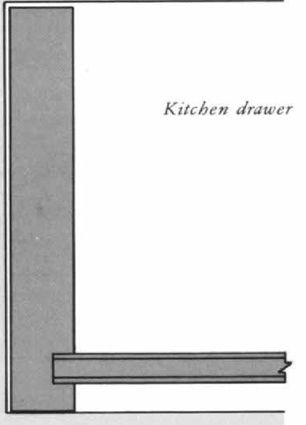

I have used both methods in the past, and my choice is to go down the slip route. This is a decision that is essentially made for me as the side panels are 3/8" thick (the front and rear panels are 3/4").

I am also interested in what thickness others would use for the drawer bottom, keeping in mind the dimensions (noted above). I am using pine here and my plan is to dimension the bottom to around 5/8" (it is presently a nominal 3/4").

Regards from Perth

Derek

Re: Drawer design and drawer bottoms

#2

Just a thought

Bob Hackett

>For those designing something that uses the drawer bottom as a wood runner for the drawer,would it make sense to make the slip extend to the full width of the drawer as opposed to adding a piece on to the inside?

My thought is that drawer sides are usually made from a secondary,less durable wood and using a piece of more wear resistant wood that served as both a slip and a runner that was fixed to a shortened drawer side might add strength to the bottom and durability to the runner in one shot.

Am I overlooking one or more important points?

MB

Re: Drawer design and drawer bottoms

#4

Which one should wear?

Bill Houghton, Sebastopol, CA

>Granted, the sides of a drawer shouldn't wear quickly; but, between the drawer, which can be patched moderately easily, and the runners, which one makes more sense to wear first? Seems to me the drawer wins as the designed weak point.

Re: Drawer design and drawer bottoms

#5

If you go with my thought

Bob Hackett

>The wear surface would be 2+ times as wide as the drawer side alone.I would think that would at least triple the life of the wearing surfaces provided you rubbed a candle stub on them every other year.

BTW-Was your question just a sly way to get me(and I assume others) running around the house pulling drawers and checking case construction?

MB

Re: Drawer design and drawer bottoms

#6

Ellis Walentine

Slips and questions

Ellis Walentine

>According to my old pal Ian Kirby, not a Frenchman by any means, slips are primarily intended to increase the bearing surface of the drawer in the housing. Greater bearing area increases sliding friction, so a paraffin rub is definitely in order. In my experience, a reasonably waxed slip/runner interface wears pretty well, although I avoid softer woods for sides and runners.

I don't claim to have the theory down pat though. For example, I've always wondered about the relative wearing characteristics of different woods for sides (and slips) and runners. I know that all the drawers I've made with denser hardwood bearing surfaces have shown almost no signs of wear. On the other hand, softer wood sides, such as poplar, which we have in a couple old dressers, have worn considerably.

To be on the safe side, I'd go for hardwood sides and runners, and slips to spread out the wear.

Ellis

Re: Drawer design and drawer bottoms

#7

Can you tell us...

Bob Hackett

>If it would create a problem to fit the slips as I suggested?

BTW-Tulip poplar was one of the secondary woods I thought of for drawer sides and this method.Pine or other softwoods would be another.

MB

Re: Drawer design and drawer bottoms

#8

Re: Just a thought

Wiley Horne--So. Calif.

>Hi Bob,

I'm not sure I understand your suggestion. What I think I understand is that you're suggesting having one slab of wood serve as both slip and drawer bottom, and that it would be flush with the lower edge of the sides, and firmly attached to the sides. Please correct me if I have this wrong, which has happened many times before and I am always happy to be set straight.

Anyway, think about wood movement. The slips are long grain to long grain with the drawer sides. But the drawer bottom needs to have its grain running crossways (right angles to the sides), and needs to be a floating panel, so that when it expands and contracts, it just slides in the grooves in the slips. Just like drawer bottoms slide in the grooves of drawer sides. In other words, the drawer bottom gets longer and shorter with weather changes, but it don't get wider and narrower, which would get the drawer stuck tight in its housing when it rains.

So the bottom can't be made rigid with the sides, because either it will be crossgrain with the sides and something will snap, or else if it is long grain with the sides, the drawer will get impossibly stuck in the case during wet weather. And then we get into issues of what frustrated owners do to stuck drawers to try to get at they clothes.

My apologies if I have tangled up your excellent point.

Wiley

Re: Drawer design and drawer bottoms

#9

drawer bottom thickness

Bill Tindall

>The reason to use thin drawer sides, which leads to what I call the "English drawer construction" to accommodate the thin sides, is to lessen the weight of the drawer. That being the case, a drawer bottom of 5/8" seems too thick to me. Faced with a similar situation I make pine bottoms in drawers this size at 3/8". Unless one intends to stand in them a 3/8" bottom is plenty strong. The weak part of the drawer is the dado for the bottom, not the bottom itself.

Re: Drawer design and drawer bottoms

#10

An answer to which should be less wear resistant

Bill Tindall

>Visit your local antique furniture store, preferably one that does not deal in the best preserved English antiques. Note the effect of the white oak drawer sides on the mahogany drawer dividers. Now imagine how on earth you are going to repair the divider so that it looks good.

Now reverse the situation where the hard drawer divider and runner has worn the drawer side. Trivial fix that doesn't show until the drawer is opened.

Much of what I learned in my formative years was from a period furniture maker who also did a lot of restoration/conservation work. It is from that perspective that one learns what works over time better or worse.

Re: Drawer design and drawer bottoms

#11

Being proactive

Bob Hackett

>Seems to me if you`ve made a piece that has oak drawer sides and mahogany dividers then you`ve set yourself up for failure.

For me the answer is not to repair the piece to fail in the same way(as a conservator is beholden to do)but to minimize the cause of the failure if I can by increasing the bearing surface of the drawer side while I`m making the repair.Just what Ellis said a slip was originally designed to do as one of it`s functions.

I would never make a good restoration man.I try to think of ways to improve things and to be bound to repeating the same old mistakes would make me crazy.I`d be thinking"This guy had the oak.Why didn`t he fit an offcut in the divider to keep this from happening?".

For me the answer is not so much "which piece is easier to repair" as it is "how do I make this last till it all falls apart".

Obviously other`s mileage varies considerably.

Mainely,Bob

Re: Drawer design and drawer bottoms

#12

I think that Bill T. was using the example

Bill Houghton, Sebastopol, CA

>as an argument for designing furniture so that the drawer side wears first, not the divider.

As to how he'd repair it, I can testify that cutting thin strips of wood to replace wood worn away on a divider, gluing them in effectively, then fitting the drawer (which includes using that bullnose plane you never thought you'd need to plane down the glued-in strips) is a huge project - I did it on some of our kitchen cabinets, badly built in the 50s from a mixture of pine, redwood, and plywood, much of it clearly scrounged, by a homeowner with good intentions and no money. Some of the drawer sides were redwood casing of a pattern used elsewhere in the house and undoubtedly saved when doors were moved or removed. Those wore like mad, but it turns out redwood dust makes a great microabrasive, so they wore the pine runners too, as much as 1/8".

Reparing the drawer bottoms was simple: plane flat, glue on strip of wood planed to the right thickness, done.

Re: Drawer design and drawer bottoms

#13

Re: drawer bottom thickness

Victor Parisian

>For larger drawers I think a center front to back rigid piece is in order. By doing this the span of the drawer bottom is slightly less than half vs without. Allows heavier loads in the drawer or thinner bottom material. More importantly this equates to piece of mind should a child decide the drawer is a step (damhikt) or someone decides to store their LP collection in a drawer (damhikt either).

Nice looking piece. Coming along nicely.

Victor - in cold and drizzly Houston

Re: Drawer design and drawer bottoms

#14

Re: drawer bottom thickness

Derek Cohen (in Perth, Australia)

>Hi Bill

I came to the same conclusion and spent some time today making a new drawer bottom. 5/16" thick Karri Pine, which is the same wood as the drawer sides (front and rear is Tasmanian Oak). This is a beautiful, straight-grained, light wood.

Here is JK blessing the panel.


I am toying with the idea of using slips on the front as well as the sides. I was going to groove the front board but in the end realised that I could save an awful lot of mucking about this way. What doyou think?

In the mean time I made the slips ..


And this is how they are positioned (just one to show the size and placement ...


Tomorrow I will make the drawer ..


Regards from Perth

Derek

Re: Drawer design and drawer bottoms

#15

Re: Drawer design and drawer bottoms

Wiley Horne--So. Calif.

>Derek's wonderful armoire, and his detailed presentations, have once again proven to be a goldmine of discussion!

I'm a little late to the party, partly because of making a computer replacement, but also because his question caused me to do a little reading as to what past practice has been in the matter of drawer bottom affixing.

Intellectually, I am persuaded by Bill T's description of ruts cut into mahogany drawer dividers (the blades actually) by hardwood drawer sides running on them over and over. So load-spreading through the use of slips certainly would be helpful. And if one is using the really thin 'English' drawer sides, then the slips avoid the need to cut a 1/8" groove in a 1/4" drawer side, thereby creating a weak place precisely where the weight of the drawer is felt. The slips would also be easy to make, since one could just groove several feet of stick, and cut to length. And drawer construction would not be made more complicated, especially if the drawer front were slipped also, as Derek was contemplating doing. So it's hard to find an argument against.

On the other hand, I wonder when slips came into being. I don't believe they ever did come into widespread use in America, unless it is happening right now! So all those early generations of cabinetmakers in America did without. And from Bill T's observation of imported case goods, apparently it was not standard practice abroad either. Perhaps Richard Jones, or someone from the UK, could tell us when drawer slips came into use, and whether the practice became universal, or high-end only.

John Townsend, working in Newport RI in the second half of the 18th century , nailed drawer bottoms into rabbets cut into the drawer sides and drawer front, and for larger drawers, he glued and nailed runner strips onto the drawer bottoms ["John Townsend, Newport Cabinetmaker", p. 70; Morrison Heckscher, Metro. Museum of Art, 2005].

John and Thomas Seymour, working in Boston roughly 1785-1815, brought their methods from their native England ["Furniture Masterworks of John and Thomas Seymour", pp. 124-5; Robt. Mussey, Jr., Peabody Essex Museum, Salem MA, 2003.] They set the drawer bottoms into grooves cut directly into the drawer sides, even on small letter drawers in secretaries. But then, in all but the very small drawers, they placed glue blocks on the underside of the drawer bottoms, up against the inside of the drawer sides (beneath the grooves). These glue blocks were fairly elaborate. They were used along both the drawer front and drawer sides. They were strips a few inches long, which were kerfed at close intervals, so as to mold themselves readily to variations in the bottom and sides, as well as the curvature of some of the fronts. Once the glue dried, they were planed flush with the bottom of the drawer sides and front, thereby providing some load-spreading where the drawers wore on the dividers. So, in effect, these glue blocks were acting as primitive slips, except that they rigidly fixed the drawer bottom to the sides, and this did result in splitting of some of the drawer bottoms, as the wood moved with the weather.

The book "Connecticut Valley Furniture", Kugelman and Kugelman, Connecticut Historical Society Museum, is a study of various furniture-making groups in the second half of the 18th century. During this period, drawer bottoms were either nailed into rabbets, or inserted in grooves in the drawer sides and front. No mention is made of runners, where the bottoms were nailed on.

One other piece of data. Jeffrey Greene's book, "American Furniture of the 18th Century", says that drawer sides and backs were 3/8" to 1/2" in thickness. He illustrates the groove in side and front method, with no discussion of any options.

All in all, the evidence seems to be that slipped drawers, and thin drawer sides, were a British (or English) innovation. Does anyone know when the practice began in Great Britain, and how widespread it was?

Wiley

Re: Drawer design and drawer bottoms

#16

Re: Drawer design and drawer bottoms

Adam Cherubini

>Derek,

Why aren't you considering nailing the bottoms on again? It really solves many of your problems. Its very easy to build, allows the drawer sides to be thin, maximizes internal volume, and permits the easy application of wide segmented or solid slips. If you have a stable drawer bottom material (like plywood), why would anyone groove drawer sides. This was an approach abandoned in the late 17th c early 18th c, when a better system was developed.

We're going backwards guys.

Adam

The point of my column has always been to tell folks how stuff was done so they can move ahead, not to force them to go backwards and do old fashioned stuff. We're plowing flelds we abandoned long ago. This thread makes me think I'm doing a crappy job.

Re: Drawer design and drawer bottoms

#17

Re: Drawer design and drawer bottoms

Sgian Dubh

>"Perhaps Richard Jones, or someone from the UK, could tell us when drawer slips came into use, and whether the practice became universal, or high-end only."

Drawer slips were in common usage in high quality British furniture in the 1700s Wiley, or at least that is what I've found in the restorations I've done over the years. Country furniture and lower quality stuff all the way through to modern work often uses a groove in a thick drawer side... which is the same as in most American furniture, even the antique American furniture that's highly rated by those that are supposed to be in the know.

Contemporary British furniture makers almost exclusively use drawer slips in high quality work. They are common or garden drawer parts around here. Drawers without drawer slips, except in the smallest drawers, are generally considered of inferior quality suitable for workaday furniture, kitchens, workshop drawers, that kind of thing. As long as the side is thick enough it will handle a groove. The problem with thick drawer sides is reckoned to be their inherent ugliness. I have always found it a bit odd that truly attractive American cabinet furniture, whether new or old, usually had within it some drawers with thick drawer sides, 1/2" or more sometimes-- they almost always look heavy and out of proportion to my eyes, but I guess that's just me.

******************************************************************

I would not use Derek's idea for a drawer slip on the back face of the drawer front for the following reasons.

You run the drawer bottom groove in the drawer front and the drawer slips one after the other using the settings needed to do this with whichever tool you do the job with. The end result is that the groove is inset the same distance up from the bottom edges of all these parts.

The slips are made with a tenon at the front end that coincides with the position of the groove. This tenon fits into the groove on the back face of the drawer front, ergo, all the grooves line up thus ensuring the drawer bottom slips in easily.

Replace the drawer front groove with a groove in a slip that is attached to the back face of the drawer front, and then ask yourself, "What lines up all these parts?" When that question's answered most people drop the 'slip attached to the drawer front' idea pretty quickly; it's additional work for no good reason and messes with installing and setting a drawer stop which usually sits right at the back of the drawer front. Slainte.

Re: Drawer design and drawer bottoms

#18

Re: Drawer design and drawer bottoms

Derek Cohen (in Perth, Australia)

>Hi Richard

Thanks for your input here.

Perhaps you can comment on this - in my understanding there are essentially two types of slips (I am not including the style, such as bevelled, rounded over or flush). Theses are either tenoned or non-tenoned.

My intention is to use non-tenoned slips. These are simply glued to the panels. I fail to see where there is likely to be a problem with alignment. Perhaps I am missing something here. Can you clarify your recommendation.

I ask for interest as I am on course and cannot turn back!


Regards from Perth

Derek

Re: Drawer design and drawer bottoms

#19

Can you elaborate a bit?

Bill Houghton, Sebastopol, CA

>Are you proposing to nail the bottoms on from below? If so, will the bottoms become the bearing surface, with nails slowly becoming proud of the bottom as the wood wears?

Or you mean to nail through the sides into the bottom?

Having, two years ago, finally gotten rid of kitchen cabinets with various nailed-on drawer components that, as the wood wore and the nails didn't, left tracks all over the wood, I would need some convincing that nails are a good long-term solution for a moving component in furniture, especially one stressed in as many directions as a drawer.

Re: Drawer design and drawer bottoms

#20

Re: Drawer design and drawer bottoms

Sgian Dubh

>Derek, there are two types of drawer slip in common usage, but both typically include a tenon at the front end to locate the slip in the drawer front groove. You can make the slips, of either pattern, without the tenon, but that just makes it harder to line up the drawer side slip groove with the drawer front groove.

The difference in slip pattern is down to the drawer interior requirements, ie,

**1- do you want the top face of the drawer bottom flush with the top face of the slip?

**Or, 2- do you want the drawer bottom to sit below the top face of the slip?

If it's the latter, 2, your slip looks like:


With an end result as in these images which incorporates a 6 mm (1/4") thick drawer bottom:


If, on the other hand, you want the inside of the bottom flush with the slips you use a thicker drawer bottom and utilise an offset tongue on the front edge of the drawer bottom-- the upper face of the tongue is on the same level as the rest of the upper face of the drawer bottom. This is to allow for shrinkage of a solid wood bottom and the tongue formed like this prevents a gap showing when shrinkage occurs. The sketches below should show it. I don't happen to have a drawer to hand with this type of slip configuration, so I'm afraid the sketches will have to do. I imagine the sketches will allow you work out what goes on.

And maybe it's time I created a new web page to explain all these differences. I have a ton of images, but I'm really too tied up with another major writing project to deal with it at the moment. Slainte.

1. Flush drawer bottom/slip configuration viewed from the back-- notice thickness of drawer bottom.


2. An exploded view of the flush slip/drawer bottom/groove configuration viewed from the front right hand corner.


Re: Drawer design and drawer bottoms

#21

Wonderful sketches

Bill Tindall

>I don't know why this style of drawer is not more widly used in the US. I encountered it in an antique store that specializes in English antiques and have used it ever since. However, every time I need to use it I puzzle for a bit to work out how it is done. I just used the handy "Snip" feature of Win 7 on my new computer to snip and paste the sketch into my woodworking folder where I can find it next time. Thanks for the wonderful sketches.

Re: Drawer design and drawer bottoms

#22

Drawer history

Bill Tindall

>At the 2007 SAPFM meeting we got to tour the Philadelphia museum. In response to a question our guide removed the drawers from the pieces in the gallery that displays furniture beginning in the 1600 and onward. Nailed bottoms got abandoned quickly in the history of refined furniture. Tools to make more technologically advance drawers may have played a part. Maybe the improved standard of living enabled people to afford better refinement in drawers or better tools to make them. What ever the case, drawer construction in quality work got settled many years ago except for this slip or not to slip issue which may be cultural rather then engineering. In my mind there are only three drawer building options for most case goods- grooved drawer sides, slips and Accuride slides. One of these options excels in kitchens.

Re: Drawer design and drawer bottoms

#23

Re: Can you elaborate a bit?

Adam Cherubini

>Hi Bill,

Forgive the expression; the devil is in the details.

In the 18th c, cabinetmakers began building drawers differently than they had previously. The exact configurations varied slightly and regionally. The standard London/Philadelphia config featured thin (1/2") drawer sides. Sometimes the fronts were rabbeted, sometimes grooved. The bottoms were then nailed on from underneath. The nail heads were brought flush with the bottom then thin, sometimes segmented, sacrificial, softwood "slips" were glued onto the sides and sometimes the front to cover the nail heads. These were easily replacable.

The key to the design was in the material chosen for the drawer bottoms. Knowingly or not, many cabinetmakers seemed to choose materials that, as a result of their cut, were dimensionally stable. Riven or heart sawn pieces are most common.

Cracks in these ancient bottoms are not unknown. But they aren't as prevalent as one might expect. I looked at maybe 50 such drawers one day and saw only a few that were cracked. Drawers bottoms were often lined with paper in the 18th c to protect textiles from the wood. And drawers then probably didn't hold a great deal of weight. I believe it's also possible that drawers may have been removed completely for access.

For modern woodworkers, the nailed on bottoms can work. Small flush head screws might be a reasonable substitution for nails. Plywood for bottoms. But the slips are easy to deal with and I think solve many of the challenges Derek has. If you let the bottoms into grooves, you have a funny step to deal with if the slip needs to be wider than the drawer sides (typical slip width is an inch). You may also have a 2 different grain orientations (between the bottom and the side). I'd even be tempted to substitute UHMW for traditional slips.

Adam

Re: Drawer design and drawer bottoms

#24

HDPE

Larry Barrett

>To follow up on Adam's thought, I have used HDPE to repair/restore worn drawers. As others have pointed out, it is not uncommon in old chests to find drawer sides have worn grooves in the runners, to the point where the drawer bottom is resting on the rail. I thought of using UHMW strips to fix this, but could not find it in thin sheets or strips. But I did find HDPE material in 1/16" sheets (MSC). This is easy to cut into strips. I have been successful just laying the strips on the worn runners. The 1/16" is often just enough to raise the worn drawers to their original height, and of course makes the drawers slide really easily.

Re: Drawer design and drawer bottoms

#25

Frank in Colorado Springs

Tremendous contribution.....it also

Frank in Colorado Springs

>disproves the old adage that 'a picture is worth a thousand words'. Yours are worth at least 5,000 words!!