We value your privacy.
We use cookies to enhance your browsing experience, analyse site traffic, and personalise content.
By clicking “Accept all”, you consent to our use of cookies. You can also choose
“Essential only” or learn more.
>Most of my mortising is done with a small Delta mortising machine. There are occasions when I would like to be able to execute a hand chopped mortise to save setup time,etc. Reading early works by Ian Kirby on the subject, he states that a mortise chisel must be exactly square, back to sides, or the chisel will twist during chopping, rendering the sides of the mortise more damaged than necessary. I would like to hear some commentary from those of you who are experienced with hand mortising. I have several mortising chisels and all are slightly angled, narrower in front than back. Are there available mortising chisels that are exactly square and do you agree that this is a necessary criterion? The walls of mortises that I have chopped as learning steps do have damaged walls from twisting. It may be my techique.
If the mortise chisel has exactly parallel sides, it will tend to bind in the wood. I believe about all of the old British mortise chisels, as well as the modern Japanese ones I have seen, are relieved a bit behind the cutting edge to provide clearance so the chisel won't bind in the cut. In other words, the cutting edge is the widest part of the blade; the body gets a couple degrees narrower behind the cutting face.
>There are square mortising chisels. But, if the chisel is not placed perfectly on the wood, if it is angled, then it will bruise the sides of the opening and you are back to where you started.
Main thing is to have an organized process. Let the chisel do the cutting, if you drill, drill undersized. Excavate from the center out with changing 180 blows, then cut down the ends; or do the tiny steps in one direction method. Try not to pry in order to learn good cutting technique. Each blow should remove a precise segment.
>Wiley and Thom- I appreciate your responses. Thom, I thought prying the cuts out was part of the process. I am not sure I understand your comment about not prying. How would you remove each cut otherwise?
>My mortise chisels are square, but I can't see that a slight taper would cause the problems you describe. Like Thom suggests, a careful, disciplined approach will give clean results.
>I like my mortise chisels to have parallel sides. They cut the mortise sides better. I just don't see the need for a tapered wall of the chisel except if you are cutting deep structural framing mortises. All the mortises I cut are rather small, furniture scale size. I like the cutting action that the trailing arris of the chisel has. Every edge is a cutting edge.
My mortise chisels are square well rather rectangular and are parallel on the sides. I have new and old ones of the same configuration. I have one that has a slight relief and that doesn't seem to cause a problem but doesn't address the cheeks of the mortise. A crisp bevel will help shear the cheeks smooth.
I also have learned to chop mortises without rotating my chisel when I get to the other end. Rather I use the bevel to chop down the far side end of the mortise. So a square or rectangular profile is helpful.
I have broken a chisel, it had a pre-existing fracture, while prying during mortising, so I do pry much any more.
Some times I predrill the mortise, some times I don't, but I do score my mortises with a proper gauge and square and striking knife.
>I am a reasonably experienced woodworker. I do mark out the mortise and tenons as you describe with a proper mortise gauge. I simply have not put the time into hand chopping mortises as the responders above apparently have. It does sound like a disciplined approach is necessary, as for example, cutting dovetails. I also respect Ian Kirby's writing in Fine Woodworking on the subject since he was taught in the English hand woodworking tradition. The thing that caught my attention in his paper in an early Fine Woodworking article was his insistence on an absolutely squared up chisel, obviously rectangular but squared to the back sides, to avoid twisting during chopping out. In a separate article in FWW, he mentions predrillng the mortise also. Which angle do you find best for grinding your mortising chisels? Some of you indicate that your mortise chisels have sides squared to the cutting edge. Did you find a chisel that was manufactured square or did you have to square it yourself? The latter chore sounds tedious. Kirby describes such a process in his articles. Thanks for the above suggestions.
>I well remember the Kirby article in FWW almost 30 years ago. I did not change my technique as a result of reading the article, but his is similar enough that I could have done so. Interestingly enough, a very indignant Frank Klausz wrote in that it was ridiculous not to have some relief on the sides. That was the first I ever heard of Frank. A lot of the skill in mortising is to bite off a consistent amount with each cut, and you have to learn that amount for each timber. You do want to be sure the sides of the chisel do not bulge out wider than the face- that will bind.
I think that you find that chopping mortices is a lot like cutting dovetails - there are a number of preferences and methods, and each has its adherants. You say tomato and I say ...
I use a mix of vintage and new Oval Bostered mortice chisels. These all are trapezoid in profile. While I can understand the rational for a square profile registering better, I have not experienced any such problems with my non-square sided chisels.
Below is the technique I use. As I stated, there are some here who will say that they do the same, and others who will dismiss it for their own. I really do not believe that one is better than another if it works for you.
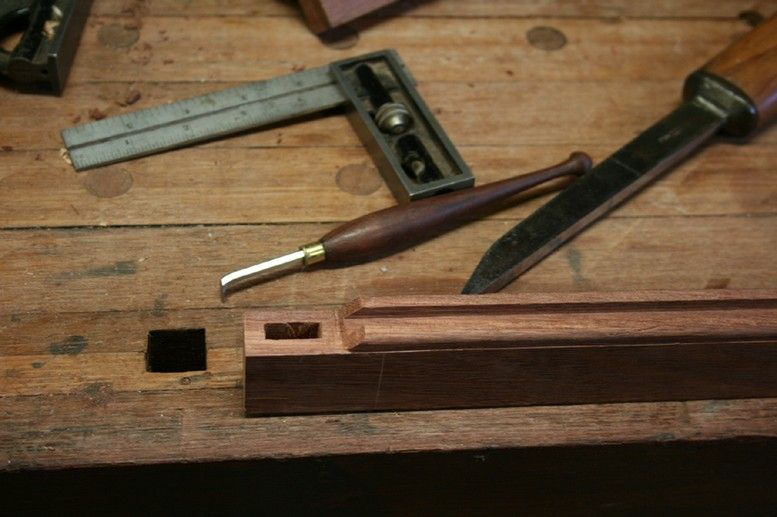
This sequence was from the images I took recently when I morticed the tenon of a jack plane tote I was building. The wood is Mesquite...
".... Now for the mortice.
This was marked out with the mortice gauge (seen earlier � thanks again Wiley for such a wonderful gift!).
A tip that Wiley gave me and that I use all gthe time is to first mark out the mortice in pencil, use the mortice chise to mark a point within this, and take the gauge settings from this (ignore the state of the mortice chisel bevel here - it was a previously unused 1/2" chisel, and was subsequently prepared and sharpened before used here!) ..
The initial dimensions are taken from the tenon end (both mortice and tenon are marked identically).
The method I use is to leave a �� at each end of the mortice, work the centre first, then clean up the two ends last.
The first run is just to establish the outline, so I chop shallowly, and make sure I stay inside the outline. Then pare this away with the mortice chisel.
Once I am near the desired depth, I add masking tape as a depth gauge and chop to the line. In this case I planned for a depth of ��
When you are finally to the depth you want, extend the outer ends to the dimenal dimension with a series of paring strokes.
I use a shop-made bottom cleaning chisel (ground from a allen/hex key) to remove chips and clean up ..
Here is the finished mortice. It will receive a tenon that it �� deep, 1� long, and �� wide.
>Derek-A fine pictorial description of your methodology and tools. The cleanout tool is a revelation. Bill Tindall chipped in with an email about chisel handles and the importance of shape in keeping the chisel straight while chopping(ovoid handle vs round). Many thanks to you and other commentators for educating me on this subject.
>I've cut mortises with tapered and square sided chisels, chisell and bit mortiser, horizontal boring/mortising machine, plunge routers with shop made and store bought mortising jigs - and then I found the Festool DOMINO. For normal furniture scale pieces mortising - loose tenon mortise and tenon joinery specifically - it's The Holy Grail - for me.
(drive by gloat if you're a Normite, an admission of a transgression if you're a Follower Of Roy).
Quick, easy and accurate - even for an absolute newbie.
But to the specific question - square or trapezoidal - the attached link is to a discussion on the subject by two very exprienced woodworkers, one of whom is also a tool maker who, among other tools, makes mortising chisels. Their discussion was extracted from a thread on the subject in the usenet newsgroup
rec.woodworking aka The Wreck
Their personal opinions, both based on a great deal of actual experience, may help with your decision.
I got, and used, Jim's square mortising chisels, which you can see by using the link at the bottom of the attached web page. Great tools - that work well - IF - you use them correctly.
And THAT starts with your layout tool(s).
You CAN'T "register" the cutting edge of a chisel to a pencil line - unless you use a 6H pencil and scribe the lines INTO the wood. A scratch awl or exacto knife can give you an incision to register the chisel's edge to - but they both produce "V" grooves so you're actually registering to the centerline of the "V", which may or may not be the end of the mortise you want to cut.
And if you use a "wheel cutter" marking gauge - with a double bevel on the "wheel" you're back to the same problem - a "V".
BUT - if you use a Single Bevel wheel - like on the Tite-Mark - and the flat face of the wheel is facing the end of your mortise - you've got a vertical wall at the end of your mortise you CAN register the flat BACK of the chisel against - and - if you pay attention - have it help you get the chisel square to the surface of the part to be mortised.
I usually make a light cut from "in the mortise" towards my single bevel scribed line to give some room for the wood to go when I make the next light vertical cut. I get the ends started with a series of light chopping cuts followed by some paring out wood for more room for subsequent cuts. Once the ends are down a quarter of their final depth or so I can start wacking thing harder and making deeper cuts - since the off cut now has a place to go.
There's a lot more to doing good, accurate mortises than just the shape of the chisel.
Hope this helps rather than adds to your decision.
(and, if you've got the dough - look into the DOMINO. It really is a revolutionary woodworking tool that allows even a newbie to do loose tenon mortise and tenon joinery - with a minimum of fret and frustration)
>Actually you CANNOT register a mortise chisels to the sides of a mortise using ANY type of mortise chisels or ANY type of layout tool.
The reason is very simple.
When you start the mortise the sides of the mortise chisel are way up in the air and the only thing that is contacting the wood is the edge.
By the time you have chopped down a little and the edges are starting to bury themselves in the wood, the position of the edge is way down into the wood and fully defines. You aren't going to move it at this point.
>I didn't follow the "v" scribe line discussion. The various means of scribing a line on wood, work fine for installing hinges, cutting dovetails and any other application I have used them for. Why again isn't a scribe line made by these means suitable for establishing the sides of a mortise where the tolerance is greater than these other applications? Are we chopping with a mortise chisel or paring to the line after drilling in this discussion?
>It's critical that you START a mortise right - on the ends - while there's still plenty of wood available.
Get the chisel started wrong and it's all downhill from there. Get the chisel started right - and you can still screw up - but it's not as easy to screw up.
And it's the ENDS of the mortise I start with - BOTH ends - and I layout the mortise WIDTH to match the mortising chisel I'm going to use - even
if I drill out most of the waste in between (leaving some meat at the ends for chopping cuts - as opposed to paring cuts to fix what the mortising chisel should have done).
I hope the attached illustration shows the importance of the way the layout line is scribed and how that can work for - or against you.
Text, especially unedited text, sure can muddle the waters, or, at best, not communicate well.
>If you start chopping a mortise at the very ends by the time you have levered out the waste the end will be destroyed. Traditional practice is to start chopping a little in from the ends of the joint to protect them, and then chop on the line at the end straight down when you are done. Since the scribing should be pretty shallow anyway (to avoid unsightly marks) how the scribe is shaped isn't really an issue one way or another.
>Yeah, and I think starting the mortise in the middle is an even better idea, work my way out to the ends, turning the chisel appropriately as I go.
And there's more. When I used Jim's square chisels in some tests, I split the wood, not when I used trapezoidal chisels. Not all the time, but enough to convince me to sell them.
As to marking mortises, I use all sorts of gauges, none of which had any appreciable effect on the resulting mortise/chisel relationship. I do set the gauges using the chisel, so take care to have the "inside" gauge blades' sides flat.
>As usually is the case, too little info can cause misunderstandings.
To clarify, I don't drive the mortising chisel into the ends of the mortise. It's scribe, pare out a bit of wood behind it, hit the mortising chisel, held vertcially, down a bit, pare out a chip behind it. Repeat for a while. As the angle of the bood behind where I'm chopping gets shallower I keep moving back.
If the first end cuts were where they should be, the sides of the rectangular mortising chisel can't twist and cause the SIDES of the mortise to wander- since the front sides of a rectangular chisel also cut wood on the way down - something trapezoidal chisels can't do because only the corners of the cutting edge contact the wood. And if the cutting edge is sitting in a One Vertical Wall scribe line, it's hard NOT TO start "in the line".
Subtle things - but they do have positive effects. Binding can be a problem - but usually only if you're impatient - which I normally am - except when using these mortising chisels. Had one stick early on. Tugged real hard to get it out - and had the handle of the chisel impact my chin. Turns out you can see stars when hit "right on the button".
>"If the first end cuts were where they should be, the sides of the rectangular mortising chisel can't twist and cause the SIDES of the mortise to wander- since the front sides of a rectangular chisel also cut wood on the way down - something trapezoidal chisels can't do because only the corners of the cutting edge contact the wood."
Hi Charlie,
Your detailed descriptions make for a very useful discussion. Thank you very much.
I have one remark about the quoted statement above, and one about the drawings.
And I offer these with this caveat: I'm live-and-let-live about most things, most particularly how folks do mortises. So these comments are in the spirit of clarifying things as I understand them, rather than trying to persuade anyone to change their ways:
1. Quoted statement. I assure you that a mortise chisel which has a trapezoidal section does indeed cut with both its blade and its edges. The sides of the blade are parallel to each other--the relief is behind the cutting face (only). I have seen plough irons that are relieved as you move up the cutting face--Alex Mathieson's for example--but that's what is being discussed in regard to mortise chisels. I would also add that the relief behind the cutting face is not always pronounced. In fact, with my Imai mortise chisels, you have to mic it to know it's there.
2. The drawing. As far as I know, nearly everyone on the planet leaves about 1/16" or a bit more at the ends of the mortise as they're chopping it out. Then, with the mortise at depth and cleaned out, the little remaining end sections are pared out. This avoids any need for levering, and, because there is so little meat left at the ends, it also avoids having the chisel back up behind the intended line. You're just paring away about 1/16" at each end; the chisel won't back up across the line.
>When would it matter if the length of a mortise is 1/32" longer (or what ever) than target? I fit tenons to the mortise at hand. This marking tool discussion seems relevant to dovetails or hinge mortising but not at all to a mortise length, unless I am missing some point.
The load on the ends of a mortise are compression. Any glue is going to have adequate gap filling compression strength, at least on the scale of the chisel deviation , so a small gap on a M&T joint end seems to be irrelevant.
The test of time has shown mortises cut with a hollow chisel mortise machine to be sound. It is hard not to get one cut with a mortise chisel way better then these machine cut mortises. Which leaves me to believe that fretting over mortise precision is not very important except for the part of getting it orthogonal so the frame lays flat. Now that dimension I can have problems with if I am out of practice.
I don't know if it matters or not. All I know is that I mark the mortise and try to cut to the lines. Knowing that there's still a tenon to adjust if I mess up.
The thing is, it's as easy to cut to the line as to cut over the line. I am under the impression that folks mostly leave a little meat at the ends, like 1/16" or so, and pare that out pretty much the last thing. Let me ask you--do you do that? Or am I under the wrong impression?
I agree with you that the key issue is whether the mortise is plumb or not. Cause it don't have to be off much before you have a cattywompus frame.
>In period work we do quite a few through mortises. Here it is awfully nice if the tenon end fits the opening snugly and makes a presentable job. House doors are often wedged, which helps close up a gap, but cabinet doors and sash are usually not. And as Wiley has suggested, overall precision is increased if the mortise is precise.
First to Trapezoidal, Rectangular and a Hybrid Wiley described (I think I got it right) - the attached illustrations with accompanying text.
As for registering the mortising chisel on the ends of the mortise - ie - in a shallow scribe line - with a vertical wall at the end of the mortise - we probably have different mortising techniques.
Rather than drive the chisel as deep as one or two stout blows can, I go at it with lighter vertical cuts followed by angle into the "end" pseudo-paring cuts to leave room for the next vertical cut - no prying to break out the chip at all (and it's often the prying with the cutting edge that dulls or damages the cutting edge).
Once the ends are established I can drill out most of the waste in between with harder blows and deeper chopping cuts. Still pare in to make room for the next chop cut. And since at least a chisel thickness of the ends has been set by the earlier end cuts, the sides stay straight and square.
Lots more to cutting mortises than is initially thought of - and as many ways to cut them successfully. I'm just trying to explain the way, one of many, that I find works - for me - and why I prefer a rectangular cross section over a trapezoidal or this new to me one - a hybrid.
I can think of a great example of where accurate layout and mortise and tenon cutting are pretty important - a table's apron to leg mortise and tenon joint. Here you want the top of the apron and the top of the leg coplaner. Be off just a little bit and you'll see - and feel it - though others may not unless they're very observant.
So when you layout the mortise in the leg and the tenon for the apron - you want the distance from top of leg to top of mortise and from top of apron to top of tenon to be really really close. The bottom of the mortise and the bottom of the tenon may be off - but you can fix that. Be off at the top and things get a bit trickier - and time consuming - which is why I like loose tenon mortise and tenon joinery.
And while I prefer to Leave The Line with dovetails and finger/box joints, and pare To The Line at the end to get a good fit, with mortise and tenon I want the mortise to start on the critical end On The Line - and keep that there. Same with the tenon - if I HAVE TO go with actual mortise and tenon - as in through tenons - which are handy for woodworking bench bases.
And back to layout tools, the Tite-Mark can be set off an existing mortise or tenon and accurately transferred to the tenon or mortise - so it's not only a layout tool, but a measuring tool - as in I need a line "this far from the fence" - and I don't need to know the numerical fraction or decimal distance.