We value your privacy.
We use cookies to enhance your browsing experience, analyse site traffic, and personalise content.
By clicking “Accept all”, you consent to our use of cookies. You can also choose
“Essential only” or learn more.
>I use what ever tool will get me the results I want in the least amount of time. I am currently working on a pair of benches made to the specs of the pictured model. The stretcher, carved texture on the seat and legs are all done with hand tools. there are other steps along the way where hand tools are used as well such as cleaning out or fitting slot mortices. a couple of the cypress boards for the seats need to have butterflies and those are something I typicaly do mostly by hand.
>I'm building a DVD case out of cherry.I cut out the stopped dadoes for the shelves this morning using a backsaw,chisel and router plane.On the other bench,I still have to glue up the lower sashes I made for a three piece arched window I'm making with red oak.And on the back of the other bench I still have to finish creating the details for the walnut clock case I'm building.I think I'd better finish something,I'm gonna run out of room.---Jack
>This sideboard / buffet (whatever you want to call it) has been taking up my spare time for the last 5 months or so. I am finishing up the drawers, 5 drawers and 4 pullouts that are built like doors. I have cut the dovetails on the pullout shelves and still have 5 drawers to cut, which will probably take tomorrow evening and Saturday. The carcase was not built with hand tools, although the surfaces were all planed smooth. I found my #131 plane to be very handy for smoothing the very slight and varied arch on the posts after bandsawing them to sahpe. I had sharpened the iron like a smooth plane but figured out it works much better if the iron is sharpened with a slight radius, in between a jack plane and a scrub plane. I plan on finishing the sideboard in about 2 weeks. THis is a pic of my bench with misc tools scattered about, following pic will show the sideboard.
>The pullout shelves are built like drawers, not doors. They will set behind four doors in the bottom of the sideboard. I designed this piece mostly based on the customer's needs and space and styled to go with a table they have.
>I am in the process of rebuilding part of my workshop following a second story addition of an office for my work.
The current project is to build a couple of tool cabinets. I am trying to kill a few birds with one stone, in this case using these as a vehicle to write a magazine article (not a review), so there is a deadline to meet.
I had essentially completed the cabinet - demonstrating dovetailed construction, sliding dovetails, stopped mortices, full- and stopped rebates, grooves in drawers, hinge mortices... all done with router planes, and then, last Saturday, I was going to glue it all together. Sunday I was due to fly off to Cape Town for a week, and I then would have about 10 days to finish the jarrah-and-glass doors, hang them, finish, and take final pictures, and complete the write up.
But Friday night it rained. Hard. And the roof leaked (the second story office addition over the garage is not complete).. and everthing was wet when I went into the workshop this morning.
There was a puddle on the end of the workbench, and the vise was already rusting.
I dried the (pine) boards as much as I could. Some were already warping. I clamped everything as flat as I could. Most of my clamps are still packed away in the container, so I did as best as I could with what I had.
There was no chance at glueing up anything as the wood had swelled up in the dovetails. The tails were a saw kerf wide. Now they were less than this ..
Fortunately we had warm autumn (fall) sun, so I left the boards to dry, turning them around to get them to do so evenly. Away for a week as I was forced to be patient, hoping the clamps will keep the boards flat (I have done this once before) and it will turn out OK.
Did I mention that I have spatial difficulties? That I am constantly guarded against the possibility of reversing directions? It really is not unusual that I build something over the course of several days, then discover that part of it was made backwards! So I have become a master of The Recovery, an ace in repair... I think that I once stated that I consider the essence of woodworking to be the ability to repair mistakes!
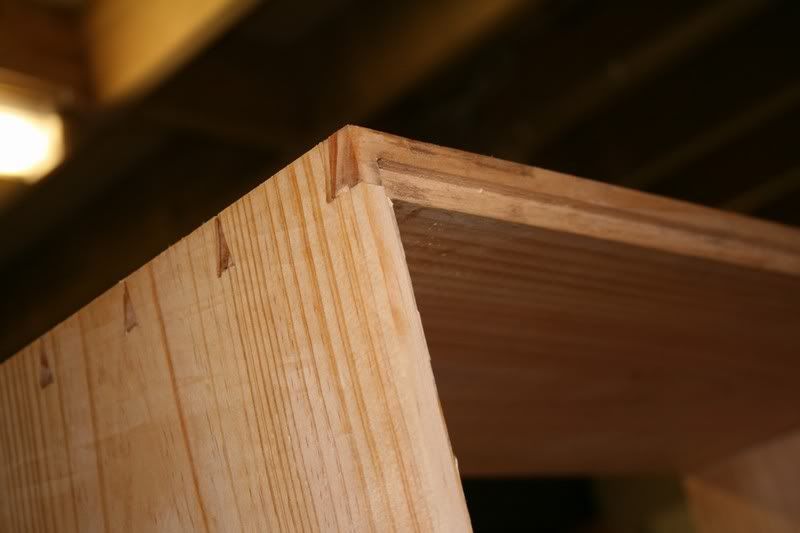
I had cut the dovetails for the cabinet. This went pretty well. The dovetails were tiny - just a saw kerf wide - and evenly spaced.
Then I planed out the rebates for the cabinet backing. These went well ... two sets of through rebates and two sets of stopped rebates. Let's do a dry fit .... Oh Damn! Cut two of the rebates on the wrong side of the board!
Ordinarily I would just redo the work, but I was/am under a short deadline to get this cabinet done. So I just flipped the boards over - but now the tails would have to fit pins that were not cut for them. Actually not such a problem since all the spacings were the same.
So I pressed ahead and cut the sliding dovetails for the centre divider and the stopped dados for the drawer housing.
I did not get a chance to test the fit as it rained ... the boards were soaked ... the pine swelled and so the tails and pins changed shape.
I really should have just junked the whole thing but I set it all aside with clamps to dry - hoping that it would not warp and that, magically, it would return to its original pre-wet state.
I returned from my trip to Cape Town on Sunday. The wood looked good. Dry, straight ... could a miracle have happened? I had a couple of hours in the workshop to find out. I completed a remaining stopped dado.. and then fitted and glued the carcass together.
Here is the the basic carcass ..
The dovetails? ... they look great!
Even more amazing was that the rebates lined up and will require minimal adjustment:
Here is one of the sliding dovetails and a stopped dado ...
>Great recovery, Derek. While good things happen to bad people, they also happen to good people and medium people, as do bad things. Or, things don't choose. Just goes to show that sometimes the best thing to do is nothing for a few days.
Congratulations on fate being kind to you.However I'm sure that attention to detail on your part helped fate along.
I am a true believer in that tenet that woodworking skill is measured by the ability to repair mistakes. I heard that before but I don't remember where.I found that if I follow basic rules and order in my joinery,and pay attention to small details,regardless of mistakes things tend to work out in the end.
>I've got a pair of walnut chess tables standing on top of each other on top of my second work bench that are 3/4 done. They have been in this state for over two years partially because I ran into issues using hide glue on purchased pre-laid up veneer backgammon surfaces (ruined two of them - $!). (The center of the table top slides out revealing a backgammon board underneith. The top is reversible so that you can hide the chess top.)
I've got a Windsor baloon back side chair complete, minus the final hole drilling and assembly. This is in the hold mode because my sons bought me the piece parts (minus the wood) of a flint lock rifle two Christmases ago.
The flint lock is slow going, and has kept me from chair making for going on two years. Justice is partially served, because the chair Christmas presents that have been going out to my kids other years past took a hiatus this past one.
I've inletted the lock, barrel, butt plate, nose, and trigger. I've channelled and drilled the ram rod whatsit. I'm to the point where I need to drill, tap and screw the lock, trigger and barrel tang together - long holes that need to hit a small targets. Then pinning the barrel and furniture & the finish shaping of the stock. I'd say it's 2/3 complete. The further I get, the more nervous I am about ruining the whole thing.
>Well, this isn't mostly handtool work, but its certainly the most handwork I've ever done on a project. There are very few surfaces that weren't worked by hand. I took a class at The Furniture Institute of MA with Phil Lowe (and lots of help from Freddy Roman). Phil does a lot of stuff by hand that I would do with a machine, but I appreciated the lessons and will apply them to other things. for example, we marked the shoulders on the side panels, cut them close with a TS, then finished them up with a chisel. We also flattened the panels by hand, etc. I learned a lot and really enjoyed the class. We didn't finish, I shipped all the parts home in boxes. I did do all the dovetails by hand and, of course, the fan is carved by hand, legs shaped, etc. I flattened the panel for the top by hand (got lucky and didn't need much work though). Spent many hours shaping and fitting by hand. Really enjoyed this project and learned a lot. Hopefully, I can remember what I learned and messed up and apply it to future projects! I have really enjoyed learning more about hand tools and using them. It is much more friendly and rewarding to me. I have done a couple of small projects mostly by hand. Anyway, enough babble...
>Ya know, A cherry medicine cabinet and shelves for the bathroom, all with a hand rubbed finish. Ya know, nothing compared to painted wood. I'll show some pic's when it's in place. Also a flat boring knife block I made for some Japanese knifes I received for Christmas. Think I'll paint it to mimic walnut and bird's eye maple. I just finished letting the paint dry so I'll be posting that early next week as well.
On to a nightstands for the bedroom and start on a new tv/stereo cabinet
for the living room.
As usual, all done with hand tools and a little help from the neander buddy.
That's a purfling marker for violin making. I have it set for 5/16 width and the proper depth to define the bead on the table edge. Not something I would buy for that purpose but I already own it and it works great for the purpose... Here's a picture of the usual state of disorder my shop has deteriorated to: