Re: HIJACK: Table Top?
Greg Sloop
>The wood is Jatoba (Brazillian Cherry).
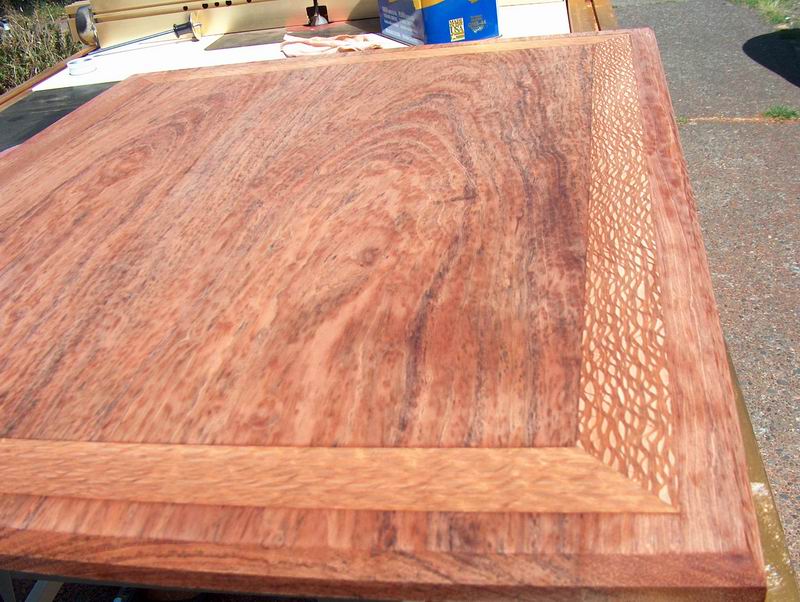
The inlay is Lacewood. I had a chunk of 8/4 here. I've used it for box tops etc. Very nice piece, and I've not seen any at Crosscut (the local great wood store) since.
Plus, nicely cut, lacewood is hard to find. A fair bit of the stuff I saw a while back was almost flat sawn. Kind of misses the point for lacewood. Anyway...
Jatoba is not a cherry at all, but is reddish and looks a bit like cherry. However, it's lots heavier and harder. More even pore structure from what I hear, so even stain application etc goes easier. Also lots of silica. Dulls steel very quickly. Lots of sharpenings on my handplanes.
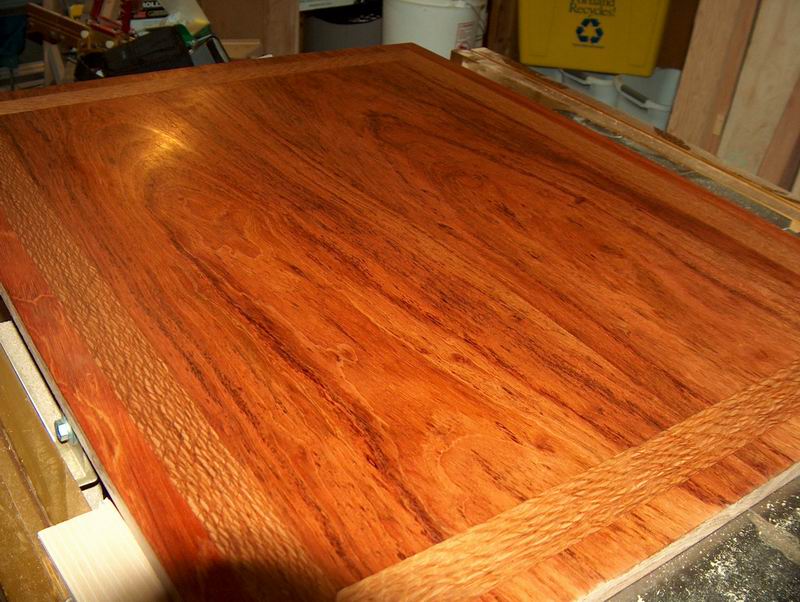
The top is almost a burl as the grain there is particularly pronounced. (burl is the wrong term, but I don't know the right term either...lots of inclusions? Someone needs to enlightedn me on the right terms.) It may look bookmatched, but that's just a fluke. One board ~10" wide and the way it cut up just ended up looking very nice - a small bif of planning, but more luck than anything.
I cut the spindles from that same piece and they were clearly under tension/compression as they bent and deformed a fair bit when cut into 1/2 X 1/2" spindles.
The size is 31X25 or so. It's a "coffee" table for the living room.
Someone recently posted about clamping cauls for panels and I decided to make a couple. These clamp the panels as flat as possible. I could have done a better job on the top, but it's close to flat. The shelf I did for this table was great - very very flat.
The cauls are just 2X3 construction lumber with one face jointed as flat as possible. The other caul has a slight radius on it - end to end. Lay some duct tape so stuff doesn't stick and off to the races. I put a bolt thru one end, and clamp the other with my quick grip clamps. Then I use standard bar clamps to hold the panel together. Veritas has a much neater looking clamp that I'm likely to get at some point. But this is the cheap mans way.
I've had never done an inlay before. I have an Incra Fence on my Jet contractor saw and the Incra miter sled and with those I was able to get a really good fit. (Not all the inlay "slots" are the exact same width. They vary about 0.020-0.032 from widest to the most narrow. They are straight and true though. Being able to narrow the inlays by 0.008 each pass made fitting them up a whole lot easier.
I cut in the inlay into the top by about 3/32" - just used a router and a clamping straightedge. One side at a time. I'd intended to lay it all out and clamp to the drawn lines. I ended up using an adjustable T-square and tapping the straight edge up to the Tsquare and clamping it down.
I kept going too far out on the outside edges, and having to move the outside edge further and further out. Started at 1.5" in and ended up at 1.0" in instead.
The whole idea of the inlay scared me a bit. I didn't have much time to complete the project and I was probably nuts for concluding I could do it, but for once it mostly went right.
I cut the inlay on the BS to about 5/32-6/32 and left the BS cut face unfinished. (Setting up a jig to run through the planer or anything else seemed suicidal!)
Glued the inlay's good face to the table top one side at a time (Tightbond III) and then hand planed the inlay down to the top of the table. I'd have used poly, but I wanted to be able to work it quickly. I didn't have a whole day just to glue down the inlays. PVA creeps, so we'll see over time just how problematic the PVA will be.
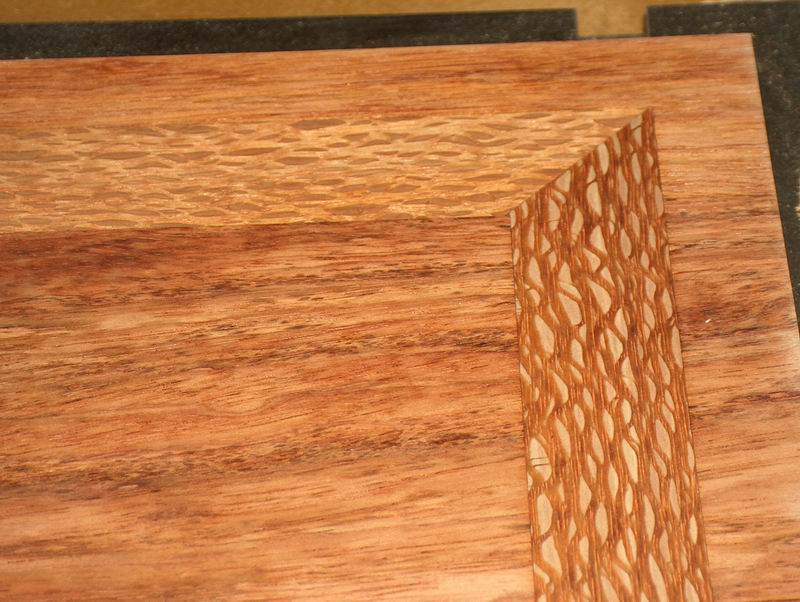
Planing down the corners of the inlay where the miters meet was more difficult, but a very sharp blade at 65 deg was helpful. (I used a LN62 with a blade sharpened to about 53-54 deg + 12 deg bed = ~65 deg.)
Took a very light cut and tried to cut both faces at 45 deg to the grain. once I got really close, I then made very light cuts as close to the same as the grain as possible.
Finally hand sanded where needed, such as joints that could still be felt, card scraped it, and ROS.
Last I added the 45 deg chamfer and trimmed it up with my block plane.
The spindles and corner joinery is all M&T.
Now I just have a lower shelf to setup, and I'll surprise my wife with it when she gets back from vacation and she gets to pick what kind of finish/stain she wants. I want to leave it natural with a wipe on poly over the top, but we'll see.
Anyway, thanks. I'm quite surprised. I was worried about the inlay and having to trash the whole top and start over.
Here are some more pictures with some text...some is duplicate of what you may have already seen...
Roughing in the inlay. Hand-plane-ing down to table top. You can see my
layout lines for routing out the inlay. (Didn't end up using them, but I had
it all "figured" out...isn't that the way it always goes?)
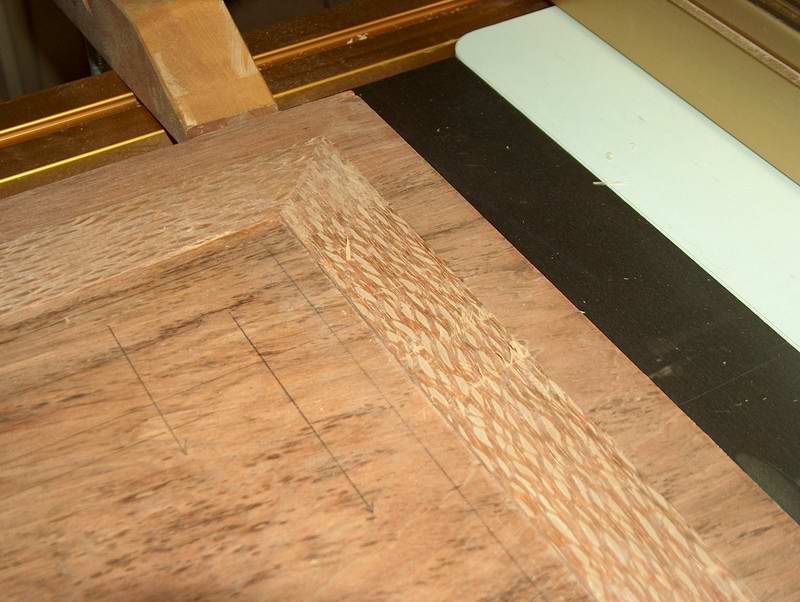
Wider angle pic of same
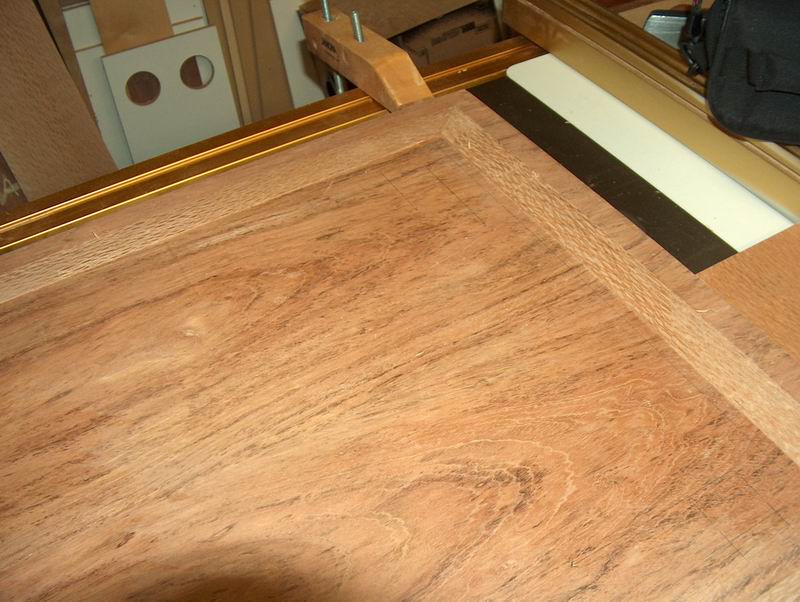
Corner detail after final prep and wipe with mineral spirits.
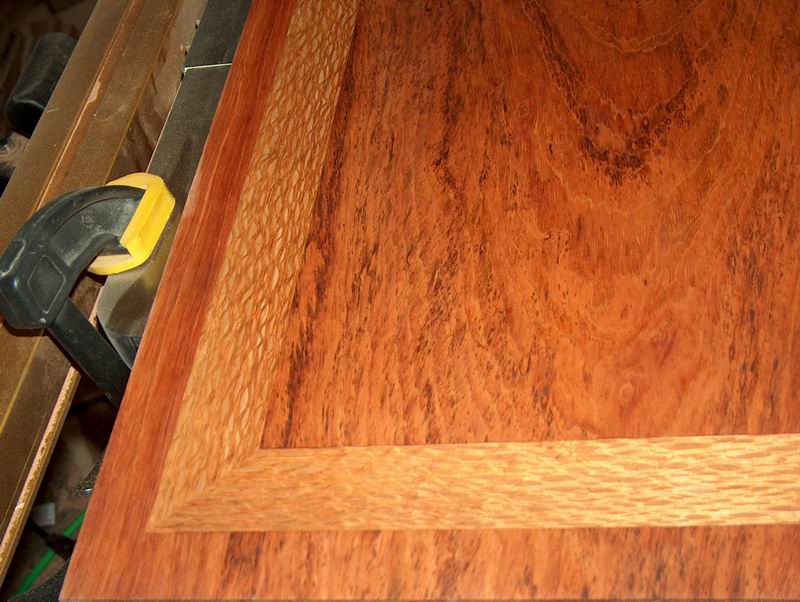
Addl detail
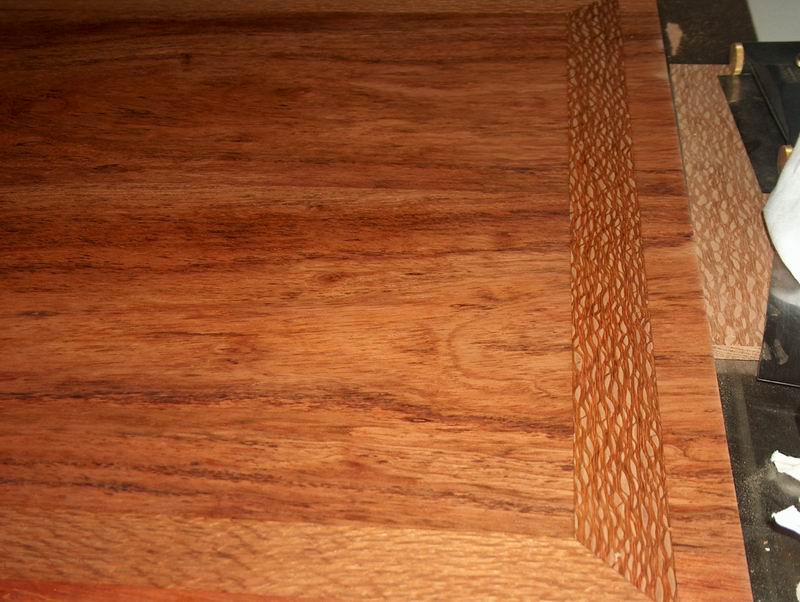
Close up..
Whole table top shot
Partial detail - the lacewood looks beautiful - IMHO. *grin*
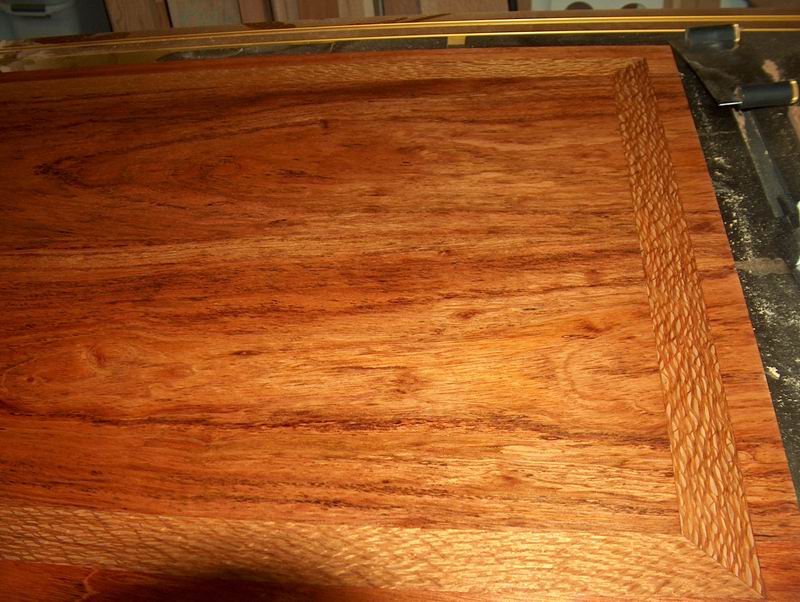
Chamfered the top. It looks splotchy because the mineral spirits are drying fast in the sun. (Got burned good today working on the blasted thing. Myriad of problems, but I think it'll be ok. Ugh.
Here's an end frame. Notice the spindles. That's 22 mortise and tenons - on each end! Again, Ugh!
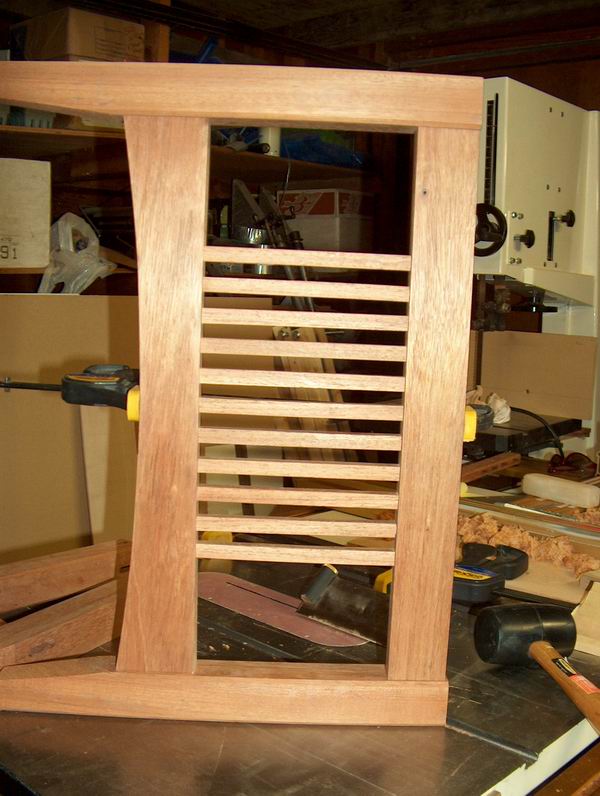
Finally have it all ready to glue up - or so I thought. I'd forgotten the slot in the top short runner that takes the hardware to attach the top. It allows the solid top to swell and contract as humidity changes. I had the frame glued up as in the last picture, and then had to pull the legs off and run the two frame/spindle assemblys over the saw blade (buried) to cut the retention slot. (Still have all my fingers, and no saw kickback. At least something's going right.
Also, the mortise and tenons into the legs were *much* looser than I had wanted. I hope they hold. Used polyurathane glue, so I hope they will.
There's a story in there about using a new tool, the Leigh FMT in this case, on a project at the last minute. But I'll save it for later. I'm sure everyone here's experienced it before...
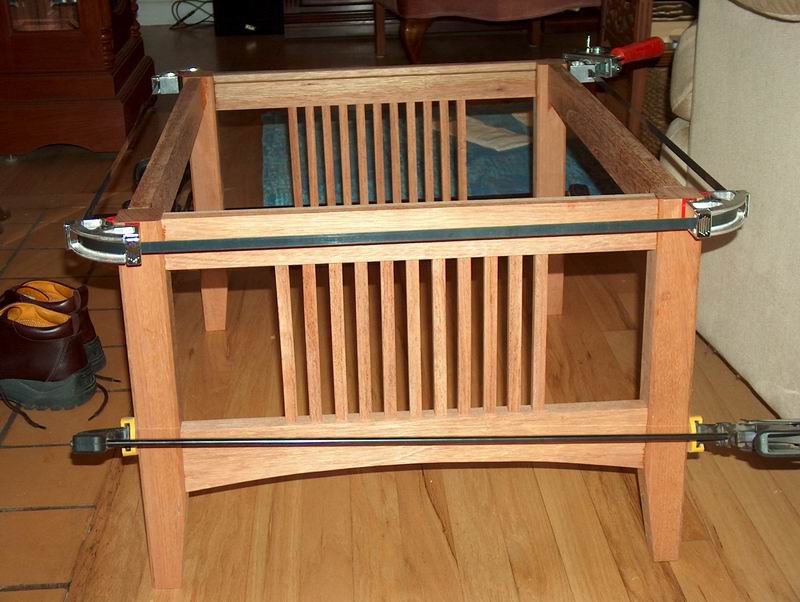
Another shot from another angle. There will be a shelf that is even with the top of the lower arched rail. It's not shown in any of the pictures. (It has to be cut to fit the exact size after glue-up.
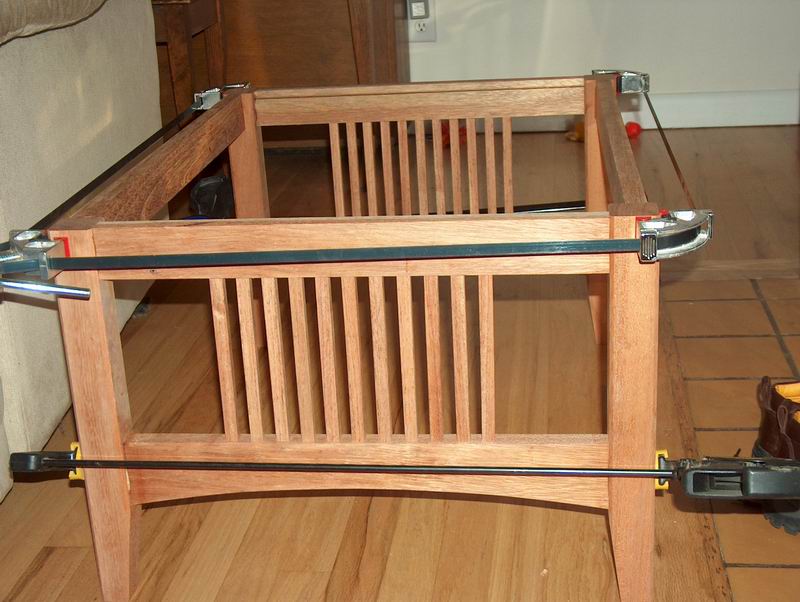
I just dropped the top on so I could gloat a bit more. (Until morning when I find my mortises didn't glue right. (Fingers crossed)
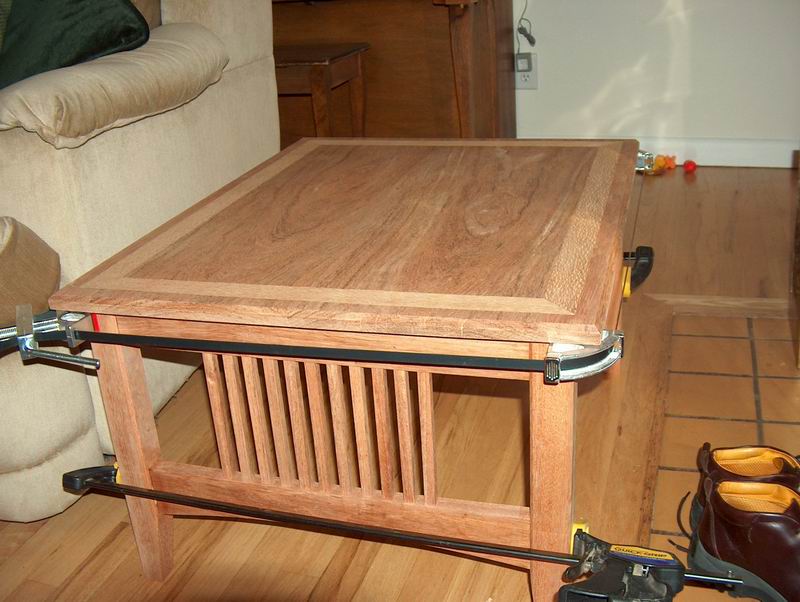
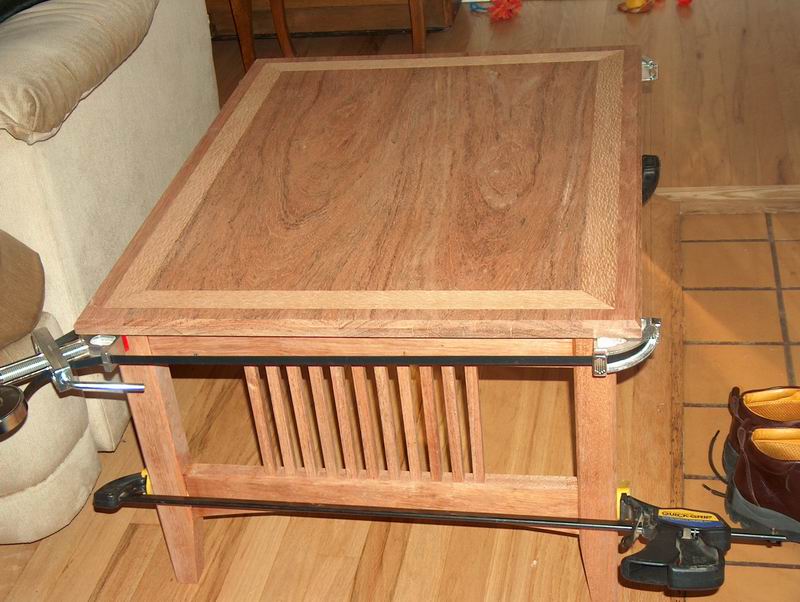
When I get a final finish up I'll go back and do a more full write up. I'm as surprised as anyone that it's turned out so very well. Total building time was probably less than four days, which has to be a record for me.
This is a partial regurgitation of some emails I've sent to friends and family detailing the project so it may be a bit disjointed. If you have specific questions, feel free to ask and I'll try to answer.
As noted above this is a surprise gift for my wife. Lets just hope she doesn't read wood-central huh? *grin* So you all keep your mouths shut ok? (Email is fine as my email is mostly private and she has her own email account.)
Thanks for the compliments and inquires. I'm glad to answer what I can. I'm no expert. I'm more feeling lucky. Perhaps I should go buy a lottery ticket eh?
Cheers,
Greg