WoodCentral Forums

Est. 1998 — 27 years of woodworking knowledge

chisel test/DT help

Posts

chisel test/DT help

#1

chisel test/DT help

Jonathan Ronnow, Sweden

>Chisels

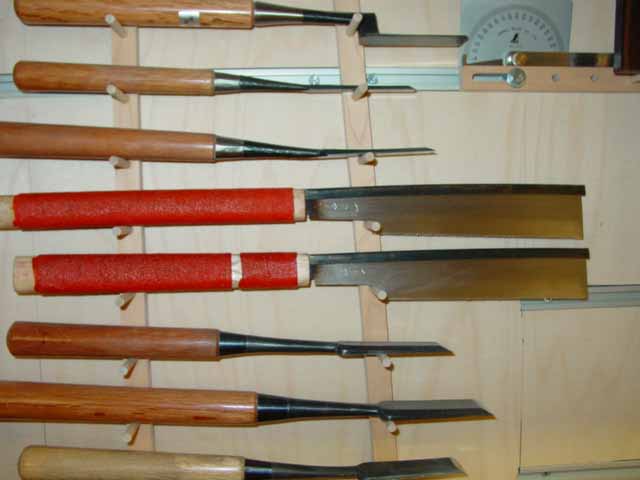
Finally used the japanese Matsumura white steel chisels today.. I chopped some dovetails in oak, they turned out more space than tails but thats an other story.

As I chopped away the remaining vaste after coping the bulk out between the pins, the edge on my EA berg chisels(red plastic handle) folded over at 30 deg bevel + 2deg microbevel. Couldnt pare with them after that. I was using them linear, being careful not to pry or twist.

Oh, I have those japanese... time to test! They also have 30 deg + 2 deg microbvl, so they are similar in geometry. They produced endcrain shavings as I chopped... and no nick to be seen in their edges! Just for fun, I tried shaving my arm afterwards. It worked =)

Dovetails

The space tails... First time I tried DTs in oak. I suspect that my sawing technique, or lack thereof, is the problem. And my saw. I used a crosscut dozuki, the boards were 18mm thick.

I begun the cut square across the endgrain and square to the endgrain surface. As soon as I had a shallow kerf, I tilted sideways and cut down at an agle to the boards face, and when I reached the baseline I cut down the backside so the blade was square to the boards face.

I think the angled cutting against the boards face made the teeth cut away on the tails sides, so the cuts were not straight through the board.

Before it broke, I cut them on a small bandsaw and they turned out fine. But now with the dozuki it just wouldnt work. I biscuit joined the boards instead, as it was getting late and since I was irritated.

Ive used the same saw on some apple wood that was muck thinner, and those dts turned out perfect, I pared all sawcuts with a chisel to the lines.

Questions...

How do you guys cut tails? Bandsaw, western saw, japanese saw?

Do you pare the sawcuts?

How much friction fit is desirable?

Anyone using handsaw jigs/guides?

TIA/Jr

Re: chisel test/DT help

#2

Some notes...

Scott Burr in Ben Lomond CA

>Japanese saw are not made to cut hardwood (for the most part). If you want to continue using Japanese saws get a rip toothed one that made for hardwood.

Do you cope out the waist before paring? This saves a lot of chisel work especally in hardwoods like oak. Saves flipping the board to avoid any blowout also.

Your japanese chisles have a mirco bevel? None of mine do, insteresting...

Scott, who uses a LN DT saw, a MF coping saw for the waist, and finishes them off with japanese DT chisels.

Re: chisel test/DT help

#3

Re: Some notes...

Jonathan Ronnow, Sweden

>"Your japanese chisles have a mirco bevel? None of mine do, insteresting... "

I sharpen on microabrasives using the veritas guide, using coarse abrasives for the main bevel. Then go up 1 degree with the cam and use 5 micron, and then up 1 deg and 0.5 micron. Thats why they are microbeveled...

I had the feeling that the saw aint no good. As for coping, I only have coarse saw blades, so I stay away from the baseline by 1/16" or so, and gently chop the rest. On the tails board I tried chopping only today, but will go back to coping I think.

What DTchisels do you have? I still havent bought any real dtchisels...

Jr

Re: chisel test/DT help

#4

Re: chisel test/DT help

Dan Donaldson

>I usually use a western saw (LN straight handled dovetail), but do also have a small Japanese saw that I use sometimes when I am working with very thin <1/4 wood. I chop the waste without coping sawing it out and try not to pare the saw cuts. If I am lucky, they fit without it. (which is to say, not paring is the goal, not always reality ;-)) I go for a fit where I can put them together with light taps when dry.

Re: chisel test/DT help

#5

I have these: *LINK*

Scott Burr in Ben Lomond CA

>Matsumura Chisels from the japan woodworker.

If I were to do it again, I'd get these:

http://www.hidatool.com/woodpage/chisel/dovetail.html


Japan Woodworker

Re: chisel test/DT help

#6

Re: Some notes...

Dave Burnard

>"Japanese saw are not made to cut hardwood (for the most part)"

In my experience that just isn't true. Especially when using replaceable blade saws. It is more likely to be a problem with the application of the saw itself. A dozuki is a crosscut saw and won't work well for dovetails. Instead use either a dovetail dozuki or a rip dozuki. I think for learning the dovetail dozuki is the way to go. It has teeth somewhere in between rip and crosscut teeth (also called thorn teeth) and is in between in the number of teeth per inch as well. A rip dozuki is my favorite for dovetails in hardwoods but it takes a bit more practice to use and I don't know of a decent replaceable blade version so they are more expensive.

Japanese saws take some getting used to. First rule is no downward pressure while sawing - the weight of the saw is enough. Second - if you can't saw straight see rule one, then take a look at your sawing motion - you can't weave your elbow around and expect a saw to track properly. Third be careful to slowly drop into a cut so that you keep as many teeth as possible engaged in sawing, this keeps you in the kerf you started previously. Two handed sawing is for big saws - rarely for furniture sized work. Dovetails are difficult and take practice, with a half decent dovetail dozuki you should be able to split your layout lines. Keep practicing...

You can buy some replaceable blade japanese saws that have been modified slightly for very hard woods, but for most domestic hardwoods like oak, maple, cherry, walnut, etc the regular ones work fine. If you are working with tropical hardwoods these modified saws are useful. They tend to have a higher TPI and the crosscut teeth are less tall.

Re: chisel test/DT help

#7

Jim in Burlington Ont.

Re: chisel test/DT help

Jim in Burlington Ontario

>I use the Rob Cosman technique with a few twists. I extend the line of cut and did practice cut 100's of straight lines using a LN fine set Dovetail saw. Then I use a fret saw very tight with the blade bent to a 30 degree angle. I did use a samll saddle to get the saw started on line and square. Doesn't seem to matter what I do they still all get sawed a little off line(internal brain problem). The one remark from Frank Klauz is when his father told him he would be good in 10 years. If your feeling cocky do some pratctice joints in maple or cherry. I have still not mastered cutting on the line beside the line or splitting the line.

Re: chisel test/DT help

#8

Re: Some notes...

Manny

>Hi Dave,

My thoughts exactly. I often hear comments about Japanese saws being only for use on softwoods and breaking the teeth if you use them on hardwoods. I can make cuts in woods like wenge or oak with any of my japanese saws. When I hear of someone breaking off teeth I usually attribute it to a "heavy handed" technique. The weight of the saw is the only downward pressure you need. I notice the application of downward pressure increases when they feel the saw isn't cutting fast enough. It usually means they are not at the correct cutting angle. In which case the handle needs to angle up or down to find the correct position.

The other thing I notice is that people tend to gravitate towards the larger 240mm saws. I think it's so difficult to learn to cut dovetails with such a large saw. Especially with the replacable blade saws because the blade is not solidly mounted in the spine. I think the best size is 180mm or smaller with the rip tooth configuration.

Re: chisel test/DT help

#9

Re: chisel test/DT help

Wiley Horne--Glendora CA

>HI Jonathan,

Your chisels are great. You just need a rip dozuki, if you want to stay with Japanese saws. Christopher Schwarz did a review on these pages a few months ago on some saws available in the US--both western and Japanese--and noted that what the world needed was an affordable rip dozuki. Since that time, Lee Valley came out with a machine made version for $69, and I notice Dieter Schmid is offering one for less than $100.

Couple of thoughts on technique. Number one, you really do want to let the saw do the sawing, like Manny is saying, and that's why you need the right saw. When you saw into end grain with a cross dozuki, the work goes so slowly that you will naturally bear down on the blade. The blade will then flex under the pressure and go off line. The rip filed saw will be faster and more positive in end grain than the crosscut saw, and it is more natural to just let it do the work itself. And it will stay on line. It doesn't take a death grip on the saw handle and clenched jaws to get the work done either; you can relax a bit and let the saw do the sawing.

The other really key point on sawing was brought out a couple of months ago by Adam and Bugbear. It has to do with sawing down two lines at once. When you're sawing the tails board, as soon as you get the kerf established square to the face of the board, start working the saw down the slant line on the face, but don't leave the end grain entirely--you can pull saw dust out of the end grain and face grain on the same saw stroke. I find it helps if I shift my position so that the mark on the face and the mark on the end grain become one single line. When your saw is sawing along both the slanted face line and the end grain line at once, it is in exactly the correct plane, and the cut on the back will fall in the right place, because that's the only place it can fall--you don't have to look at the back.

Wiley

Re: chisel test/DT help

#10

Re: Some notes...

Pam Niedermayer - Austin, TX

>No arguments with anything you and Dave said, neither hard wood nor soft wood is any kind of issue. However, I'd like to add the comment that Mark Grable says the best way to learn to use Japanese saws is to use one that's way too big for the task at hand.

Pam

Re: chisel test/DT help

#11

Re: chisel test/DT help

Charles

>So, in other words, a very expensive set of chisels worked as advertised.

You saved yourself a few swipes on a whetstone.

With that amount of time savings, may we assume you knocked out all the drawers for a chest of drawers, or did poring over your micrometer eat up some of your productive time?

Re: chisel test/DT help

#12

Re: chisel test/DT help

Charles

>Just kidding....

Hard to say what is causing your problem with the fit. Could be a dull say is causing you to expend more effor which is hurting your accuracy. Sharpen your saw, or try your back up saw and see what happens.

Re: chisel test/DT help

#13

Re: Some notes...

Manny

>Totally agree. If you get through the frustration you'll be that much better. But, I've seen people just give up after trying out the bigger saws. If they start with a smaller one they usually get good results to begin with and less likely to give up on a Japanese saw.

Re: chisel test/DT help

#14

draft article in A&R section *LINK*

John Truxell-Svenson (jvs)

>The article includes another rip dozuki sold by Tools for Working Wood, the Harima-Daizo, for about the same price as the Lee Valley. Never touched either one, but I do have an Izeamon, and like it a lot.

Probably in a small minority on this, but if I didn't already have that, I would be better than half-tempted to stick with another saw that I already have--a Gyokucho 651 Blue Hard. It's a dirt cheap, replaceable blade ryoba, as fast as the Izeamon or faster, and plenty smooth enough cutting for drawer-sized work. I tried it on a lark in some cherry when I first bought the Izeamon and was worried about it shedding teeth in some badly-positioned cat's paw figure (my bad, obviously the wood was fine, and I stopped worrying about the saw shortly after that). Ryobas probably aren't ideal for dovetailing, but the rip side of a fine-tooth one works just fine.


/jvs


Rip Dozuki Review

Re: chisel test/DT help

#15

Re: Some notes...

John Kissel

>Hi,

I strongly agree that Japanese saws are well suited to hardwoods. Been using them almost exclusively for many years. Don't know about the disposable blade types but it does help to have the teeth configured for hardwoods and it's worth mentioning when purchasing. Although it isn't my first choice I've found that crosscut dozuki's will work quite well in a pinch.

A techniques that is worth trying is to saw your dovetails with the saw held vertically. This can be done by kneeling at the bench or even while sitting. I heard of this approach from Harrelson at Hireade America. It works surprisingly well and is a lot easier than you might think. It requires very little force and easily gives a nice plumb cut.

JK

Re: chisel test/DT help

#16

Re: draft article in A&R section

Wiley Horne--Glendora CA

>John,

Good catch on the Christopher Schwarz article!

You make a good point about using the rip side of a ryoba for dovetailing. I prefer a rip dozuki, but have used a 210 ryoba for the purpose, and there are other folks who have all the saws, but who prefer fine ryobas for the purpose. A small ryoba, like a 180-190mm would be excellent. If I'm recalling correctly, I believe Manny posted about using a high-end ryoba for the purpose a couple of years ago.

The main reason I prefer a rip dozuki with fairly fine teeth and about no set, is that I find it easier to start that saw in exactly the right spot.

Please tell about the Izeamon. You must be using it for tenons also.

Wiley

Re: chisel test/DT help

#17

Re: draft article in A&R section

Manny

>Wiley,

Yeah, there was a time I was training myself to rely on one saw; A ryoba. I was using a ryoba for most things including dovetails. I did this to cut down on the number of tools I had to ship when I traveled to woodworking classes. Yataiki makes his ryobas a little thicker than all others I've used/seen. That stiffens the blade which I find helpful. A little more than a year ago I received my 180mm dozukis from Yataiki. I've been using those a lot since. If I did this right then you will see a pic of them after this message. I try to switch back and forth between the dozukis and ryobas to keep up my skills.


img

Re: chisel test/DT help

#18

Magnificent saws, Manny!

Wiley Horne--Glendora CA

>From the old family steel, aren't they? Thanks for posting the photo.

Wiley

Re: chisel test/DT help

#19

Re: draft article in A&R section

John Truxell-Svenson (jvs)

>Well, it's the nicest saw that I have, an cuts faster, smoother, and as straight as anything else that I have used, so I don't have much comparative information to offer. No matter what kind of cut, the nicest thing about using it is the feel of the stroke--more like slicing than sawing, and that is even more noticeable in tennons than dovetails. That said, the fit of work that I do with it vs. a 651 or Tashiro rip (both a little coarser) has more to do with how well I am doing than the saw, but it does seem make it a bit more likely that I will have a good day.


/jvs

Re: chisel test/DT help

#20

Re: chisel test/DT help

Jonathan Ronnow, Sweden

>hehe.... you are probably right about that... but I dont own a micrometer yet =) Better get one eh?

Seriously though... guess I have to get the proper saw, leaning towards japanese, make 100 or so training cuts and lighten up my grip.

Sorry dear, I have to go to the shop this evening too....

Thanks all!

/Jr

Re: chisel test/DT help

#21

Well...

Scott Burr in Ben Lomond CA

>I stand humbly corrected. I admit not having a lot of time with Japanese saws and I've learned quite a bit in the follow up posts. It sounds like I'm approaching sawing with Japanese saws like trying to swing a golf club like a baseball bat. Thank you for your posts and I have something to do this weekend.

Re: chisel test/DT help

#22

Re: chisel test/DT help

Jonathan Ronnow, Sweden

>*snip*. I find it helps if I shift my position so that the mark on the face and the mark on the end grain become one single line. *snip*

...that makes sense. Do you look with both eyes, seeing a "V" shaped line, or close one and look with the other? I tried the one eye thing but the saws back spine was in the way.....

Jr

Re: chisel test/DT help

#23

Re: Well...

Tim of San Leandro

>I'm quite green to woodworking and even greener to hand tools....

I've got several japanese saws - all of the replaceable blade sort - and haven't snapped any teeth yet - KNOCK ON WOOD : ).

I've sawn jatoba and purpleheart and white oak and hard maple and walnut and several other softer woods....

The teeth have caught sometimes, but I grip the saw lightly enough that when a tooth catches, the handle slips in my grip a bit.

Tim

Re: chisel test/DT help

#24

Re: chisel test/DT help

Wiley Horne--Glendora CA

>Hi Jonathan,

Both eyes open. We were talking about the tails board. The same lesson applies to both the tails and the pins board, but in slightly different ways. The following description assumes use of a pull saw--a dozuki or rip side of a ryoba. Also, this is assuming that the board is held vertically in a vise, in the western style--the approach would be different if the work were being held differently. Finally, this is just my procedure, and others may do it differently:

Tails Board. Both eyes open. Start the cut on the far side of the end grain, with the idea that the most important thing on the first stroke or two is to pull a perfectly square kerf across the end grain. The saw is in the waste (the pin entry). At this point, you're standing square to the kerf. Once the kerf across the end grain is established, shift slightly to the left or right until the kerf you've just made lines up in a single straight line with the face grain mark. With the saw still in the end grain kerf, start pulling the kerf down the face grain line. At this point, the end grain kerf is still very shallow, so saw both the end grain and the face grain on each stroke--it's like you're making your own miter box as you saw. On the tails board, what is crucial is that the end grain line be square, so favor the end grain kerf as you saw. Once you get about 1/4" deep into the cut, the saw will only go where it's already headed, so just saw to the scribe line. Do all this with a poised but relaxed attitude. Your sawing motion should stay in one plane--no elbow waggling.

Pins Board. You've already transferred your tail board sockets by knife onto the pins board end grain, and now we have the pins board vertical in the vise. I like to have the narrow face of the pin toward me; the wider face on the backside of the cut. This is because the error tolerance is less on the narrow side. This time, start the cut at a 45 degree angle on one of the near edges. Line up slightly to the side as before so that the end grain line and the face grain line are in a single line. And saw down both lines equally. The saw is in the waste, and you're just barely shaving the marked line. Again, you're making your own miter box, and once the saw is 1/4" to 3/8" deep into the cut, you've got the kerf pretty far down both the end grain and the face grain line. At this point, you've got it whipped and it's just a matter of finishing the cut at the scribe line.

Again, both eyes are open, you can see the whole board spreading out on either side of the saw blade. And whether it's the tails board or the pins board, you've got both legs of the V that you're sawing lined up into a single line. The saw is entirely in the waste and ever so barely shaving that line.

Wiley

Re: chisel test/DT help

#25

Great!

Jonathan Ronnow, Sweden

>Thanks for that thorough how-to, just what I has hoping to read!

Lesson learned #1:

Obviously the narrow side of the pin has to be the most accurate, this is the show face. Kind of a "Duh.." experience. Never thought of that, thanks for pointing it out!

Lesson learned #2:

Move saw in straight line, no wiggle. Better practice that...

Lesson learned #3:

Line up myself so the endgrain & facegrain lines appears as one. Then line up saw against that line. Ive been trying to saw two lines at the same time, rather than sawing in the same plane.

Lesson learned #4:

I need (oh, now I can actually motivate it...) a new saw =)

Thanks!

Btw, I think that this thread could be compiled into a great "how to" article...

👍 This page answered my questions

Your vote helps other woodworkers quickly find the answers and techniques that actually work in the shop.