>This is my first message in your hand tool messageboard. I posted the following message on the general site and then thought that it would be better placed here. So, here it is.
I'm taking a 1 week intensive hand tool workshop in about a month and I need to make a panel gauge. Any good information sites? any personal experience with making one? type of wood? length? etc...
If nobody posts a plan or pic here, I'll break mine apart and take a photo for you.
Basically, it's a headstock with a square mortice to recieve the shaft of the gauge. Mine has one tapered side to the mortice and a tapered key to lock the shaft into place.
>If you do a search in the Hands Tools forum for panel gauge, you'll come up with a thread on panel gauges. One of the threads has a sketch with approx sizes. Its the post of 22 Feb 2004 at 5:52 pm.
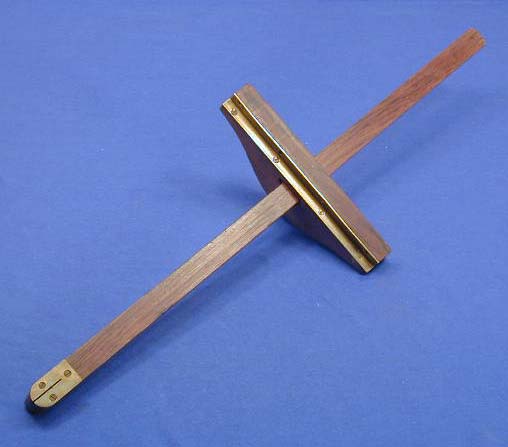
>Here's a nice picture of my. Stanley 85 1/2 from the business end. The arm is 20 1/2" long. This model has brass wear plates on the head and arm and a brass thumbscrew and shoe. You can use an old phonograph needle for the point.
I've also attached a link to a nicely done (and for sale) craftsman made panel gage with a wooden thumbsrcew and shoe.
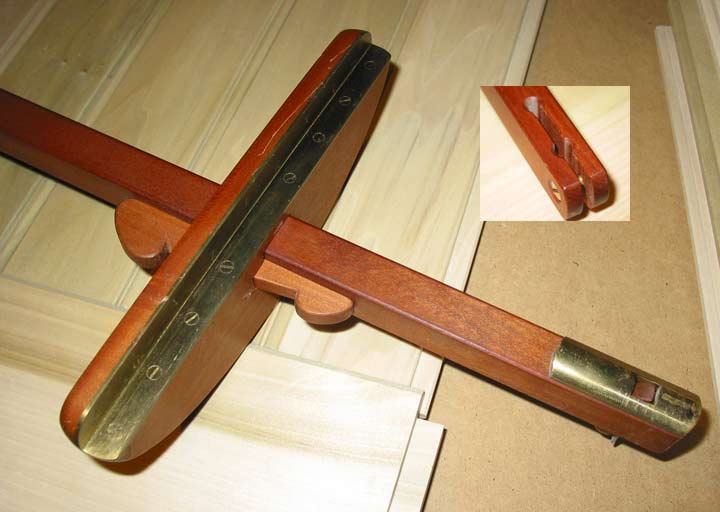
>Here's the link to the one I made. If you're familiar with making straight & square stock, then it's a pretty easy project. It took me about 8 hours (entirely using hand tools).
I took great care when cutting the mortise to ensure that the hole was square to the head. Nevertheless, the rod it did not lie square to the head and it took me a while to figure out why.
The problem ended up being that my wedge didn't exactly match the wedge slot - this caused the rod to cant as the wedge was tightened.
Rob's version also has a pencil hole at the other end of the rod - I didn't bother with this, but it would be an easy and perhaps useful addition.
On this gauge the wedge was made of the African Blackwood cutoffs that Lee Valley is selling, the head is maple, and the rod is cherry.
Good luck.
Oh - one other thing. If you're right handed I might be tempted to put the wedge on the other side of the rod. This would allow you to hold the gauge with your left hand while using your right hand to tap the wedge home.
>Easy tool to make - a salvaged hack saw blade and some hardwood scraps are about all you'll need.
Cherry or mahogany is fine, with something like a 1" x 3" x 9" stock and 3/4" x 7/8" or so for the stem. 18" would be close to standard, but a 24" stem with a pencil slot is very useful for marking larger panels such as sheet goods.
Only thing critical in dimensions is to make the rabbet on the stock match up with the cutter on the stem so the panel stays in plane during marking. Wear strips are nice but easily added later, along with a pencil slot.
>This is one tool where shop made is easy and fun. About 6 hours, and yes - next time I'll use larger screws so that all of the slots can be filed off. Maybe next life.
Insert is the pencil slot at other end of 24" stem (beam, shaft, rod, whatever) - inner hole is for stress relief and outer to hold pencil.