WoodCentral Forums

Est. 1998 — 27 years of woodworking knowledge

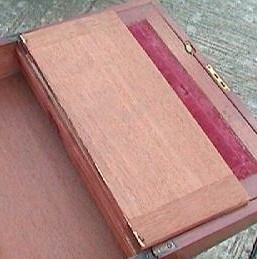
Here is the backside pic

Posts

Here is the backside pic

#1

Here is the backside pic

John in West TN

>This is the underside of the the top shown in the previous post. This configuration appears pretty typical in photos I've seen. So, how does the maker get it to look mitered on the top, when it looks like this on the bottom??

Cheers,

John


img

Re: Here is the backside pic

#2

Re: lap

Moses Yoder in White Pigeon, MI

>This is probably a lap joint, with the top half mitered; picture doing a half lap joint, then mitering the end, cutting the other board's end to fit this mitered lap.

Re: Here is the backside pic

#3

I agree

R.J. "Sam" Simpson

>

Re: Here is the backside pic

#4

Concur, and brief instructions

Andrew F in Australia

>it's dinnertime here and I've got to get the kids fed.

Basically,

1) lay out shoulder with a marking knife

2) chisel out a v-groove for the saw to run in as it cuts the shoulder (don't cut yet)(starts the saw kerf below the surface of the timber and leaves a simple, clean line as being visible

3) cut cheek of tenon

4) cut shoulder after locating the saw in the v-groove

See the stanley sheets for pointers

http://www.geoffswoodwork.co.uk/Stanley%20Page%203.gif

http://www.geoffswoodwork.co.uk/Stanley%20Page%208.gif

Cheers,

Andrew
👍 This page answered my questions

Your vote helps other woodworkers quickly find the answers and techniques that actually work in the shop.