Tool Cabinet Finished Pics
Brian Cargnelli
>Sorry guys, here are the pics one at a time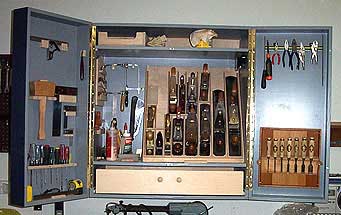
Est. 1998 — 27 years of woodworking knowledge
Tool Cabinet Finished Pics
Brian Cargnelli
>Sorry guys, here are the pics one at a time
Re: Tool Cabinet Finished Pics
Brian Cargnelli
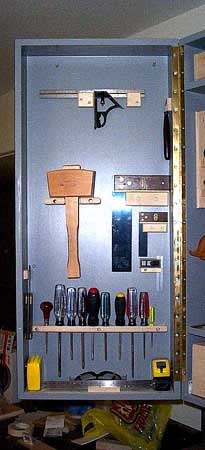
>
Re: Tool Cabinet Finished Pics
Brian Cargnelli
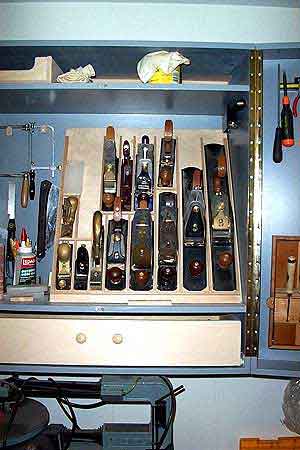
>
Re: Tool Cabinet Finished Pics
Brian Cargnelli
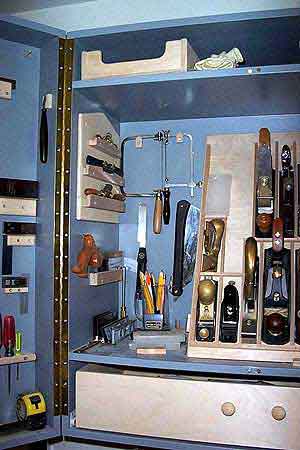
>
Re: Tool Cabinet Finished Pics
Brian Cargnelli
>
Re: Tool Cabinet Finished Pics
Brian Cargnelli
>
Re: Tool Cabinet Finished Pics
Brian Cargnelli
>
Re: Tool Cabinet Finished Pics
Brian Cargnelli
>
Re: Tool Cabinet Finished Pics
Steven McKinley from Calgary
>I like it. Lot's of room for more tools (wink, wink, nudge, nudge, say no more, say no more)
Steven, who needs to finish one more house project before he makes a shop project.
Original Post, Sorry for the stupidity
Brian Cargnelli
>Hello all,
a few months ago I posted several questions as to various tool cabinet designs. My shelf full of stuff was no longer working for me so I set out to re-invent the wheel. After spending a lot of time asking questions, reading the Tool Box book and looking at tons of pictures sent to me by lots of people, this is the result.
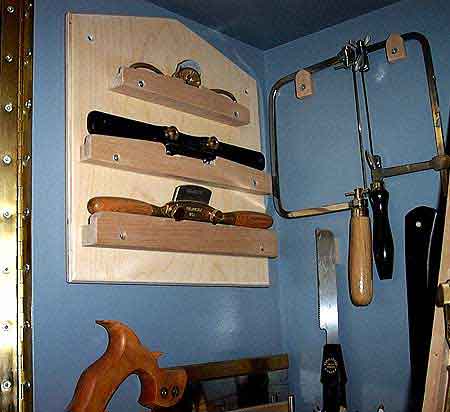
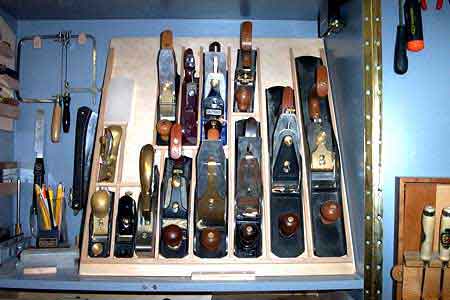
I decided to use paint grade ply and use simple joints (rabbets) with nails and screws. I used a French cleat to hang it on the wall. I also designed a simple plane caddy on about a 60-degree angle. To get this angle I laid out all the planes on the ply in the design I had in mind (after numerous redesigns) and figured out the maximum height of the board. I then simply placed it in the cabinet on the shelf and leaned it back until it hit the back and used a adjustable bevel square to figure out the angle. Cut it on the Band saw and cleaned up the edges with my LN LA 7 1/2. I used some popular pieces to separate the planes and glued and brad nailed them in place. If I am going to do this again, I would screw them down so that I can reposition them if the need arises. I made the shelf so that by removing a front cleat (2 screws) I can get to the shelves behind the planes where I keep extra blades, some other seldom used tools etc� I think that if I don�t use this stuff in the next year, it will go to an auction and I will buy more stuff that I will use.
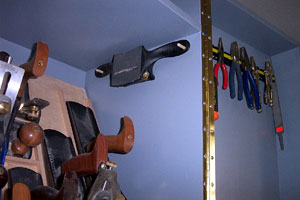
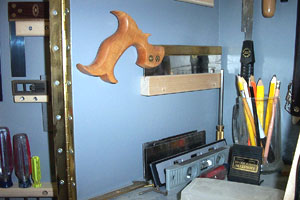
All of the stuff used to hang the tools on the doors where made to fit a particular tool. I screwed these in place so that the door arrangement can change over time. I used 1/2 inch baltic birch ply as the door insert, but I would use 3/4 inch next time. Just the ability to use longer screws I found would really help. The hanging spokeshave caddy is my own design and I took a bit of time to carve out the shapes. Tools held in place with rare earth magnets.
I used a total of 25 rare earth magnets to hold tools in place. I simply drilled a hole and used hot melt glue to hold the magnet in place and then place the tool against it. Works really well. In particular I wa able to use this technique to hold my LV Cabinet Scraper in place above the plane caddy, suspended on a couple of dowels. I used 3/4 inch Rare Earth magnets for this one, but all of the others are 3/8 ones from Lee Valley.
I have used the design now for about four months and have really loved using it. The cabinet sits 1 1/2 steps from my bench and I know instantly if something is missing and am now really just reaching for the tool that is I know is always in the same place. A real time saver needless to say.Let me know what you think.
Re: Nice home for nice tools!!
Rob Cosman
>Hi Brian, very familiar looking tool crib, however I see a few areas where we need to talk!
See you in October.
Rob
Re: Nice home for nice tools!!
Brian Cargnelli
>Yeah, you and my Visa Right! I do wnat to buy one plane from you each year. That's it! Have a nice night.
Nice work Brian.....
Dave Anderson Chester,NH
>Very functional and versatile. Nothing beats having the tools you need within a coupla steps of the bench. You were wise to screw things in place, as you tool collection, err- excuse me- assortment, grows over the years things constantly need to be modified so there's a place for the new stuff.
Re: Nice work Brian.....
Todd O. Cronkhite Native of Maine
>Very nice looking cabinet Brian, even if it is only plywood it certainly is nothing to be ashamed of, actually quite contrare. If you can make plywood look that nice imagine what you will do once you start working with solid woods.
How's about posting the dimensions and a close up shot of that chisel rack. I need to build a tool cabinet as well and yours looks like a good un' to steal ideas from. ;~)
Todd O.
Re: Nice work Brian.....
Charles McKinley (Harrisville,PA)
>Hi Brian,
Great cabinet. I like the way you figured out the angle for the plane rack. It looks like a lot of thought went in the it and there is some room for expansion.
Chuck