Demilune hall table with turned cabriole legs

Est. 1998 — 27 years of woodworking knowledge
Demilune hall table with turned cabriole legs
Re: Demilune hall table with turned cabriole legs
I don't know why the pic presents sideways; it's upright on my desktop.(Peter?). The most difficult part for me was making the apron. I used the brick layering method followed by cutting and wrapping veneer around the form. I do a good deal of turning, so turning the cabriole legs was not the hard part.
Re: Demilune hall table with turned cabriole legs

Re: Demilune hall table with turned cabriole legs

Re: Demilune hall table with turned cabriole legs

Re: Demilune hall table with turned cabriole legs

Re: Demilune hall table with turned cabriole legs

Re: Demilune hall table with turned cabriole legs
Fabulous! Beautiful! I know about the brick pattern for the apron, but I would have never thought of using plywood for it. Great idea! My Grandmother had a matching pair of similar tables and the brick pattern had photographed through the veneer. I think the plywood stands a far better chance of success and never being seen again. Nice work.
Re: Demilune hall table with turned cabriole legs
Thanks for the upvote. It would seem that the only way the brick pattern could show throw through the veneer would be if the veneer was especially thin. In my case, I re-sawed a "slice" of redwood veneer about 3/32 inch thick from a flat board. I hope there won't be a problem latter.

Edited posts in the topic to orient photos correctly
Re: Edited posts in the topic to orient photos correctly
But they are still sideways in my posts. Can you fix it so that they never get sideways?
Re: Edited posts in the topic to orient photos correctly
They look better now. I hope some people get inspired.

Re: Edited posts in the topic to orient photos correctly
Nice work, Eliot. I was interested in that photo of clamping your veneer to the curved form. You didn't mention how it turned out (it looked fine in the finish shot), but it looked like your clamping cauls were not in continuous contact with the veneer. This leads to less clamping pressure in those areas, and can result in a bumpy or irregular curve. In your case, the thick veneer would have prevented some of that. My old go-to trick was always to cut several strips of Masonite the same width as the glue up, wax them thoroughly, and then clamp them around the outside of the veneer. Start clamping in the middle and work to the ends. The thickness of the Masonite pack provides continuous clamping pressure to the whole glueline.
I don't know if this would have made any difference in this case, but it's a tip to consider on future glue-ups like this one.
Ambitious work, nicely done. +1 on the upvote. Thanks for documenting and sharing.
Ellis
Re: Edited posts in the topic to orient photos correctly
Ellis, actually, I did EXACTLY as you said when I actually glued it up.The photo is not the real glue up; it's a picture of what I did just to see how it would all fit. A little sanding got rid of some slight marring.
Re: Edited posts in the topic to orient photos correctly
>But they are still sideways in my posts. Can you fix it so that they never get sideways?
Do you use an iPhone? This seems to only be an issue with iPhones. I found this, but can't attest it will work, and I no nothing about Apple devices.
https://theunlockr.com/how-to-stop-auto-rotate-for-images-on-an-iphone/
Re: Edited posts in the topic to orient photos correctly
I don't want to get caught saying something that's not entirely true: on second look,THAT photo is the actual glue up -- not just the dry run. If you look closely, there is a layer of material between the cauls and the veneer. I re-sawed some melamine covered hardboard to get what I needed. Not quite the same as waxing it, but the melamine serves the same purpose in not adhering to the glue.
Re: Demilune hall table with turned cabriole legs
Eliot, that is fantastic! I hope to be capable of such excellent and advanced work at your age. You are an inspiration!
I like the idea of bricking. This is a method used by our absent friend, Bill. I shall use it in future. I’ve built a couple of demilune tables but laid up strips on a curved form, and this was so much work without a vacuum bag (the built is on my website but also in the Articles section, on WC).

Regards from Perth
Derek
Norm begins to discover hand tools......
there are things here that will drive Derek bonkers (and people aware of safety)......
Re: Demilune hall table with turned cabriole legs
Derek, I tried over and over to respond but couldn't. Finally switched servers to google chrome and now it seems to be working all right.
My message is that your demilune table looks perfect. And if I ever do another one, I would use square joinery at the apron, as you and old Normie did, instead of cutting flats on the upper, onion-shaped part of my turned legs. That was difficult and resulted in a somewhat unsteady table, which I had to reinforce with a slat along the two rear legs.
As for inspiration, it goes the other way!
Re: Norm begins to discover hand tools......
Same message that I posted to Derek. Except in your case I did listen to the Four Tops. You know I'm a classical guy, but I may learn something new. My granddaughters are real Swifties, and I have to admit that I must get out more.
Re: Demilune hall table with turned cabriole legs
Derek, I tried over and over to respond but couldn't. Finally switched servers to google chrome and now it seems to be working all right.
My message is that your demilune table looks perfect. And if I ever do another one, I would use square joinery at the apron, as you and old Normie did, instead of cutting flats on the upper, onion-shaped part of my turned legs. That was difficult and resulted in a somewhat unsteady table, which I had to reinforce with a slat along the two rear legs.
As for inspiration, it goes the other way!
Eliot, we learn from each other. Roger posted a video by Norm, and I did one thing in common with him, laminating the apron.
Norm (from the video) ...
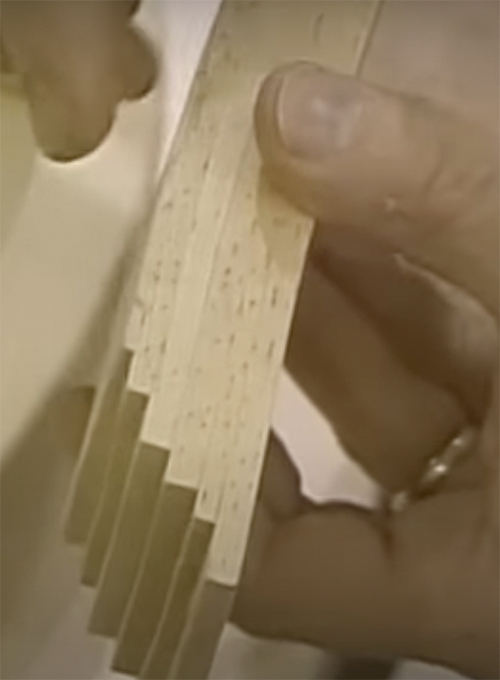
Mine (made in 2007) - Jarrah laid up in 2mm strips, all epoxied together ...

When we differed lies with the central leg, where Norm used mortice-and-tenon joinery ...
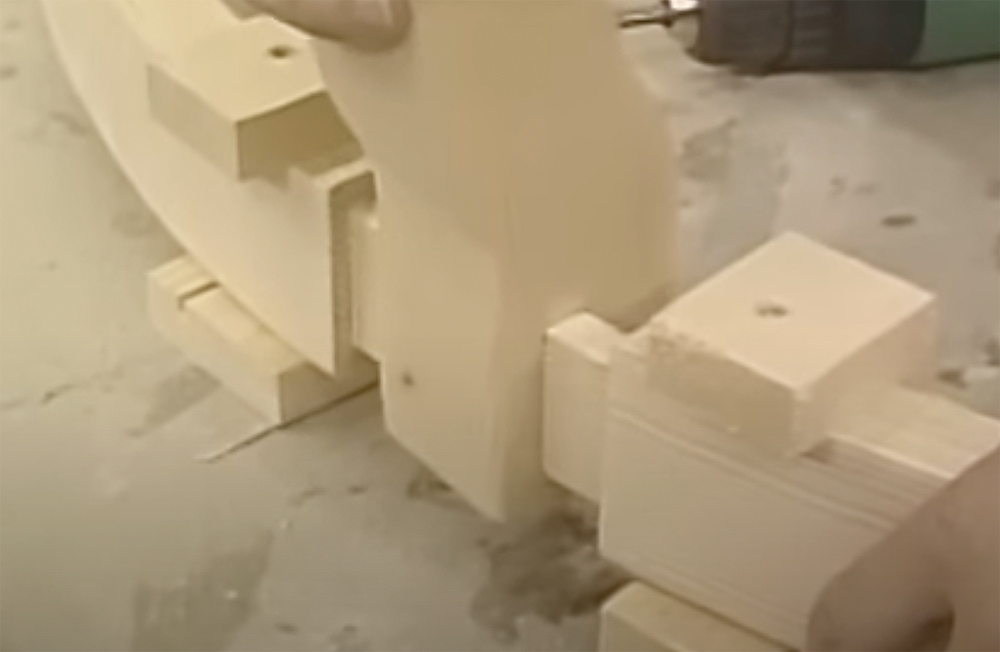
I made a bridle joint ...


What did you do?
I suspect that Norm's was a stronger design, but the bridle joints have endured.
The bead was made with a scratch stock ..

The ends were mortice-and-tenon ...

Can you add some of the joinery details from your build.
Regards from Perth
Derek
You being a classical guy, you might appreciate.......
Re: You being a classical guy, you might appreciate.......
I have to from admit, that I get the same wonderful feeling when listening to him that I get from what I call classical. We have all lost a great crooner. Frank Sinatra said he was the best!
test
Added later 05 min 18 s:
Having just made one, I LOVED Normie's version! I had a harder time of it because of the turned legs, which were much more difficult to join to the apron. Also, my shape isn't circular; it's more of a 'D' shape; so cutting circles on the band saw was not an option. But good old Normie does not let me down. I do agree, though, that he is a bit fast and loose with his table saw technique. ( But, then again, so is Rob Cosman.)