Home Articles Forums Gallery Marketplace Videos

WoodCentral Forums

Knowledge You Can Build On — Est. 1998

Price drop on over 1300 Rockler items

Power and Hand Together (5): Pardon, but your slip is showing.

Posts

Power and Hand Together (5): Pardon, but your slip is showing.

#1

Power and Hand Together (5): Pardon, but your slip is showing.


When drawer sides are thin, say between 6mm -  8mm, then "slips" are used to hold the drawer bottom rather than ploughing grooves into the sides. Slips are runners which are glued onto the sides. They have two purposes: firstly, to hold the drawer bottom in a groove ploughed into their sides and, secondly, to widen the underside registration of the drawer side.


I like to add a bead as a transition between the slip and the drawer bottom. Below, the bead is about to be scraped on the sticking board ...
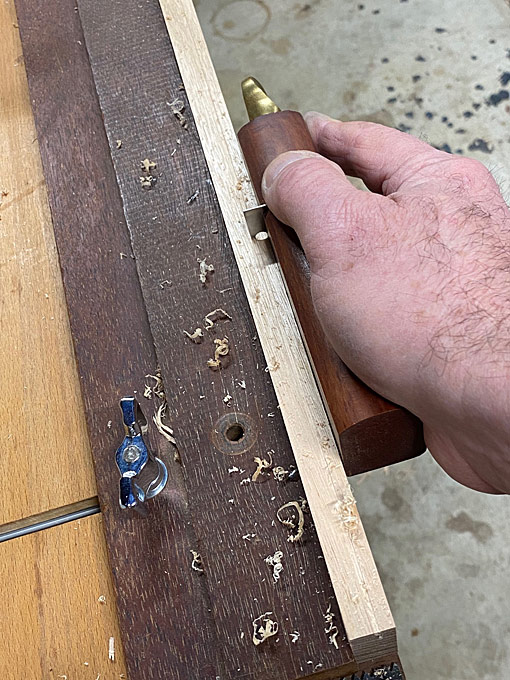


The scraper is made from hardwood and uses a shaped section of bandsaw blade to create the shape. This design comes from Garrett Hack ...
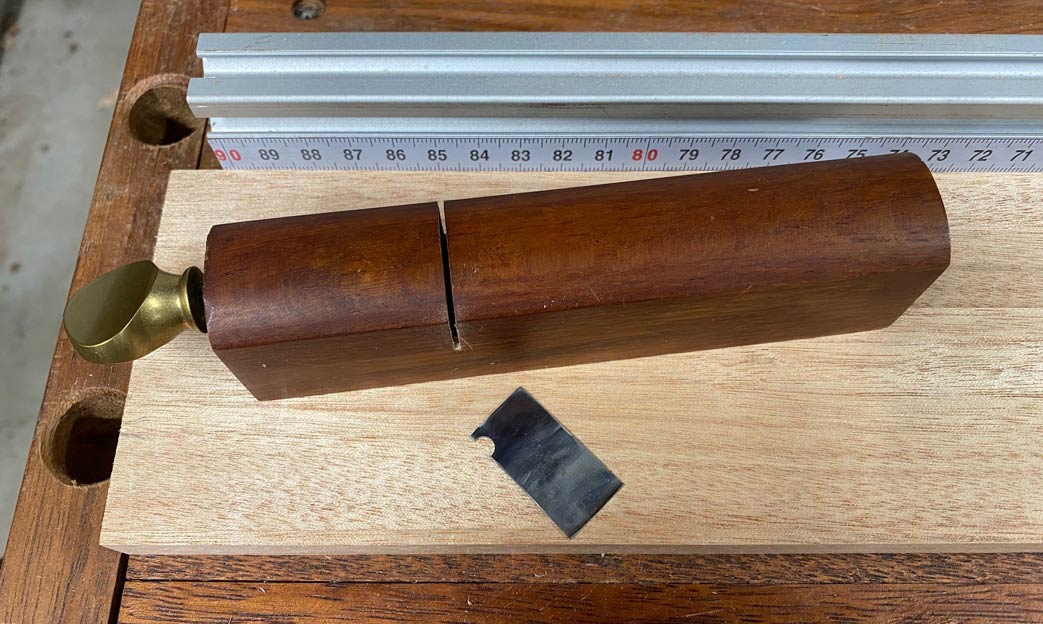


This is final shape created ...
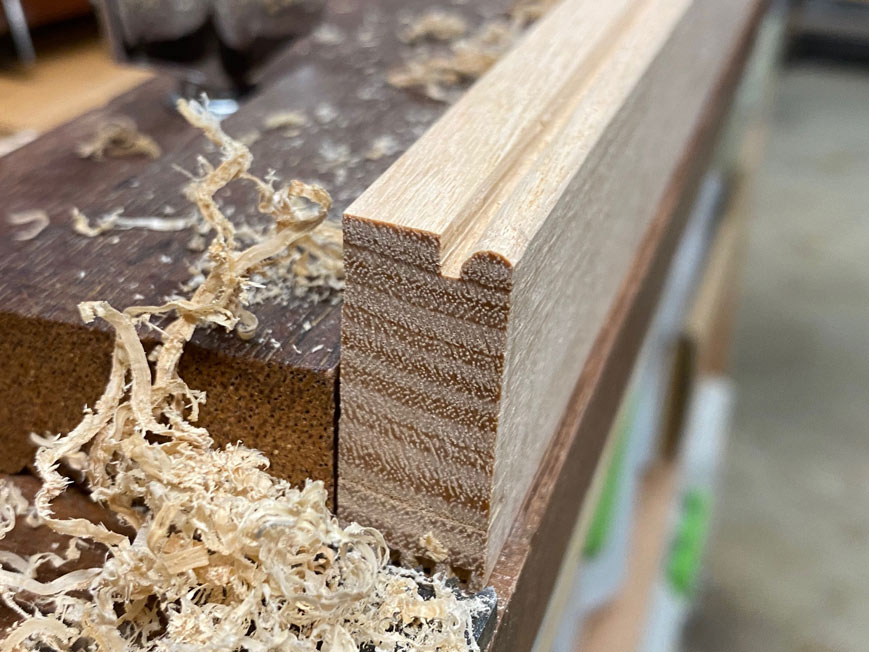


Once the bead is made, turn the board on its side and plough the groove ...


Completed bead (oversize still) ...
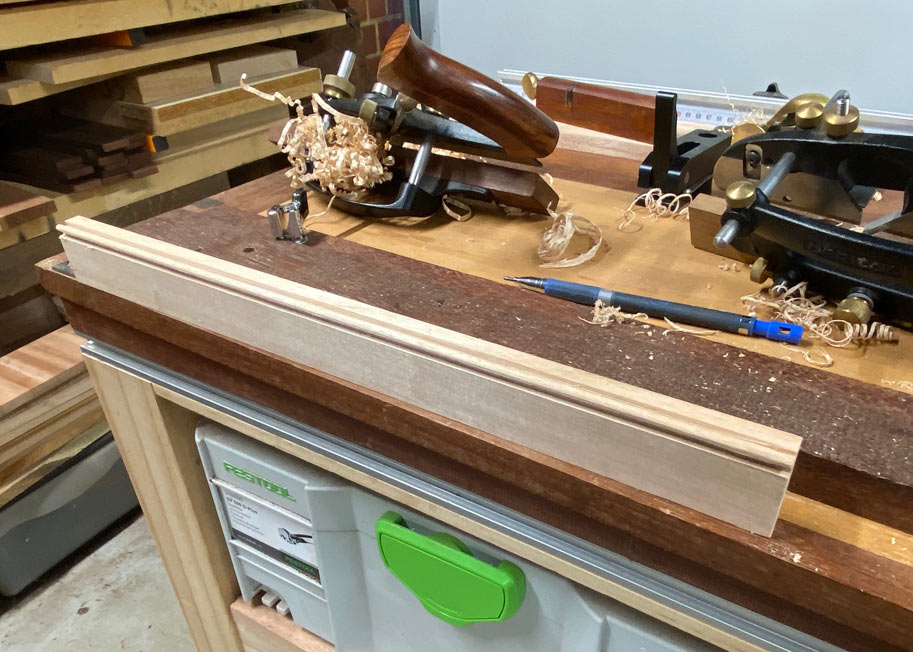


The slip is cut to size. Thos is how it will look inside the drawer ...
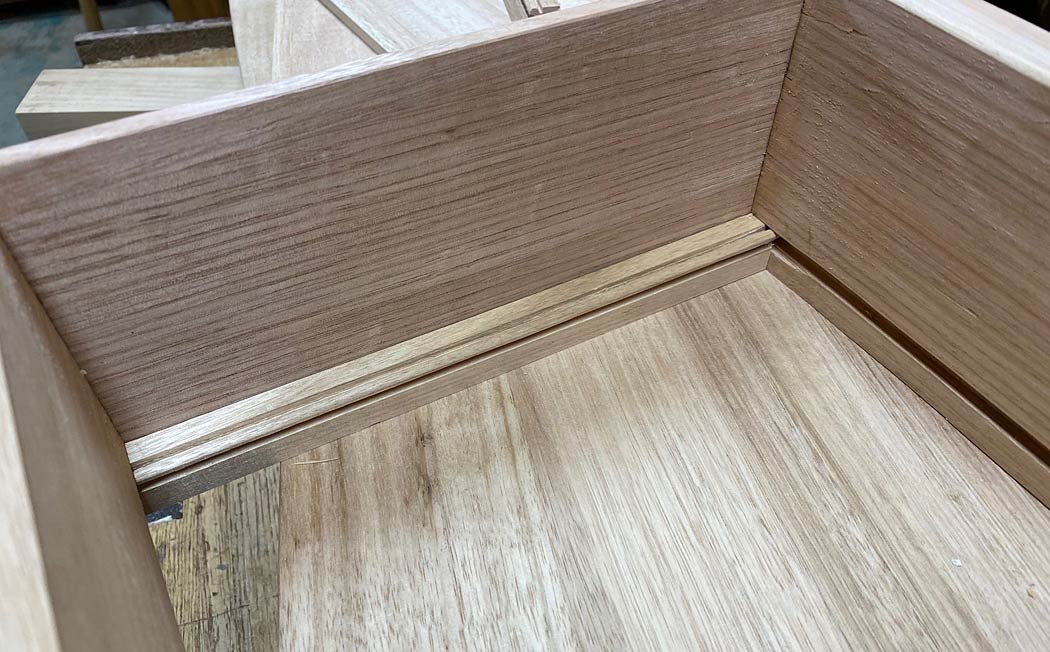


The end of the slip has a tenon, and this will fit into the groove in the draw front (which was ploughed in an earlier post) ...
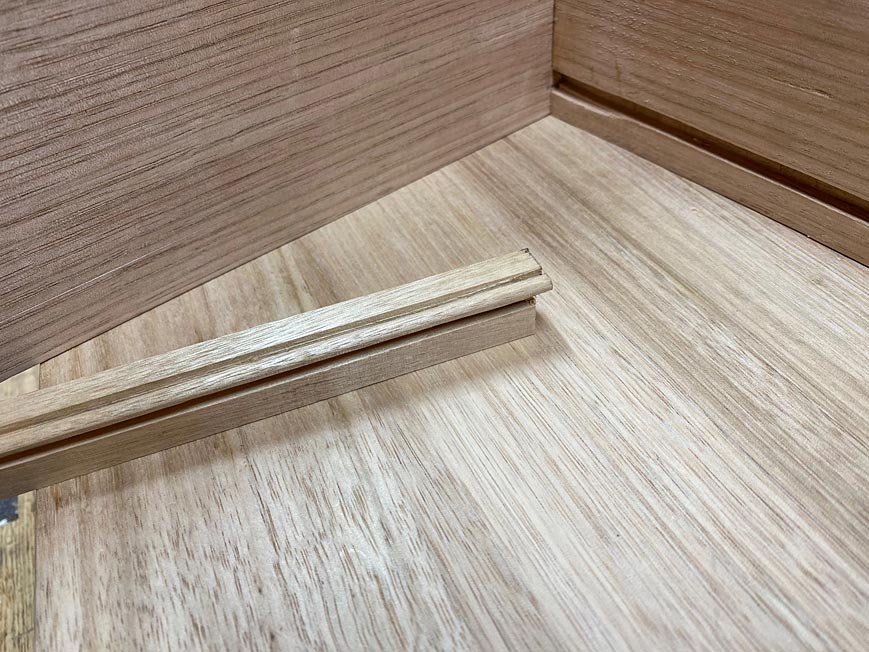


The slips are glued to the sides ...
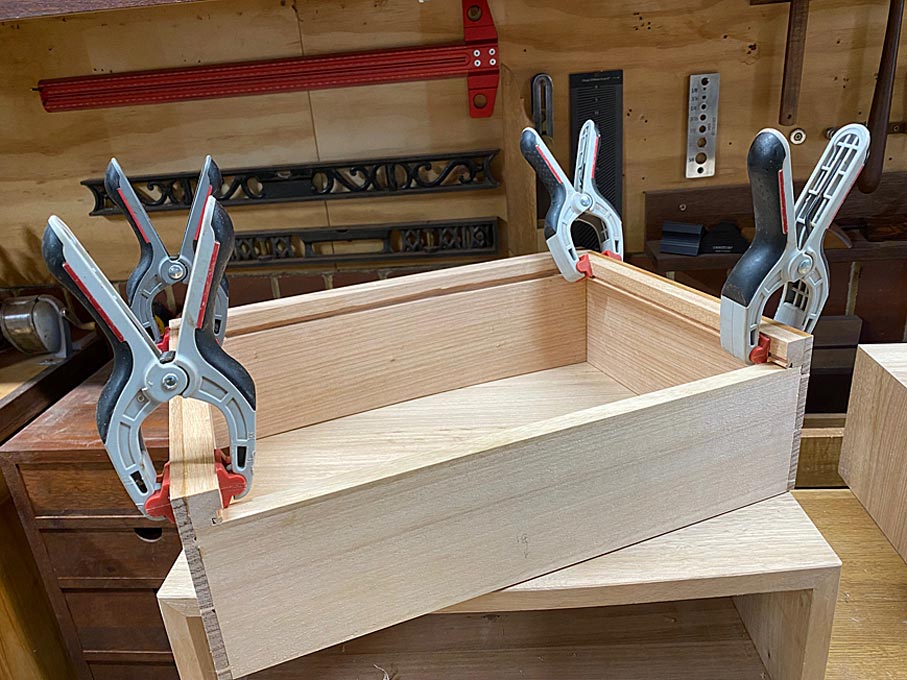


And now it is time to fit the drawer bottom!


At this stage it is oversize but planed to thickness, in this case 1/4". The panel is set on the sticking board to hold when ploughing 3mm side rebates. The sticking board is given a slight modification for this purpose as the panel is too wide to fit against the fence. Instead, it slides under the fence, which then acts as a hold down ...
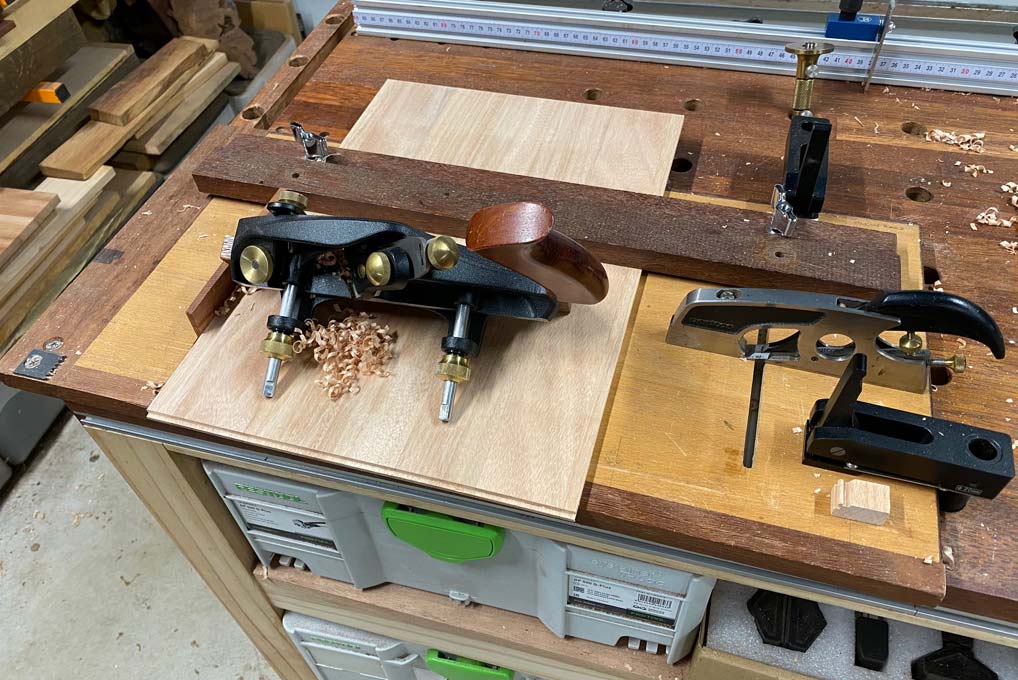


To add to the set up, a thin board is set into the track as a fence/stop ...


The width of the rebate is marked in with a cutting gauge - the finish here must be perfect as it will be viewed for always - and then is planed almost to depth. Finally, it is finished with a small shoulder plane. This ensures that the finish is clean and ready to use ...
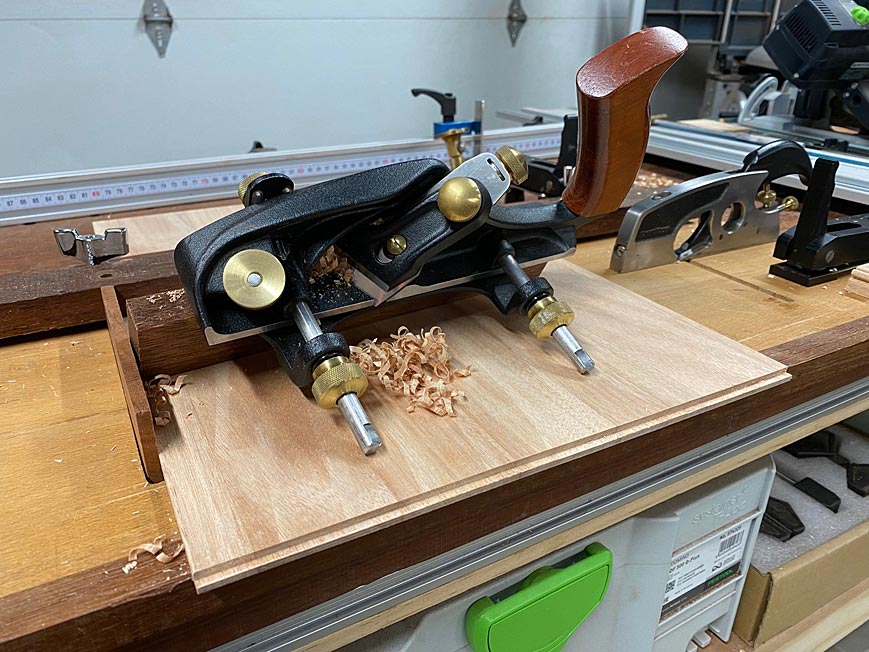


Incidentally, note the new front thumb "knob" I made for the Veritas Skew Rabbet Plane.


To fit the drawer bottom, the panel needs to be sized. Before marking and sawing, the width between the grooves is checked the full length. Unless it is parallel, the drawer bottom will bind. The rules here are used for this ...
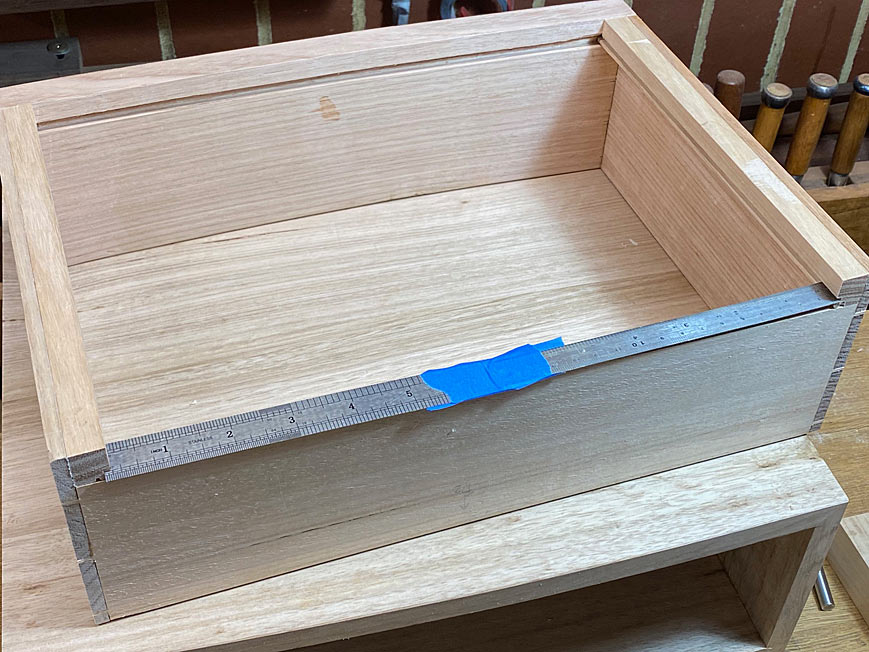


Now the bottom is marked against the grooves themselves, and the total width crosscut ...
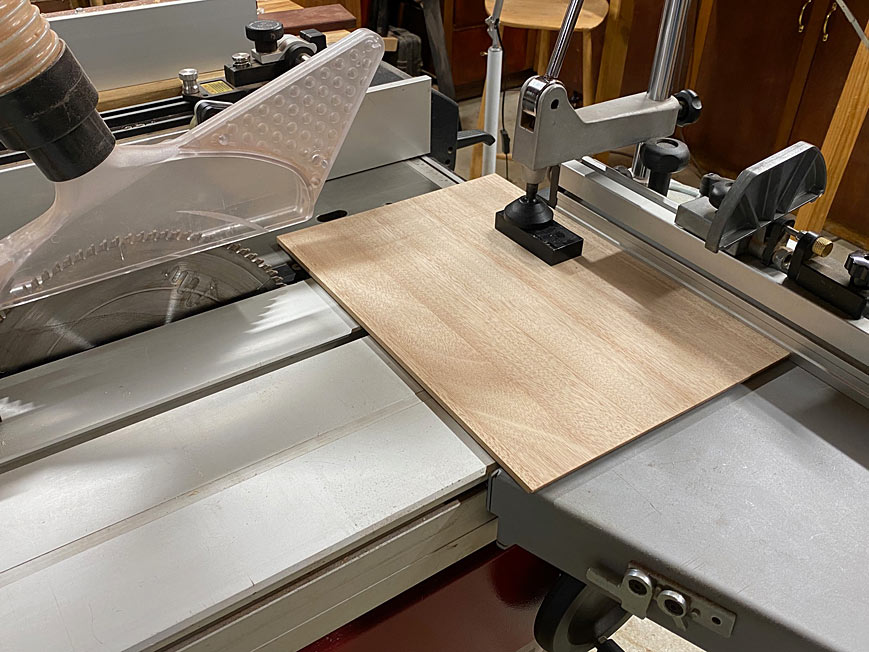


... and the procedure of planing the rebate is done once again. This is a little more exacting than before as there can be no slip ups.


The completed panel slides into the grooves and is pushed in as far as it will go ...
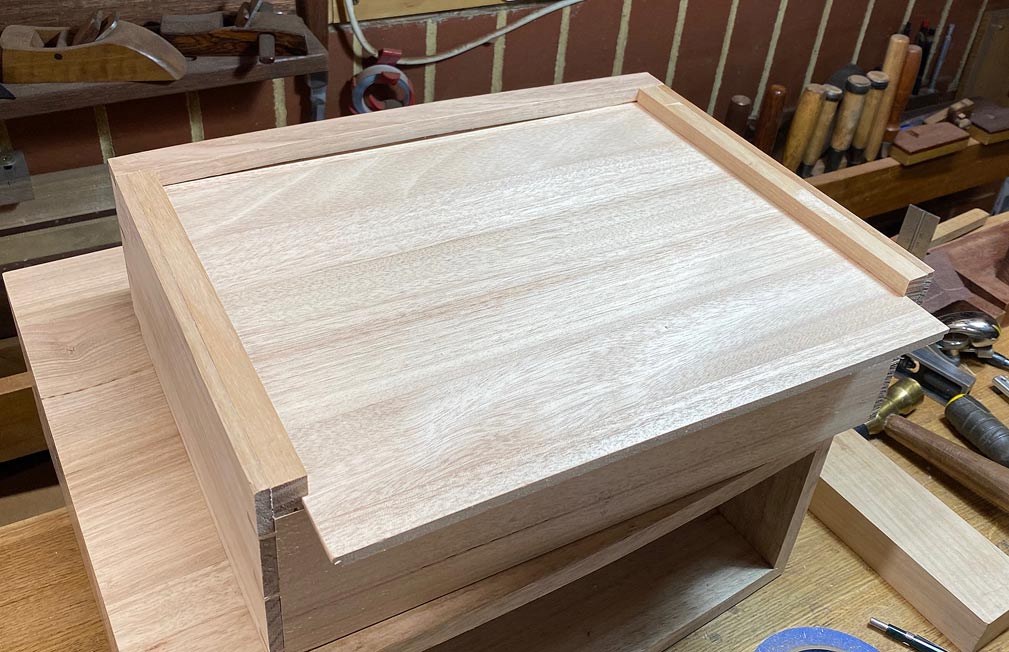


Of course, as the drawer front is curved, it stops short ...
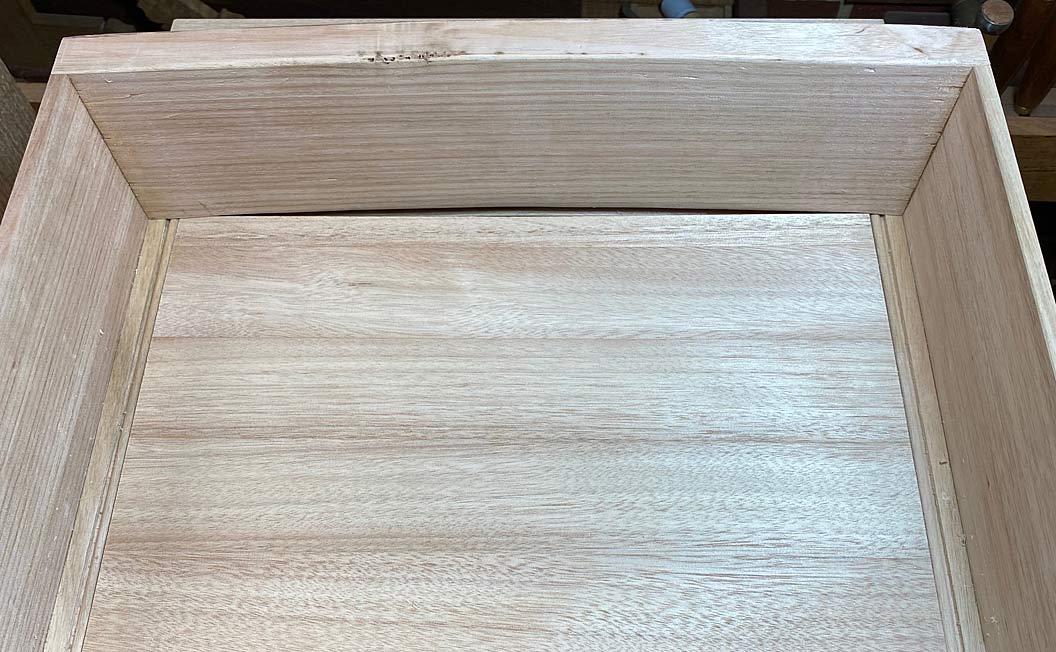


The curve is scribed onto the drawer bottom ...
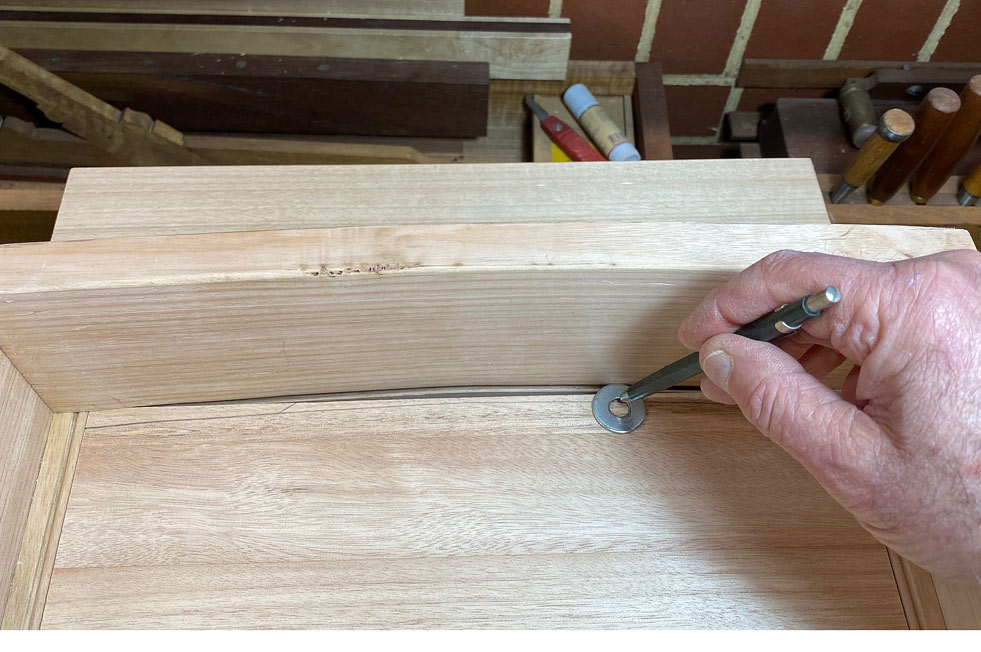


Here is the bottom shaped ...


A close up of the drawer bottom, rebate and bead ...
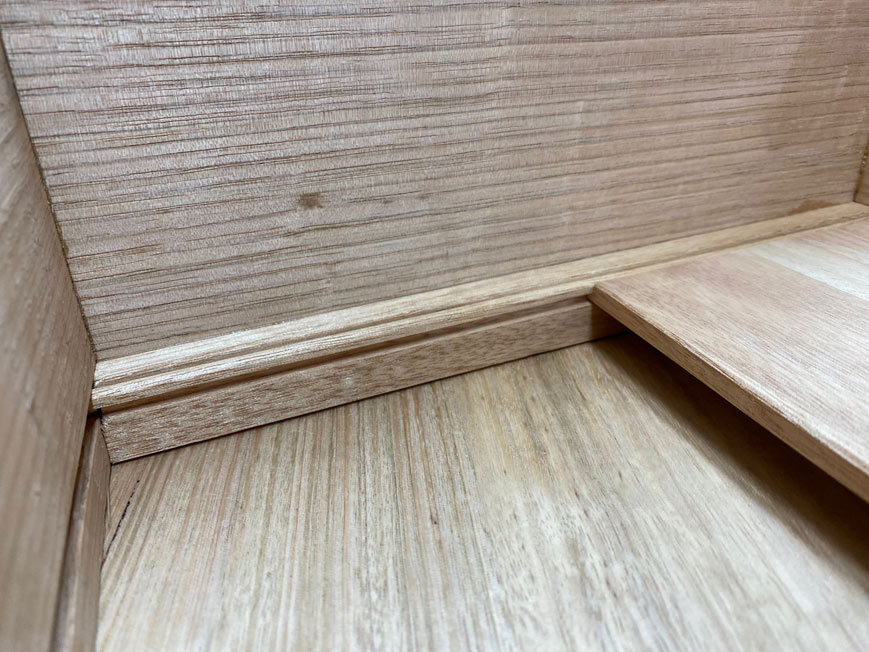


The fitted drawer bottom ...
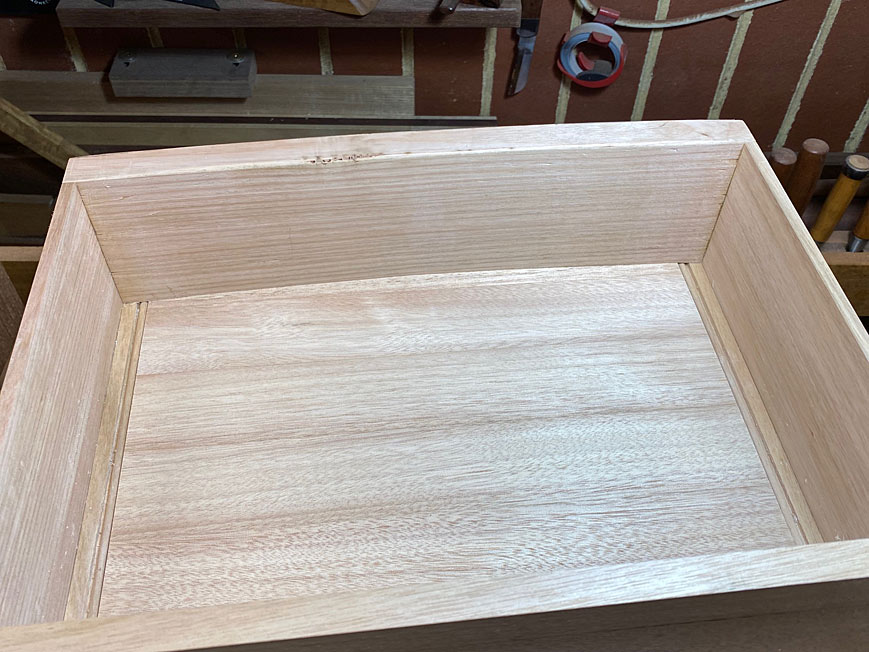


Time for finish. Hardwax Oil is used on the exterior, which has the advantage in being waterproof - needed for a bedside table. This is one coat at present. It will need time to cure.
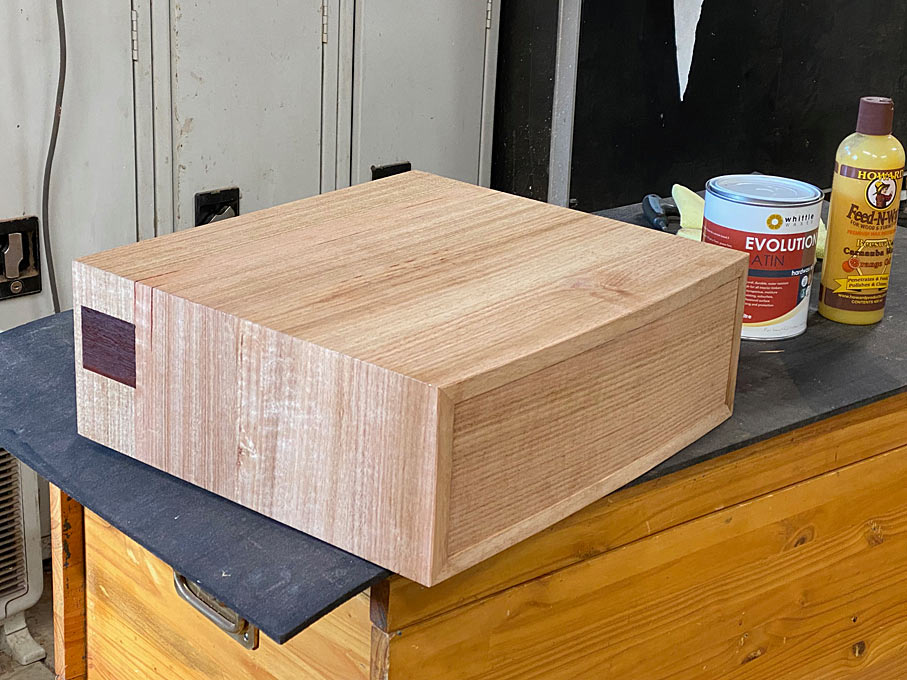
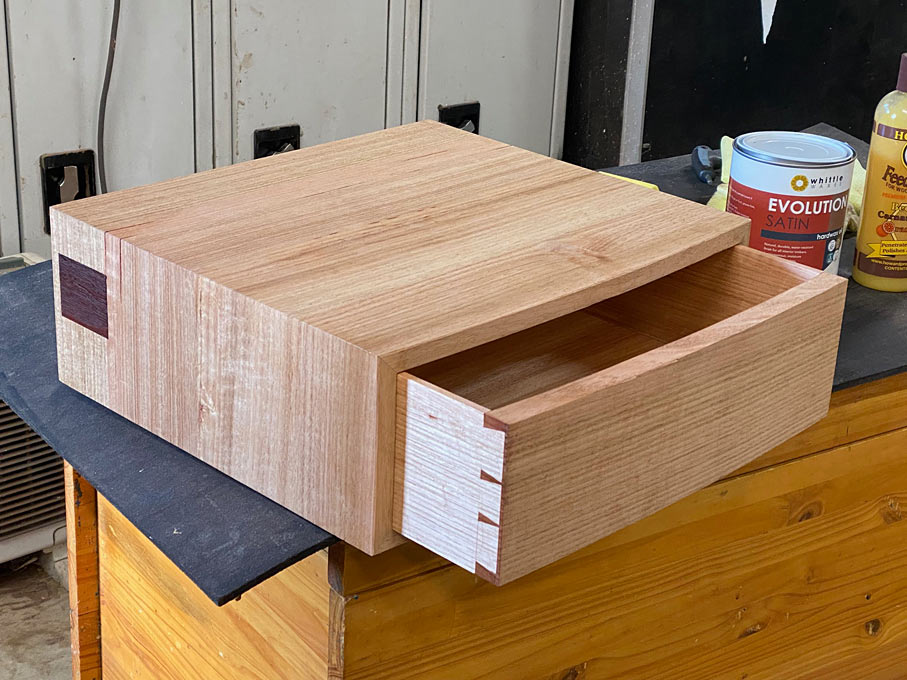


Carneuba oil/wax is used on the interior.
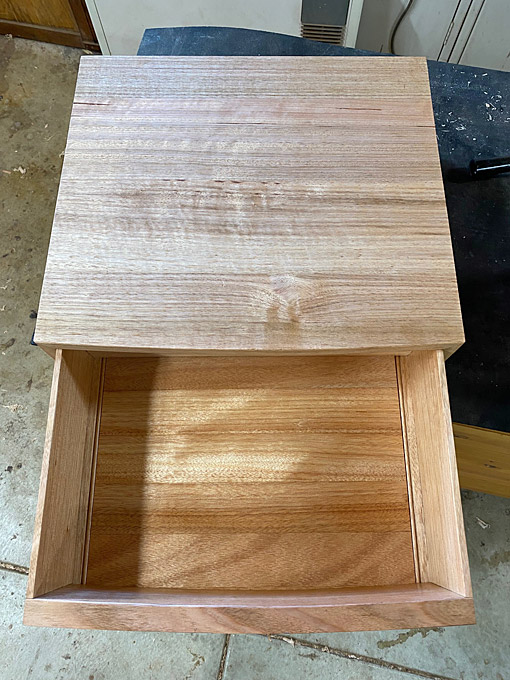


I have made a couple of handles, but not really sure what I want just yet. I will wait until all is done.


In the meantime, we are now ready to start on the bases.
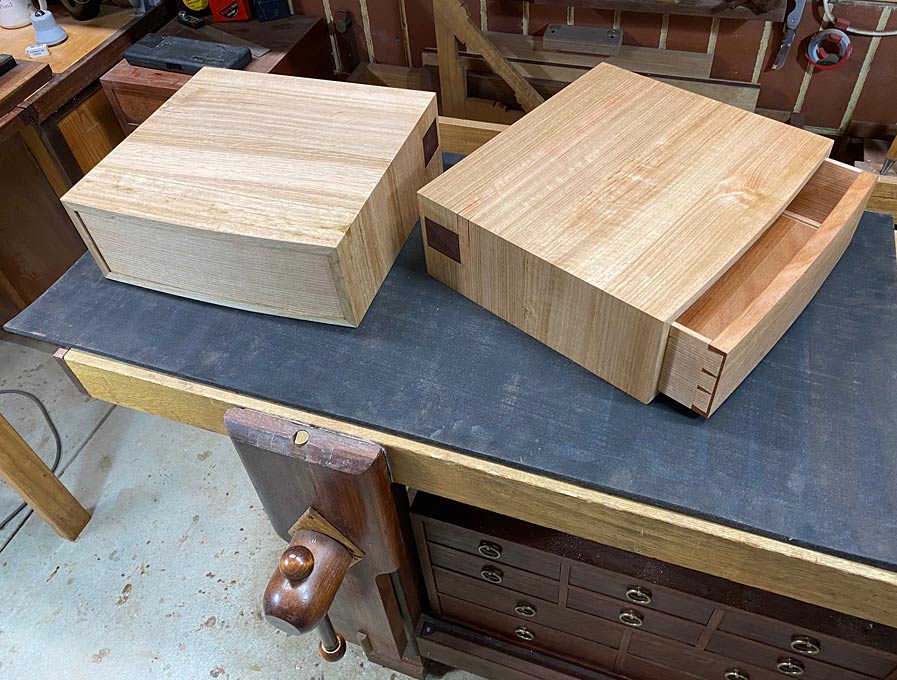


Regards from Perth


Derek


Re: Power and Hand Together (5): Pardon, but your slip is showing.

#3

Re: Power and Hand Together (5): Pardon, but your slip is showing.

Derek, another lesson for all of us and a remarkable achievement!!


Re: Power and Hand Together (5): Pardon, but your slip is showing.

#4

Re: Power and Hand Together (5): Pardon, but your slip is showing.

The "worsher" (Kentucky dialect) used for scribing the drawer bottom is a neat idea.


Re: Power and Hand Together (5): Pardon, but your slip is showing.

#5

Re: Power and Hand Together (5): Pardon, but your slip is showing.

waterproof - needed for a bedside table

I'm afraid to ask...

What kind of power tool are you talking about?


Re: Power and Hand Together (5): Pardon, but your slip is showing.

#6

Re: Power and Hand Together (5): Pardon, but your slip is showing.

Hi Steve, the hand tools are all guided by AI. I wear a body suit created by Festool, and it has a feedback loop through the Frontal Cortex, organising and timing motion. Bloody amazing … I can plane boards with one hand while eating crumpets with the other.

The “power” refers to using power tools for the grunt work, and using hand tools for finesse. That is my usual way. I start off with power and progressively introduce hand tools. The message I am seeking to reinforce is that building goes best with both.

Regards from Perth

Derek


Re: Power and Hand Together (5): Pardon, but your slip is showing.

#7

Re: Power and Hand Together (6): Pardon, but your slip is showing.

Derek......do you glue in the front edge of your drawer bottoms??.......or leave them unglued and easily removable?? Do you prefer making drawers with slips as this allows for very thin drawer sides??

Perhaps, Peter can make a modification that would allow a poster to edit the title of the post without having to delete the entire posted text and photos.

Despite all the negativity toward WOOD Girl, she never showed her slip.


Re: Power and Hand Together (5): Pardon, but your slip is showing.

#8

Re: Power and Hand Together (6): Pardon, but your slip is showing.

Derek......I also enjoyed your utilization of a washer to mark your drawer bottom curve......but, for a man who has just about every tool ever made, take a look at Veritas Offset Wheel Gauges (05N6405) in solid brass......


Re: Power and Hand Together (5): Pardon, but your slip is showing.

#9

Re: Power and Hand Together (5): Pardon, but your slip is showing.

Beautiful work!

A question on the half round bead on the drawer slips: What is the advantage of the bead, since you now have two arises, one on each side of the bead, one left by the scratch stock  on the slip and one on the end grain of the drawer bottom? Both of these square corners could catch and chip on whatever is put in the drawer. Would it be better to file the blade in the scratch stop to form a quarter round bead adjacent to the half round bead you filed into it?


Re: Power and Hand Together (5): Pardon, but your slip is showing.

#10

Re: Power and Hand Together (6): Pardon, but your slip is showing.

But they're not made in metric offsets!


Re: Power and Hand Together (5): Pardon, but your slip is showing.

#11

Re: Power and Hand Together (7): Pardon, but your slip is showing.

What is the advantage of the custom small brass knob on your Veritas skew rabbet plane (over the stock large bubinga knob)? I'm sorry if you have already posted an explanation elsewhere, but if so I missed it. Do you think the modification would be helpful on a left handed rabbet plane used north of the equator? ;^)


Re: Power and Hand Together (5): Pardon, but your slip is showing.

#12

The Controversial Skew Rabbet Plane set-up.......

William......Derek did have postings on this subject on Hand Tools under the subject heading of "Manuel for Setting Up the Veritas Skew Rabbet Plane"......look for a posting dated May 1, 2023 with the heading "New Front" for this specific plane modification and explanation.

And I must say that overall, Derek's entire postings on setting up and using a skew rabbet plane where far more controversial and divisive than my innocent featuring of WOOD Girl ever was......


Re: Power and Hand Together (5): Pardon, but your slip is showing.

#13

Re: The Controversial Skew Rabbet Plane set-up.......

Thanks, Roger. I thought I had seen it. I'll need to copy Derek's setup article so I can read it again later when I'm actually fiddling with the plane.

Oh, and I don't think she wears a slip.


Re: Power and Hand Together (5): Pardon, but your slip is showing.

#14

Re: Power and Hand Together (6): Pardon, but your slip is showing.

Hi Roger

No glue. Also, the choice is an extra deep groove to encourage expansion to the front, or a screw-and-slot to encourage expansion to the rear. I prefer the latter, but the front connection needs to be a firm fitting to prevent any rattles.

Regards from Perth

Derek


Re: Power and Hand Together (5): Pardon, but your slip is showing.

#15

Re: Power and Hand Together (5): Pardon, but your slip is showing.

William, the bead is simply a way to make the transition from slip-to-bottom a feature. I’ve never had one chip, but no doubt they could accumulate dust. Never noticed. But that is why God invented vacuum cleaners. :)

Regards from Perth

Derek


Re: Power and Hand Together (5): Pardon, but your slip is showing.

#16

Re: Power and Hand Together (7): Pardon, but your slip is showing.

William, using the knob raised the hand and makes the plane even more vulnerable to tipping. Removing the knob has two advantages: firstly, the centre of effort drops, and secondly, this also allows the hand to simultaneous apply lateral pressure. I previously just removed the knob and pressed a thumb on the screw hole. Then a forum member suggested a knob like a block plane, and I though it a great enough idea to make one. It works really well.

Regards from Perth

Derek


Re: Power and Hand Together (5): Pardon, but your slip is showing.

#17

Re: Power and Hand Together (7): Pardon, but your slip is showing.

That makes sense. The next time I get the rabbet plane out, I'll have to try it both ways. Curiously, I've always used the Veritas adjustable mouth block plane with the optional wooden knob. That's different than the forces on a rabbet plane, since the only use I make of the block plane where tipping is an issue is cutting chamfers.