100+ Wood Species + Full-Shop Services: Lumber, Veneer, Tools & CNC. Everything in One Place.

WoodCentral Forums

Est. 1998 — 28 years of woodworking knowledge

Underbench cabinet: 14. Dovetailing for blood! *LINK*

Posts

Underbench cabinet: 14. Dovetailing for blood! *LINK*

#1

Underbench cabinet: 14. Dovetailing for blood!  *LINK*

Derek Cohen (in Perth, Australia)

Bill and I have been discussing drawer-making. We have different approaches since our target audience is a different group. Bill is better aligned with production work, aiming to build a drawer as quickly as possible. He is less concerned with aesthetics (although his work always looks exceptionally good) and more focussed on finding shortcuts to increase speedier construction. My work is aimed at being the best I can, with a focus on traditional construction completed to as near perfection as I can muster (which sounds grander in words than in practice!).

I argue that my drawer-making is quite speedy. The speed comes from minimising unnecessary tasks by planning ahead. This is not immediately apparent in that I use techniques that appear to add extra work. In actual effect, they reduce errors and thereby reduce the time required to tune or repair joinery. My aim is to get it as right as possible - immediately. One example if this is that I do not check whether the drawer is square after glue up ... because the drawer will dry in the drawer case, and so fitting the drawer case is what is important.

Now the issue about fitting the drawer case is that this is only possible if the dovetailing is a flush fit, and ready to go into the drawer case. It is expected to be a tightish fit, which will need to receive just a small amount of final tuning. The level of expertise involved here is not really that high; it is more about the approach. I believe anyone can do the same, and this is the motivation to write this chapter. I am sure that Bill will likely do the same ... I look forward to learning from his approach, adding technique to my own.

The discussion started when Bill questioned why I had cut all the drawer parts (sans the drawer bottom) for this cabinet ...
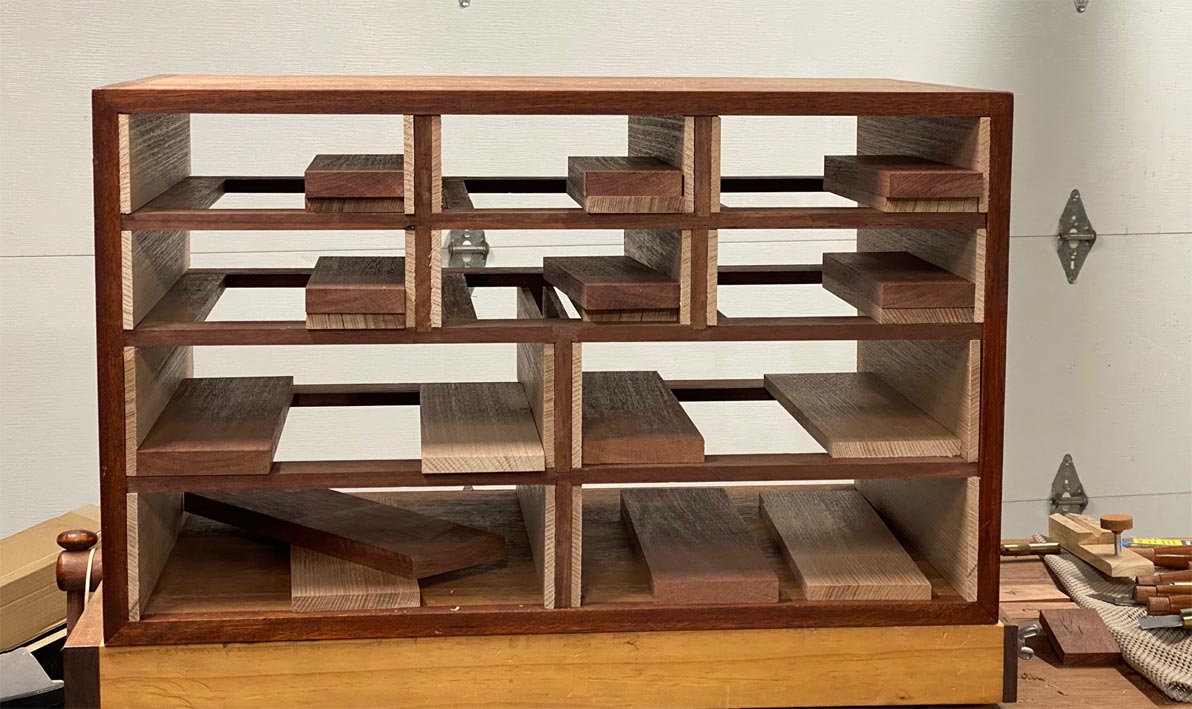

Bill makes one drawer at a time. He does this as he is concerned the wood will move .. warp or twist .. if it is allowed to rest. My argument is that speed comes from massed repetition: returning to saw all the parts separately is slow. I do not fear the drawer sides moving as I use quarter sawn timber for drawer sides, which is very stable. The wood here is Tasmanian Oak (which is actually an Australian Eucalyptus).

The drawer-making process is divided into three stages: first comes the (half-blind) dovetailing of the sides to the front. The groove or slips for the drawer bottom is added later.

Secondly, the drawer back is (through) dovetailed to the sides. This relies on the height of the groove, and the reason it is completed later and not up front.

Thirdly, the drawer bottom is made and inserted.

What I wish to demonstrate here is the first stage: dovetailing the front to the sides.

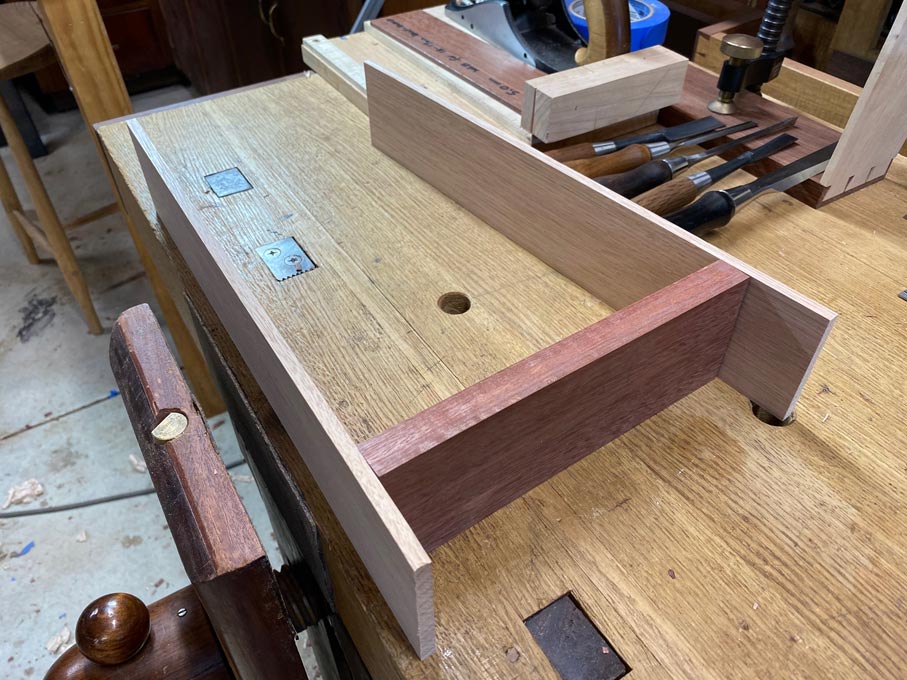
Here are the parts. The Tassie Oak sides are 1/4” (6.35mm) thick and the Jarrah front is 3/4” (18mm).

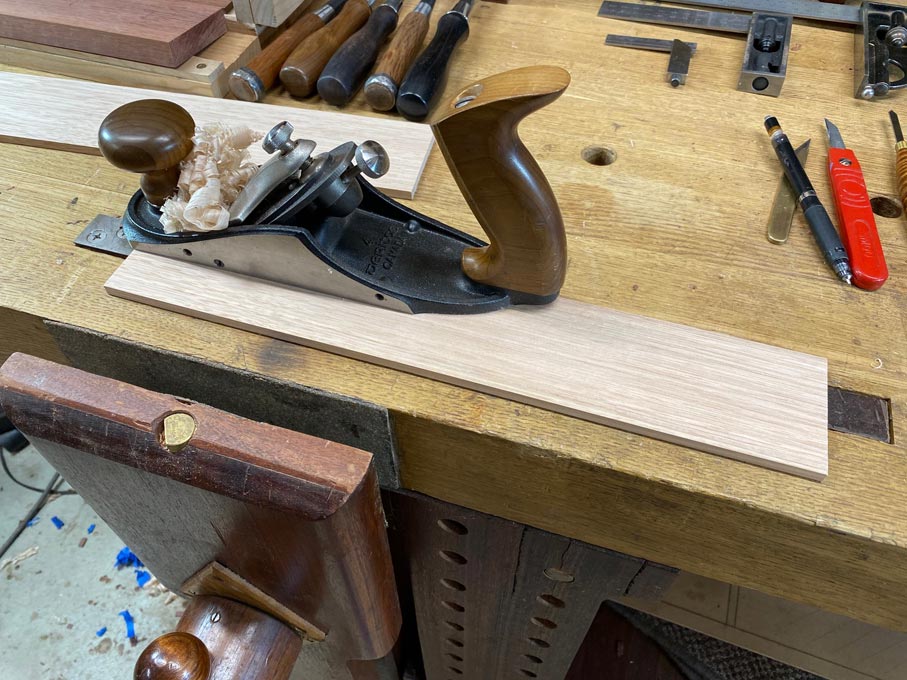
The inside face of the drawer sides is planed to remove any machine marks ...

We will cut Tails First, so mark the tail board ...
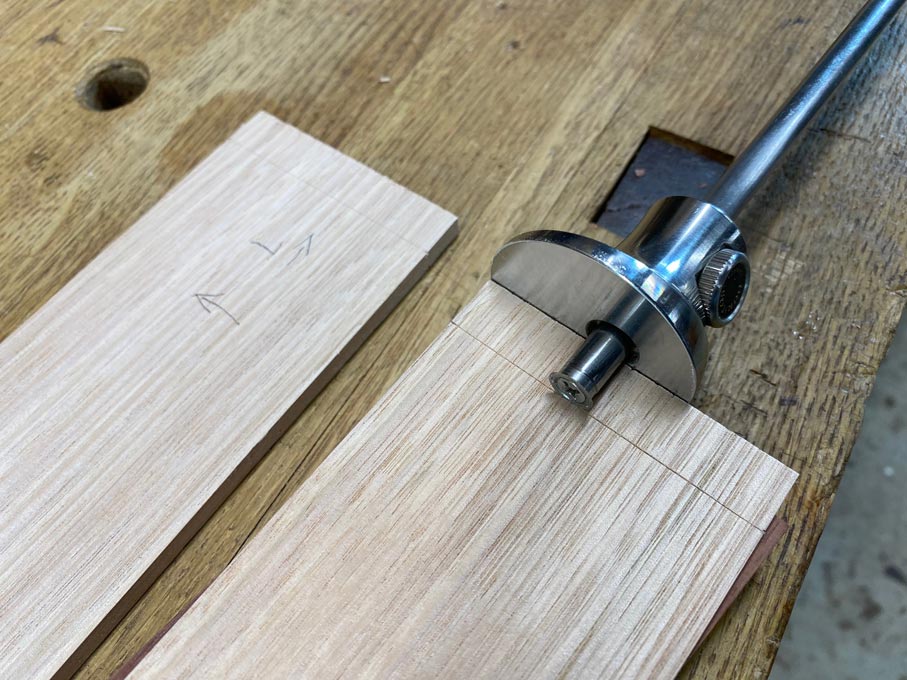

To speed marking of the tails, a template (or story stick) is made. This will set out the tails for the top two rows, six drawers in all.
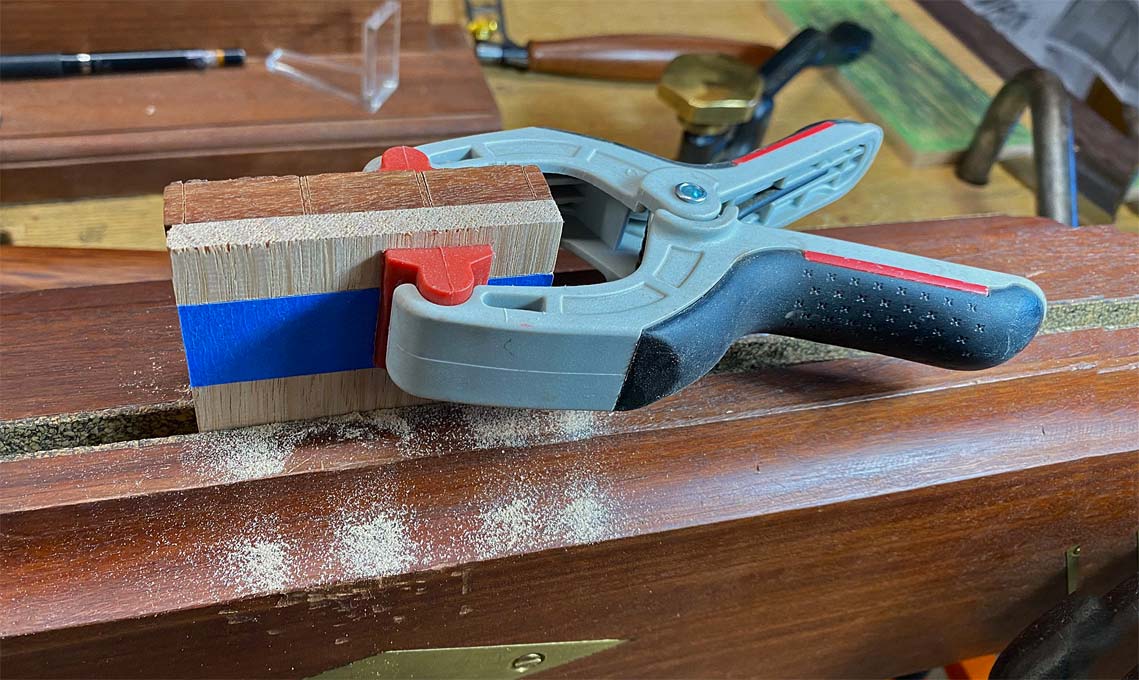

The tails are sawn. Note that there is a line of blue tape to help my aging eyes know when to stop cutting!
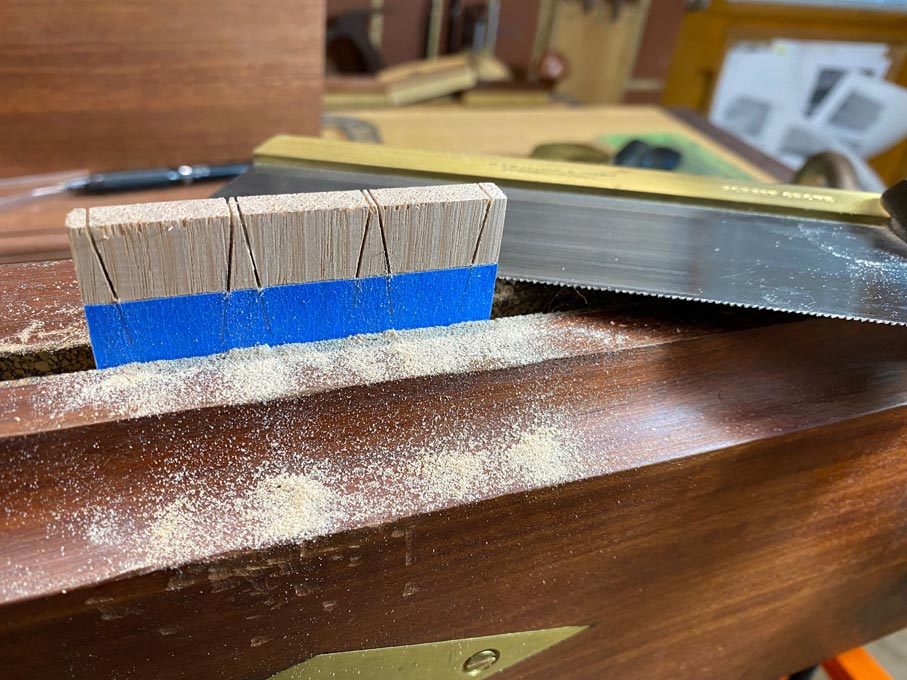

An important step is to undercut the baselines. This will increase accuracy when paring ...
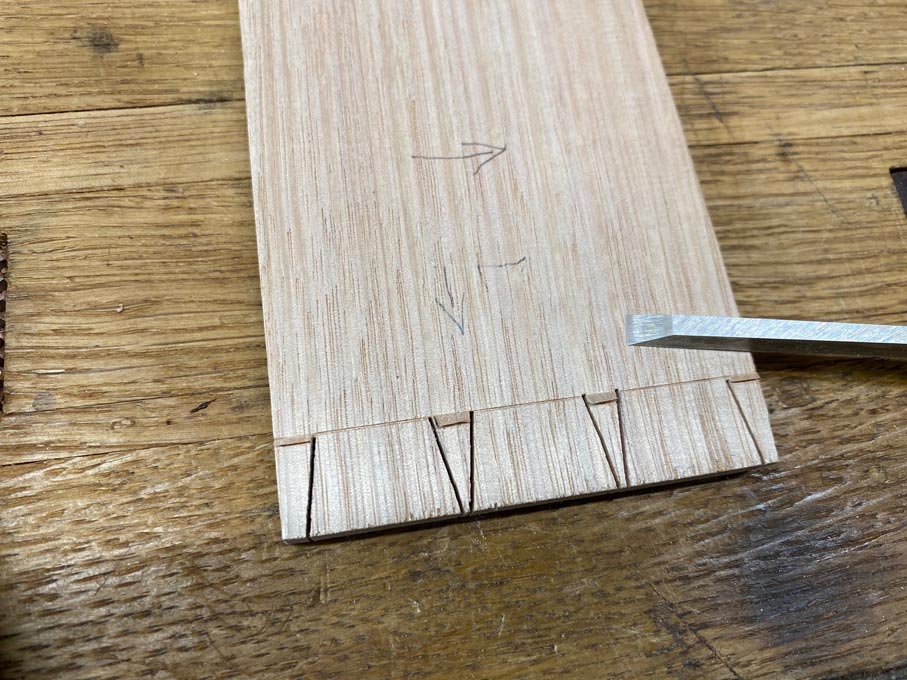

Fretsaw the waste as close to the baseline as possible. I generally leave about 1mm ...
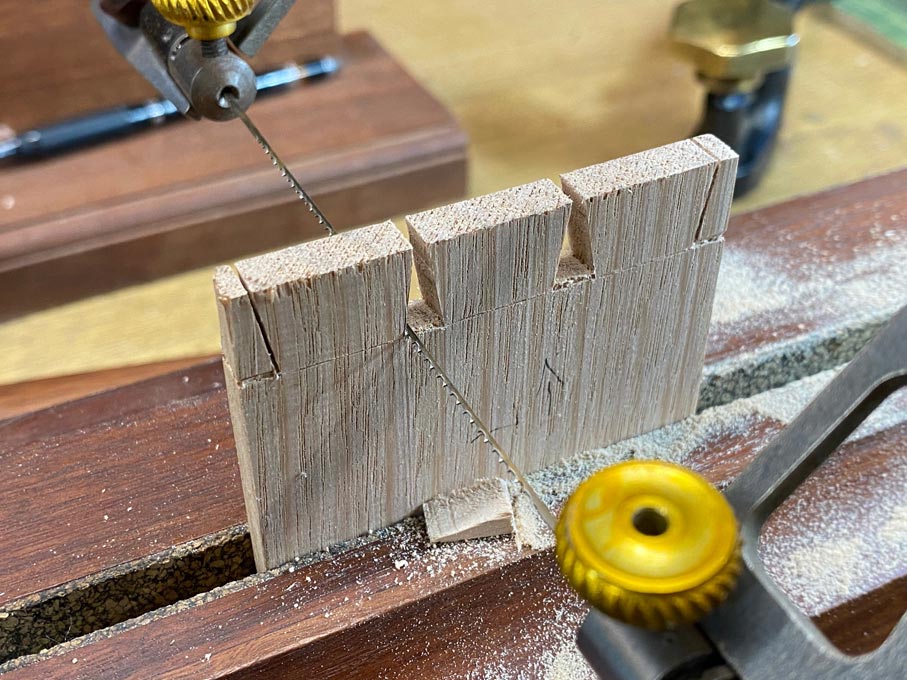

Saw away the half sockets at each side, as usual. But now possible to set the chisel in the chisel wall and use a single down stroke to sever all the waste in the internal sockets, leaving the tail board done.

Mark the web on the drawer front. For 18-19mm drawer fronts, I keep make this 5mm wide.
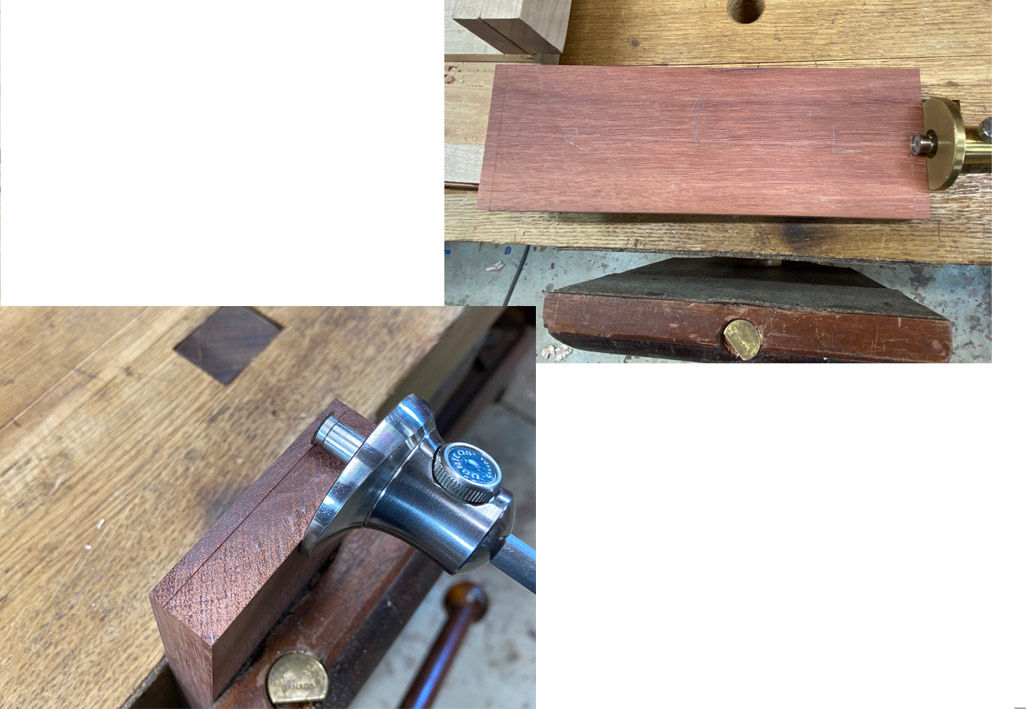

Once again, to aid visibility, blue tape is applied to underline the baseline ...
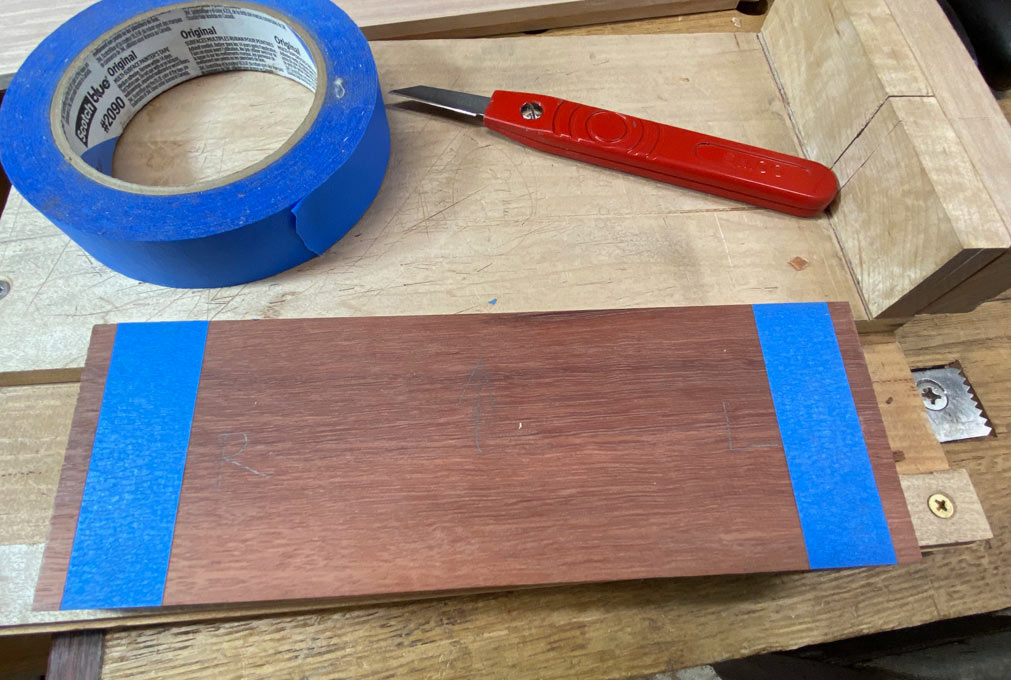

... and the pins. Here it extends to the web line ...
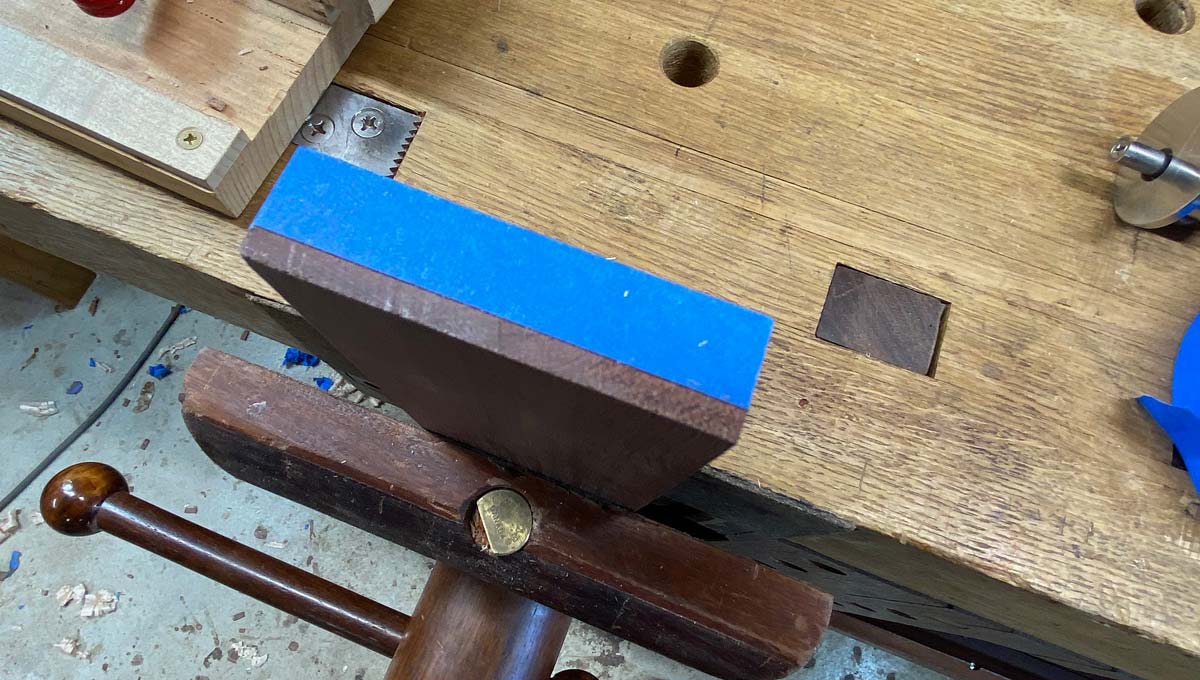

This next bit is extremely important, and can make-or-break the final result. The tails are transferred to the pin board. A single bevel knife is preferred. This will hug the wall of the socket, and slice the tape in a single stroke.

Secondly, the tail board is held firmly by a clamp, and is positioned squarely using a combination square. The square is placed along the reference edge, which is the lower edge of the drawer side. This will switch when the other side is marked out. The importance of this technique cannot be overstated: a squared joint is a prerequisite for a perfect fit. Anything that is not square will require planing, and a lot more tuning.
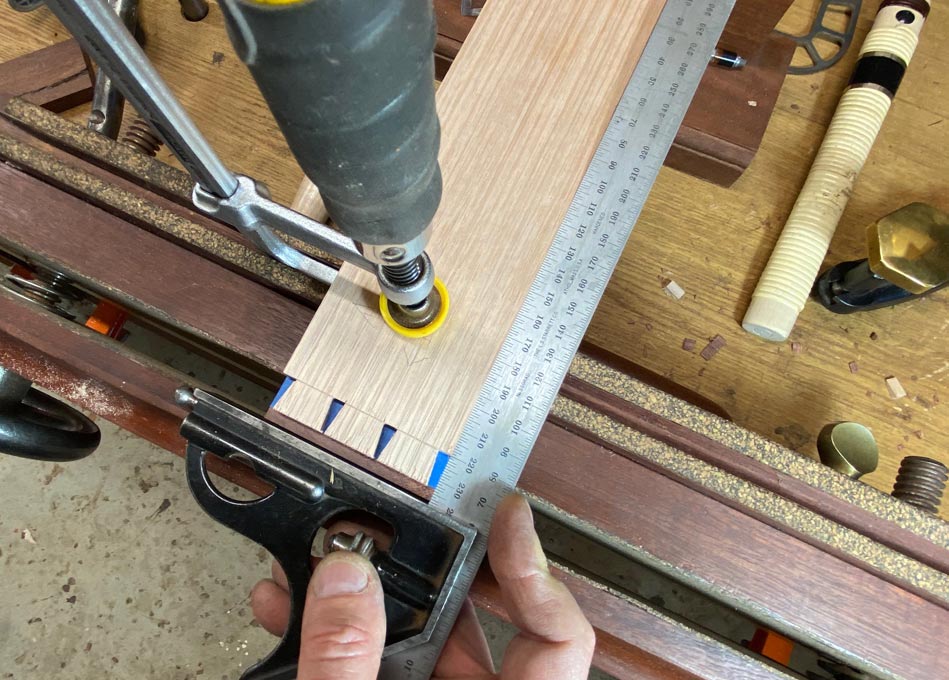

Below is the result of sawing to the line (is the sawing is more accurate than the dropped lines :) In practice, the dropped lines are unnecessary if you have a decent sense of plumb) ....
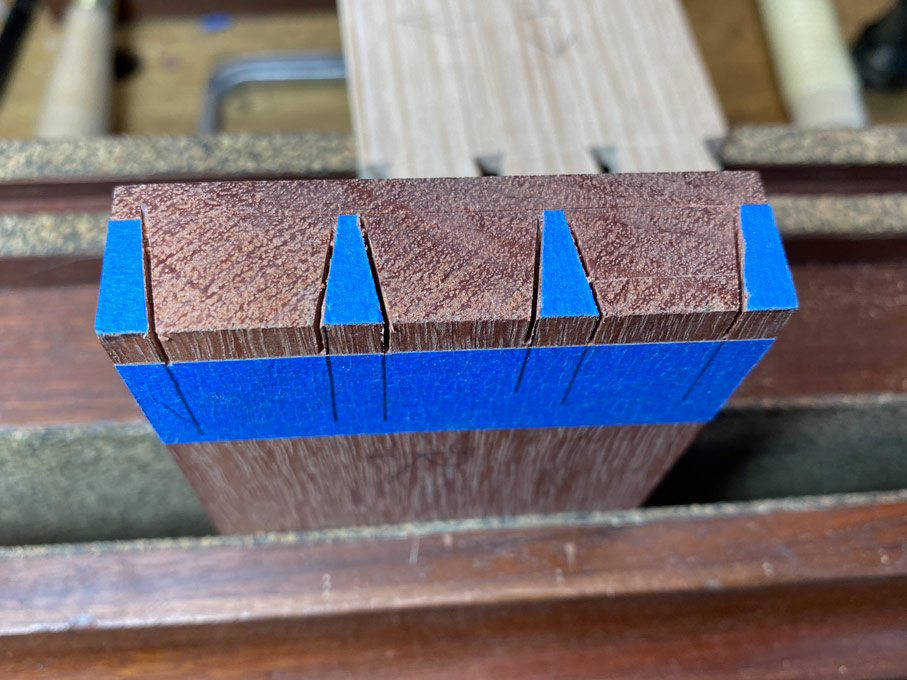

Another time saver comes in the form of deepening the kerfs. This is my version of Tage Frid’s scraper method, a “kerfing chisel”.
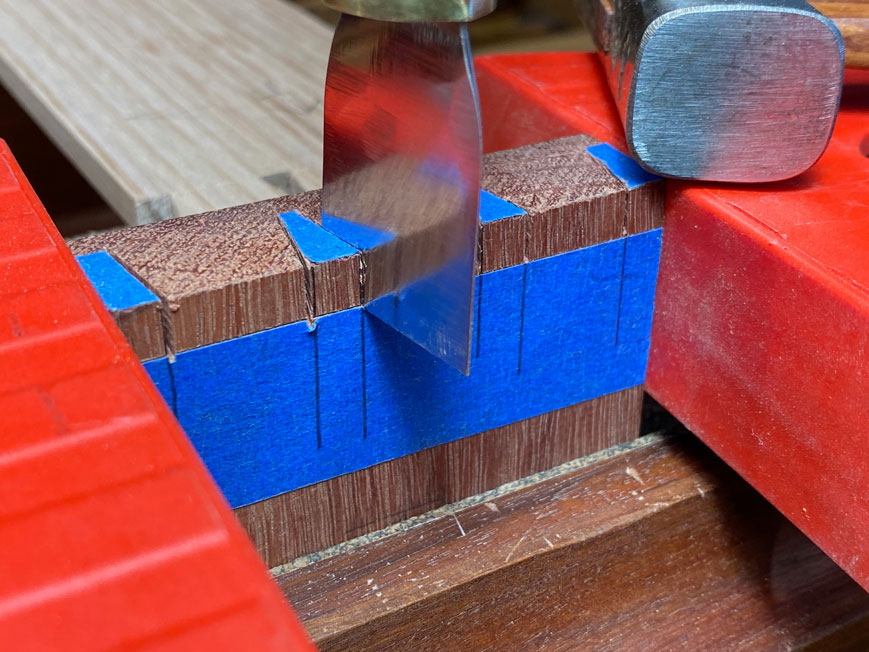

With the kerfs deepened, remove all the blue tape, and deepen the base lines ...
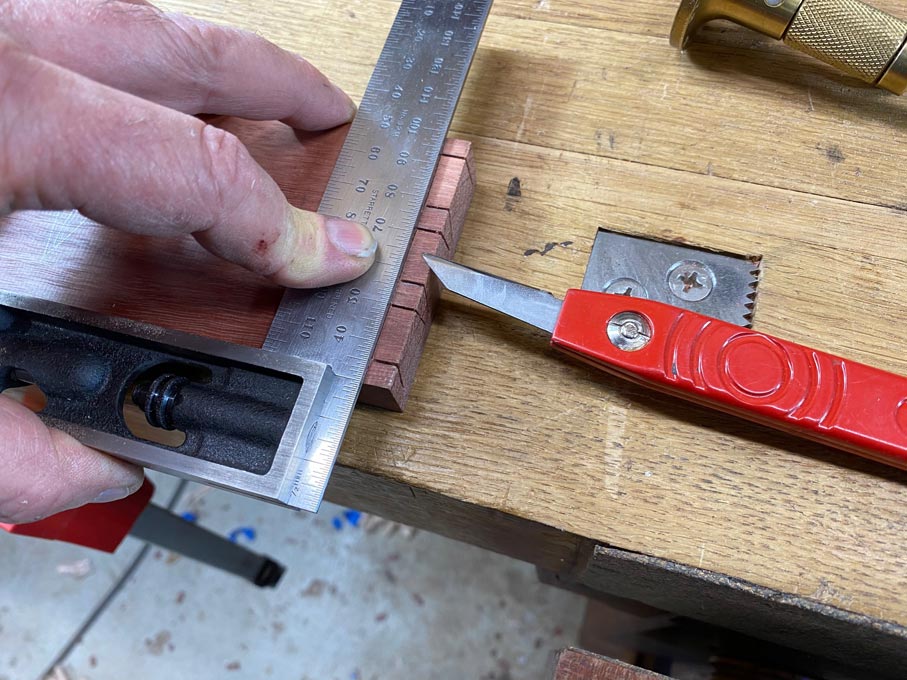

Undercut the baselines to create a chisel wall for each socket ...
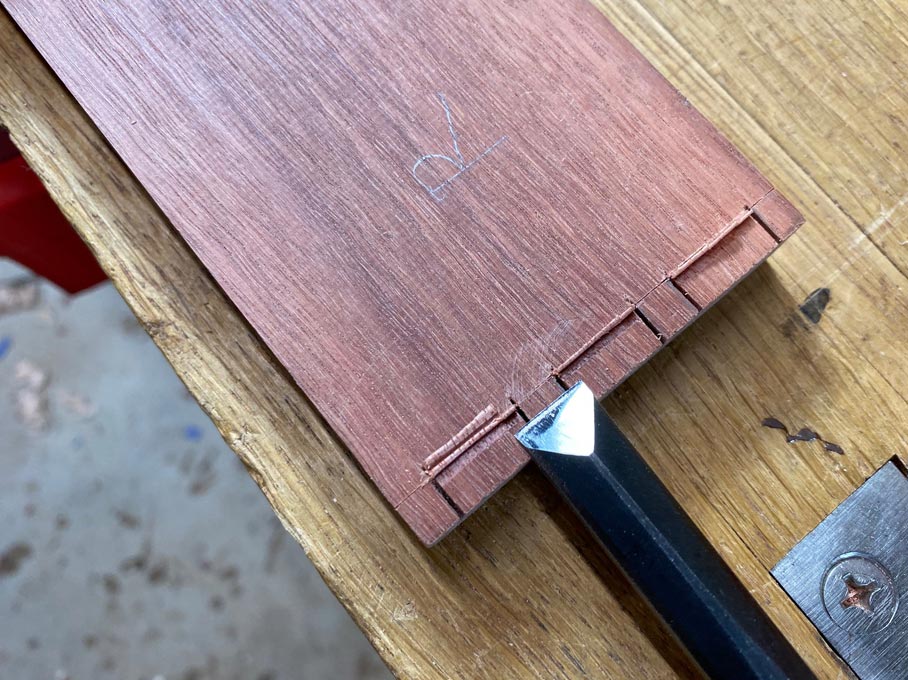

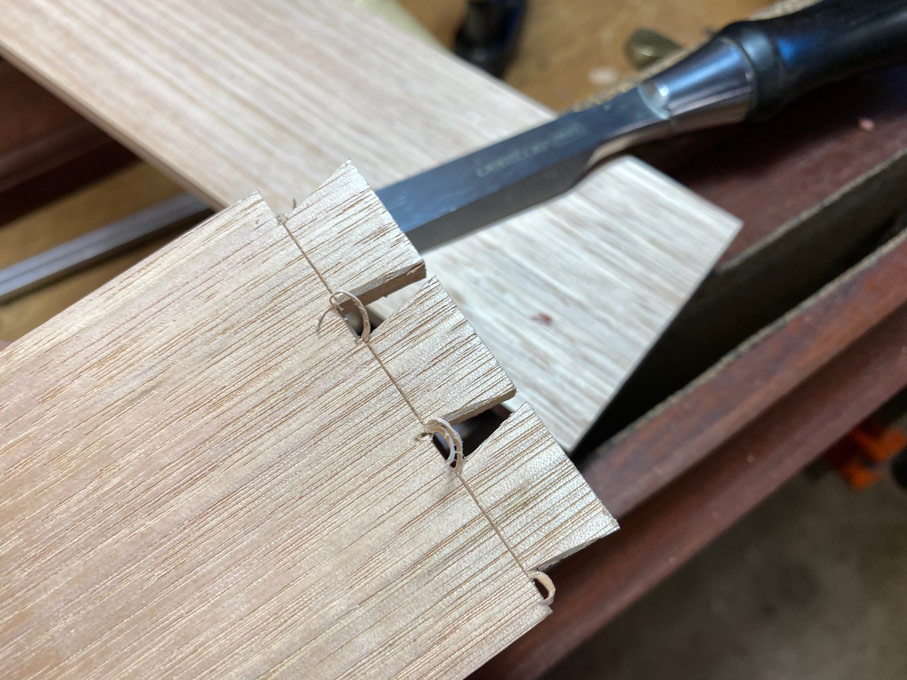
Chisel in the chisel wall and three moderately firm hammer blows. The chisel wall prevents the chisel moving backwards and over the baseline. This means that chiseling can start at the baseline, itself, and reduces later extra paring ...
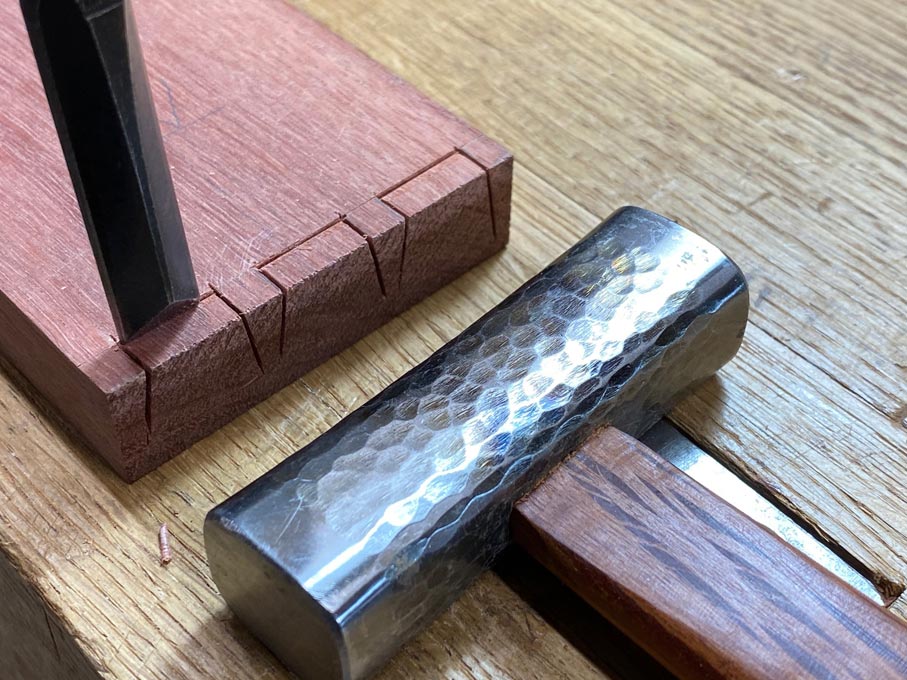

Split out the waste ...
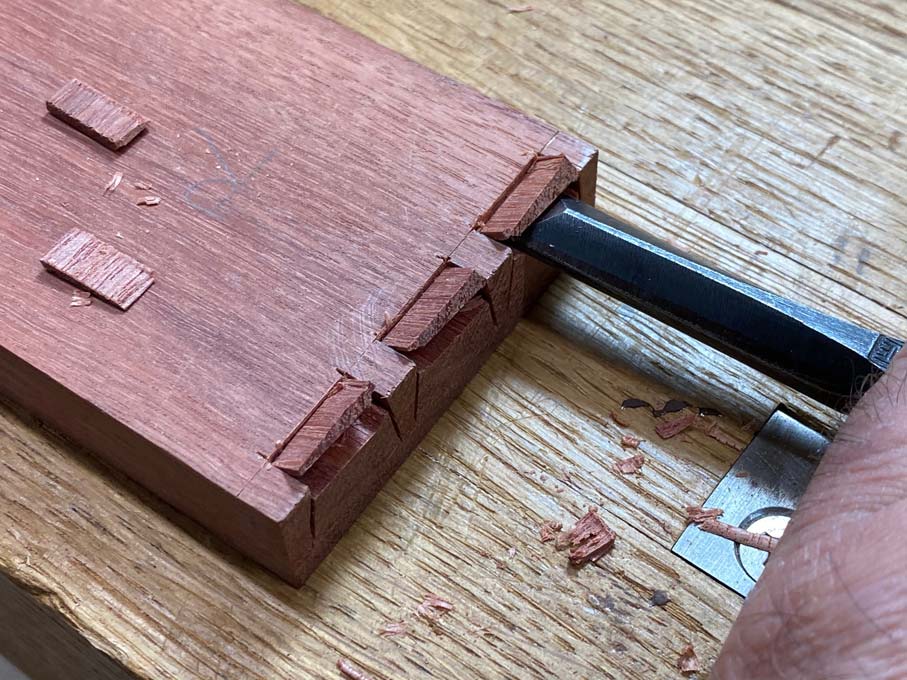

With hard Jarrah and a decent Japanese chisel, it takes me three rows to get within 3mm (1/8”) of the web line. I stop at this point ...
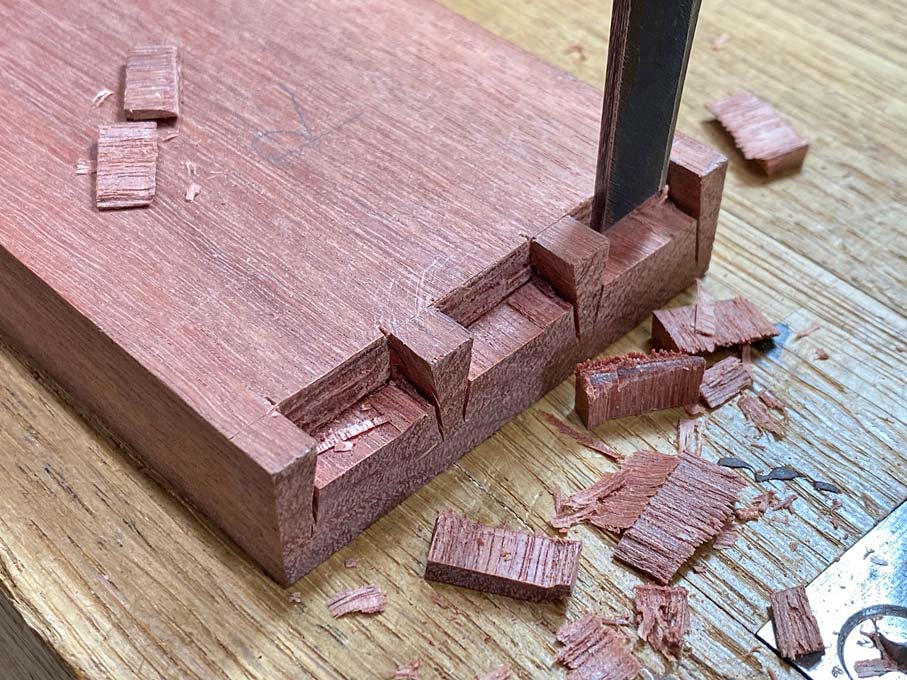

This is repeated at the other end of the board ...
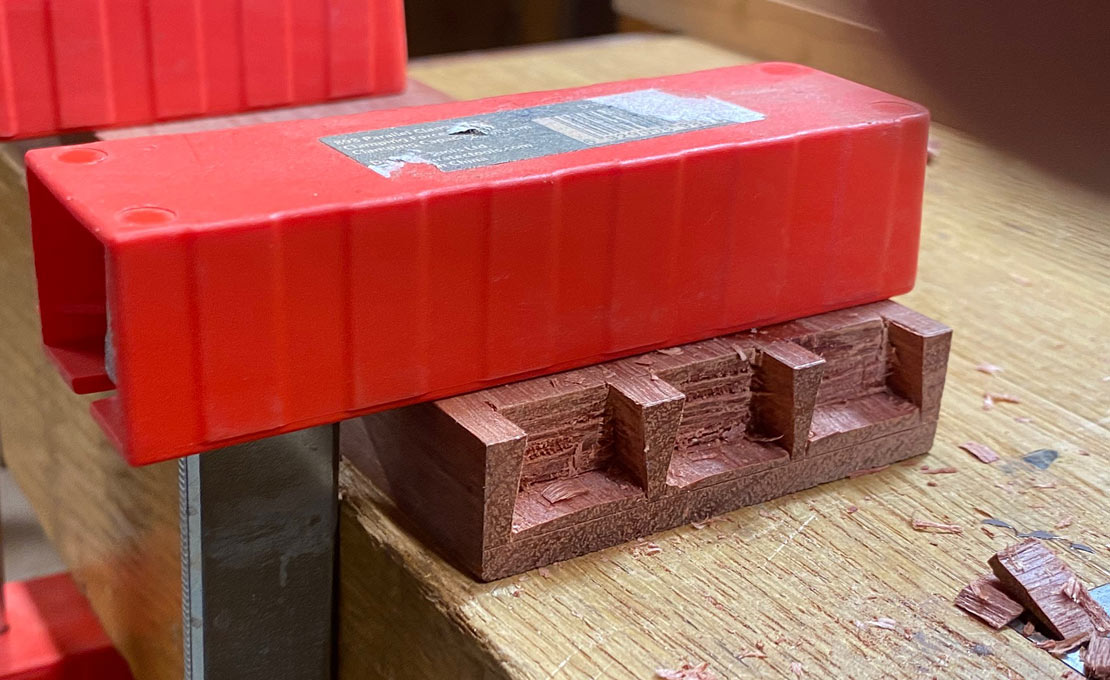

Back to the Moxon Vise: the sockets are cleared by paring the remainder in 1mm slices ..
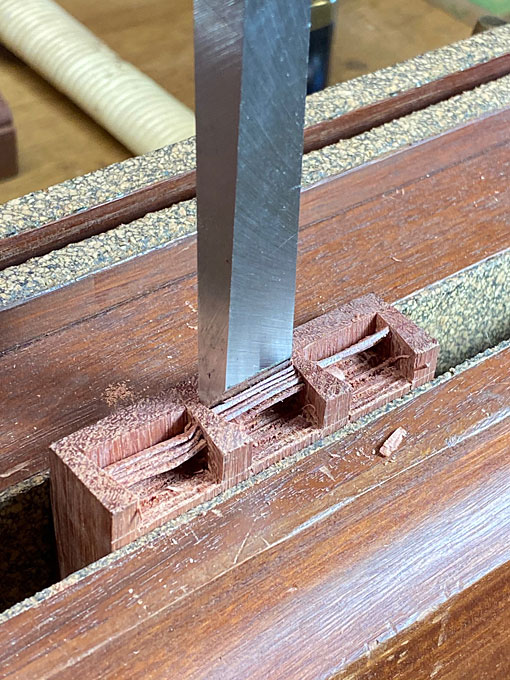

Cleaning out the socket was facilitated by earlier extending the kerfs, and now with a corner chisel ...
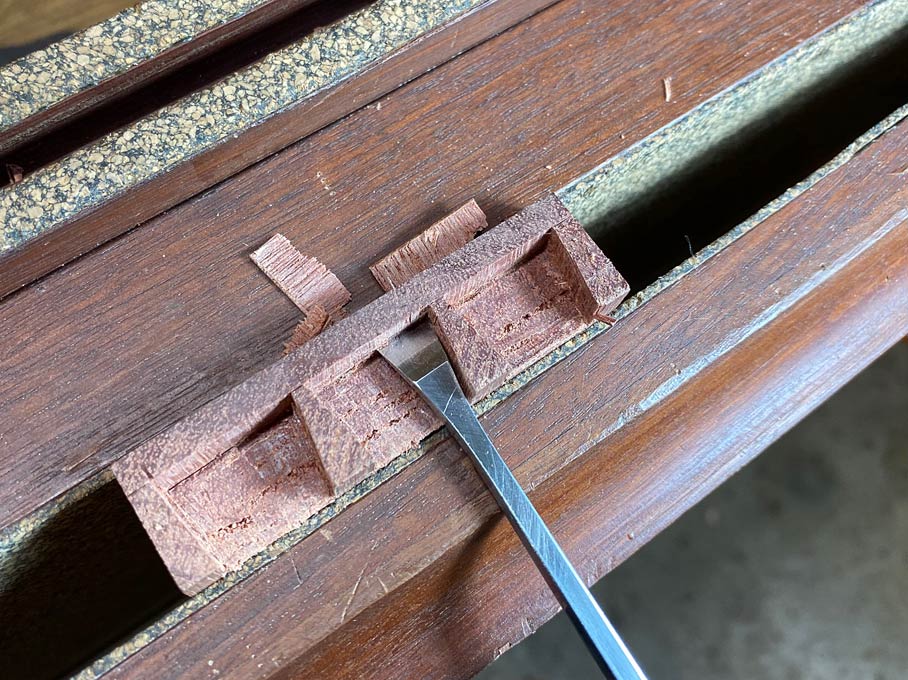

It is all about “release cuts”, as David Charlesworth has written in his articles over the years. Create a release cut, and waste will fall away without a fight. The deepened kerfs mean that there is no further paring needed at the sides of the sockets. Clearing the waste is a matter of splitting it out. The chopping is a release cut here.

Finally! The dovetailed sides are tapped into the sockets of the drawer front. The goal here is that they fit “off the saw”, and no further work is needed? Note that the small section here does not only protect the surface, but it ensures it is driven flush ...
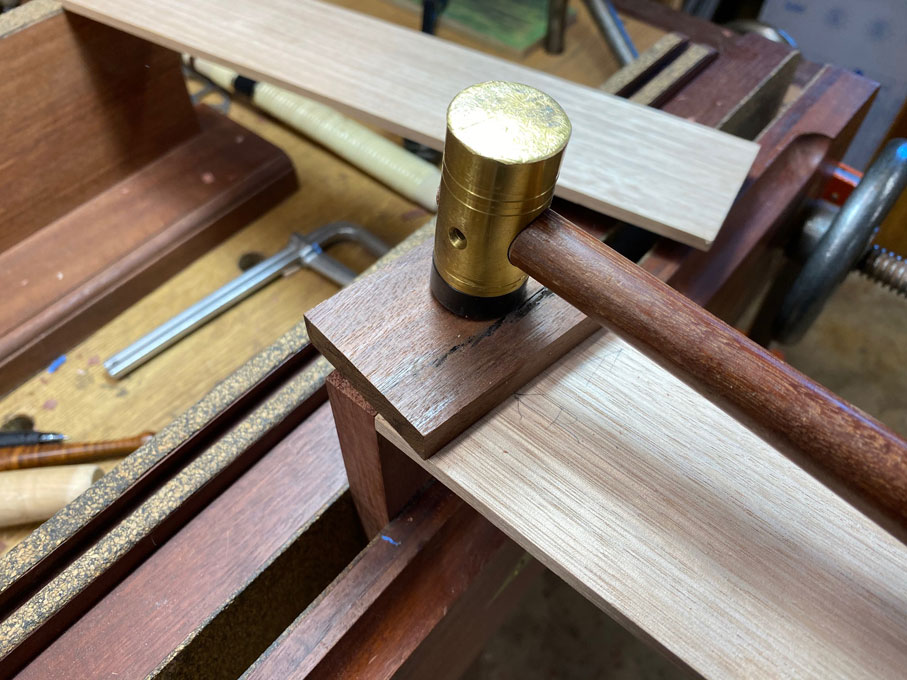

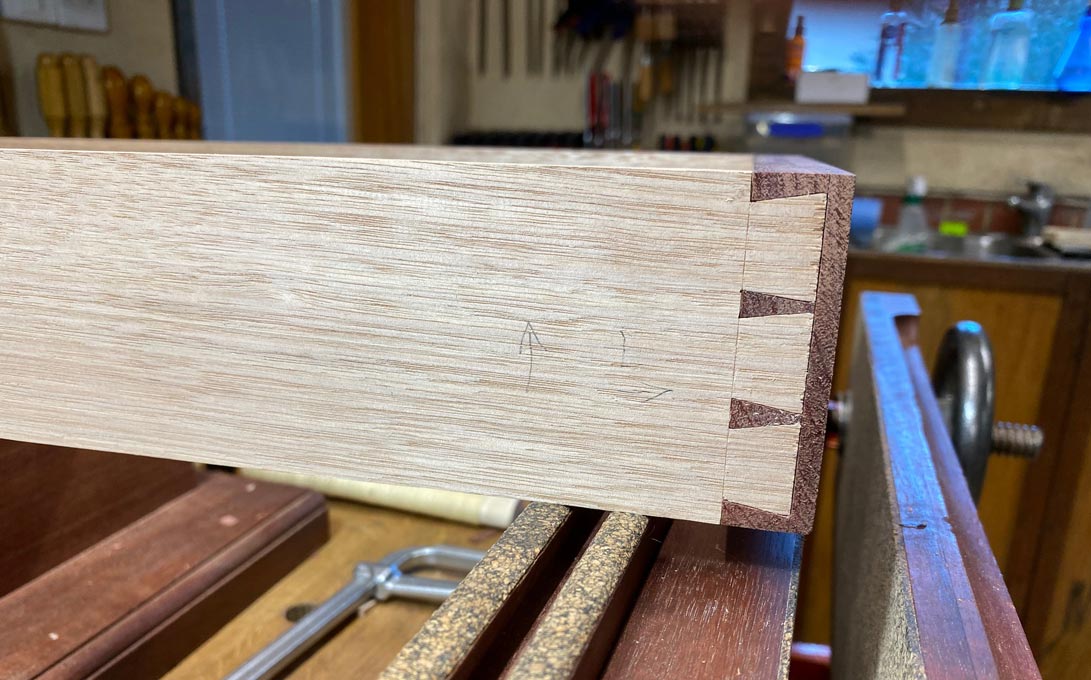
How did we do? Here is one side ...

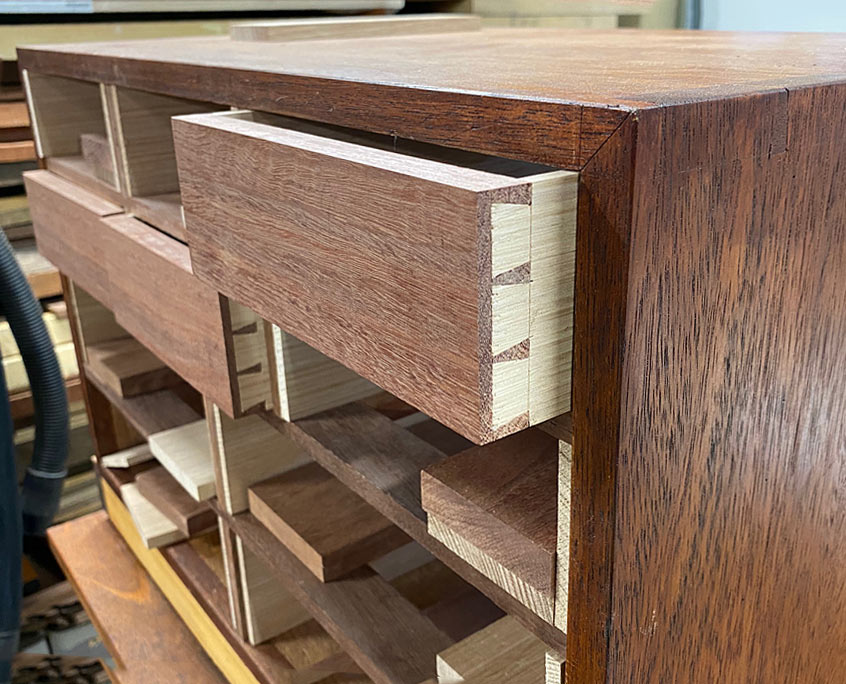
And here is the other side with the “drawer” inserted into the drawer case ...

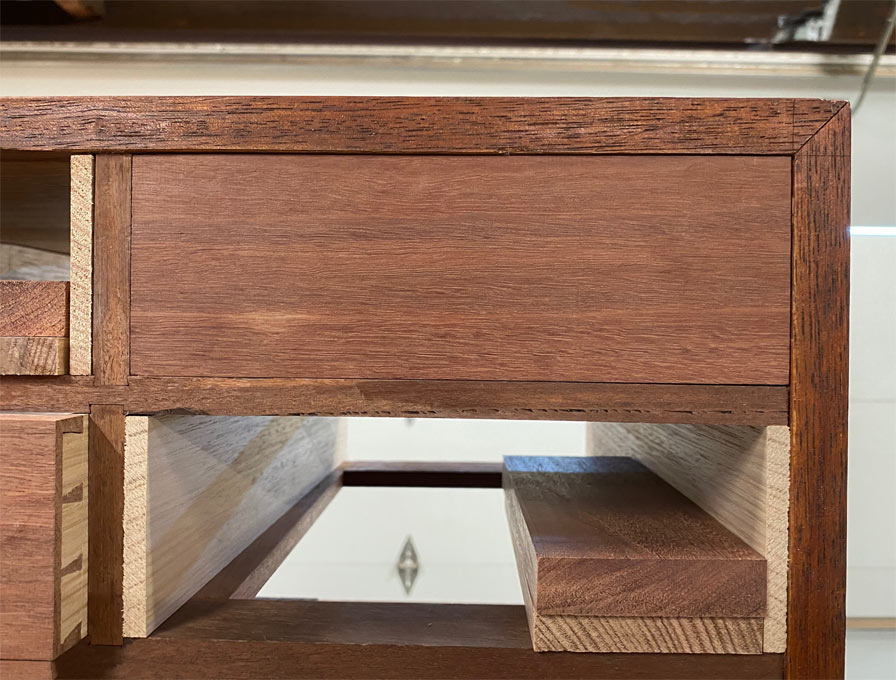
The drawer can be pushed flush into the drawer case, which was the target at the start ...

Regards from Perth

Derek


Make a kerfing chisel

Re: Underbench cabinet: 14. Dovetailing for blood! *LINK*

#2

Re: Underbench cabinet: 14. Dovetailing for blood!

John Jardin

Derek, thank you for your wisdom, fine craftsmanship and outstanding visual narration...an inspiration to many of us.

Re: Underbench cabinet: 14. Dovetailing for blood! *LINK*

#4

another of your backwards approaches

Bill Tindall, E.Tn.

:) I build the back of the drawer first. I have no idea why.

With the exception of a couple of details we do drawers the same. Curing the drawer in the case has another benefit. It gets the drawer out of the way so another can begin. I might add to be sure the glue is cleaned from the drawer side before case curing. A sharp whack is said to free one glued to the side of the case.

I will re-emphasize your point of having the parts perfect. Perfect parts enable perfect joints. If you ever make a drawer that doesn't sit flat on the table saw, after getting it to work properly in the case you will spare no effort to never make another drawer that doesn't sit flat. Lack of flatness is a particular challenge on large shallow drawers like the pencil drawer for the desk I am making.

Re: Underbench cabinet: 14. Dovetailing for blood! *LINK*

#6

Re: another of your backwards approaches

Derek Cohen (in Perth, Australia)

Bill, why do you build the back of the drawer first?

And what do you do to ensure that the drawer will sit flat?

Regards from Perth

Derek

Re: Underbench cabinet: 14. Dovetailing for blood! *LINK*

#8

answers!

Bill Tindall, E.Tn.

Bill, why do you build the back of the drawer first? Because I am in the northern hemisphere. :b

And what do you do to ensure that the drawer will sit flat? I do what you do, carefully. If it comes out flat I didn't screw up, something getting rarer over time.

Re: Underbench cabinet: 14. Dovetailing for blood! *LINK*

#9

differing details

Bill Tindall, E.Tn.

Some details I do different


I slightly overcut the baselines. I despise digging the waste out of these corners. Also, this kerf provides a place for the marking gage tip to enter when transferring tails to pin board. My customers don't care and it make my life easier.


I chamfer the inside of the tails. It makes starting the engagement of sides to front and back easier. This operation can get frantic on a big glue up. Whatever can be made to go easier is time well spent.


I don't beyond minimal effort on shop furniture. Shown is my vise and shooting board. Building these handy items should not delay getting a sock drawer in service.


And finally we probably both mark parts to minimize cutting pins on the back of the board instead of the front, for example. I'll bet we differ in that I leave them on the piece. I think family will enjoy encountering these marks decades from now.

Re: Underbench cabinet: 14. Dovetailing for blood! *LINK*

#10

Re: answers!

Mark Hennebury

One way that I use to cut parts like these to width accurately is with a router table setup.

The router is set do work like a thickness planer in that you have pressure bars pressing the wood away from the cutter and against a fence. The pressure bar is a piece of 1/4" plexi-glass. You can set it to cut standard up-cut, or climb-cut ( if You are taking a small amount and are experienced doing climb-cuts, and understand the dangers)

You need to Chamfer the pressure finger on the outfeed side so that it can ride up on the incoming board.

Cutting to width this way ( standard up-cut or climb-cut) is a very accurate way to size multiple pieces, guaranteeing all are the parts are parallel and the same size. The fence and pressure bars are usually clamped in place. And can easily be micro adjusted by a simple tap with a hammer. You joint one edge of all of your parts first. Then on the router table you run that edge against the fence, the router trims off the excess on opposite edge..


Re: Underbench cabinet: 14. Dovetailing for blood! *LINK*

#11

Re: differing details

Derek Cohen (in Perth, Australia)

Some details I do different

I slightly overcut the baselines. I despise digging the waste out of these corners. Also, this kerf provides a place for the marking gage tip to enter when transferring tails to pin board. My customers don't care and it make my life easier.

Not so different, Bill. This is another example of the importance of a release cut. I do not do this with the tails - rather, I saw to the line and then pare the last bit of tail waste with a chisel with minimal lands. This gets into the corners.

However, on the pins, I do end up over-extending the socket kerf using the kerfing chisel. No big deal - this will later not be seen.


As the socket is cleared (with chopping), the side walls with the deepened kerf can be seen to make this process easier ...


I chamfer the inside of the tails. It makes starting the engagement of sides to front and back easier. This operation can get frantic on a big glue up. Whatever can be made to go easier is time well spent.

I do this too ....


... not specifically to make glueing up easier - I have had a dry fit - but to prevent damaging the pins.

I don't beyond minimal effort on shop furniture. Shown is my vise and shooting board. Building these handy items should not delay getting a sock drawer in service.

I agree.

And finally we probably both mark parts to minimize cutting pins on the back of the board instead of the front, for example. I'll bet we differ in that I leave them on the piece. I think family will enjoy encountering these marks decades from now.

I do write notations in pencil on the back. I find these disappear when shellac is rubbed over them.

Sometimes I leave messages in indelible ink, such as underneath a drawer. My son (nearly 28) moved to Sydney about 2 years ago, and found a message I left him in a chest of drawers I built for him when 10 years old. :)

Regards from Perth

Derek

Re: Underbench cabinet: 14. Dovetailing for blood! *LINK*

#12

Re: answers!

Derek Cohen (in Perth, Australia)

Mark, I know that what you suggest is an excellent method - you always do excellent work. But I do not understand what you have written. :O Usually visuals help a lot. Not this time.

Can you try again ... kindergarten level? :)

Regards from Perth

Derek

Re: Underbench cabinet: 14. Dovetailing for blood! *LINK*

#13

Re: answers!

Bill Tindall, E.Tn.

All that Derek said leading to why is this better than ripping to width with a table saw? I have never lacked accuracy ripping to width.

Re: Underbench cabinet: 14. Dovetailing for blood! *LINK*

#14

Re: answers!

Mark Hennebury

Thank you for the compliment. We are all just travelers on the road, working at learning and improving. And You guys are doing some fine work yourselves, and i very much enjoy all of your posts.

The router setup i find good on occasion for precise sizing and providing a good finish on small parts.

If you look at the setup in the view below, you can see that it works on the same principle as a thickness planer. The jointed edge of your boards are feed against your fence, the plexi-glass fingers act as springs pressing the wood that you are dressing down tight to the fence as you feed the wood passed the router bit, trimming off the excess. The pressure fingers are up very close to the router bit so they give very good control. With a sharp router bit you also get an incredibly clean finish, accuracy and repeatability. With the fence clamped on, you can easily adjust it a couple of thou with a light tap from a hammer. So you get get very accurate width of parts. In the drawing below the you would feed from right to left which would be standard up-cut, due to the chamfer on the outfeed finger.

Let me know if it makes sense to you.


Re: Underbench cabinet: 14. Dovetailing for blood! *LINK*

#15

Re: answers!

Bill Tindall, E.Tn.

Glue line rip blade for finish and my table saw cuts to width to the precision (correct use of this word) that wood is stable. I fail to see the difference between capturing the board to be sized between a fence and a blade vs fence and a cutter.

Re: Underbench cabinet: 14. Dovetailing for blood! *LINK*

#16

Re: answers!

Mark Hennebury

Same principle as ripping against a fence on your saw; just my preference for a sizing a whole range of small parts square edged or shaped.

I used to make lots of small parts like business card and credit card holders that were sized and rounded over that way.

It's just another tool in the belt.


Re: Underbench cabinet: 14. Dovetailing for blood! *LINK*

#17

Too much Blue tape

Bill Tindall, E.Tn.

My impression of Derek's dovetailing is it employs too much blue tape. My thoughts were that any blue tape is too much.

Cranking out 9 drawers provides opportunity for contemplation about the process. Where am I spending time that could be saved? Adjusting the damn lighting to get a shadow on scribe lines was becoming an annoyance to be optimized. The scribe line that under my lighting conditions was most difficult to see well is the dovetail base line. A supplement light that had to be adjusted was essential to get a shadow on this line.

With great reluctance I added tape across this line. Wasting tape and taking the time to apply it weighed heavily on me. Blue contrasting with white poplar made the boundary obvious. An obvious boundary made sawing faster. But I still fretted over the cost of tape. However, it was found that the same piece of tape could be used multiple times easing the financial pain.

In the end I reluctantly conceded that when lighting conditions result in insufficient definition of a scribe line that tape could be considered.

Re: Underbench cabinet: 14. Dovetailing for blood! *LINK*

#18

Re: Too much Blue tape

Paul in NJ

Bill,

On poplar you could run a sharp pencil point lightly down the scribe line. Just do it freehand, it tracks the scribe line nicely. Faster than tape.

regards,

Paul Dzioba

Re: Underbench cabinet: 14. Dovetailing for blood! *LINK*

#19

enhancing scribe lines with pencil

Bill Tindall, E.Tn.

On poplar you could run a sharp pencil point lightly down the scribe line. not unknown to me and I have used it.

Just do it freehand, it tracks the scribe line nicely. When one "gets in the groove" indeed it does. And when not paying attention it hops out, for me at least.

Faster than tape. Tape can't be 2 seconds slower. Pencil on poplar sap wood works well. Pencil on dark olive-green heartwood, not so good. Tape works on anything.

I'm not sold on tape yet. But if someone as cheap and lazy as I am starts using it regularly the idea is worth looking at.

Re: Underbench cabinet: 14. Dovetailing for blood! *LINK*

#20

Re: enhancing scribe lines with pencil

Derek Cohen (in Perth, Australia)

It is bad enough that lines scored with a knife into end grain start to close up within seconds. Then there is dark Jarrah end grain, where it is impossible to see a fresh line, never mind the fading line. Even with an added spotlight.

Everyone who has used blue tape swears by it. If it takes couple of minutes extra, I would rather that and the good results that will follow, than later regret haste and impatience in trying to save a few seconds. No one remembers a few minutes used in preparing joinery. Everyone can see a poor job, since it is forever there to remind us.

Do you question the results I get?

Regards from Perth

Derek

Re: Underbench cabinet: 14. Dovetailing for blood! *LINK*

#21

Re: enhancing scribe lines with pencil

Bill Tindall, E.Tn.

you missed the ;) at the end.........

Re: Underbench cabinet: 14. Dovetailing for blood! *LINK*

#22

Re: Too much Blue tape

Curt Putnam

Even though I see the post as tongue-in-cheek, as one of those people whose visual acuity has dramatically fallen off in the last couple of years, working with knifed lines would be largely impossible without the blue tape trick.

Derek, I know you are not claiming its invention, merely the 1st publication. Regardless, thank you!

Re: Underbench cabinet: 14. Dovetailing for blood! *LINK*

#23

Re: Too much Blue tape

Derek Cohen (in Perth, Australia)

Thanks for the back up Curt.

I am afraid that I have to work at regaining my humour in this area.

I vacillate between considering that this is such a petty issue, and then feeling irritated by a memory of a conversation with a "notable" author.

One of my pet irritations, which stems from a scientific background, is when credit is not given to the original source of an idea in an article. In Internet woodworking, it seems that the last person to use a technique or write about something is treated as if they were the original source by many readers of fori. For example, Rob Cosman makes a video using a technique he was taught by Alan Peters, in this case the "#140 trick" - which is about planing a fine rebate (using a Stanley/LN #140 skew rebate block plane) to aid in transferring Tails to the Pin board. Then Chris Schwarz uses this method, and readers subsequently refer to it as his technique. Along comes Megan Fitzpatrick, writing for Pop Wood, and she uses the method. Now it is ascribed to Megan (noting that neither Chris nor Megan claim the method as theirs - both are good at referencing their sources).

What has this to do with Blue Tape and dovetails? Well, a few years ago an article was written in FWW magazine, and the author claimed the method as his own. I wrote to him to say that I had written about it some years before on several fori, and it had been published on my website a few years before he "invented" it. The author insisted it was his idea, and that I must have read about it on his (nonexistent) blog. The issue here is that when reference is made or fori to the use of blue tape with dovetails as emanating from FWW, I am reminded of the condescending conversation. I do not want or expect ownership, just to be treated with respect.

In the Nov/Dec edition of FWW magazine, my Lingerie Chest was published. The event was soured for me by the magazine publishing in the same edition a shop tip - using blue tape to replace the #140 trick - which was lifted straight out of my website by some little shit - who was paid for this tip. This was on my website 2 years beforehand: http://www.inthewoodshop.com/Furniture/The140TrickisDead.html

Not much humour about blue tape at this time. Sorry.

Regards from Perth

Derek

Re: Underbench cabinet: 14. Dovetailing for blood! *LINK*

#24

The Green Tape Method of Scribe Line Enhancement

Bill Tindall, E.Tn.

For some reason I have some "green" tape. I'll replace the old technique of blue tape with the new improvement of "green tape". It is a well established fact that the human eye is more sensitive to green than blue leading to the superiority of the Green Tape Method of Scribe Line Enhancement, hereafter to be known as the GTMSLE method, which unfortunately has too few vowels to create a catchy acronym, think Scary Sharp (will have to think of a new name. ) Now if I just knew how to UTube so I could market this new method.........

In addition to the loss of smell symptom of Covid 19 disease, I think it has also over time resulted in a loss of sense of humor.

My personal thought is that I would rather be known for a creative and attractive furniture design than blue tape.

Re: Underbench cabinet: 14. Dovetailing for blood! *LINK*

#25

Re: The Green Tape Method of Scribe Line Enhanceme

Derek Cohen (in Perth, Australia)

The use of green tape could replace the use of blue tape. Act now to mark your ownership of this new technique!

:)

Regards from Perth

Derek

👍 This page answered my questions

Your vote helps other woodworkers quickly find the answers and techniques that actually work in the shop.