PS
Bill Tindall, E.Tn.
Yours look more attractive than the Moser's. I do not find Moser's finish attractive either.
Est. 1998 — 28 years of woodworking knowledge
PS
Bill Tindall, E.Tn.
Yours look more attractive than the Moser's. I do not find Moser's finish attractive either.
Insight on design
Derek Cohen (in Perth, Australia)
so how did you get from what you just described to the final shape? There are a lot of decisions to be made and each needs to be just right or the result would be neither attractive or comfy. Did you arrive at a result through drawing alone, some mock up seats, luck  .....?
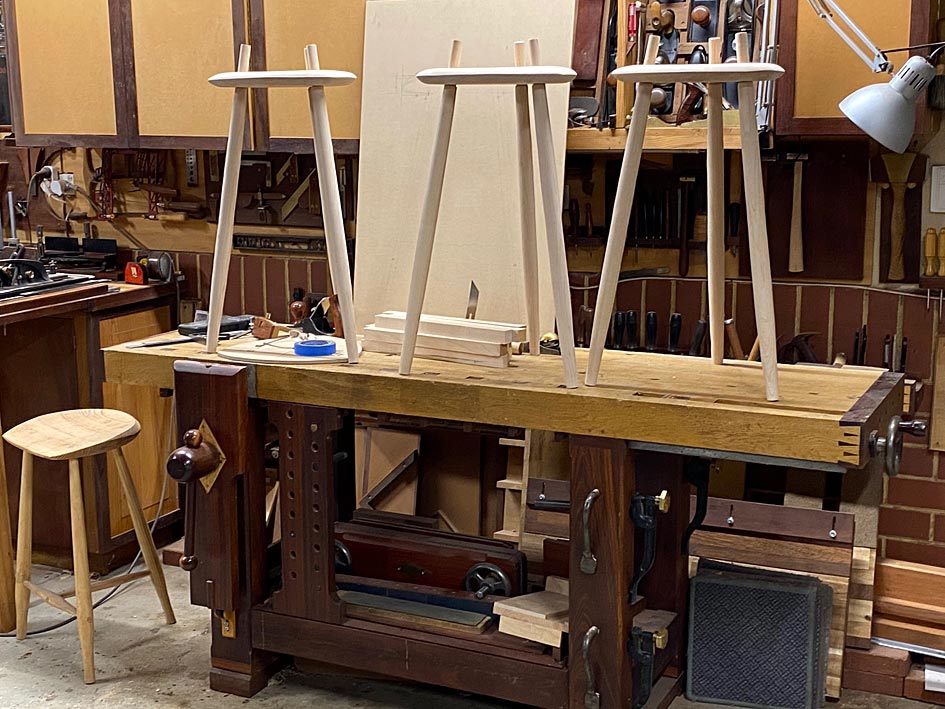
Bill, as always, I draw up full scale models on thin MDF sheets. Behind these stools is the elevation, with the leg angles ...
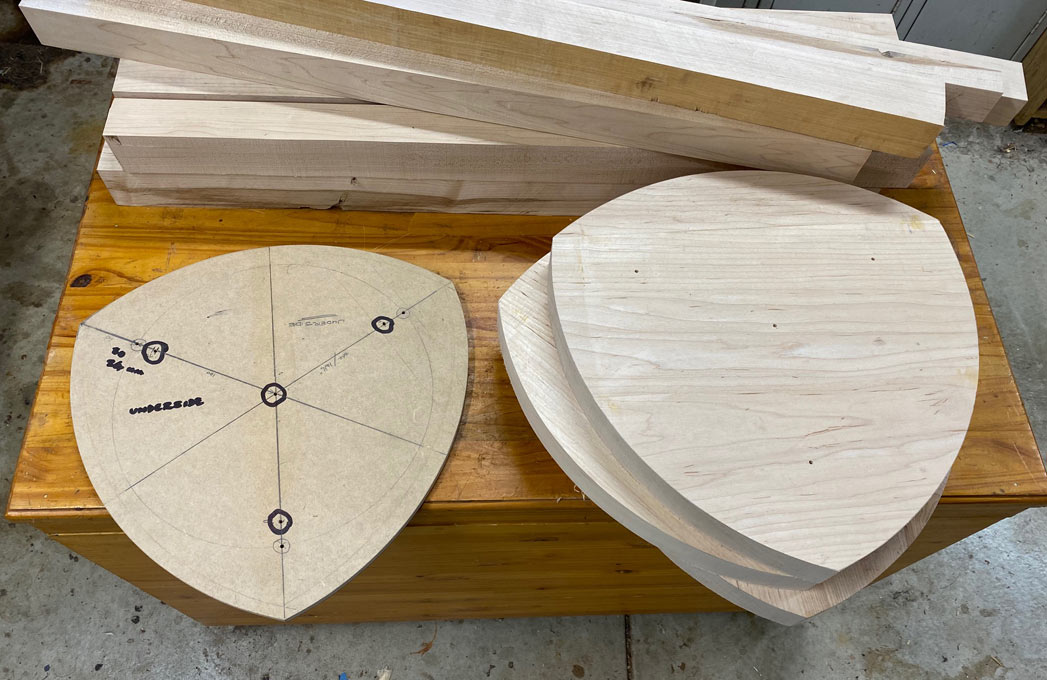
I made a couple of seats, same shape but different sizes. Played with the circumference curves, trying different radii. This is the final one, which became the template ...
When the seat was finally done, it was time to re-shape the section between the mortices and the edge. Getting the thickness and final curve was a case of removing waste until it looked and sat right ...
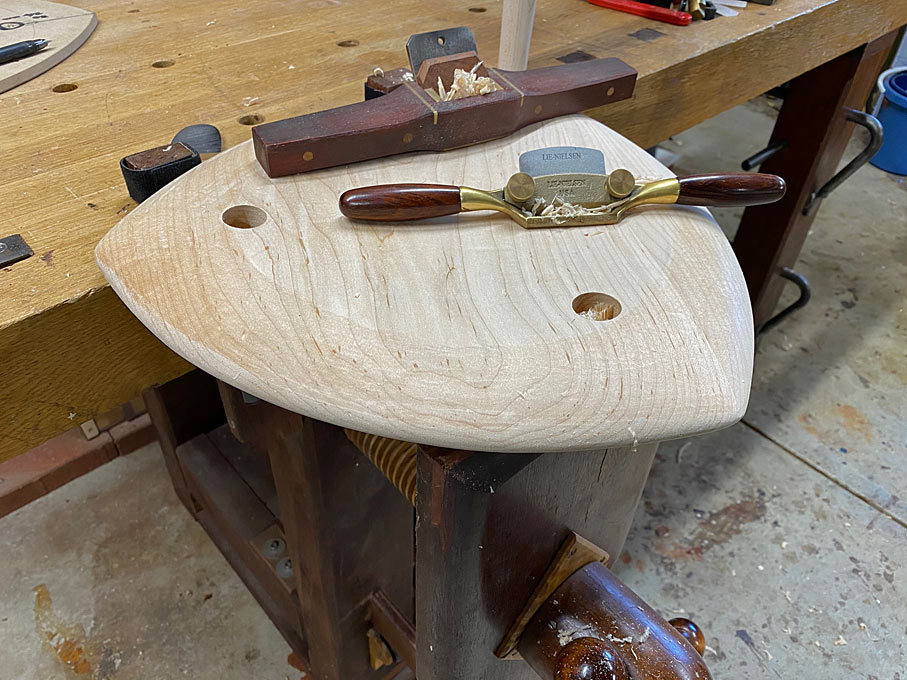
This last part really says something about ones sense of aesthetic: Lynndy would come by and say that she liked what she saw, and Did not understand why more waste needed to be removed (in my opinion). When it was finally all done, she could see the difference it made. In other words, visualising the form is an important aspect if a build, and difficult to communicate. From the day work I do, I know that many cannot do this.
What would you do?
Regards from Perth
Derek
Re: Insight on design
Bill Tindall, E.Tn.
What would you do?
To answer your question, I don't build chairs/stools. I would need to make a dozen to begin to get it "right". I suppose I might have made some in easy to carve pine. But I am better at engineered furniture than arty furniture so I may never have got it right. Chairs is the only furniture we ever bought rather than made.
Re: Some insights
William Duffield
I strongly prefer Bern Chandley's leg tapers even over Escherick's, but I like your Reuleaux triangle seat shape the best.
Re: Insight on design.. That's OK!
Grant Smith
Bill,
Your comments about being better at Engineered builds than arty got me thinking.
I admire your workmanship, as I am sure others do as well. Your methods of work also intrigue and inspire.
One can only stop and wonder the origin of any hand made object, be it free form or of rigid lines. How many glances at a magazine or internet occurs before a design is solidified. How many sketches, how many erasures are made by the builder (dozens? none?) before a product appears. How many subsequently mimic either that unique design or the "children" born of others admiring.
I love to get inspiration from both highly engineered types of furniture and free form art furniture. Never copying beyond a few lines or features. About the closest I get to properly engineered furniture is looking at another's work and making it my own. I might just like a single line and go from there. I guess I like the giant puzzle. Indeed, I enjoy holding the design in my mind and building from there.
I have made Adirondack chairs and love seats merely by looking at a picture, measuring my own form, mocking up parts with clamps. Wash, rinse, repeat until I am comfortable. Make marks, measure, and build.
I tend to make a sketch, usually only a scale front view, to work out proportions and key dimensions. Then I build. Sure, I occasionally work myself into a corner with that approach. I do enjoy working my way back out.
Methods of work are as different as each of us. I suspect one's life experience lends a lot to how we work.
Having an open mind and learning how others work is, I am sure, more useful than can be imagined.
The world needs both (and other types of makers too).
FWIW,
Grant in Iowa
Love the product and processes. Thanks
Henry (Raleigh NC)
Derek - thanks for your wonderfully descriptive posts on all of the design, fabrication, and final product. This is all great learning for many of us, and very inspiring.
Like Bill chairs have never gone out the door of my shop (except a few repairs), but I aspire to make some. A project like these stools, which would easily find a place in our home, looks like something to add my to-do list (though contrasting seats would very likely be a feature).
Between Bill's posts on casework and the ideas you have posted, I am learning much (from many others as well). Now to apply some of it!
Thanks,
Henry
The Problem with Engineered Chairs
jessecloud
For most furniture, we were taught - and successfully used the principle of making the tenons as big as you can. Unfortunately, chairs need to be thin in parts that take a lot of stress. This makes a much better looking chair and contributes to the light weight needed to life the darned things.
First chair I made was something of a Sherman Tank, close to indestructible but clumsy looking and too heavy to pick up easily. Since then every chair I make is a little skinnier and more graceful than the previous one. I too often need to make twelve of something to get it right, but I am sneaking up on it.
One great reward to making chairs is that you can fit the chair to a person's body. Most tall or short people have never had a comfortable chair to sit in.
Derek, could you post a clear....
Barry Irby
explanation of how to drill the holes in the legs for the spindles?
My son and I are working on a three legged stool and I would like some leadership on the process of doing the rungs.
What I did (this time around).
Derek Cohen (in Perth, Australia)
Hi Barry
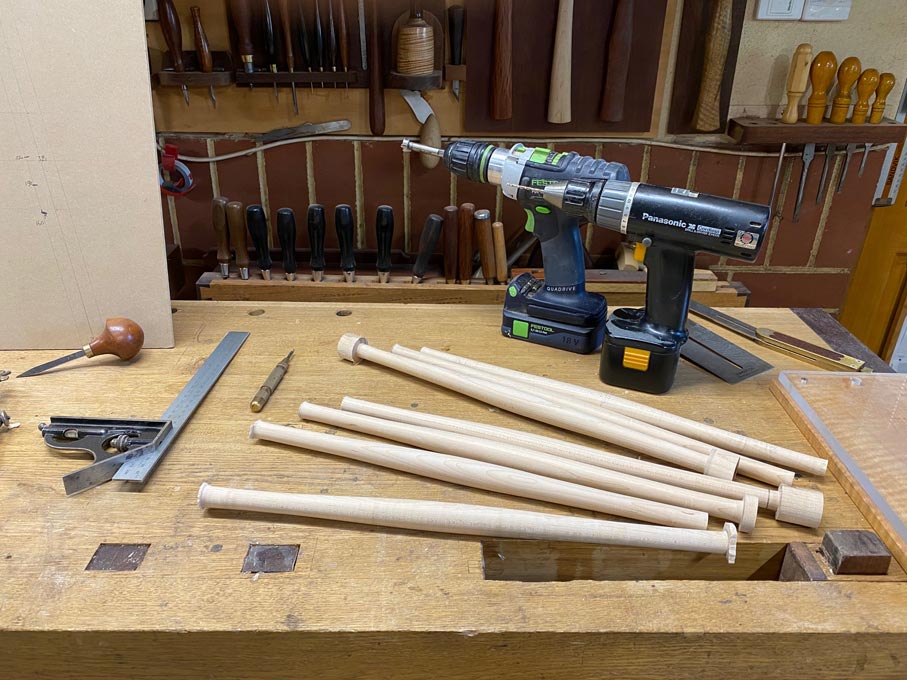
No doubt that there are many ways to skin a cat. I have done this differently when using a brace. This time I used cordless drills: one set with a 1/16" twist bit and the other with a 5/8" forstner (which was the size of the mortice and tenon).
It began with driving the wedges in firmly enough to ensure that the legs were secure, but still able to be removed (the photo has one completed stool - pre-glue up - but this was done earlier).
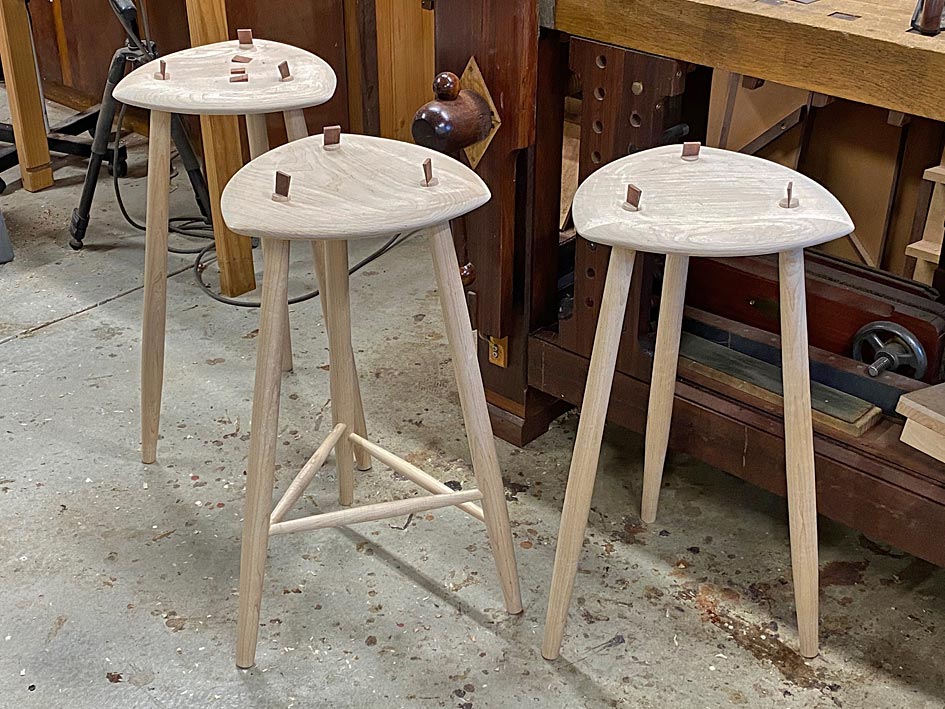
The next step was to position one of the stools on sheet of MDF and mark off the circumference and position of the legs. The legs would be equidistant from one another. Since the seats were marked from a template, and the mortices drilled on a bench drill, all the stools will have identical positions.
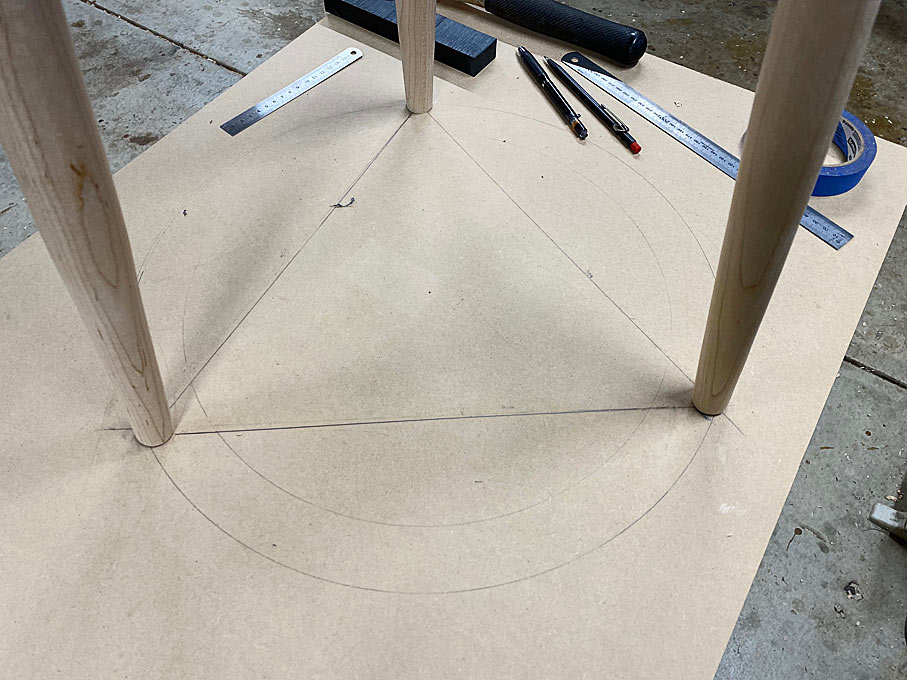
The lines between the legs are drawn in. This aided greatly in maintaining the line between legs for the stretchers.
Alternative ...
What I have done in the past (idea from Peter Galbert), when using a brace, is wrap a rubber band around the two legs and scribe between these. That would create a mark, and then the angle would be drawn alongside. The leg wopuld be clamped in a vise ...
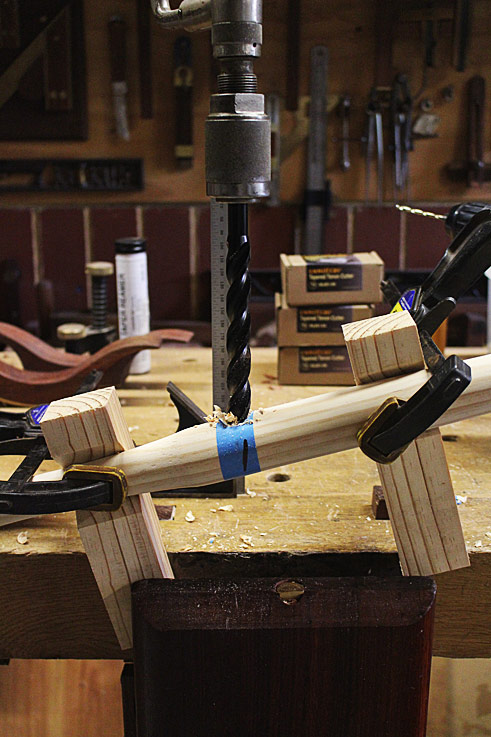
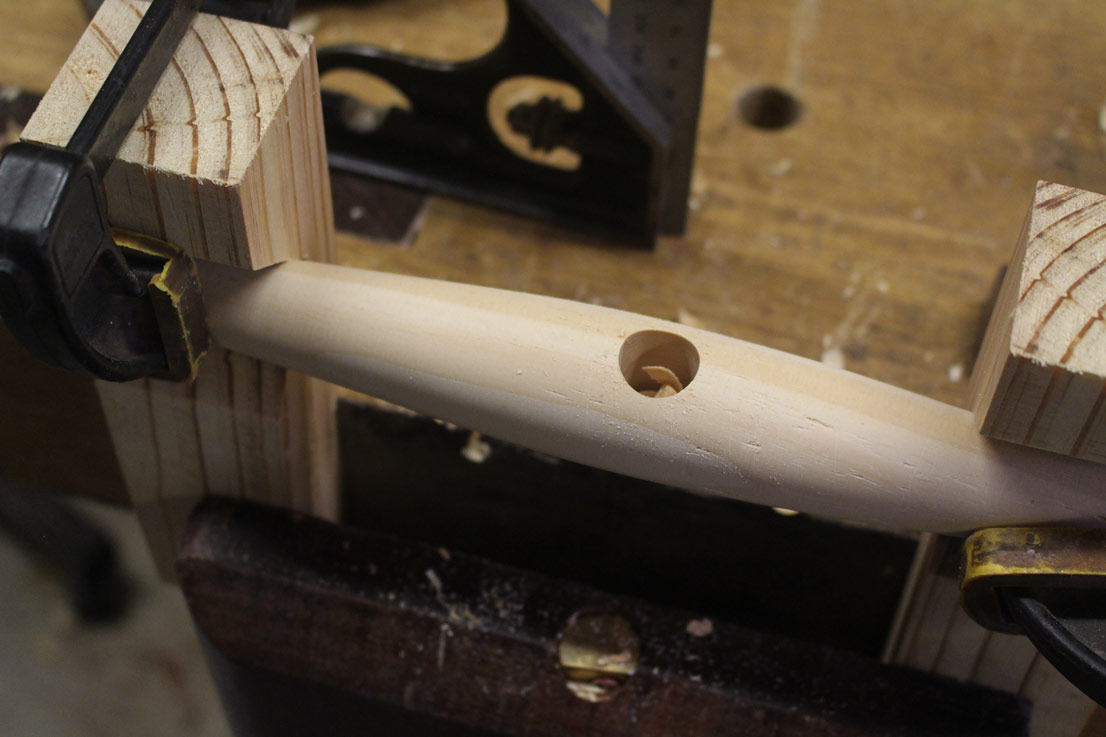
Back to the current build ...
Here are the two drills I used along with all the pre-shaped (and over-long) stretchers ...
Now, mark off the heights on two facing legs ...
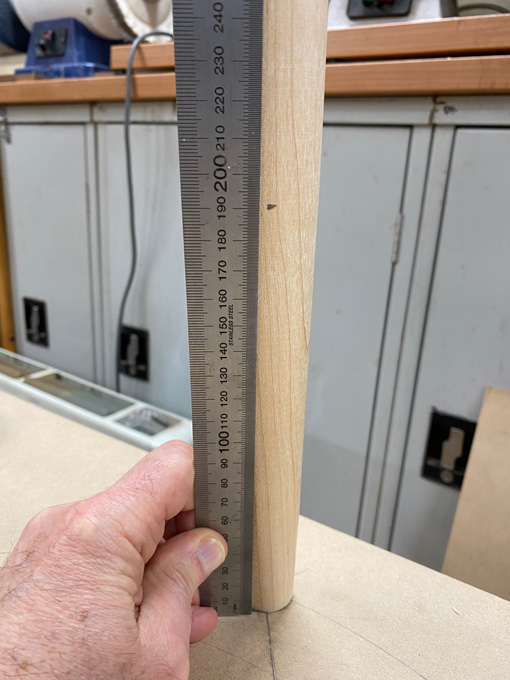
Drill a pilot hole (to prevent the forstner bit slipping). I just eye-balled horizontal, but you could use a Wixey gauge if you want. I did this once, then ...
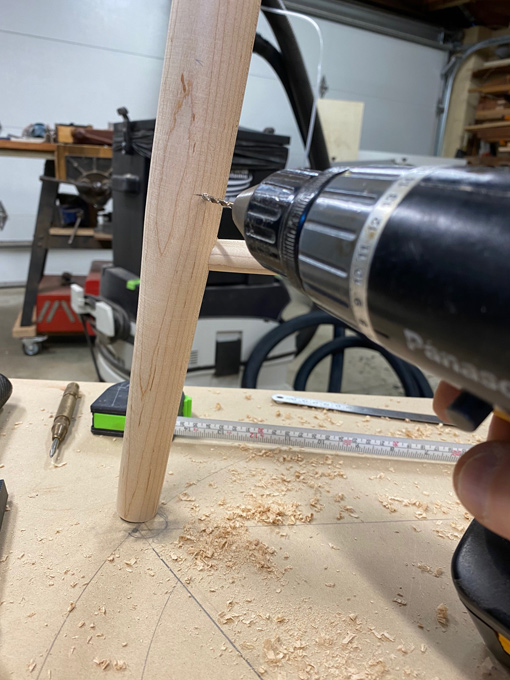 [
[
The reason for only doing one pair at a time is that legs might move slightly, and then mortices might end up out-of-alignment.
Now drill the mortice ..
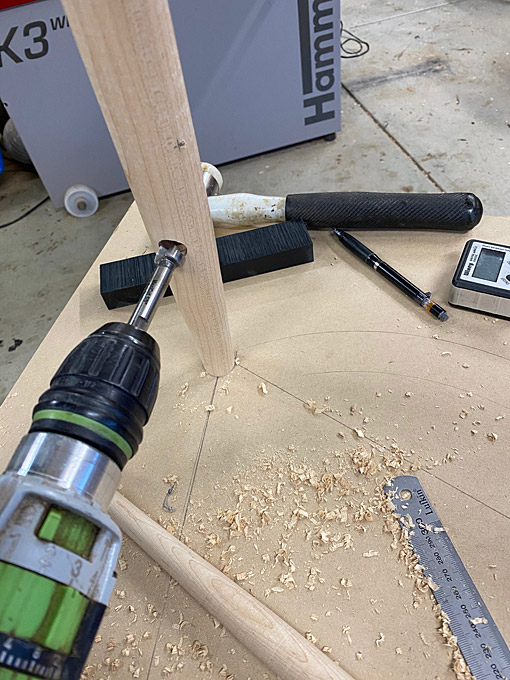
The mortices were around 15mm deep.
Once the pair are drilled, temporarily insert a stretcher. The stretcher is over-long and needs to be cut to length. I placed the back on the lathe, marked the ends, and then turned the final tenon thickness with a Sorby jig (Elias's photo) ...
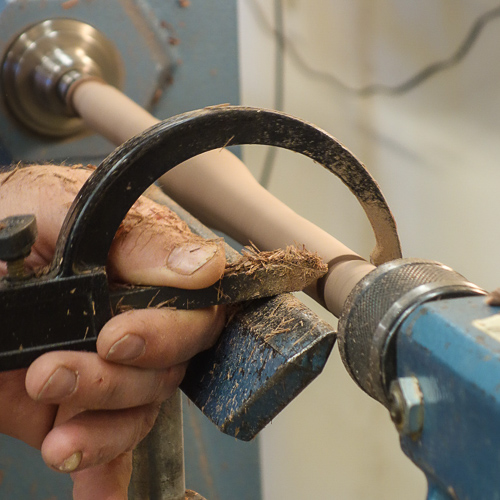
Fit the stretcher. The leg into the seat will need to be loosened for this.
Now do the next pair, and then the last pair.
When it comes to glueing up, mark everything carefully! Then pull it all apart.
Glue up the stretchers-in-legs first. Then add glue to the tenons and fit the seat. Ensure all it as tightly seated as possible. Now add glue into the tenon for the wedges, and tap them in. Move slowly, progressively, little-by-little, from one to the next. Do not pound one in and then the next.
You are done.
... ready to mark the ends ...
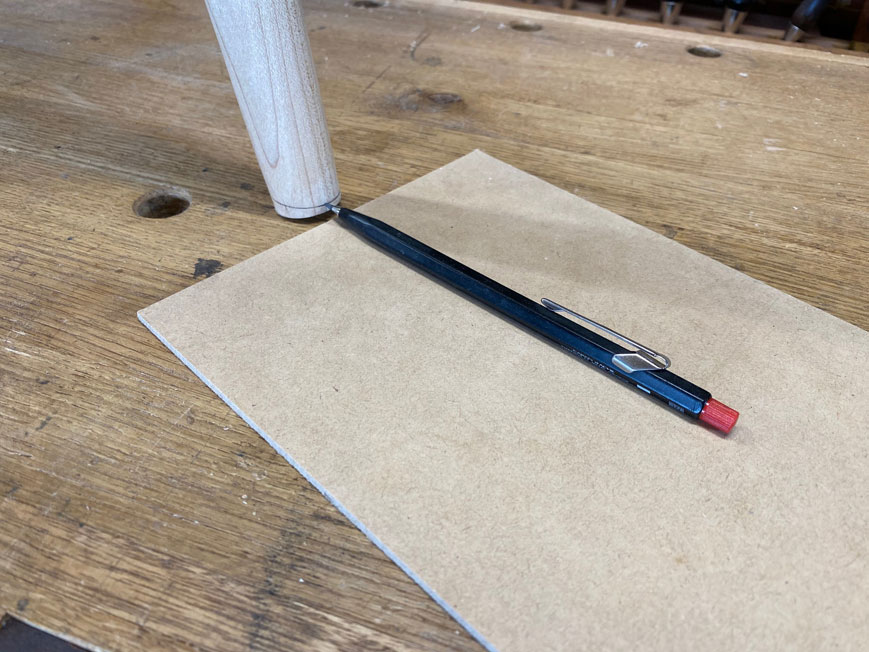
...and saw flat ...
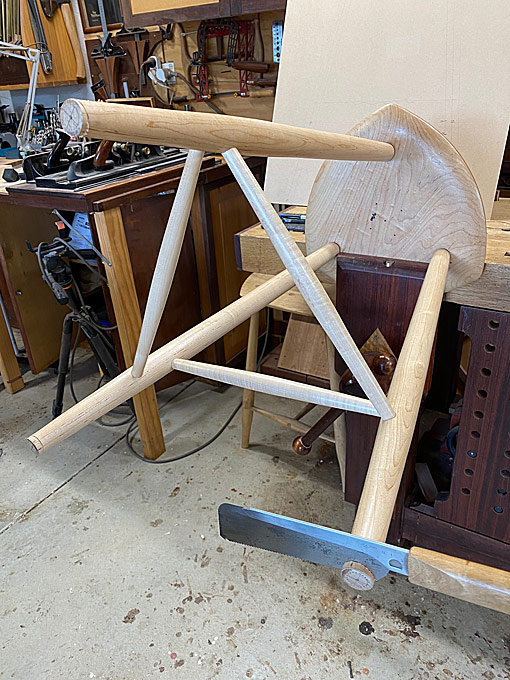
Regards from Perth
Derek
Excellent! Thanks
Re: What I did (this time around).
Barry Irby
Thank you, I appreciate it. Pretty much what I was gong to try but I would not have thought of the second drill with the tiny bit.
Got a minute? About fifty years ago I was at college in the mountains of Virginia. Riding around in the countryside I came across and old fellow selling stools on the side of the road. They were 18" tall and had four legs and rungs. $4 each. Walnut, Cherry, or maple. I bought four. Got his name and address and called my parents and insisted they buy more. In the end we bought about thirty. I told him he was working too cheap and raised the price to $8. I went to his shop and he showed me how he made them. He had a piece of wood on his drill press with a bunch of finishing nails in it. He laid the leg in place and drilled the hole. What made this so amazing was he had Essential Tremor or something that made his hands shake badly. It was all he could do to keep the leg in the jig and his hand on the drill press handle. The drill bit would descend and when the tip was about an 1/8" from the wood he would get really steady, drill the hole, back out and go back to shaking. His complaint was that I bought so many stools he had run out of scraps and had to use his good wood. I still have two of the stools and they are as sturdy today as they were new. His name was Ash Compton.
I have never been good at trimming the legs by hand. I use my router table to compensate. With most any straight bit in it, I use double stick tape to fasten a room key card or old credit card to the table covering about half the bit. Raise the bit to the height of the top surface of the card. Slide the offending leg up to it from the low side and trim off the thickness for the card. Repeat as often as necessary. The card provides the offset like the like the outfeed bed on a jointer. This works well for getting a four legged chair or table to sit level. A vertical jointer.
Re: What I did (this time around).
Derek Cohen (in Perth, Australia)
My pleasure, Barry. If you need the information again, it is on my website. Scan down this index page ....
http://www.inthewoodshop.com/Furniture/index.html
Regards from Perth
Derek