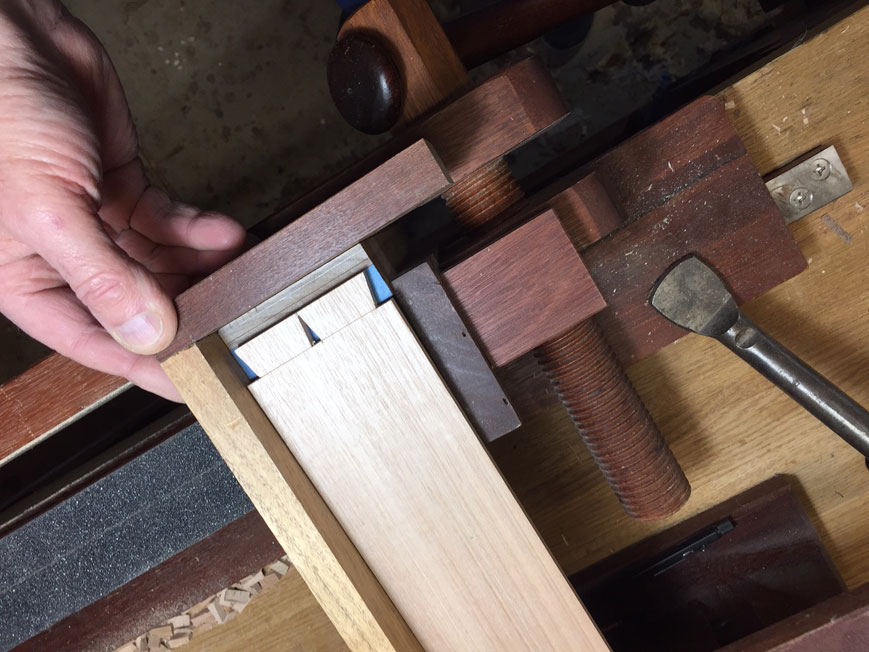
I assembled a drawer (1 of 9) and it came out wampas. Warped, two opposite corners high and the other two low. The dovetails were glued and the unit inserted into the chest to cure.
The six inch deep drawer is the one. I have tried to adjust it by planing the top and bottom and it's much better. What I am wondering is can I insert the plywood bottom with glue and then force the high and low corners in opposite directions vertically and maybe heat the hide glue in the dovetials to allow the glue to flow a little.
instead of in the dovetails. If you have a 6" drawer side with a 1/8" twist, then attach a side say 24" long perpendicular to that, it will be out by 1/2" at the other end.
Since you used liquid hide glue it will be easy enough to take things apart. Check to see which parts aren't right and make new ones. Then put it back together again.
The dovetails were cut with a Leigh jig. I use it just often enough to be bad at it. Actually "bad" is a bit dramatic. Lets say less than excellent. I bought the jig from a friend and I also got two routers from a different source. I leave them set up and ready to go. Now what I need to do is standardize the thickness of the material and I would. be good to go.
One "problem" I ran into is the two routers are identical. In flipping and flopping the jig back and forth from pins to tails I picked up the wrong router for one part. Ended up with one really odd looking part. Remade it. I solved that problem by color coding the jig and routers with blue tape.
The drawers are graduated. Three 3" ones, a pair of 4" ones and one each 5", 6", 7" and 8". Having two routers simplifies the resetting of the jig for various widths, but not having to change the router bits.
I think you nailed it. In anticipation of this, I prepared the stock for the drawers at least a month ago. I resawed some air dried poplar, dressed it, and set it inside a conditioned space to acclimate. I must admit that when I selected the pieces for the drawers, I may have let sum slightly warped pieces creep in. I had a vision the dovetails would pull it square. NOT
I will check the rest of the stock, find some flat pieces, I hope, and make a new drawer.
(Gave some thought to installing a thin plastic glide on the "high" corner to take up the slack. Probably not a worthy Idea.)
I may take the drawer apart and see if any of the parts are salvageable. But, one of the "problems" with the Leigh jig is that it is very adjustable. And I adjusted it for each of the different heights of drawers. Not much chance of getting it set back to exactly the same setup. Might have to use some of the 1" epoxy to fill the joints.
I have plenty of stock to pull another drawer from. I will just have to be more careful abut making sure I pick REALLY flat stuff.
Barry......on YouTube, Rob Cosman has a series of videos on drawer making.....I think he is actually in the process of making his drawers now, in current time.
It was very interesting to watch him during his preparation phase of drawer parts.....to say that he was absolutely meticulous in making sure that all his parts were dead flat, square, and sized to the drawer opening before starting to dovetail is an understatement.
I don't think we, the average woodworker, will rise to this level of perfection.....but, we can, at least, get some insight on how to make exceptional drawers.....boxes.....cases.....etc.
Barry, are you any good at hand cut dovetails? If so, it would be easy to disassemble the drawer, check the parts, remake the offending piece and hand cut the dovetails. You should be able to mark the joint from the remaining pieces of the drawer. It would be a lot faster and probably more accurate than trying to reset your Leigh jig and a whole lot faster than remaking the drawer from scratch.
Johanna, I am considering that, but I am going to use 1/4" plywood for the bottom and I doubt it will add much rigidity to the drawer.
The more I think about this I think it would be smarter in the long run to remake the drawer. I am afraid that even if I correct the problem now it will creep back out of shape over time.
I have extra stock and the routers are still set up and it would be easy to reset the jig for all four parts.
I think the best bet is to start or in this case, restart correctly.
Barry, the cause is that the front and sides where not aligned when you dovetailed them together. There is no correction for this once done.
It is a very long time since I used a dovetail jig, so I am not sure what you must do to ensure the lower sides - the registration sides - are in line.
This is what I do when hand sawing ...
There is also a demo at the 8:00 minute mark in this video ...
The dovetails were glued and the unit inserted into the chest to cure.
How did you get the drawer in and out if it was warped as bad as you describe? If it fits the opening it was designed for why are you trying to fix it? The drawer should have set flat on your bench when it was assembled. If it does not set flat during a dry fit there is an issue that curing in place will not fix.
I reswed this poplar from 5/4 stock that has been air drying for at least five years. Sawed it, dressed it, with some work on ti to make it flat, and set it up on end in a spare bedroom to acclimate for a month or two.
Sorted though it picking the best and flattest pieces and then cut them to length and width, being careful to produce square ends, both in thickness and width. Sanded the faces and sprayed shellac on to the ends about 2" to aid in clean up. Would have sprayed the whole surface, but did not have enough.
Glued the dovetails on all surfaces and then on the only known flat surface gently app,lied parallel jaw clamps to sahug up the DT's and produce squeeze out. Removed the clamps after several minutes and cleaned up the squeeze out with water on a paper towel. Inset4ed the drawer box into the chest and wedged it left to right, front and back. Less it dry overnight.
As I removed the wedges in the morning I cleaned up the exterior, easing corners, and polishing the ends of the DT's. All of the others went nicely back into the case. This one offered resistance and was rubbing to one top corner and the diagonal bottom corner. Set it back on the flat surface and it was wampas.
This one is the only one that twisted. It maybe I was not as vigilant and I should have been or that the pieces warped inthe day or two they were in my unheated shop.
I took a shaving or two off each place it was rubbing and it's better. There is still some friction. It may be that I can install the bottom and twist it into submission and if it were a shop drawer, I would. But, this is for my grandson and his Dad is in the military and will be moving fairly frequently. So, I want to give it the best possible shot and lasting al lifetime without issues built in.
I am on the way to the shop to rebuild the drawer.
My other son wants his version built with Baltic Birch plywood boxes and ball bearing runners. I am beginning to understand.
I tend to forget that you folks who live in places with high humidity have major issues with wood movement. I used to deal with that when I lived in Pensacola and Houston, but after over 20 years in New Mexico I just never think about it much. Ditto rust issues.
I would try one more thing before giving up on the drawer: Soak all four joints in hot water, until the hide glue gets pliable, and clamp the drawer down to something you know is flat, like your table saw. Check to make sure the corners are square. If it is still wampus after it has dried, do it again, but with a wedge under the two low corners just high enough to counter the amount of free wampus.
"You can't break something that is already broken" Or it's more famous corollary, "MightASWell take a Shot....
I clamped it to my TS with a 1/8" shim under two corners and heated it with a heat gun. It seems to have worked. Slid into the chest nicely. I am giving it a day or two to see if it holds. I did go ahead and glue in the bottom.
In a fit of desperation I had planed about a 1/16 off the two offending corners. I checked those edges with a straight edge and straightened them. That helped. I think I got it.
Thanks for all the help.
I am retaining some drawer stock and leaving the jig set up, just in case.
Greart! I'm glad it worked. If it hadn't, you would have had better results with an application of wet heat, since moisture activates hide glue, even after a century. I usually use a small paint brush that I dip in the water bath in my glue pot. For new work, a heat gun, used carefully, is effective, but it can make a mess of old finish on a piece you are restoring. The best free advise I know on these techniques is offered by Thomas Johnson, on his YouTube channel: