WoodCentral Forums

Est. 1998 — 27 years of woodworking knowledge

Entry hall table for a niece: Part 12

Posts

Entry hall table for a niece: Part 12

Edited #1

Entry hall table for a niece: Part 12

Derek Cohen (in Perth, Australia)

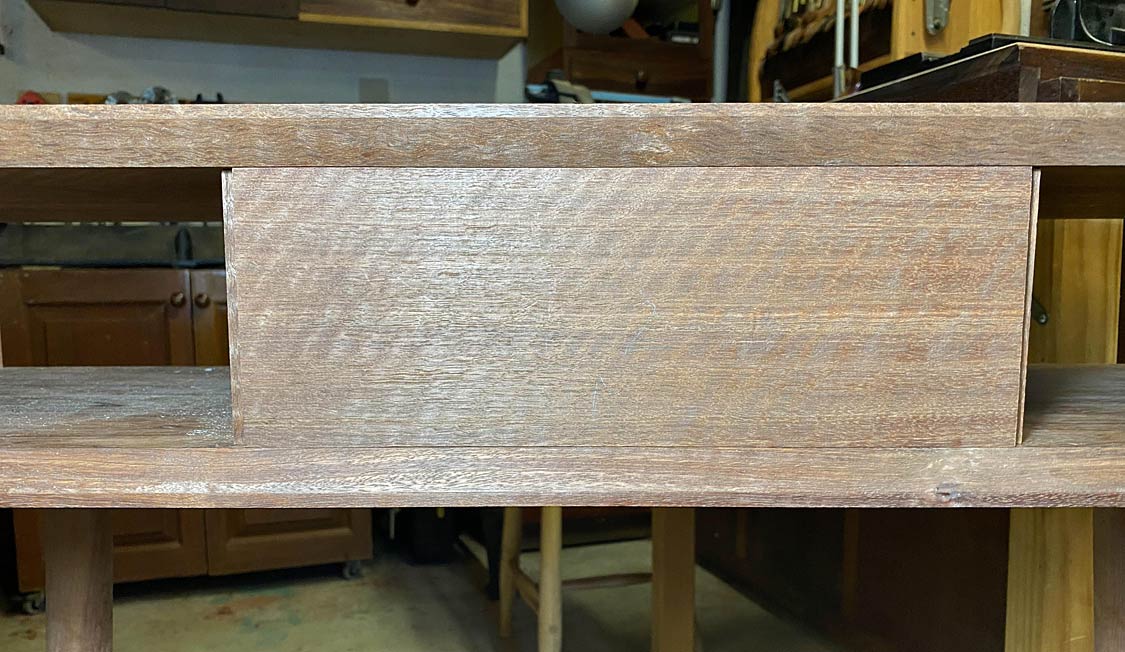
This is the part where we begin building one-piece lipped drawers (as contrasted with applied fronts).

In preparing for this part of the build, my research uncovered exactly one article on dovetailing lipped drawer fronts. This is by Christian Becksvoort in Fine Woodworking magazine (#263-Sep/Oct 2017 Issue). Interesting that.

Why lipped drawer fronts? Simply because the three drawers must run continuously across the front, without a gap between them.
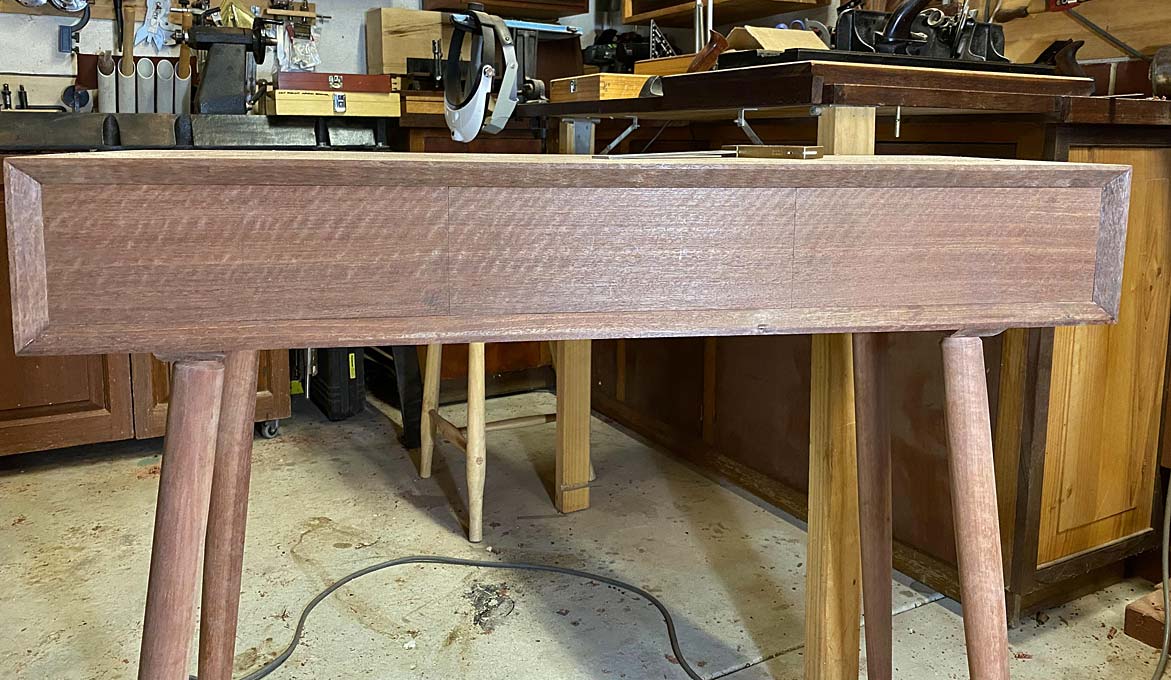

The lipped sides will wrap around the drawer dividers, and these will double as drawer stops. This will be illustrated in a short while.

The lipped ends create a challenge to form the pins/sockets for the tailed drawer sides since it becomes difficult to saw. I have a novel solution :)

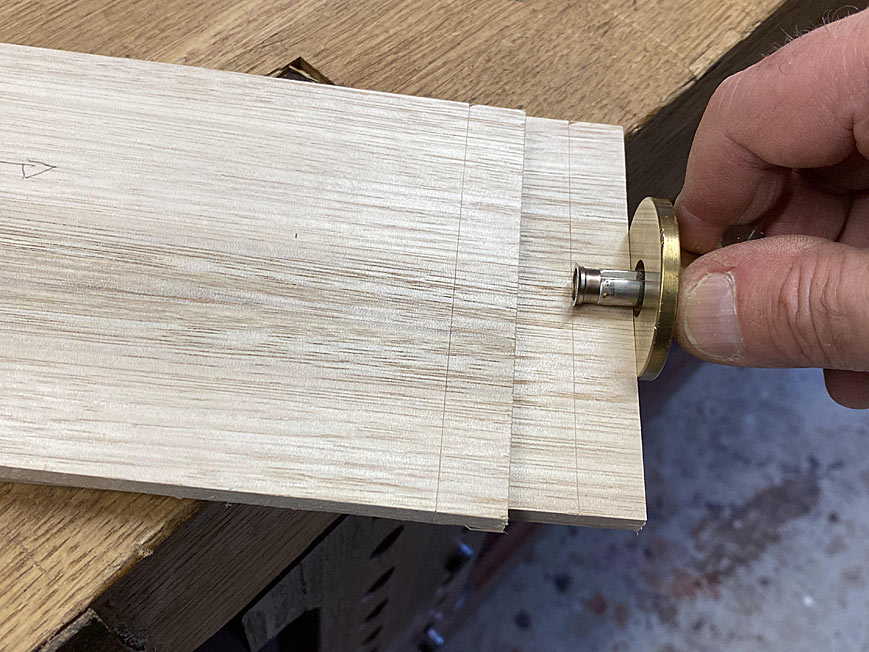
We begin by marking where the lipped sides will be. This is knifed in through from the rear of the case ...
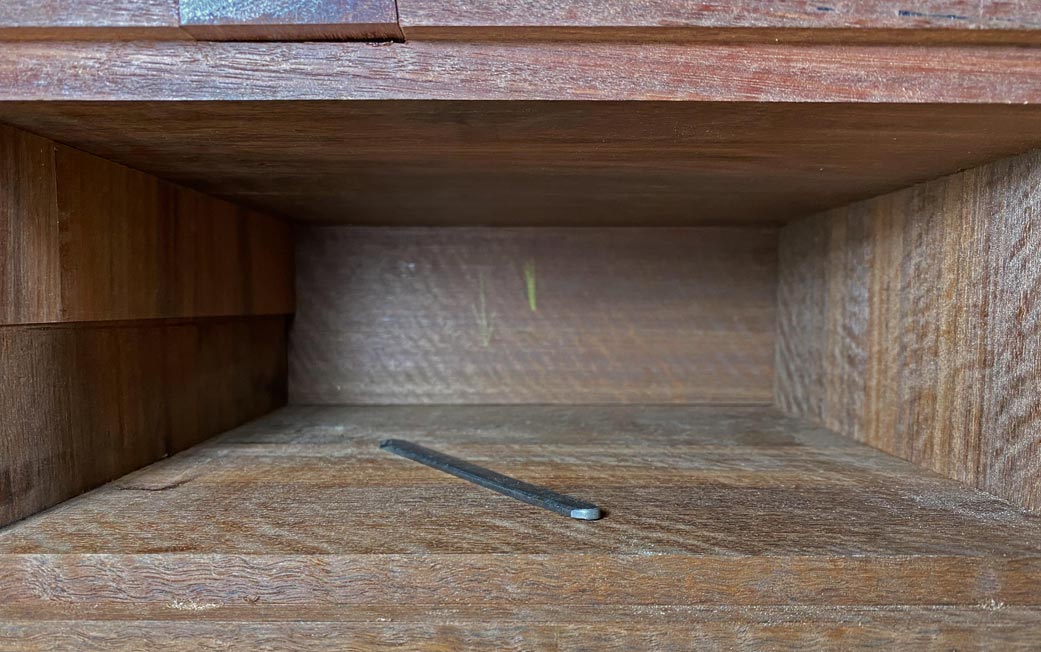

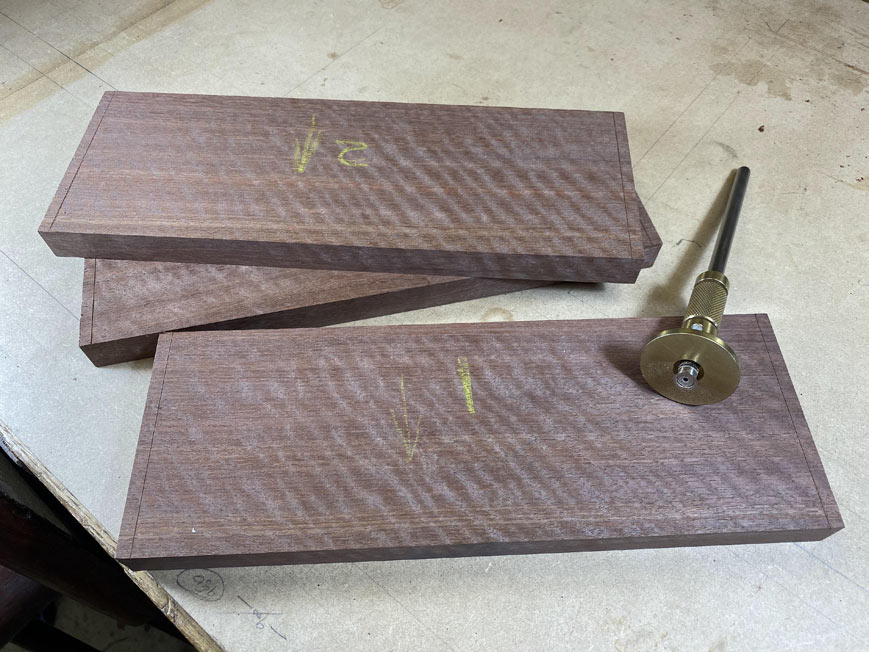
The marks are knifed with a cutting gauge.

The distance from the edge is exactly the same for each board - 6mm. The side spacers are 6mm wide and the two central drawer dividers are 12mm thick, of which each lip is half this thickness.

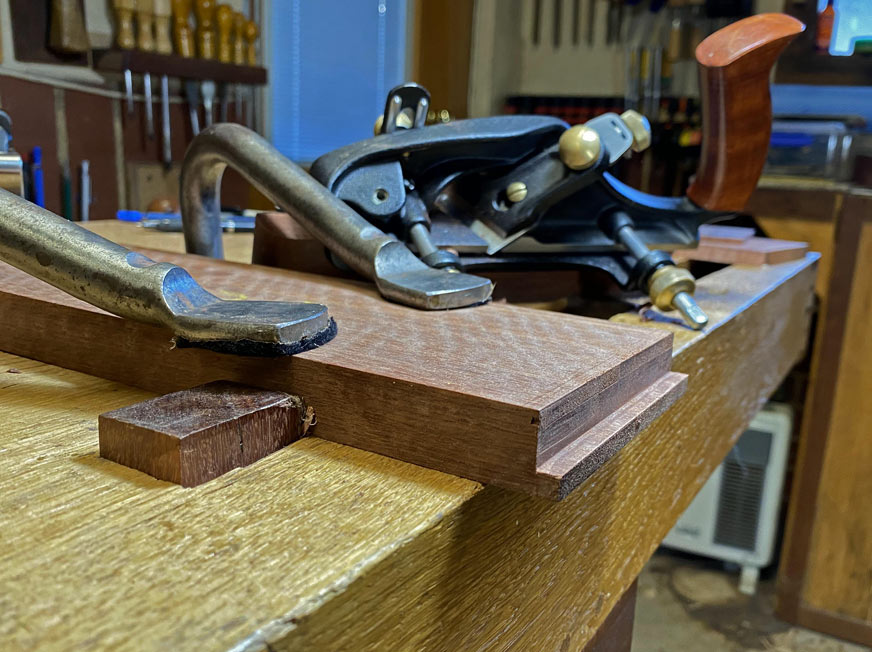
The drawer front is rebated with a moving filletster plane ...

With both sides rebated, the centre must fit snuggly between the drawer dividers ...
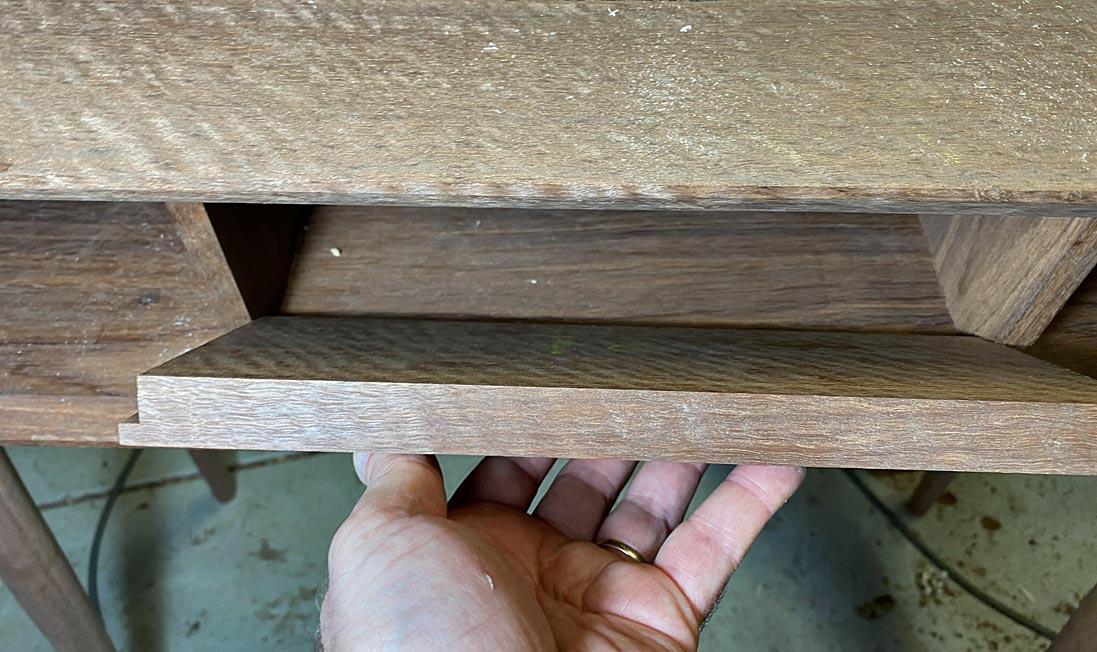

... and leave exactly half of the dividers remaining ...
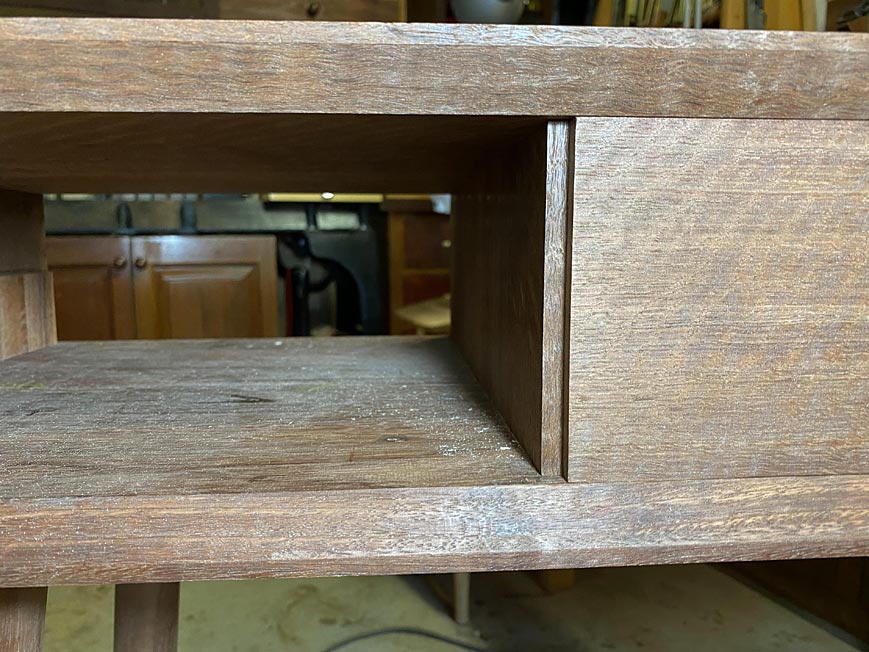


Side-by-side, perfect fit ...
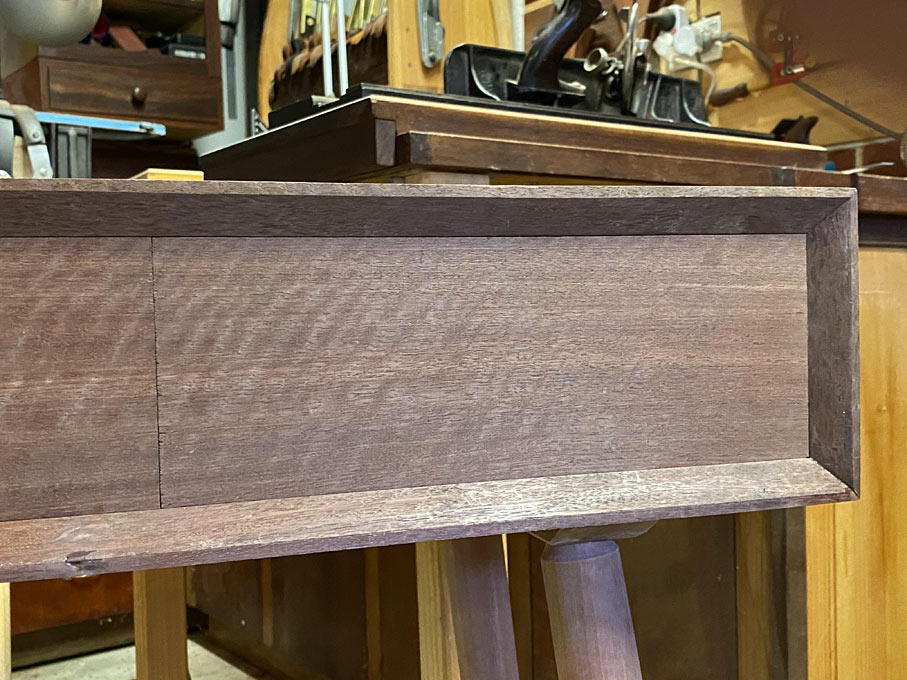

The rebates are fine-tuned with a cutting gauge, ensuring that they are even and square ...
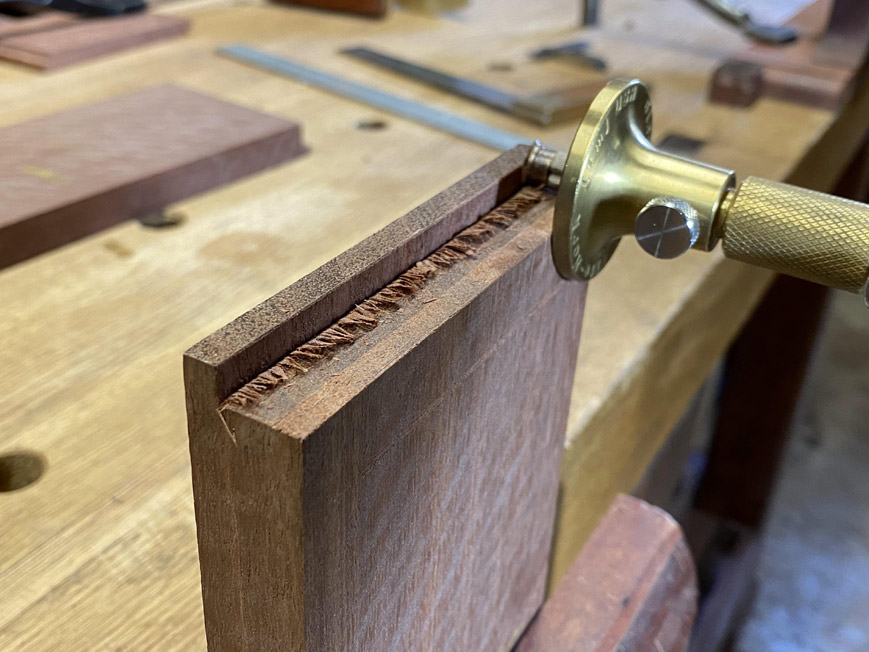

This measure is transferred to the drawer side ...

I took the time to lay out the dovetails on a scrap as a template. This saves a lot of repeated layouts ...
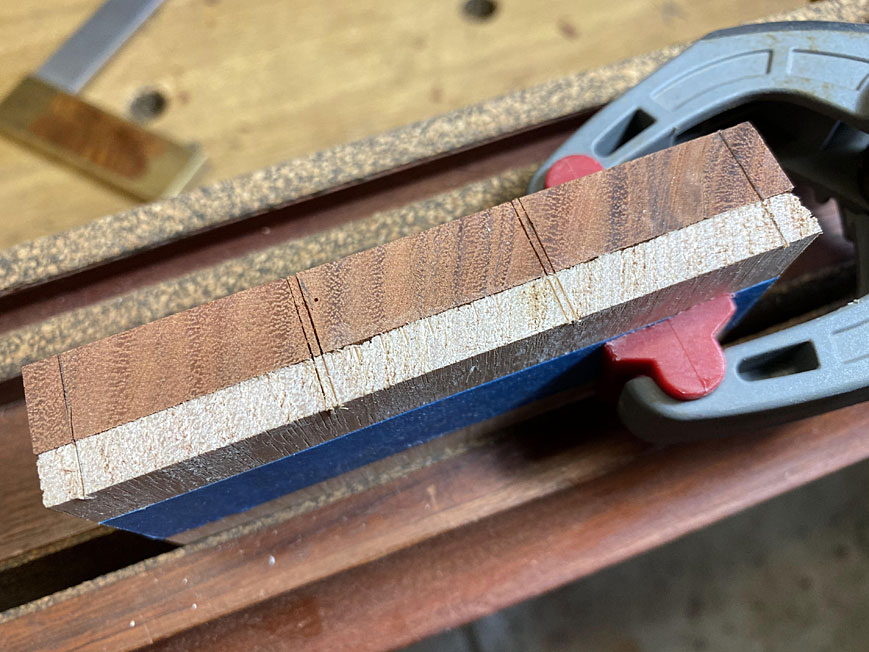

Tails done ...
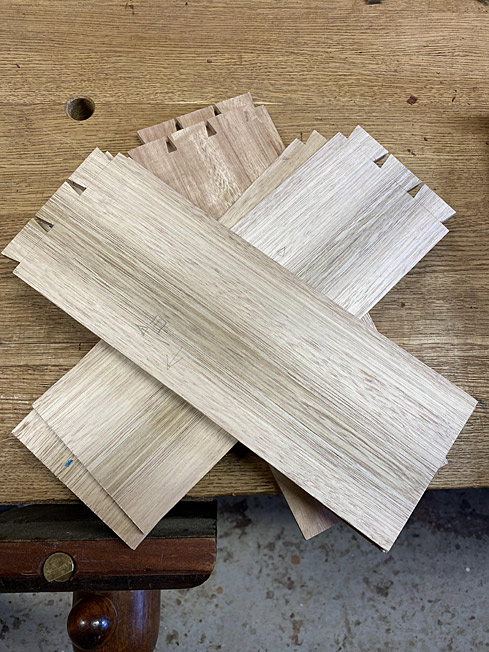

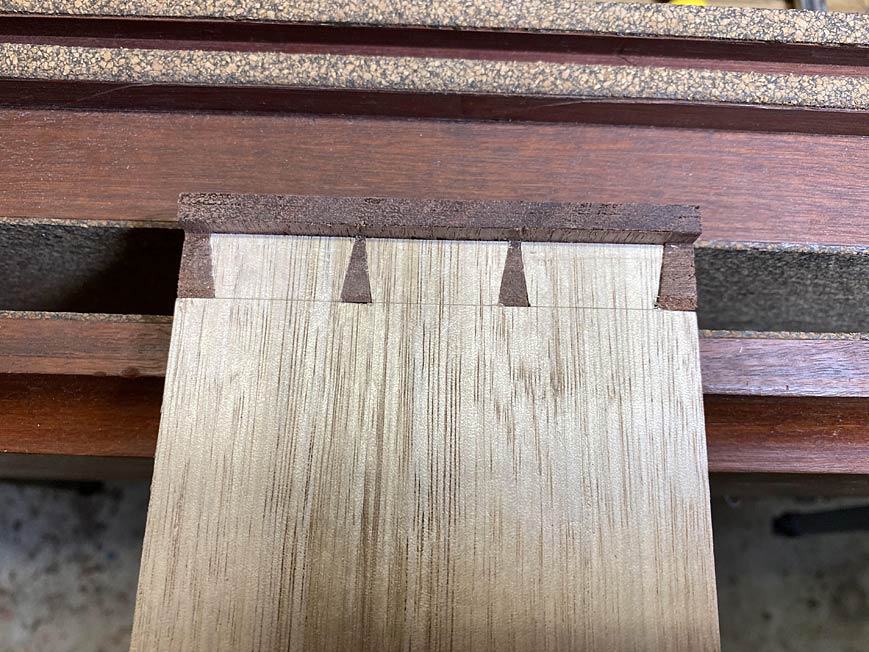
The tail board with be placed here, but with the lip extending past ...
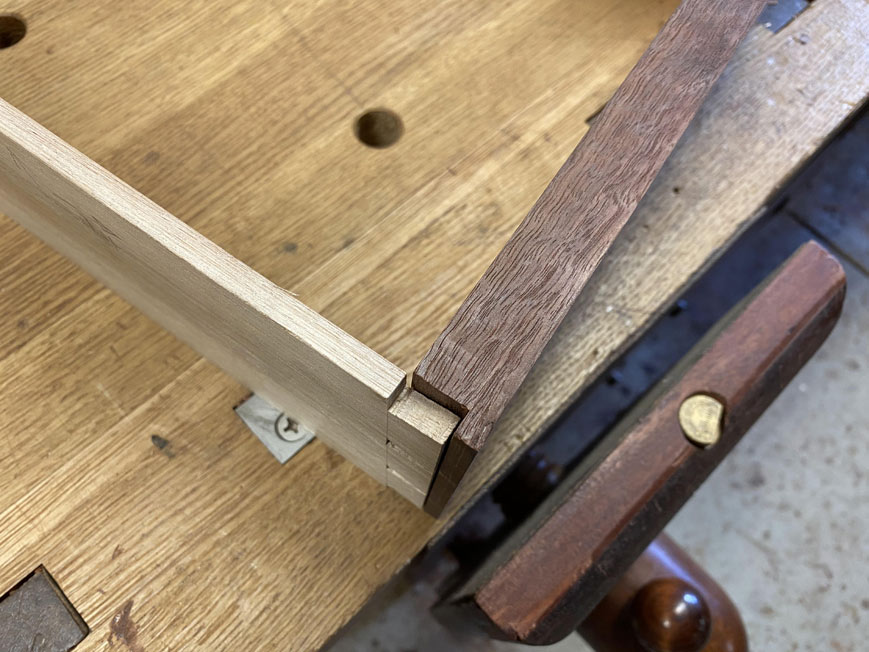

This is what it would look like if dovetailed ...


To make it easier to see what I am sawing, I am using blue tape ...
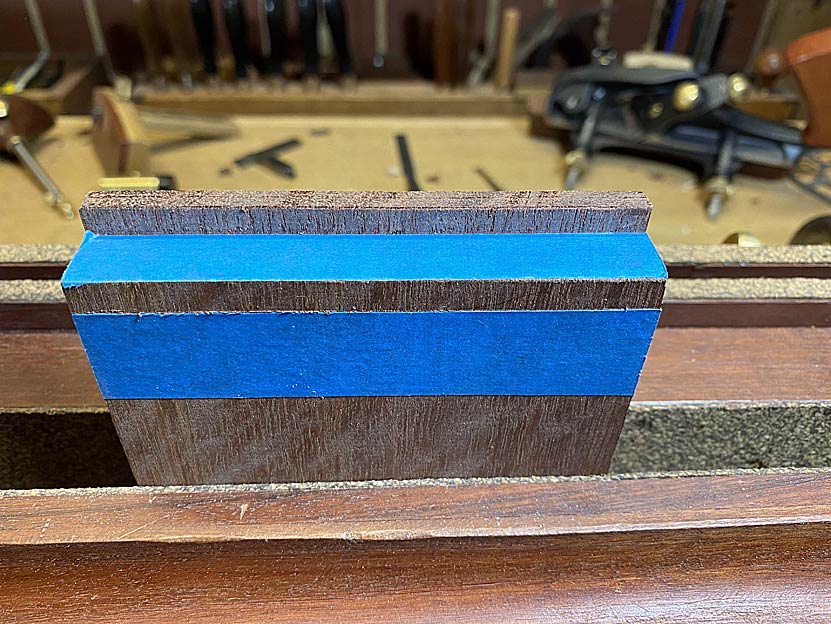

Transferring the tails to the pin board is made a little easier as the rebate is a handy stop ..
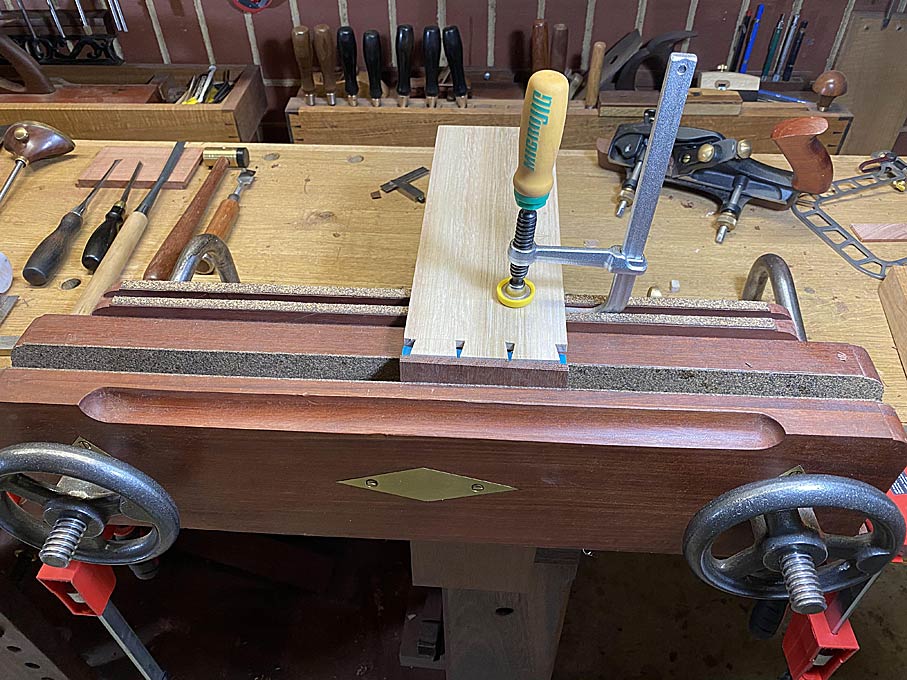
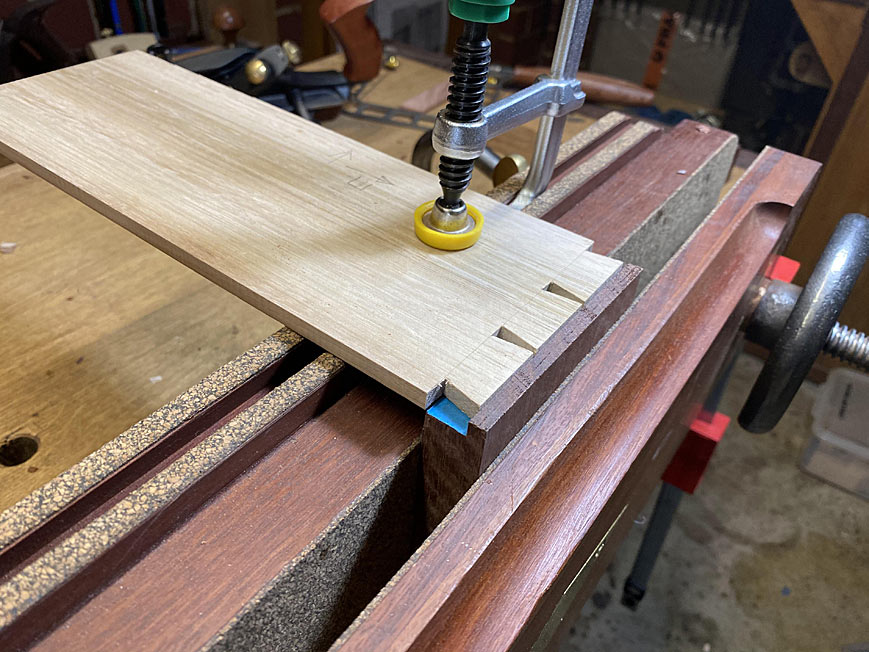

Marked out produces this ...
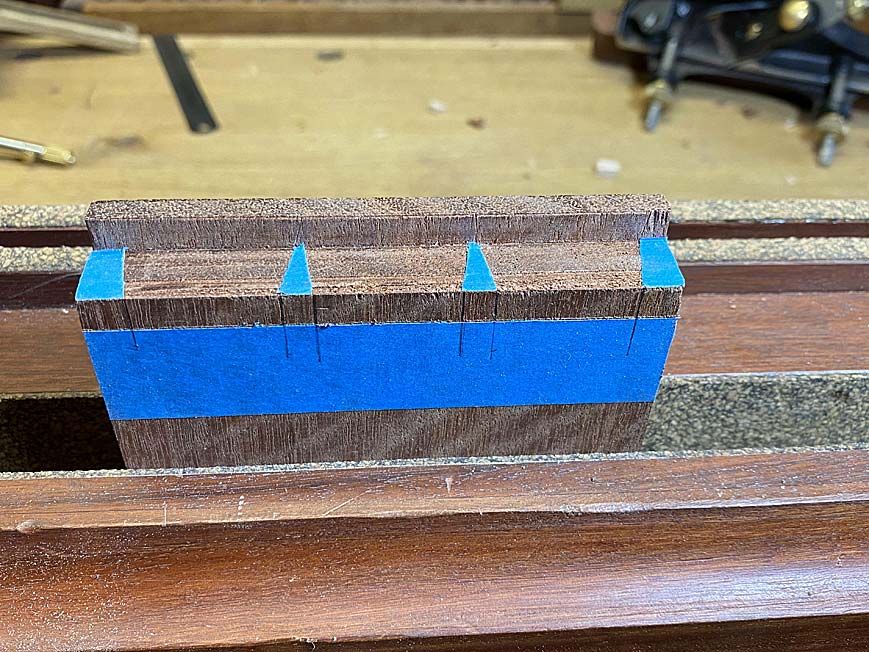

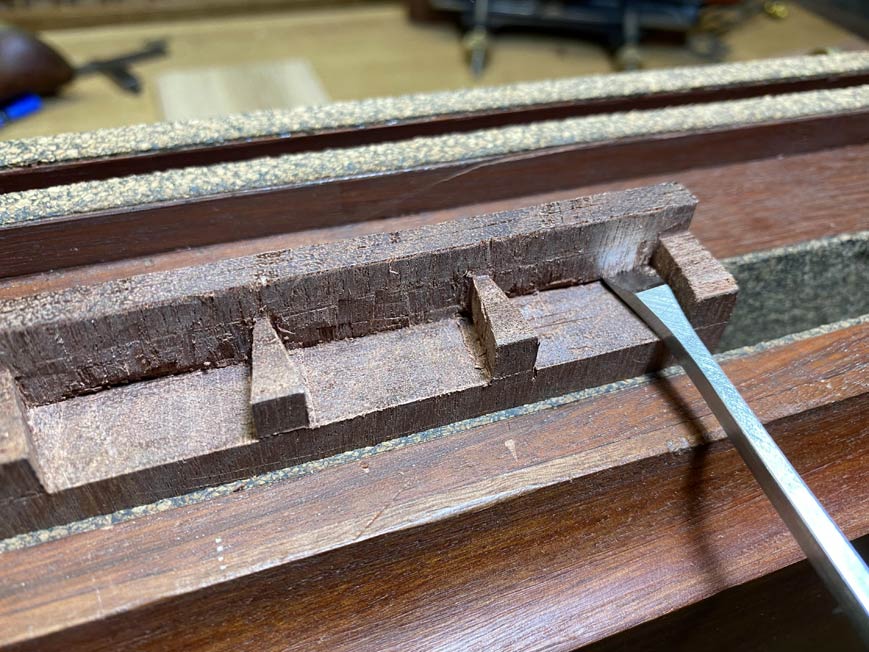
And that is where it stops being straight forward as this is as much as it is possible to saw inside the lines ...
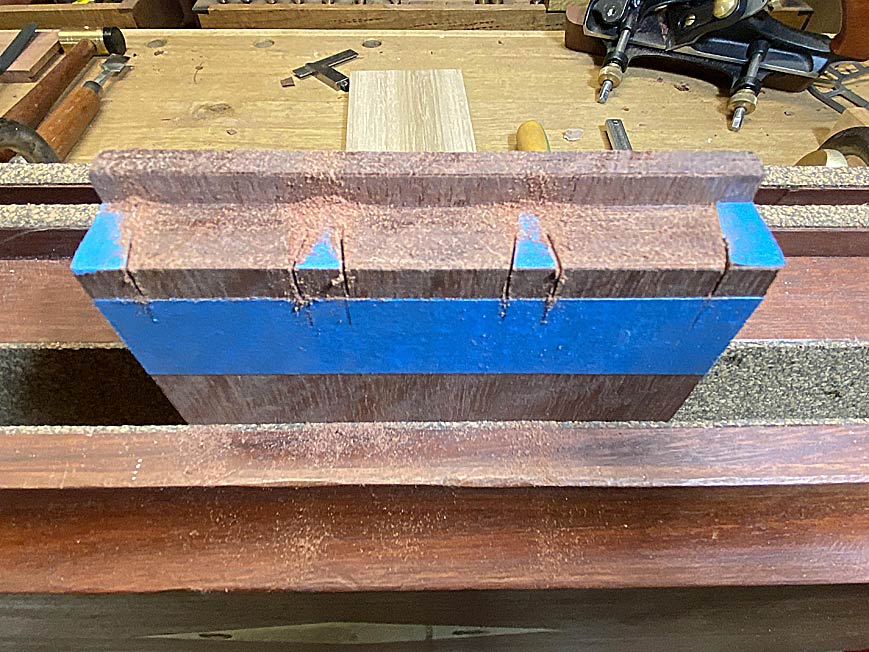

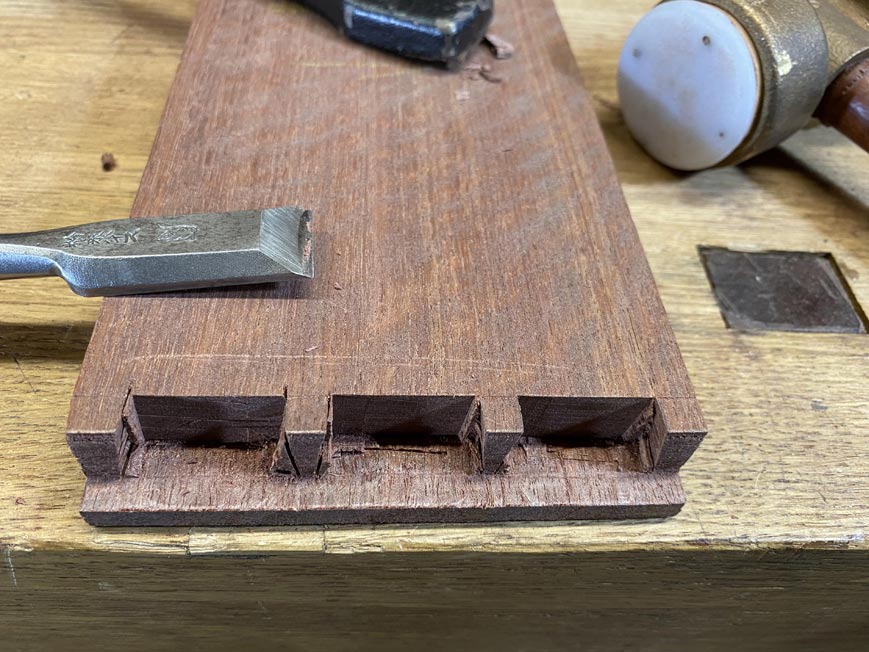
I decided that, if I could not saw it, I would chop it. This gives new meaning to "chopping dovetails" :)

The pin board is clamped (to avoid any splitting), and the kerfing chisel is used to deepen the existing half-kerf, and then extend it across the socket ...
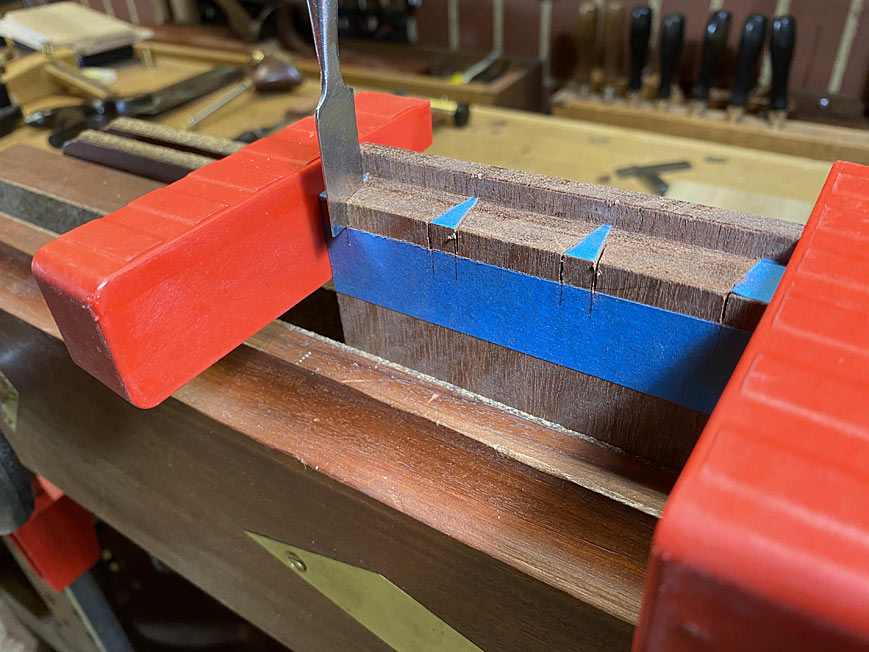
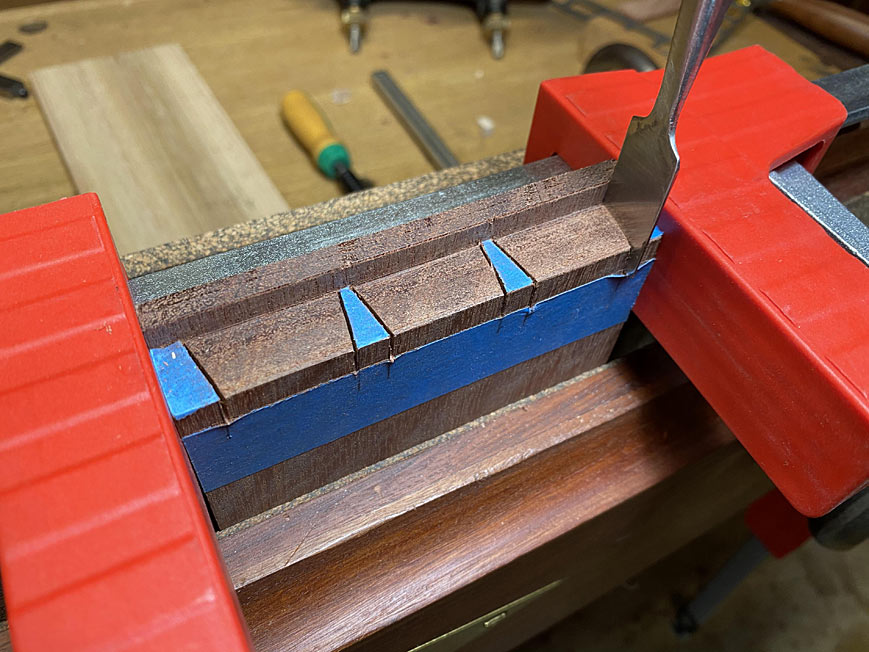

Now the waste is chopped out ...
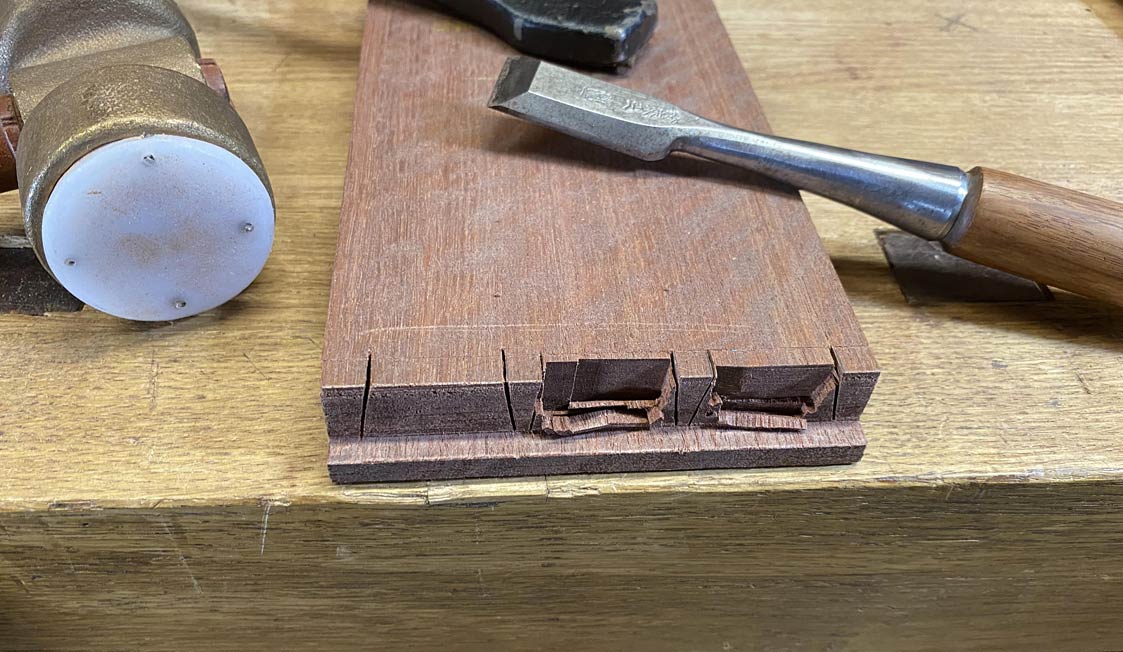


This picture of a fishtail chisel cleaning the corner of the socket is for bill :)

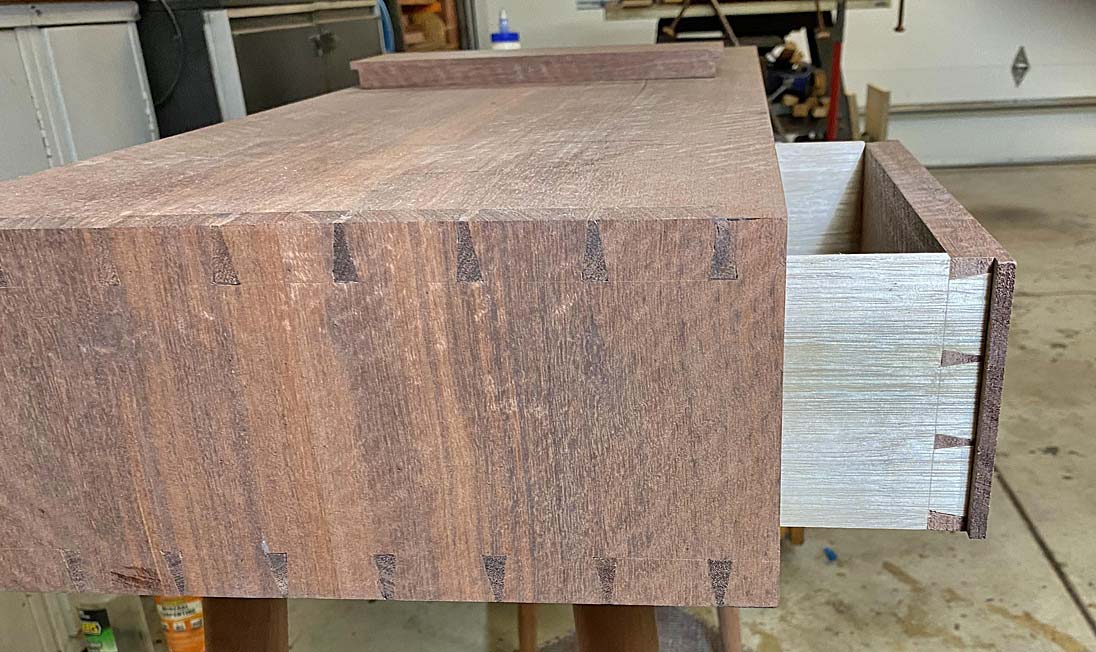
Does it fit? Oh, the suspense!


Two more to go.

Regards from Perth

Derek

#EntryHallTable

Re: Entry hall table for a niece: Part 12

#2

Re: Entry hall table for a niece: Part 12

Bill Tindall, E.Tn.

I expect the extra work of chopping out the dovetail pins was compensated by the easier and surer result of the drawer fronts mating well across the front. Getting perfect reveals between the drawers would not have been easy with an applied front.

Do you have a plan in the back of your mind for some attractive legs on the hope the customer will tire of these 1950's model :) Some 1990's Krenov legs would suit that case well.

Re: Entry hall table for a niece: Part 12

#4

Re: Entry hall table for a niece: Part 12

Yonak

Derek, when you finally give this heirloom piece to your niece, I hope you put a notebook with all the photos and details in one of the drawers. What a great find that would be for your great, great grandniece when it's eventually given to her !

Re: Entry hall table for a niece: Part 12

#5

Re: Entry hall table for a niece: Part 12

roger lance

This is a situation where removing the majority of the waste on the pin board could have been done with a power router and the pin board held horizontally.

I know you are a fan of the vertical position for waste removal; but, here the other approach has merit.

Re: Entry hall table for a niece: Part 12

#6

Using a router

Derek Cohen (in Perth, Australia)

Hi Rodger

I had originally planned to use a trim router to remove the bulk of the waste, and set it up for this procedure with a 1/8” carbide upcut cutter.

I started in on this - drawer front flat on the bench top! - and then struggled to control the cut. The cutter wanted to climb, and it was really difficult to prevent it doing so.

In the end I stopped and put it away - just too dangerous for so little gain. There was so little waste to remove - 1/4” depth - and the side kerfing had already created a release cut. Chopping was quicker than I expected, so I shall continue this in the other two drawer fronts.

Regards from Perth

Derek

Re: Entry hall table for a niece: Part 12

#7

Re: Entry hall table for a niece: Part 12

Derek Cohen (in Perth, Australia)

Yonak, thanks for the thought. I think that we all likely think and feel the same way after a piece is done - will others be aware of the blood (sometimes literally!) and sweat that went into the piece. Will they appreciate what we do? I think that this is us thinking like a woodworker; my wife has a reasonably good idea what challenges are present, but our non-woodworking friends still appreciate the end result in a satisfying way.

My niece is not a woodworker, and I doubt whether she understands furniture from our perspective. However, she is an architect, and must know more than the average in regard to construction. Still, her focus will likely be the aesthetic. It is more likely that her future father-in-law will lecture her on the build, as he is a very keen amateur woodworker who would fit in here very well!

Regards from Perth

Derek

Re: Entry hall table for a niece: Part 12

#8

Re: Entry hall table for a niece: Part 12

Don Stephan

That situation in my mind clearly justifies the clamparama and do hickey to hold down the side while marking the saw cuts!!!

Later this week I'll have to go down under on the web site and re-read the details.

Re: Entry hall table for a niece: Part 12

#9

What?  No spelching?

Don Stephan

Okay, how much to learn your secret to chopping down the back of the opening without tearing back into the board - what I have seen referred to by the very classy name of spelching.

I have tried touching up my chisel cutting edges, making very thin cuts, , , ,, and get horrible spelching in hard maple and black cherry drawer fronts, and poplar drawer sides.

Re: Entry hall table for a niece: Part 12

#10

Re: Using a router

roger lance

By all means continue with what you are doing.....it's successful.....can't risk the matching fronts with a mistake that might have only saved you a few minutes work.

After the build it might be interesting to experiment a little with different router bits/set-up to see if you might not gain more control than you had initially. I've not had the kind of result with horizontal waste removal that you experienced.

Re: Entry hall table for a niece: Part 12

#12

Re: Entry hall table for a niece: Part 12

Sgian Dubh

Interesting. I'm a little surprised you didn't follow the procedure used in secret mitred and secret lap dovetailing, i.e., pins first, transfer the pins to the tail board followed by cutting the tails: with or without your blue tape trick, I suspect it would have been easier to transfer the locations of the requisite cuts for the tails. I assume there's a reason for doing the job in the order you've done so, perhaps the Becksvoort article you mention? Slainte.

Re: Entry hall table for a niece: Part 12

#13

Re: Entry hall table for a niece: Part 12

John Jardin

Thank You, Thank You, Thank You

Re: Entry hall table for a niece: Part 12

#14

records with the furniture

Bill Tindall, E.Tn.

I have the good fortune that my family usually helps make the piece. When it is delivered it comes with a CD of the pictures and sketches I made while making it. At some time in the future I think they will like to recall seeing the contribution they made to it. Somewhere on the piece I embed a quarter of the current date, and I write out the origin of the lumber if family is connected to the origin in any way.

Re: Entry hall table for a niece: Part 12

#15

Wrong bit

Bill Tindall, E.Tn.

The bit will run away when it gets buried more than half the diameter. With a dinky 1/8" it was going to be difficult to keep the bit from going beyond half diameter.

Use a 1/4" bit. I use a straight bit. I don't experience any need for upcut or down cut for this task.

Remove waste with arcing cuts. Now that I have good lighting I route right up to the saw kerf as can be seen in my previous post on making the modified skew chisel.

That said, this was not the time and place to explore a new technique.

Re: Entry hall table for a niece: Part 12

#16

Re: Entry hall table for a niece: Part 12

Derek Cohen (in Perth, Australia)

Richard, I did not follow Becksvoort's method. He used power tools predominantly.

The article helped understand the issues in making this joint. Then I worked out a method for myself.

I am waiting for YouTube to upload a video I made today of chopping one side of a lipped drawer. The video took 39 minutes, partly because of explaining to the camera what I was doing, and partly because the camera made me cautious. After the video I have one more drawer to do, and I knocked this off - both sides - in less that half the time taken in the video for one side.

As part of the process, following the kerfing chisel, the waste can be chopped out in 8 - 10 strokes. That is what I did later. In the video it probably took about 12 chops.

Overall, tails first works for me. It is fast. I have difficulty understanding the motive to go pins first.

Regards from Perth

Derek

Re: Entry hall table for a niece: Part 12

#17

Re: Entry hall table for a niece: Part 12

Sgian Dubh

Derek, I too generally prefer the tails first approach. But for secret lapped and the secret mitred dovetails the only feasible approach is pins first because you can't mark the pins from the tails in these types of dovetail. It just seemed to me that the same approach would be easier for this task because of the easier access to the transfer the profiles. Evidently you found a way to do this with your tails first approach ... but I'm not sure I would have chosen it. Slainte.

👍 This page answered my questions

Your vote helps other woodworkers quickly find the answers and techniques that actually work in the shop.