WoodCentral Forums

Est. 1998 — 27 years of woodworking knowledge

Apothecary chest - part seven

Posts

Apothecary chest - part seven

#1

Apothecary chest - part seven

Derek Cohen (in Perth, Australia)

This weekend I spent time preparing to build the drawers for the apothecary chest. There are 24 drawers, which makes 48 drawer sides, plus 24 drawer fronts and 24 drawer backs. And then there are 24 drawer bottoms. And slips for the drawers.

All this before building the drawers can begin. I wonder how long this would take if I did it all with hand tools?

I've been reading the posts by Chris Schwarz about the forthcoming publication of John Brown's “Welsh Stick Chairs”. This was a seminal book in the same manner as James Krenov's "A Cabinetmaker's Notebook". I've not read John Brown's book, and I am looking forward to doing so. I have read Jim Krenov many times. It seems to me that they are similar in the way that they value the craft that is woodworking, and the importance of hand tools. However, they differ in the way they view machines. Krenov used his to prepare the way for hand tools. Brown would have nothing to do with them. It seemed he feared that craft would be lost if machines were used ...

"The hand too maker needs the best bench he can make – or afford! You must know your tools, what they are made of, fine adjustments and sharpening angles. Everything must be clean and sharp. Tools talk to the craftsman, and will let you know when they are right. What the machine does by noisy, brute force, you will be able to do with quiet cunning"

"I would not go so far as to say that there are no skills necessary to working machines. It is important to be able to read and interpret complicated instructions. What you end up with is engineering skills – precision engineering in wood".

Link: http://tonykonovaloff.com/?page_id=54

What has this to do with the work I did this weekend? Well, I could relate to the role of engineer. Preparing the wood for the drawers with my machines was the work of a machinist. Would I have rather spent the time doing this by hand? Well, I have done this in the past - I worked almost exclusively with handtools and a few hand power tools for over 25 years before purchasing a tablesaw, jointer, thicknesser/planer, and bandsaw. I began upgrading these over the past 7 years. I would not go back. Machines do not replace handwork.

The question is whether this compromises the work I do?

The drawers have Tasmanian Oak sides and back. The drawer front will be Black Walnut to match the carcase. The oak has become harder to come by in Perth. I prize it because it is all quarter sawn, which is ideal for drawer sides as it is stable. It is light in colour and a good contrast to dark timbers. But I have so little now. Much of it is narrow boards - I grabbed everything that my local Bunnings store had a few years ago when I heard they were no longer going to sell it.

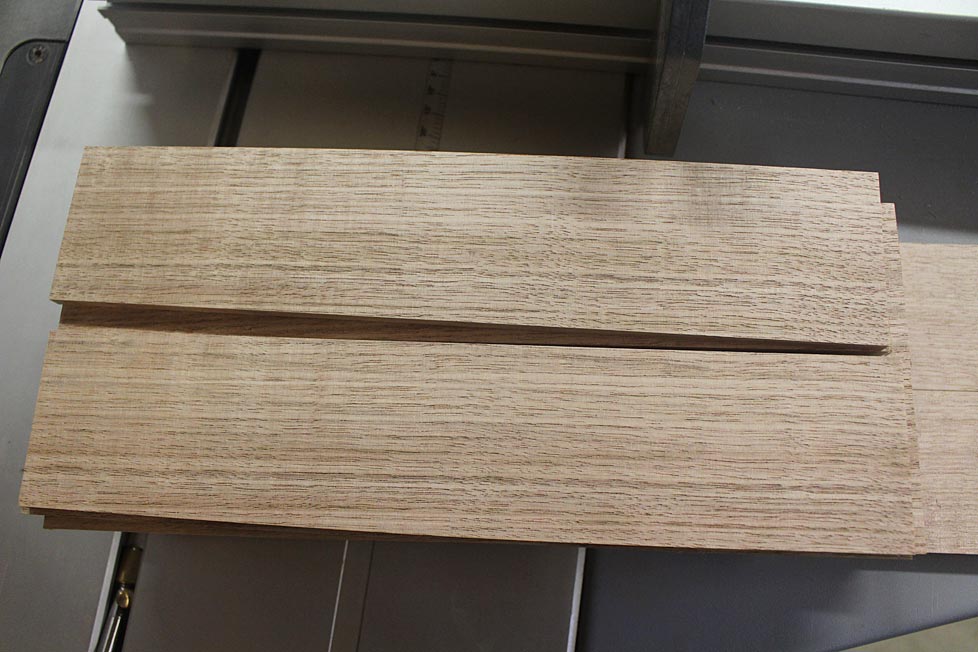
These boards would be resawn and book-matched to become the drawer sides ...


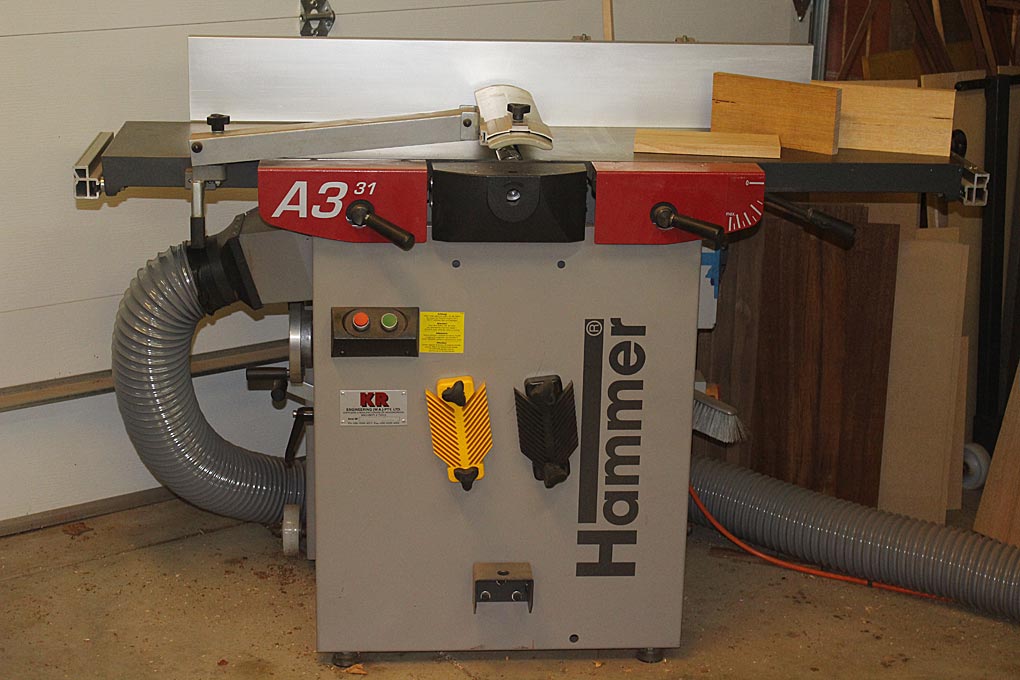
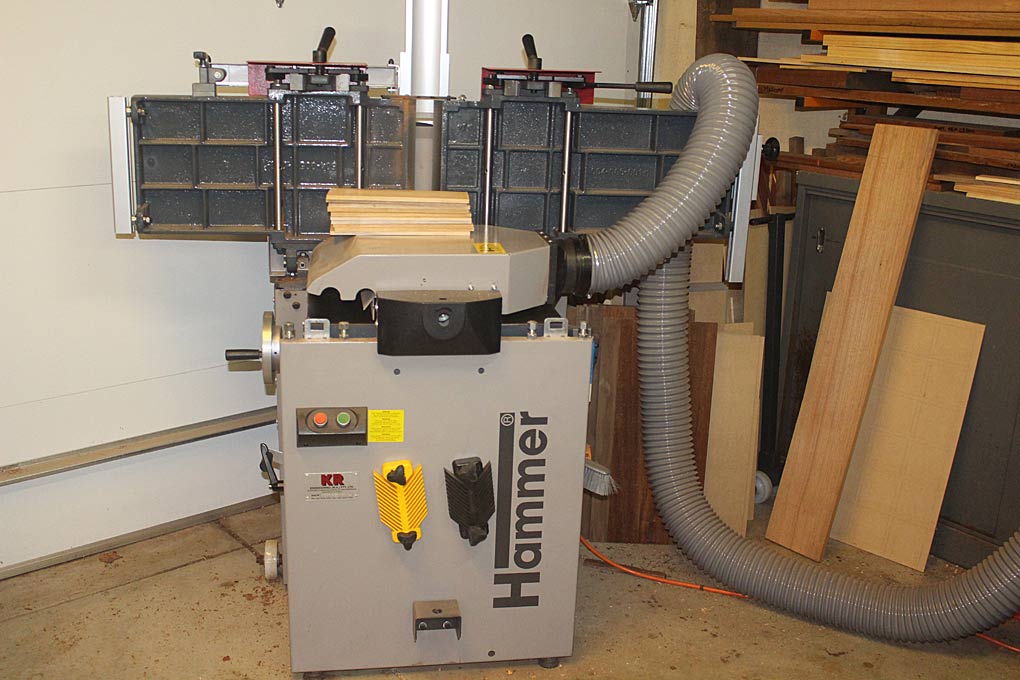
Where my jointer-thicknesser/planer excels is that I can cut the boards to short lengths, and still process them. Shorter boards will not lose much waste when flattening ...


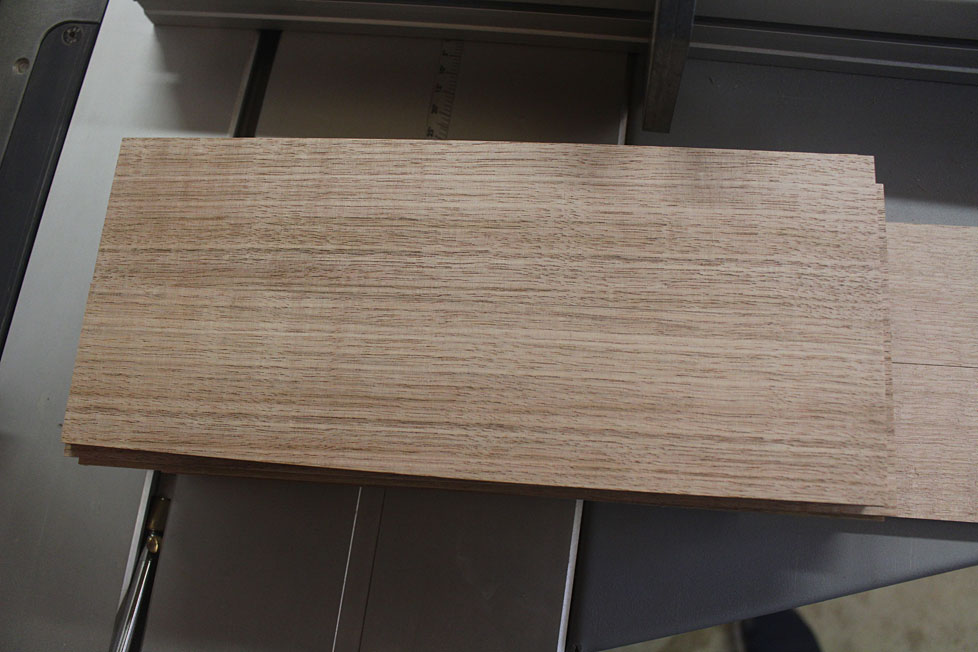
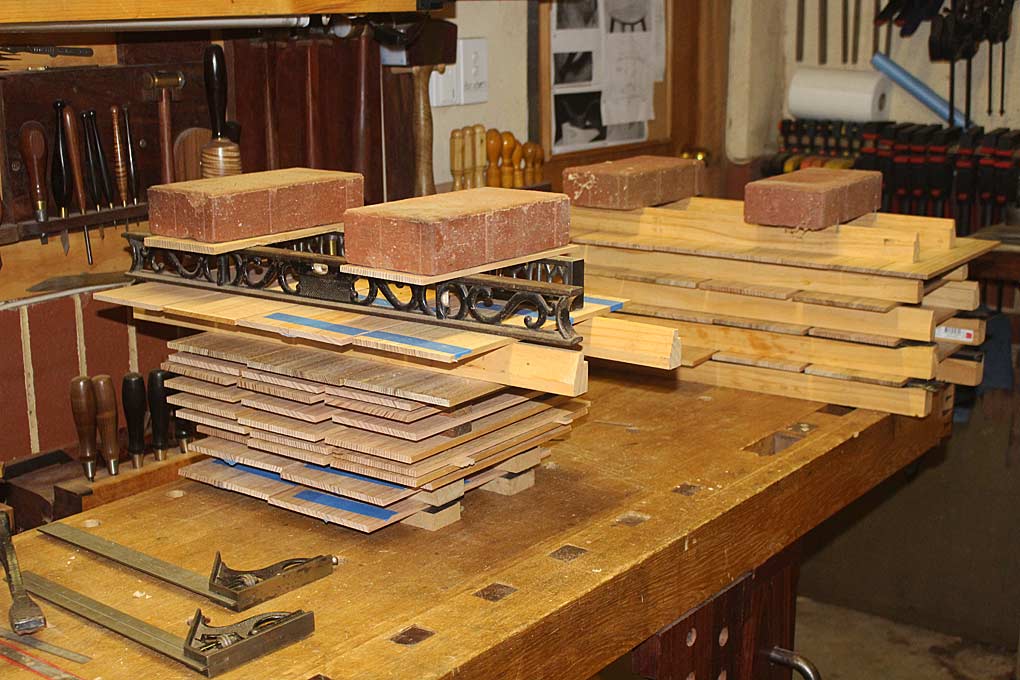
This was at the end of Saturday. Drawer sides taken to 1/4" and stickered. I have had good fortune with this method in the past. The wood is stable and cleaned up with a cabinet scraper. If there is any slight movement, it will be taken out when dovetailed.

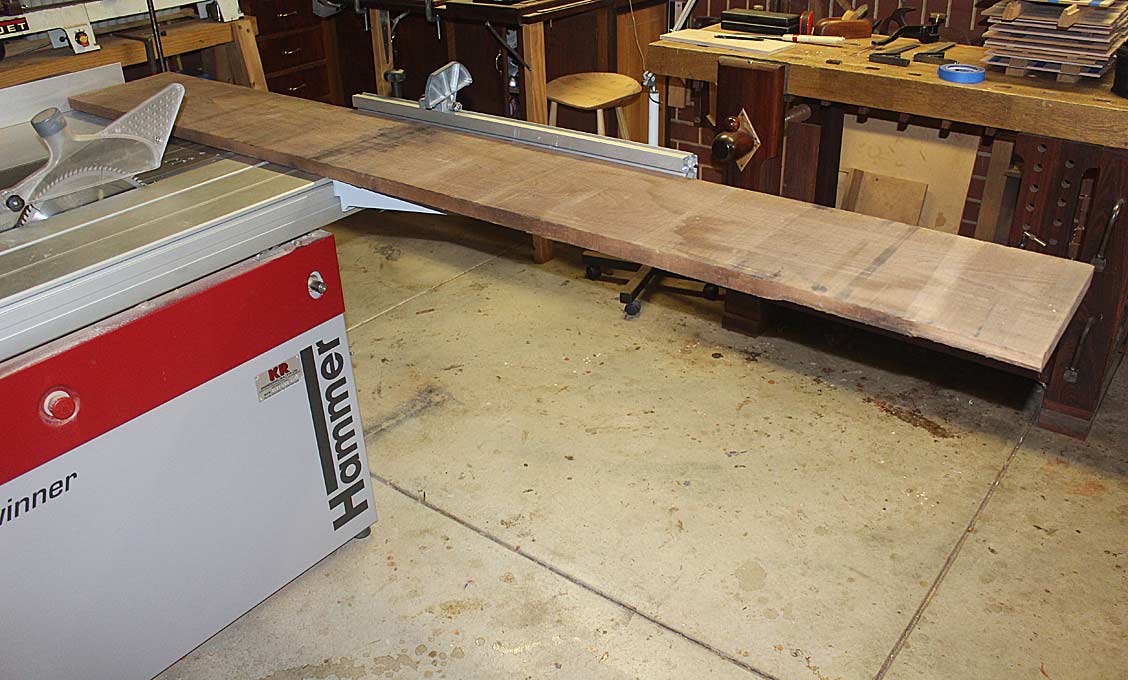
The black walnut is rough sawn. This board is 1" thick and will make all the drawer fronts.

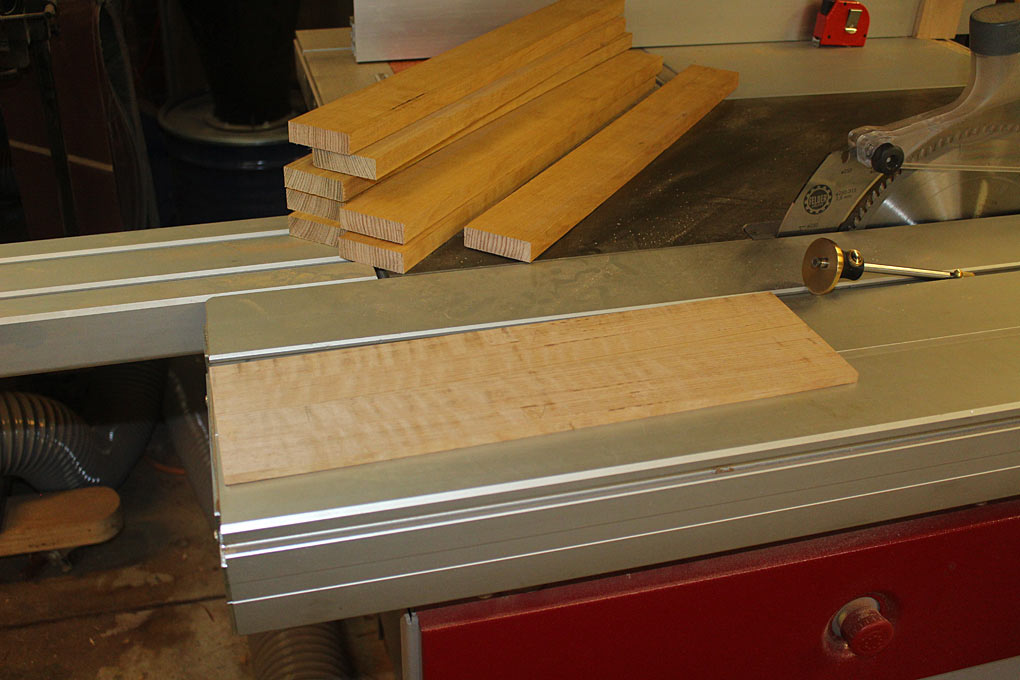
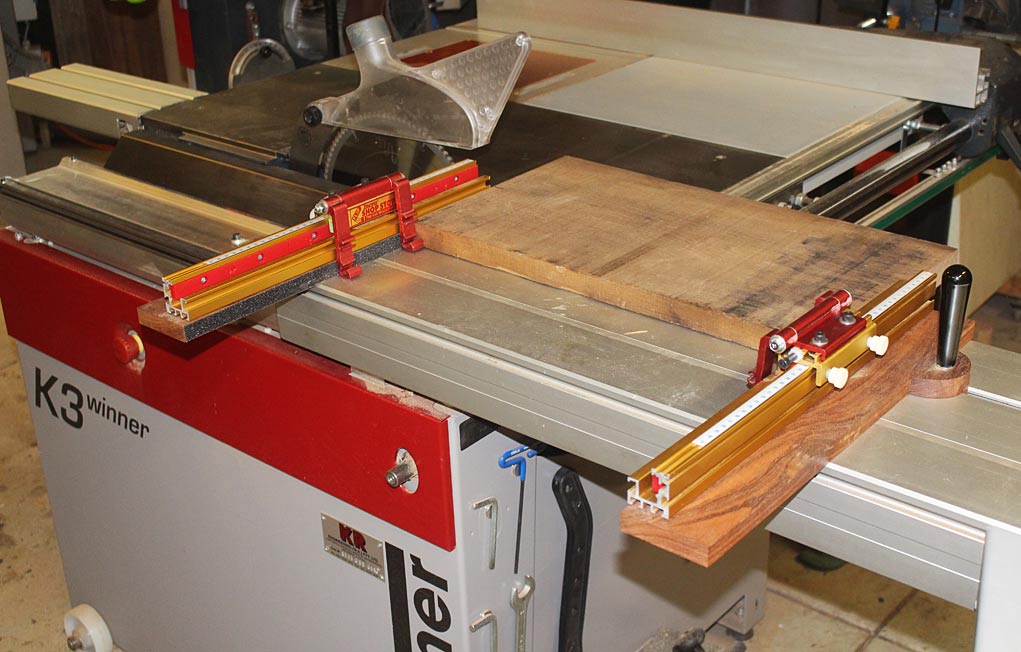
The tablesaw is new. The slider is magic to rip as well as crosscut. Here is a Frans and Fritz jig used to quickly rip the short lengths into two sections (= two rows of drawer fronts) ...
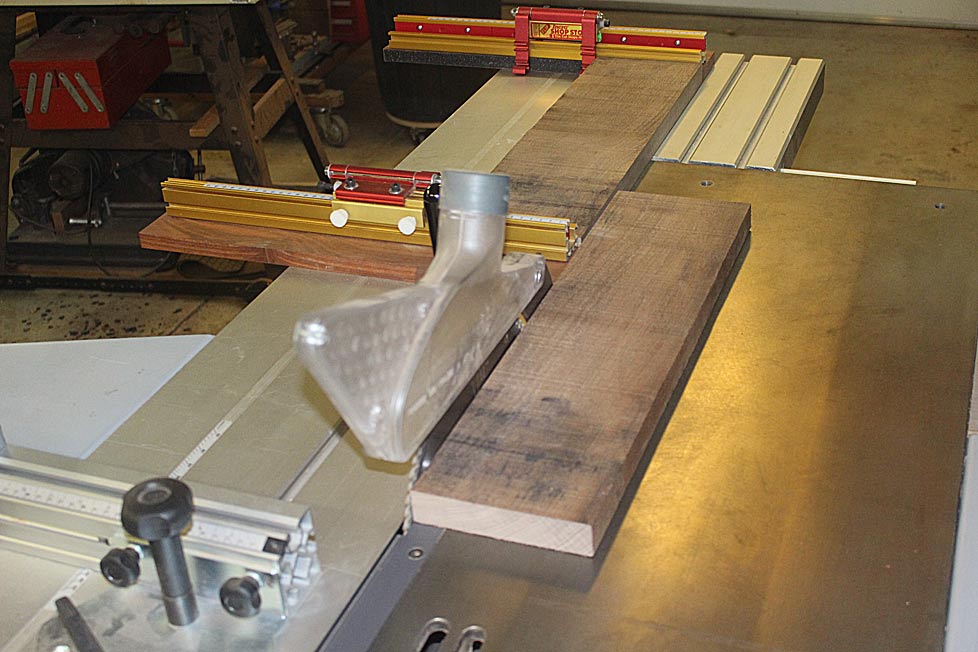
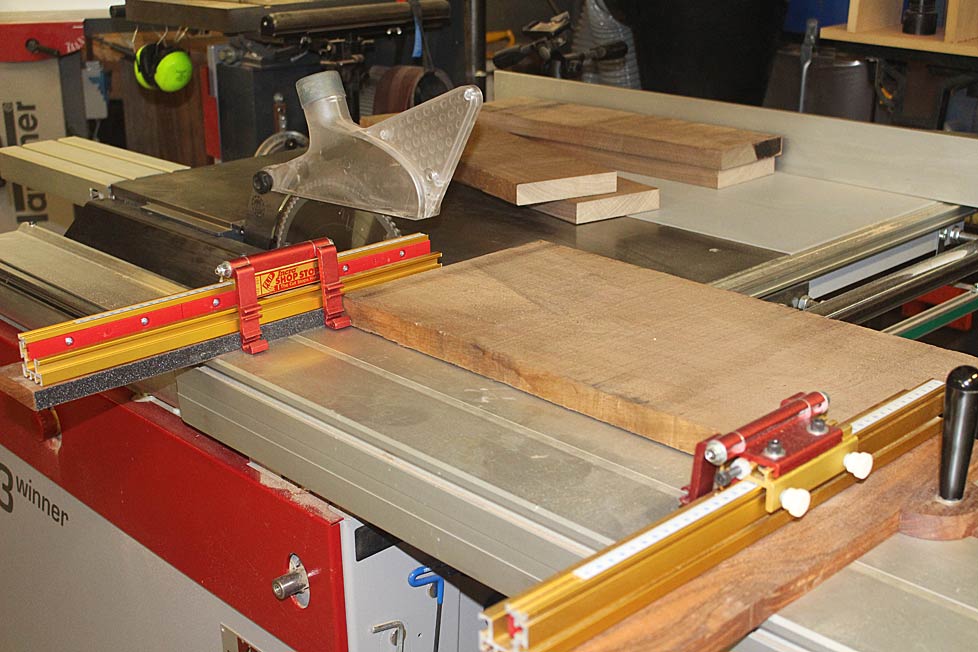

This is just raw material. It does not replace the handwork in building the drawers.

I have begun fitting the drawer sides to the drawer blades ...
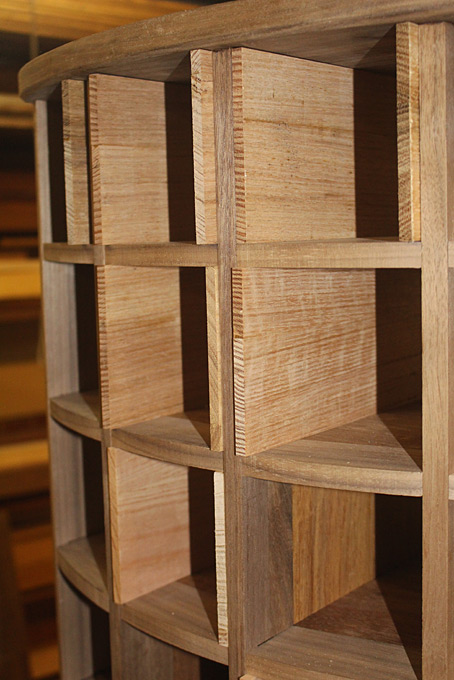

There is so much more still to do ... and I have not even made the drawer bottoms or slips.
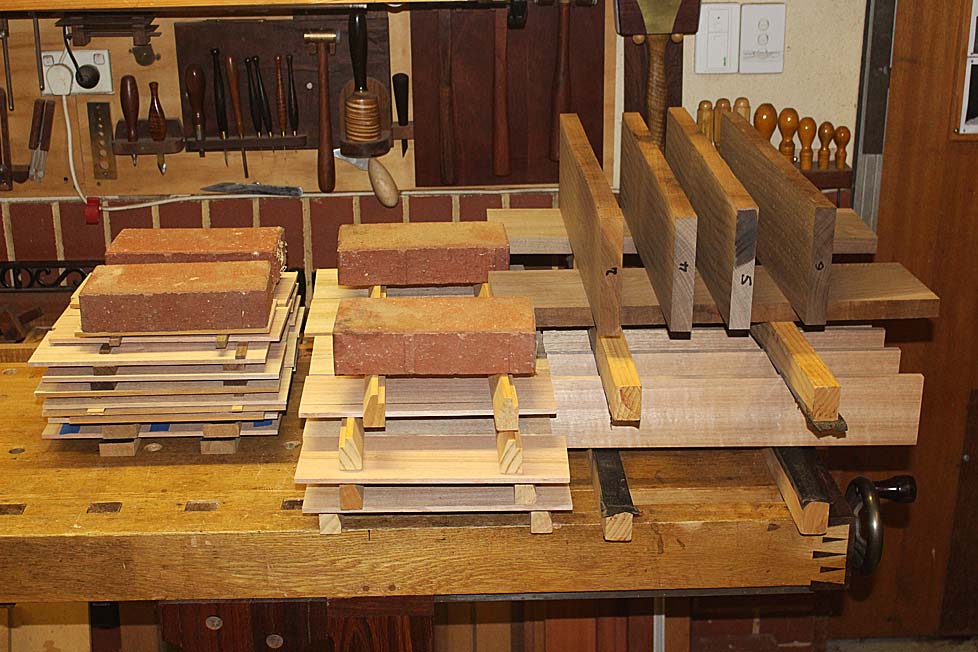

Regards from Perth

Derek

Re: Apothecary chest - part seven

#2

Re: Apothecary chest - part seven

Don Stephan

Always interesting to read journals that are so well written, and quite often I pick up a tip or alternative approach. Thanks for taking the time to share.

Re: Apothecary chest - part seven

#4

Re: Apothecary chest - part seven

Bill Tindall, E.Tn.

Slips make sense on large storage drawers for they enable a large bearing surface and a thin side yielding a light weight drawer. I don't see them as necessary in such a case as this cabinet.

Re: Apothecary chest - part seven

#5

Re: Apothecary chest - part seven

Derek Cohen (in Perth, Australia)

Hi Bill

I have been toying with the idea of a groove along the sides as it would be a huge time saver. If I build slips, I would want to also rebate the drawer bottom so the tops are coplanar. That is a lot more work. My concern is that the drawer side is 1/4" thick, and the groove could be no more that 1/8" deep. These drawers are not going to hold heavy items and, since expansion takes place front-to-back, that could work. What are your thoughts?

Regards from Perth

Derek

Re: Apothecary chest - part seven

#6

Re: Apothecary chest - part seven

Bill Tindall, E.Tn.

Depends on drawer size. I would do what is done for Chester County spice boxes if drawers are small. Rebate bottom of side and inset drawer bottom in the rebate. Or cut a 1/8 deep groove and insert 1/8" thick bottom in groove if the drawer is larger. These drawers will see little wear compared to a dresser so any bearing surface would seem adequate.

Re: Apothecary chest - part seven

#7

Re: Apothecary chest - part seven

Sgian Dubh

"There is so much more still to do ... and I have not even made the drawer bottoms or slips."

I've seen many modern and antique pieces including drawers of a similar scale made with sides roughly 6 mm thick with a ~3 X 3 mm deep groove carrying a shy 3 mm thick solid wood drawer bottom. I think slips in a piece like this is overkill, especially considering the overall weight likely to be carried. So, like Bill, my advice is to forego the slips. Slainte.

Re: Apothecary chest - part seven

#8

Re: Apothecary chest - part seven

Derek Cohen (in Perth, Australia)

Thanks Richard. Yes, I agree with you and Bill. Another of the reasons I had been thinking of slips was that I recall how time consuming it was to groove the back of the curved drawer fronts on my Lingerie Chest. So I was thinking of a slip behind the drawer front as well. All said and done, it is far less work to simply groove the pieces!

Regards from Perth

Derek

Re: Apothecary chest - part seven

#9

Re: Apothecary chest - part seven

Sgian Dubh

I've never seen any logic in making a slip for the rear face of a drawer front, whether the back face of that front is curved or straight. It's ugly, extra work, merely adds thickness to an already more than thick enough front that will take a groove to carry the drawer bottom, and serves no useful purpose whatsoever. Whether the intended slips are flush or the quadrant style I can't ever see me being persuaded to voluntarily incorporate them in a drawer box.

I've never seen such a redundant and pointless thing in hundreds, if not thousands of drawer boxes, antique through to modern, that I've either worked on or observed over the decades in this game. The first time I came across this idea must have only been sometime in the last ten years or so, and in my opinion it's a retrograde design 'tic' that ought to be knocked on the head and buried as soon as possible, ha, ha. Slainte.

Re: Apothecary chest - part seven

#10

Re: Apothecary chest - part seven

Derek Cohen (in Perth, Australia)

Ha Richard, I did the rear-of-drawer-slip-thing about 10 years ago and was rapped on the knuckles then by you!! :) Never did do it again. Still, I remembered that it worked back then, and it occurred to me to be a way to work around the groove in a curved drawer front.

What I plan to do is simply cut a deeper-than-usual groove when the drawer back is flat, and this will leave a groove for the drawer bottom after the back is hollowed out.

Regards from Perth

Derek

Re: Apothecary chest - part seven

#11

Re: Apothecary chest - part seven

Sgian Dubh

"it occurred to me to be a way to work around the groove in a curved drawer front."

Did I give you a rollicking for doing that all those years ago? I don't recall, but that's maybe when I first saw that drawer slip visual abomination - there's a joke in there, and I don't do those emoji things.

You could, of course, simply run a groove in the back of a curved drawer front with a ~3 mm bottom bearing slotter or groover in a table mounted router, the depth of slot determined by the diameter of the ball bearing. I guess it all depends on the tightness of the internal curve or arc (long versus short radius) and the overall drawer front length to cut the slot for the drawer bottom. Then just cut a matching arc in the drawer bottom itself. And, of course, it depends on off you have the appropriate cutter and matching bearing, plus your willingness to substitute machine work for hand work. If it's all hand work, than an alternative might be to cut a groove using a scratchstock plus a custom made blade. Slainte.

Re: Apothecary chest - part seven

#12

clarification needed

Bill Tindall, E.Tn.

"I've never seen such a redundant and pointless *thing* in hundreds, if not thousands of drawer boxes"

Is "thing" slips in general or a slip at the front of the drawer box?

Re: Apothecary chest - part seven

#13

Re: clarification needed

Sgian Dubh

Slips attached to the drawer sides aren't pointless Bill. As you mentioned in an earlier post they do provide a greater surface area for wear. They are also removable and replaceable therefore aiding repairs when required to account for wear over the decades. Personally I do like slips, with a preference for the flush style from an aesthetic perspective, even though they're a little more difficult to execute. I don't always use slips. For instance, in just one example, I wouldn't choose to use slips in drawers attached to side mounted metal runners, and it's not practical to use them with undermount runners - there isn't enough room, and they're generally pointless with whatever type of proprietary runner, side or bottom mounted.

My aesthetic and practical disdain is reserved solely for the drawer slip thing that some people seem to have got into their heads is a good idea to attach to the back of a drawer front. I simply can't come up with a single good reason to install one … ever. Slainte.

Re: Apothecary chest - part seven

#14

request

Bill Tindall, E.Tn.

"I've never seen such a redundant and pointless thing in hundreds, if not thousands of drawer boxes, antique through to modern,"

There is lot to be said for thin drawer sides leading to light weight drawers. But thin sides require more bearing surface for large drawers. There seems to be more than one way to deal with this need.

I get to look at drawers occasionally in a shop that specializes in English Antiques and reproductions. That extra bearing surface that is associated with thin oak sides seems to come in more than one variety. I would find it of interest to learn of the various ways this extra bearing surface was implemented in English Furniture. (You make such delightful diagrams.) Sometime this thin"runner" seems to just be glued to the bottom.

Re: Apothecary chest - part seven

#15

Re: request

Sgian Dubh

"Sometime this thin "runner" seems to just be glued to the bottom.

Indeed there is that sort of version Bill. Typical was to work a rebate (not a groove) in the bottom edge of the drawer side that itself might be something like 1/4" to 1/2" thick, with the rebate something like 3/4" wide X perhaps 3/8 - 1/2" deep. To this rebate was fitted a drawer bottom, maybe 1/4" thick, and then the rebate left exposed at the bottom edge of the drawer side was filled with a piece of wood that would be about 3/4" wide by 1/2"+ wide. The 1/2"+ bit would later be planed down flush with the bottom edge of the drawer side

The size details of all the related parts varied a bit from maker to maker, but fairly common to all of them was to glue this rebate infill piece (the slip) to the drawer side. In addition, it's not unusual to see these slips both glued and pinned on.

Some people reckon this style of slip is the 'right' style it being both period correct (whatever benefit that's supposed to confer) and pretty simple to execute, but there are disadvantages. One being that the solid wood drawer bottom frequently got glued to the slip as the latter was glued in place leading to splitting of the drawer bottom at inconvenient places.

I spotted your sneaky suggestion through a bit of flattery that I doodle something up for you (ha, ha), but I'm not falling for that (more ha, has), and you'll just have to manage with a bit of text for now. Anyway, you'll soon have plenty of opportunity to admire all my wonderful drawing skills (oh, did I just brag? Sorry) when I send you a copy of my book, which will hopefully arrive with me in the next week or so meaning I can get a copy off to you soon after. Slainte.

Re: Apothecary chest - part seven

#16

description of English drawer building

Bill Tindall, E.Tn.

what follows is a description of drawer building in an English factory (late 1940's about) that I received some years ago from an English factory drawer builder, Alan Batty. Alan later ran a shop doing wood turning and became legendary as a demonstrator of wood turning. In answer to a question he turned a spherical pool ball for some English table game, made a container with a threaded top and other amazements. He mentioned a stint as a drawer builder during journeyman training and what follow is a response to a question I asked about the process.

"You have transported me back years, I am going on memory here, I will try to answer your questions in order

[1] we always cut one side at a time, to my knowledge no one ever sawed as a pair, this was in case of error

[2], we always cut the pins first and marked the dove tails off the pins, the pins varied as to the century, in the regency period for example I believe the pins were very slender, I have seen every combination over the years from cogged dovetails [I thought these were hansome] to were the pin and dovetail were of almost equal size. just a point of interest when we cut the dovetails we made the dovetails slightly thicker on the outside,[[this was only a slight taper hardly perceptable.] when you tapped dovetails together they tightened up without splitting.As I say we always cut the pins first, I have heard auguments for the opersite, just a point all tradesmen I know always worked, cutting the pins first.

[3] I do not understand what you mean by slips, on the bottom of the drawer we put a wearing piece, which ran on the runner for the drawer it ran the full lenght of drawer at on 2 sides, this was only a rubbed glue joint fixing in place, this wearing piece was tenon sawed all most thro but no quite, it was cut every 21/2 to 3 inches at approximately at a 30 degree angle, it was important the saw cut did NOT go all the way through, I was given to understand by doing this the wear was less, never did understand how this was supposed to wear better, but we always did it anyway

[4] The bottom of the drawer was a 1/4 to 5/16th thick, made in planks depending on the tradesman 4"to 7" wide and edges were rubbed glue joints until final width was achieved, this then fitted into a slot that was cut around the drawer, the slot was worked out so as to fall on a dovetail not a pin, as it would weaken a pin

[5] 6 sets a day were required."

I recall seeing drawers with these diagonal saw cuts into a wearing piece. But the situation prevented me from being able to remove the drawer and examine the construction in detail. I think this wear strip was just glued to the drawer bottom, not the side. I am unsure I understand Alan's description or if I assessed the drawer I opened accurately.

Re: Apothecary chest - part seven

#17

Re: What???

Hank Knight

I got it through this point:

"on the bottom of the drawer we put a wearing piece, which ran on the runner for the drawer it ran the full lenght of drawer at on 2 sides, this was only a rubbed glue joint fixing in place"

But this threw me:

"this wearing piece was tenon sawed all most thro but no quite, it was cut every 21/2 to 3 inches at approximately at a 30 degree angle, it was important the saw cut did NOT go all the way through, I was given to understand by doing this the wear was less, never did understand how this was supposed to wear better, but we always did it anyway"

Any idea what Batty is talking about? I can't visualize anything from his description.

Re: Apothecary chest - part seven

#18

Re: What???

Sgian Dubh

"Any idea what Batty is talking about? I can't visualize anything from his description."

Not a darned clue Hank. He lost me completely at about the same place. Wearing strips, slips … all the same thing basically to me, but his description left me bamboozled. Slainte.

Re: Apothecary chest - part seven

#19

What I think I remember from a drawer in hand

Bill Tindall, E.Tn.

As mentioned, I get to a shop occasionally and peek into drawers. I have seen these attached wear strips and they have been segmented, perhaps to capture grits that could accumulate on the wear surface.?.. and or, they were segmented to accommodate drawer bottom expansion on those occasions where the English orient their drawer bottoms properly.

From memory, and not being able to remove a drawer, I think the bottom was attached to the drawer side either in a rebate or groove leaving a space between the drawer bottom and the runner. This space was filled with a wear strip that ran the length of the drawer. This strip was either flush, or slightly proud?, of the drawer side and provided a bearing surface for the drawer to slide on the runner. I think this strip was simply glued to the drawer bottom, a solution to providing a bearing surface vastly quicker than making slips as described by Mr. Cohen.

In the 1000 drawers you have examined surely you have seen drawers of this general description in 19th century construction. I was hoping for results from a more detailed examination so the details of this method could be revealed.

The goal here is to reveal ways of accommodating wear when using thin sides. If us rebels knew various ways the English used to solve the wear maybe we would use thinner sides.

Re: Apothecary chest - part seven

#20

Re: What I think I remember from a drawer in hand

Hank Knight

Bill,

Saw kerfs to capture accumulated grit make some sense (not much IMHO). The kerfs are not cut all the way through, so I don't see how they could accommodate expansion and contraction of the drawer bottom. Either way, it strikes me as an odd construction.

Hank

Re: Apothecary chest - part seven

#21

Re: What I think I remember from a drawer in hand

Larry Barrett

Bill, et al

I have a chest of drawers with drawer bottoms as you describe, including the saw kerfs as described by Alan Batty in the wear strip. The kerfs are very thin. The wear strip is glued to the bottom. The drawer bottom is tapered on the sides to fit into a grove in the drawer sides. The wear strip, in addition to widening the bearing surface, may also strengthen the bottom since it is quite thin where it slides into the grove. The bottom was roughly planed with a jack, so is rather uneven. It seems possible that the kerfs in the wear strip may there to allow it to conform better to the rough bottom. I will try to take a picture if I can summon the energy to empty all the candles, etc my wife has stored in the drawer.

Re: Apothecary chest - part seven

#22

Re: What I think I remember from a drawer in hand

Larry Barrett

Photo of drawer bottom


Re: Apothecary chest - part seven

#23

Re: What I think I remember from a drawer in hand

Brian Holcombe

Seems crazy to glue it right to the drawer bottom, has it split the bottom further up?

Re: Apothecary chest - part seven

#24

Re: clarification needed

Don Stephan

In defense of Derek, I once posted pics of drawer slips on the sides and (gasp) back of the drawer front. I was SO naive and silly.

I learned of slips from your first description of them here Richard, and sure I still have a copy of that posting. I was so taken by them I didn't read the description closely and simply ASSumed they went across the back of the drawer front as well. Have to say if the slip adds visual interest to the inside of a drawer, and I think they do, I was a glutton for interest without stopping to think if the back of the drawer front needed one. As you've pointed out above, the drawer front is almost always going to be thick enough to house a groove for the drawer bottom, and a slip on its back side isn't going to be as easily seen anyway.

Nonetheless it was only through your willingness to share and educate that I was introduced to drawer slips, and I will always be grateful to you for that Richard.

Re: Apothecary chest - part seven

#25

Re: What I think I remember from a drawer in hand

Larry Barrett

No splits in drawer bottom. Allowing expansion of the bottom could be another reason for the kerfs.

Sorry for the poor picture. Instead of emptying it out, I took the pic while lying on my back under the drawer.

👍 This page answered my questions

Your vote helps other woodworkers quickly find the answers and techniques that actually work in the shop.