WoodCentral Forums

Est. 1998 — 27 years of woodworking knowledge

Router dado jig for Roger

Posts

Router dado jig for Roger

#1

Router dado jig for Roger

Derek Cohen (in Perth, Australia)

Roger, I took about 20 minutes out from the Apothecary Chest build (on the Hand Tool forum, for those who do not go there) to put together a jig for the 40 remaining stopped dados.

If these were through dados, I'd simply hand plane them with a dado plane. If they were in walnut, as with the carcase, and not rock hard merbau, the secondary wood, I might continue with a saw, chisel and router plane, as with the first 6 I made. I like the control I get from using hand tools. A power router makes more sense at this stage.

I really took about 20 minutes for this jig. It is extremely simple, and should be very easy to use.

My reasoning said that one either creates a dado to match a panel, or one makes a panel to match a dado. The adjustable jig you showed me (on the Hand Tool forum) matches the dado to the thickness of the panel. I have decided to go the other way, that is, to make all the dados 12mm, and then make all the panels also 12mm. I believe that this will be much faster.

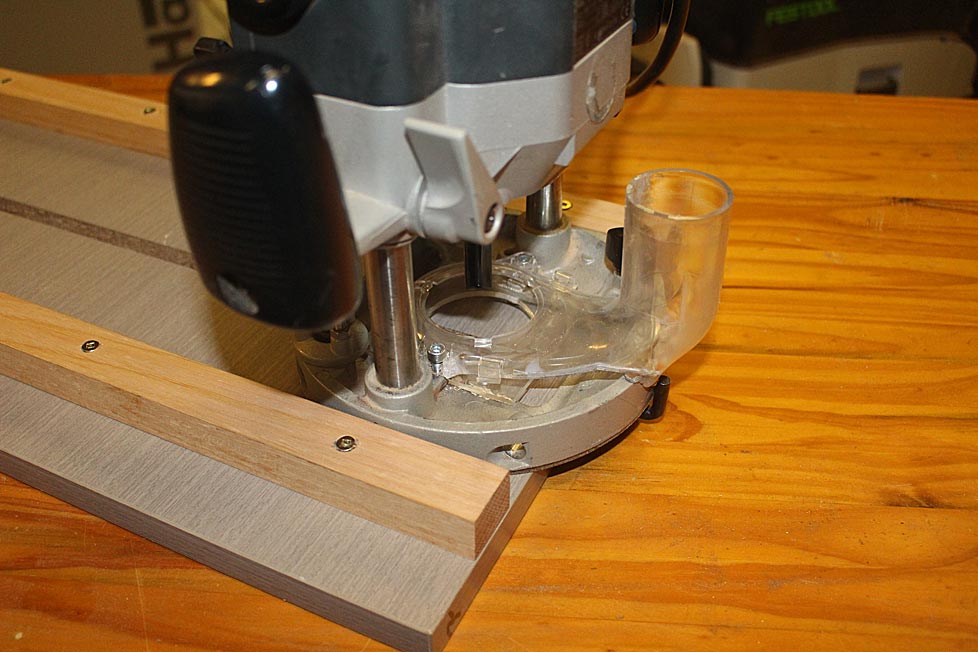
The jig is simply melamine veneered chipboard with side fences. The groove down the centre is 12mm wide.
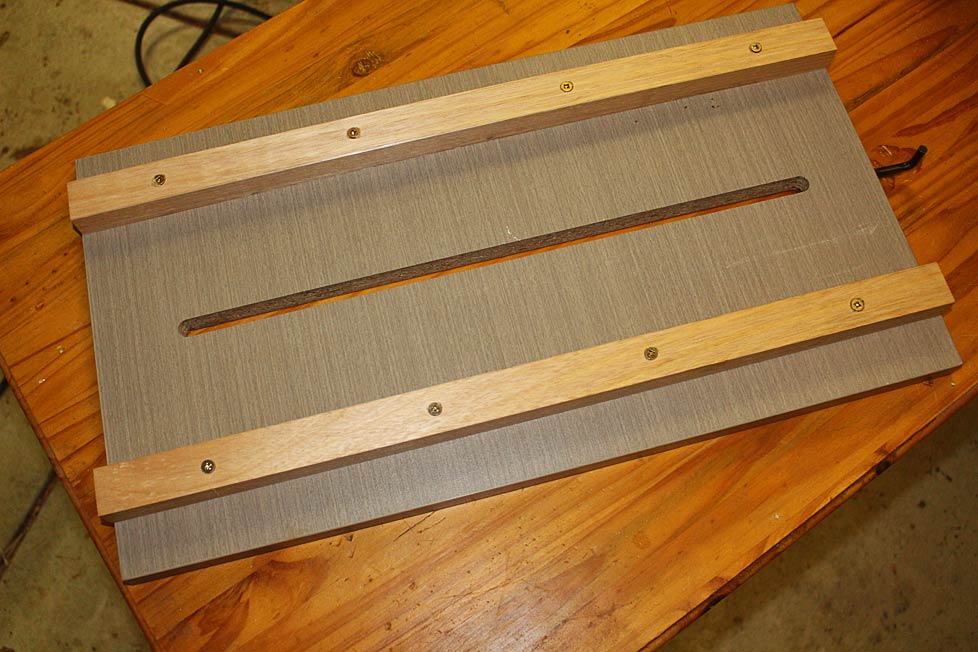

The stop was an afterthought, but works well ...
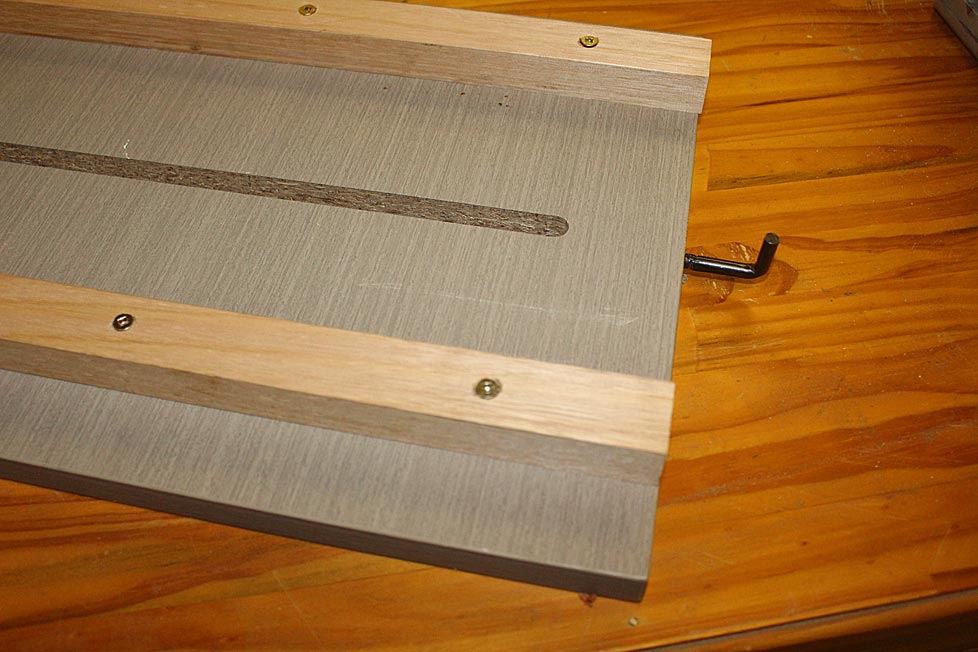


The idea is that the groove can be placed exactly in line with the markings, and the dado have a defined end point.
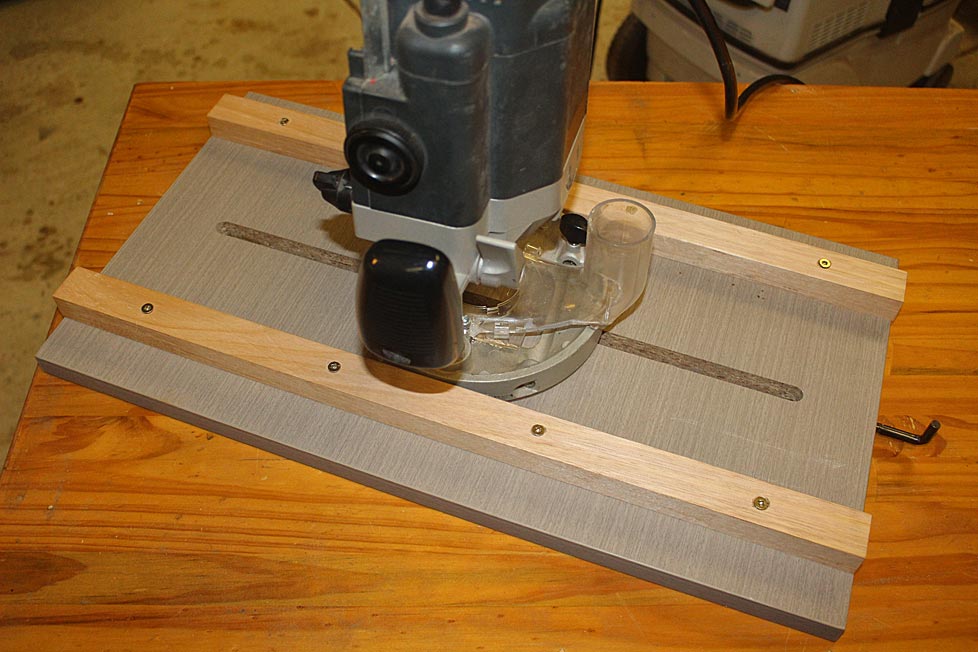

It is dedicated to this router. The round base makes it easy to move (especially with waxed surfaces).
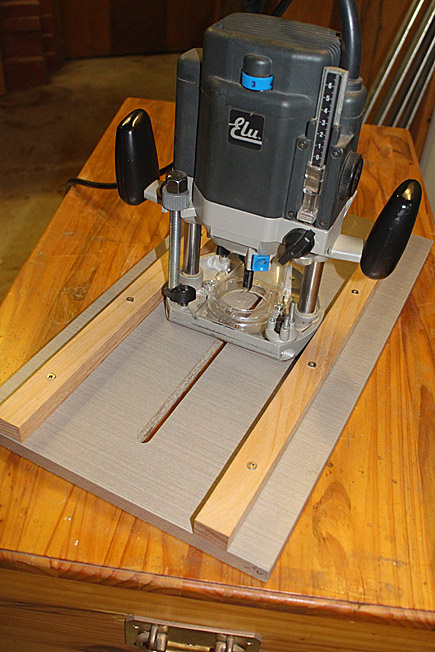

The underside has strips of non-slip. There is sufficient surface area for claping as well.


Are there weaknesses to this method? Do you think that I would do better with yours?

Regards from Perth

Derek

Re: Router dado jig for Roger

#2

Re: Router dado jig for Roger

roger lance

Derek.....I have a similar dado jig to the one you are proposing. I made it years before I made the adjustable jig I showed on Hand Tools.


I used this jig initially to make straight cutter dados.....the two guide sides fit the router base and center the router in the jig and eliminate side movement of the router. A stop could be added to the jig or I'd just mark out on the work piece where I wanted to stop the dado and then finish up with hand tools on the end of the dado. I controlled the dado width with the width of the router bit. The wide sides of the jig were for clamping and allowed the clamps to not interfere with the movement of the router. This worked great. The opening for the router bit in the jig is wider than any bit I might have used so you have to spend some time making sure the center of the jig is in the center of the intended dado.

Now, I use this jig mainly for making dovetailed dados.....


Works wonderfully for this purpose. So, I'm using the adjustable jig with a guide bushing and a straight cutter.....it only takes seconds to adjust the jig to the desired width.....and the other jig with a dado cutter and no guide bushing is required.....


Just for clarification, a picture of the back of the simpler jig.....


Now, to answer your question about which is best: what you are proposing is absolutely fine.....it will do the job and do it well. You've made it and I'd use it. But, its a one-trick-pony.....that adjustable jig is versatile and a pleasure to use.

If you have the storage room in your shop, make the adjustable jig at a latter date.....you're going to like it. But, for now, what you have will work for what you need it to do.

Re: Router dado jig for Roger

#3

example of use of dovetail dado jig.....

roger lance

This is a baby cradle I made using this jig to attach the rockers to the bottom of the cradle.....


Thats got to be wax around the dovetail in second picture...... :\ ......

Re: Router dado jig for Roger

#4

Re: Router dado jig for Roger

Derek Cohen (in Perth, Australia)

Thanks Roger. I made this jig as a "one-trick pony", as you describe. I could be used again. However, i just needed something quick-and-dirty, and the materials were to hand. Thanks for confirming that it will do the job.

And NICE cradle! I made one similar for friends about 20 years ago. As I recall, it had box joints made on a table saw. Not as pretty as yours ... :)

Regards from Perth

Derek

👍 This page answered my questions

Your vote helps other woodworkers quickly find the answers and techniques that actually work in the shop.