Home Articles Forums Gallery Marketplace Videos

WoodCentral Forums

Knowledge You Can Build On — Est. 1998

This $39 jig will make you a WOODWORKING GOD!

Incorporating a knot question

Posts

Incorporating a knot question

#1

Incorporating a knot question

Bill Tindall, E.Tn.


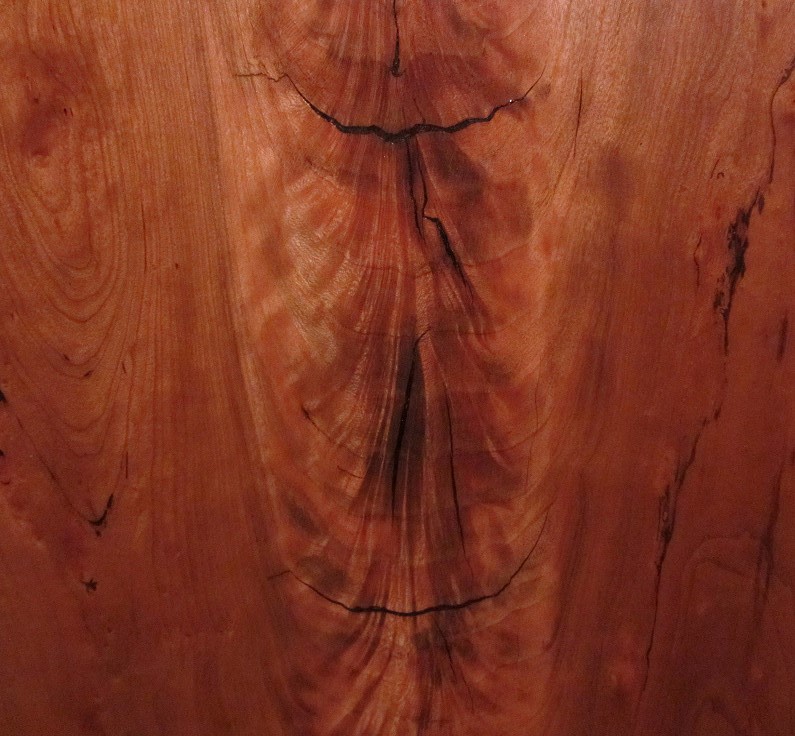
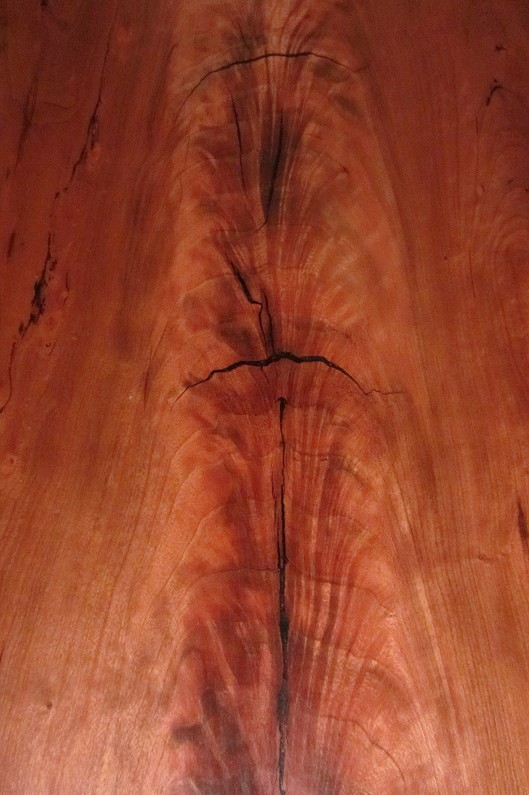
The knot comments and questions got me to thinking about using the knot in the top. It is not without precedent to see a large knot like this in Period furniture. Indeed, it would center perfectly and its grain blends into the surroundings without a sharp knot boundary. But it is cracked and the crack runs at an angle into the board, and the crack is not very wide.

If I was to use the knot it would have to be filled, glued together, or whatever is done with a knot (I have no experience). What is to be done with the crack?

Re: Incorporating a knot question

#2

Alan Young

Black Epoxy fill

Alan Young

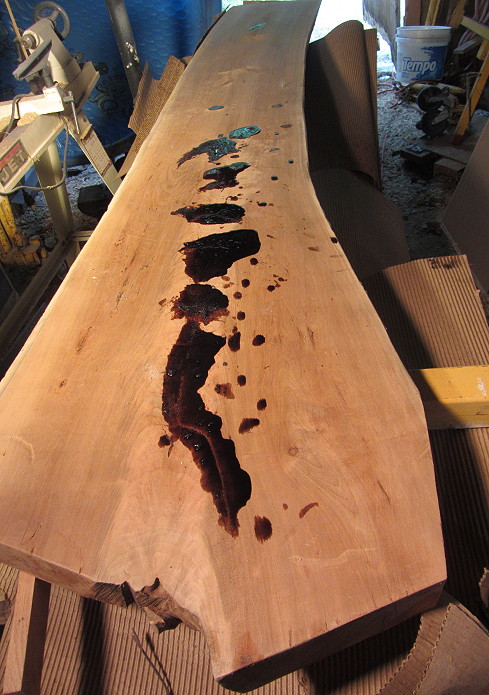
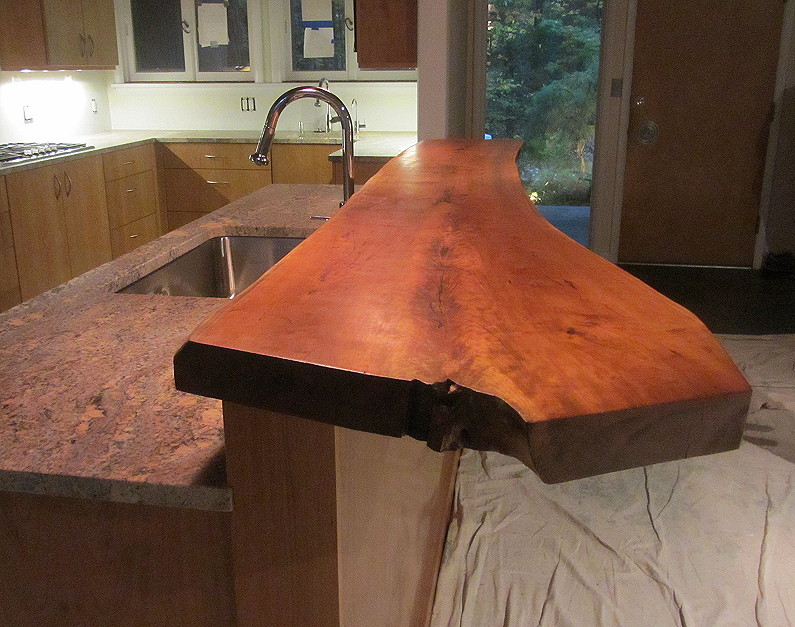
Bill- I used an epoxy colored with black trans tint dye to fill the cracks in this cherry slab


As I recall you often stain your walnut- you might consider the epoxy with the black coloring or the stain color you plan to use for the rest of the piece.

-Alan

Re: Incorporating a knot question

#3

Re: Incorporating a knot question

Dennis E Peacock

I've used epoxy and fine ground coffee grounds. You can also add just a touch of black tint to that mix to give it a bit of darker color if you'd like.

Re: Incorporating a knot question

#4

Re: Incorporating a knot question

Keith Newton

Bill, I would cut some little wedges out of the same wood, then drive them in with glue, after dry-run fitting them. You can either whittle or touch on the belt sander to do side bevels which helps make the zigzag easy, and look nice.

Score both sides with a knife about 1/16 high and snap the extra off.

That is a nice looking knot, with the figure around it. Keeping the knot gives a good way for that to be used.

Re: Incorporating a knot question

#5

Re: Incorporating a knot question

John in NM

For big knots/cracks in mesquite we used West System two hour epoxy and Proline universal black tint (available at a real paint store if you can find such a thing any more).

Of course it's probably not worth buying even a small West System or similar kit for one little knot, so 5 minute epoxy does as well. Its a bit more viscous than a 2 hour epoxy of course, so it can be a little harder to get it to fully fill the crack.

Seems kinda a waste to buy a pint of tint too, since you'll only need about a drop for that. There are lots of ways of tinting epoxy though, some mentioned already, but about the cheapest one would be charcoal dust - either briquettes if you use them or just some of the dark cinders from cleaning out the woodstove.

If none of that will work, email me your address and I'll send you a little jar of the Proline stuff.

Re: Incorporating a knot question

#6

follow up question

Bill Tindall, E.Tn.

The crack is not very wide and it runs at a steep angle to the surface. I could wick CA in there but I don't think I can wick epoxy and the crack is too narrow to pour it in, I think. How do I get epoxy in there? I was thinking some application of vacuum but noting comes to mind for employing vacuum.

Maybe vacuum cleaner from opposite side? Surely wife would not mind if a bit of epoxy sucked into the vacuum?

PS I have West.

Re: Incorporating a knot question

#7

Re: Incorporating a knot question

Joseph Mulherin, sr

Bill,My opinion is to use Dennis's idea of the coffee grounds or dry coffee in a darker shade, and use the 2hr epoxy to get it into the crack easier.

Re: Incorporating a knot question

#8

Re: Incorporating a knot question

BrianMonumentCO

You could also use a clear epoxy. It creates an interesting appearance.

I have used that successfully in filling gaps in walnut rifle stocks.

Re: Incorporating a knot question

#9

Black epoxy.....

roger lance

you know you start out incorporating a knot.....then maybe a barked edge.....and the next thing you know, you're some kind of neo-hippie or something.....be careful.

Re: Incorporating a knot question

#10

Re: Incorporating a knot question

Frank Ashmore

You could blow it in with compressed air

Re: Incorporating a knot question

#11

I have done this, and...

Grant in Iowa

Bill, I have filled similar narrow cracks with West system epoxy. Here is my method:

-Mix up a small amount of epoxy and add dry powdered pigment. I usually use burnt umber for walnut, and sometimes add some black, or finely ground graphite, as you are generally better off to err on the side of darker than needed.

-Tape the opposite side to prevent the epoxy from running out. I use either blue tape or clear packing tape. Work the mix in to the crack. I use toothpicks, fine wire, or a set of metal spatulas I have for the purpose.

-I also cover the entire knot with the mixture, as it will generally look better this way once sanded back. I add enough mixture to "heap" it a bit over the crack so the next step is easier.

-I apply heat with a heat gun (you might try a propane torch from a distance or a heat lamp if you don't have a heat gun). This reduces the viscosity of the epoxy so it soaks in to the grain and fills the crack better. Heating also brings any bubbles to the surface. You may need to add additional epoxy and repeat a couple times to actually fill the crack. I use the 24 hour epoxy, and can check and refill it several times before it gels. Again, heap the epoxy atop the crack when you done, as it will shrink upon curing.

-The next day, it is fairly easy to power sand off. It won't look perfect, but upon staining and finishing it will look pretty good.

I do find this method to work excellent on Cherry, as the knots tend to be darker, and therefore hide the repair easier. On Walnut, it is not going to be perfect, but if you treat the entire end grain of the knot, it will be passable to the average woodworker, and invisible to the customer. You might spend some time fiddling with coloration on samples if you have the time and stock available. Since you stain your walnut projects, you may find the time well spent for future reference.

If you think the crack is wide enough, you can split some walnut into small wedges and drive them in to the cracks after epoxy soaking them. This would probably give you the best chance of a satisfactory result, especially if you only need one presentation side.

FWIW,

Grant in Iowa

Re: Incorporating a knot question

#12

Thank you for the lesson

Bill Tindall, E.Tn.

there is no risk in trying. I will "fix" the knot before I size the piece. It my lack of experience leaves it looking like crap I'll just trim it off and use the rest of the board. Again thanks for the instructions.

Re: Incorporating a knot question

#13

Vacuum...

John in NM

I generally didn't find vacuum necessary to get a good fill with two hour epoxy, it soaks right in pretty well. It would have been handy to degas the stuff after mixing, but its a pain to do if you don't have a vacuum pump already.

If you really want a perfect fill, you can make a bell jar out of a PVC pipe cap (a big one, naturally) and pour epoxy on the back taped crack, then pull a vacuum on it, pulling any bubbles out of the crack. Then pour more epoxy on it, etc.

Don't even need much vacuum for that, might even be able to use a shop vac or something. Nowhere close to enough for degassing, but might be enough for pulling bubbles out of a crack.

Re: Incorporating a knot question

#14

Re: Incorporating a knot question

Bruce, a MN Galoot

I don't have pics, but I filled cracks and knots with West System regular epoxy and sanding dust on a cherry dining table I built for some friends. The color turned out a bit darker than other knots in the wood. I was very pleased with the results and so were my friends. Sanded to 320, they looked really good under the pre-cat poly.

Re: Incorporating a knot question

#15

Re: I have done this, and...

TomD

Same here, WEST graphite powder, pour in. If you are worried about outgassing, and I am only worried about that on coatings, do it at the end of the day when shop temp will drop a few degrees. Probably barometric pressure could be involved, but I have never noticed.

Re: Incorporating a knot question

#16

Re: Thank you for the lesson

Keith Newton

My experience of heating the wood with epoxy already on it, causes more bubbles to come up as the air within the wood expands.

I've had better luck warming the wood before putting warmed epoxy on after. Then, the cooling air in the cells contracts, pulling it in better, plus the epoxy flows better too.

Re: Incorporating a knot question

#17

Re: Black Epoxy fill

Jim Hoeller

Even if you don't use the black dye, the epoxy will appear dark enough. I use clear epoxy on some walnut boards with knot holes, checking and some other defects and it appears as dark as the wood around it.

Re: Incorporating a knot question

#18

sanding issue

Jerry Gibbs

Sanding a large hole filled with epoxy, such as the pith in the middle of a slab, can be an issue. Grit that is sufficient for the wood, such as 180 or 220, may leave visible scratches on the smooth epoxy. Best to check that the epoxy fill doesn't need finer sanding. For small cracks such as Bill Tindall has, this is not an issue.

Re: Incorporating a knot question

#19

Re: Incorporating a knot question

don stephan

For defects this size I often fill twice over two days, even when trying to pack in the first application with a putty knife or tongue depressor.

After sufficiently filled, a card scraper does a great job leveling the cured epoxy, then sand with your finer grits. Something with as much movement as this piece I sand to at least 400, often 600, before finishing. Differing opinions on this, but I think it brings out more of the detail in the wood.

Re: Incorporating a knot question

#20

report

Bill Tindall, E.Tn.

My concern was unfounded. The epoxy went right through to the tape on the back. I used a hair drier. I keep one in the shop and it is amazingly handy. I warmed the board, puddled the epoxy and warmed it. As it sank into the crack I pushed more to the depressed area. Eventually the crack filled.....I suppose.

I colored with burnt umber pigment from Lee Valley. (it is what I had)

The central pith hole got filled with walnut band saw dust and soaked with epoxy.

I'll first plane off the excess and then card scrap tomorrow.

Re: Incorporating a knot question

#21

Don't let it get too hard,

Keith Newton

I like to deal with epoxy puddles when they are like hard leather, rather than plastic laminate.

Re: Incorporating a knot question

#22

Re: Incorporating a knot question

mdclor

I had a knot in walnut that I resawed and filled the knot. I used black TransTint in 5 minute epoxy. The filled part looks like the center of the eyes. I liked it so much that I just framed it and hung it on the wall. I think it looks like an owl, but others have thought it looks like an alien and a heart.


I"m sorry the pic isn't the best.

Re: Incorporating a knot question

#23

Good advice....

John in NM

Unless one has a belt sander, the stuff can be a pain to cope with after a day or two.

Same goes if a lot of heat is used to accelerate the cure - we used to park boards in the Tucson sun or stick them in the kiln if we needed it quick - but then we were running them through a 36" wide belt afterwards, so hard was the idea. Using handtools I would want to catch it at just the right, leathery moment.

Re: Incorporating a knot question

#24

You know Merle....

John in NM

I've always joked about framing a nice chunk of wood and hanging it on the wall - I'm glad to see that someone has actually done it! :D

Re: Incorporating a knot question

#25

as a turner I fill a lot of knots

john lucas

My local wood source will sometimes give me deals on short sections of wood with knots that other cabinet makers don't want. I make hand mirrors and the knots look perfect in pieces.

The tricks I use. 1st of course evaluate the knot. if the holes and cracks are large I often mix a colored filler, sometimes sawdust from exotics, sometimes as simple as powdered tempera paint. This thickens the epoxy so it won't work for really fine cracks or where the cracks start big but go really small as they taper out.

For thin cracks I use shoe dye to color the epoxy. It doesn't thicken it so it flows better. You can thin regular epoxy with alcohol although I've never done a test on how much alcohol you can add before you degrade or change the epoxy.

Heat will obviously make it flow better into the tiny areas. I have not tried vacuum because I can usually get it to flow quite nicely. I do back up the other side with tape because I have glued a mirror to the workbench.

System 3 mirror coat that I get from Woodcraft will penetrate the smallest cracks. It heats up as it cures and becomes very viscous. I Filled a hole drilled in some pine one time because I needed a piece of colored epoxy to turn for a small knob. When I came back in the morning to check on it there wasn't any epoxy in the hole. It had wicked all the way through then pine endgrain. That's how well that stuff penetrates. I've since used it as a wood hardener on occasion. Coloring it with shoe dye doesn't seem to affect it any.