Home Articles Forums Gallery Marketplace Videos

WoodCentral Forums

Knowledge You Can Build On — Est. 1998

If you sell to woodworkers, your customers are already here

Jointer Upgrade, Helical Head Installation

Posts

Jointer Upgrade, Helical Head Installation

#1

Jointer Upgrade, Helical Head Installation

Jim Shaver - Oakville, Ontario

>I spent some time tonight upgrading the cutter head on my General 480 jointer.

After taking a class a year ago at Marc Adams one of the lasting impressions for me was that the jointers there all had helical heads. They cut like a dream and I went looking for the feasibility of buying one for my own jointer.

I bought a special one made just for my jointer, from Byrd, it�s what they call a Shelix head, the carbide cutters at an angle as well as being set in a helical row.

I removed the jointer fence, then the jointer from the base

Photo Sharing and Video Hosting at Photobucket

Set it up on a saw horse to work, a neighbour helped me lift he beast.
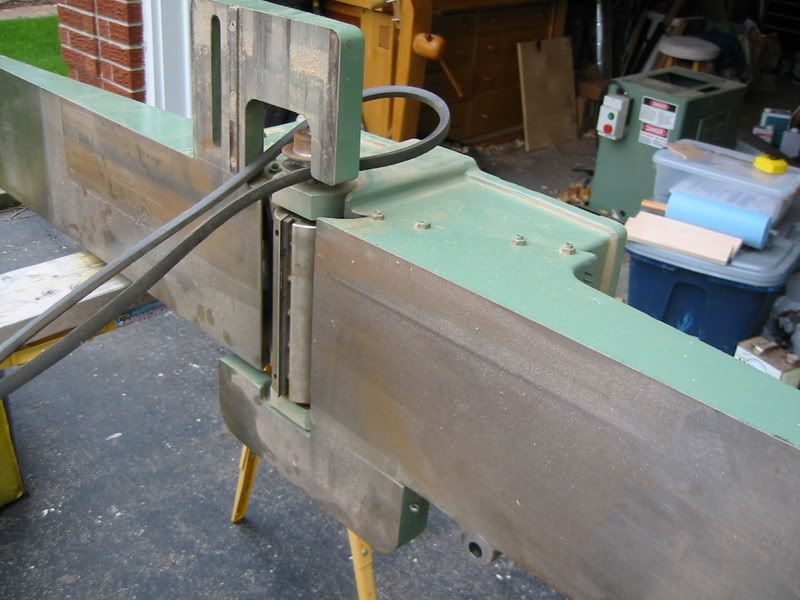
Photo Sharing and Video Hosting at Photobucket

Photo Sharing and Video Hosting at Photobucket

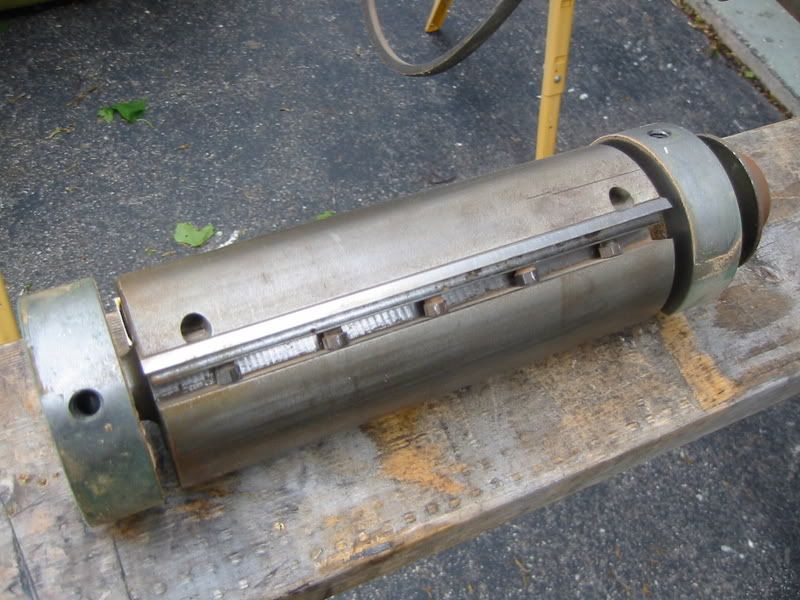
I took the old cutter head out,

Photo Sharing and Video Hosting at Photobucket

Photo Sharing and Video Hosting at Photobucket]

removed the head

Getting the bearings off the old head was a chore, a piece of wood used as a drift and a steady blow with a hammer made things go along

Photo Sharing and Video Hosting at Photobucket

I replaced the bearings with new ones and pressed them on the new cutter head.
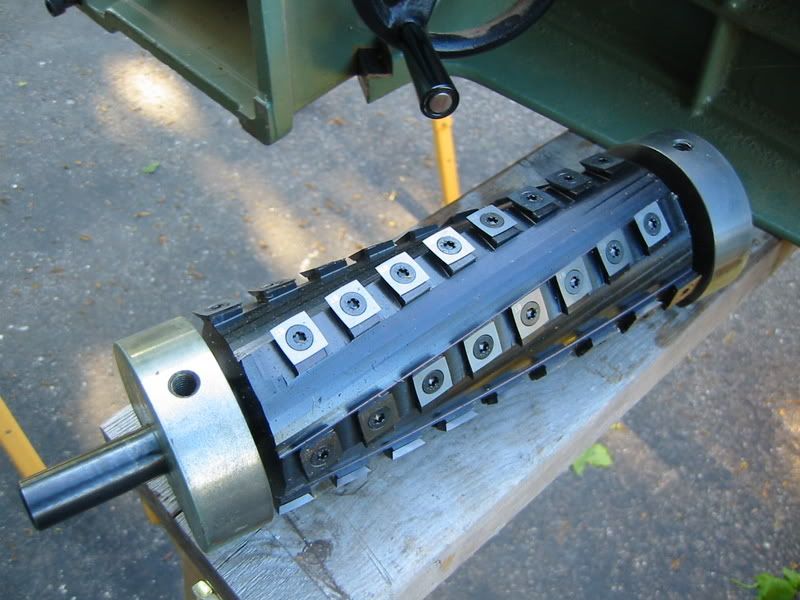
Photo Sharing and Video Hosting at Photobucket

Photo Sharing and Video Hosting at Photobucket

Here it is ready for final assembly

Photo Sharing and Video Hosting at Photobucket

I will set it up and run it this weekend, I am looking forward to the improved performance.

Total time today was about 3 hours.

Take care,

Jim

Re: Jointer Upgrade, Helical Head Installation

#2

Great info, Jim!

Ellis Walentine, Host

>What are the blade inserts made of?

Ellis

Re: Jointer Upgrade, Helical Head Installation

#3

Thanks Ellis

Jim Shaver - Oakville, Ontario

>Hey Ellis,

The cutters are carbide....and all four sides are sharp, just rotate them when they get dull or develop a nick......all heights are equal...so no need to worry about setting the cutter heights.

Take care,

Jim

Re: Jointer Upgrade, Helical Head Installation

#4

Re: Jointer Upgrade, Helical Head Installation

Jay St. Peter

>It's a great upgrade. The nicest things are that you will no longer need to worry about which direction you feed the wood, and not having to adjust knives.

The whole head changing process took me 25 minutes on my Grizzly 8". But, I could get to the bolts that held the cutterhead without removing the tables from the base. The Byrd head I bought also came with new bearings attached and ready to go. I remember what a bear they were to remove when I refurbed my old Rockwell jointer.

Jay St. Peter

Re: Jointer Upgrade, Helical Head Installation

#5

Sweeeet!

Jennifer@Indy.USA

>Wow, that looks wicked Jim. What a great idea...I love that you just rotate the carbide chicklets when they need it. How great!

Jen

Re: Jointer Upgrade, Helical Head Installation

#6

Re: Jointer Upgrade, Helical Head Installation

Larry Clinton At Frankfort (Central)., Indiana

>Congratulations! The helical heads really work well. I have the Byrd head in my 20" Yorkcraft planer and the Grizzly version in my 8" Griz Joiner. I really like both. They do a tremendous job on figured woods and hard to plane wood like honey locust. You also eliminated the task of setting knife heights, sharpening chipped blades etc. I don't worry near as much about old lumber, if I do hit a nail - I will only loose 1 edge of 4 cutters or so. Haven't had to touch any inserts in mine in the year or so since I got them.

Re: Jointer Upgrade, Helical Head Installation

#7

Very cool. But what do you do

Joanne Adler in Pt. Pleasant, PA

>after you rotate the little blades 4 times? Can they be sharpened or do you have to replace all the little buggers? I can't wait to see how smooth a piece of wood looks after it gets shaved on that thing. Do post pix of that, if you would be so kind. Thanks.

Re: Jointer Upgrade, Helical Head Installation

#8

That's on my to do list....

Brian in Sandusky, OH

>...once funds free up.

The whole helical idea for jointers and planers is fantastic.

If I were buying a new machine today, there's no way that I would buy a non-helical cutter.

Re: Jointer Upgrade, Helical Head Installation

#9

Go Jimmy Go....

HC Sakman

>You'll never, never look back Jim. Congrats and enjoy it.

Note: Deep cut on face jointing may bog down your motor (if it's 2hp)No biggie though.

Chico...

Re: Jointer Upgrade, Helical Head Installation

#10

Twist and Shout Baby!

Thomas Skaggs, Foothills of Mount Level

>Jim,

Looking good man! I've been using my spiral cutter for a few months and love it. You'll love the difference. Enjoy!

Tom

Re: Jointer Upgrade, Helical Head Installation

#11

Thanks Jim!

Jim Dillon

>Jim,

I have the same jointer and may start to save up and do that mod in the future. Great post.

Jim

Re: Jointer Upgrade, Helical Head Installation

#12

Tip

Jim Shaver - Oakville, Ontario

>Hey Jim,

Since you have the same great jointer (..and same name) be aware that the bearing housings are accessed from the base, you will need a 5/16 Allen key to free them up, mine were torqued on pretty good. You can see the access holes in the base in the image of jointer on it's side shot through the bottom with the old cutter still in place.

General has a great design and the simplicity and robustness of the jointer was very evident when I was taking it apart. Of the three hours of work, 2 1/2 hours were associated with the bearings...I must have looked like a monkey in my shop trying to find a way to pull them off with out the RIGHT tools (there has to be an easier way to remove the pressed bearings than the way I did it).

Byrd provided new bearings, they actually were the same brand and model as the OEM ones in the jointer.

Take care,

Jim

Re: Jointer Upgrade, Helical Head Installation

#13

Mr Felder

Jim Shaver - Oakville, Ontario

>Hey Chico,

Now that I have this one done I am going to give it the summer, then I might give the planner a shot....David E. in London has done one, I wonder if he's up for offer some advice on a second one?

:-)

My jointer has a 2hp motor.....but I will leave the fine work for my

Photo Sharing and Video Hosting at Photobucket

Hey, can your Felder do that?

Take care,

Jim

Re: Jointer Upgrade, Helical Head Installation

#14

Re: Jointer Upgrade, Helical Head Installation

Mike Fitterling

>Jim, you are going to love that cutterhead. I put one on my 15 inch planer and, in addition to the tearout free cuts, an added bonus is how much quieter it runs. You will be amazed. My planer is hardly any louder while planing lumber than it is just running under no load. Also, because the chips are much reduced in size, chip collection is much easier.

Cheers,

Mike

Re: Jointer Upgrade, Helical Head Installation

#15

Another thank you

Jim Dillon

>

Re: Jointer Upgrade, Helical Head Installation

#16

Re: Joanne - the inserts are replaceable only

Larry Clinton At Frankfort (Central)., Indiana

>The inserts for the Byrd head are $26.00 for a pack of 10 at Grizzly (I'm sure you couldn't have them sharpened on 4 sides for $2.60 each - and then you would have some "lower" on the cutterhead). The Grizzly inserts are $2.00 each. A full set for my Bryd 20 inch planer (96 inserts is about $250.00, sounds high but remember thats actually the same as replacing 4 sets of knives and they are long lasting carbide. My 8" Grizzly joiner uses 40 inserts - total cost of $80 - again 4 cutting edges = four sets of replacement blades at a cost per blade set of $20. I looked at the options and the fact that if you damage a nick a normal set of blades you either re-sharpen or replace the set vs rotating replacing just the inserts damaged in a helical head. After reviewing costs I believe the inserts are far cheaper in the long run.

Re: Jointer Upgrade, Helical Head Installation

#17

You Guys!

George@Colonel's Workshop-Havertown PA

>Really know how to hurt a guy, extinguish him with extreme cruelty, and abuse his corpse. :<)

George

Re: Jointer Upgrade, Helical Head Installation

#18

George

Jim Shaver - Oakville, Ontario

>ahhh George,

I'll let you in on a secret, it was Just a "Canadian" thing...really, we just borrow pictures from our friends of their tools and live our lives in Dreamland.....

Isn't that right Chico?

:-)

Take care,

Jim

Using my goalie skates as scrapers!

Re: Jointer Upgrade, Helical Head Installation

#19

Rick L

Re: !/2 hour job...

Rick L

>so why did you have to take off the tables and such?

Re: Jointer Upgrade, Helical Head Installation

#20

Re: !/2 hour job...

Jim Shaver - Oakville, Ontario

>Hi Rick,

I did not have to remove tables, but the access to the fastners are in the base, if you look at the image of jointer on it's side shot you can see the bottom with the access holes.

Take care,

Jim

Re: Jointer Upgrade, Helical Head Installation

#21

Rick L

Re: Easier way...

Rick L

>is to slide the base to the edge to access the bolt. Then slide the base the other way to access the other bolt. I can see unbolting the base from the cabinet but it's still a 1/2 hour job if approached in a different way. Just so others don't think you need to remove the tables. I work on machines and don't like to do any more work than necessary especially if I'm getting paid by others.

Re: Jointer Upgrade, Helical Head Installation

#22

Re: the inserts are replaceable only

Joanne in Point Pleasant, PA

>Thanks, Larry. Makes a lot of sense. Certainly sounds more cost effective than sharpening 4 sides of that many cutters. What do you do to keep track of what sides you've used on each cutter--make a mark with a Sharpie or something? I think I'd consider such a head on a planer, but I can't imagine putting one on my antique jointer Frank. Even if it would mean a smoother cut.

Re: Jointer Upgrade, Helical Head Installation

#23

Pulley pullers and bearing presses *LINK*

Mark Goodall - ATL - tooljunkie

>Everytime I walk into NorthernTool or AutoZone, I'm amazed and how many (more) of the various pulley pullers or bearing presses, etc, there are. I've got a couple of adjustable pullers and they work well sometimes with some bearings.

I just struggled trying to take off some 13" and 15" tires from a gokart that I've restored for my kids and realized how much easier it would have been with one of these.

Happy Woodworking!


img

http://www.northerntool.com/webapp/wcs/stores/serv

Re: Jointer Upgrade, Helical Head Installation

#24

Yes, I said tires........

Mark Goodall - ATL - tooljunkie

>I just realzied that my post might be confusing. Yes, the topic and tools we were talking about was bearings. And I've not had too much problems with bearings because of soem of the tools I have.

But I didn't have anything large enough to press the rubber tires off the steel split hubs on the gokart (same parts as a riding lawnmower).

Happy Woodworking!


img

Re: Jointer Upgrade, Helical Head Installation

#25

Re: the inserts are replaceable only

Larry Clinton At Frankfort (Central)., Indiana

>The cutters are machined with a "dot" in one corner. When installed they were all put in with the dot in the same location (from memory - I think it is the upper left corner -looking at the face of the cutters - with the shaft at the top). They suggest always rotating Clockwise so you know when you turned one. At this point I doubt if I would rotated a damaged one - probably replace it. My only concern is if the normal wear of a years use would make the "good" inserts lower than one with a new sharp edge. This would only be an issue I guess if they were close to needing rotated (pretty dull) when one became damaged.